
Home>Create & Decorate>DIY & Crafts>How To Make A Display Case
DIY & Crafts
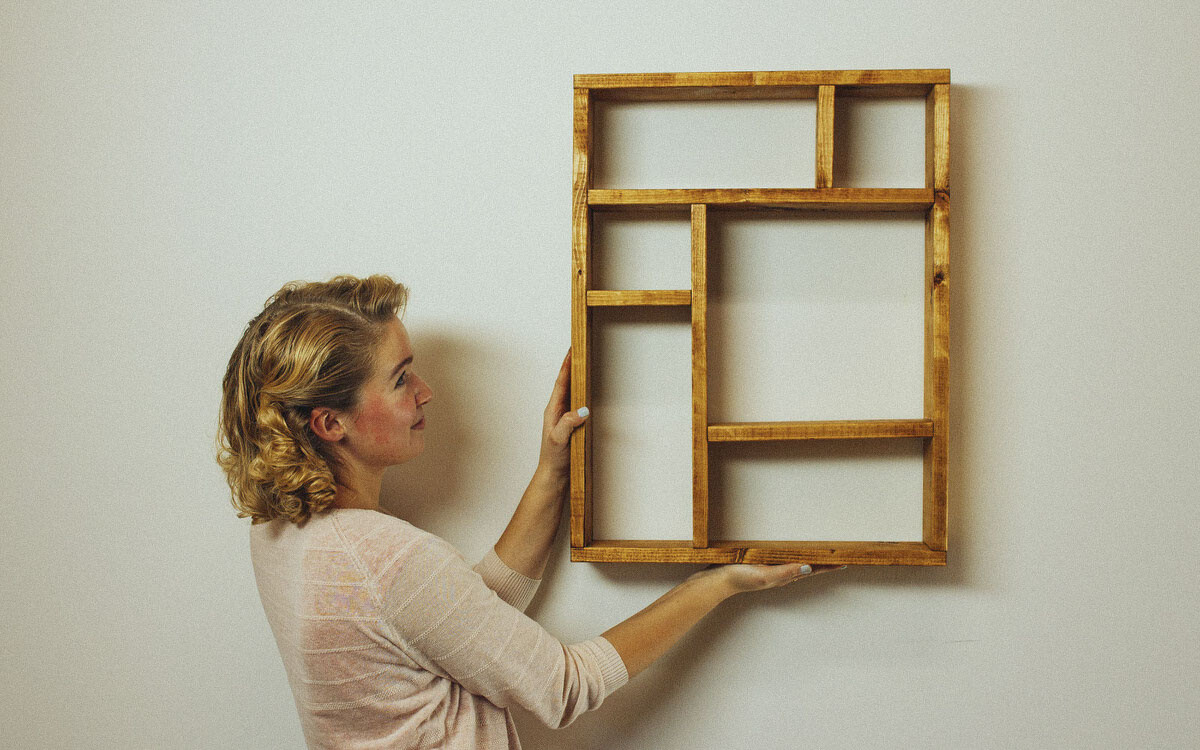
How To Make A Display Case
Published: June 12, 2024

Senior Editor in Create & Decorate, Kathryn combines traditional craftsmanship with contemporary trends. Her background in textile design and commitment to sustainable crafts inspire both content and community.
Learn how to make a stunning DIY display case for your crafts and collectibles with our step-by-step guide. Perfect for showcasing your DIY projects!
(Many of the links in this article redirect to a specific reviewed product. Your purchase of these products through affiliate links helps to generate commission for Twigandthistle.com, at no extra cost. Learn more)
Introduction
So, you've got some precious items or collectibles that you want to show off in your home. Maybe it's a collection of vintage vinyl records, action figures, or antique teacups. Whatever it is, making a display case is a great way to showcase your treasures and add a personal touch to your space. In this article, we'll guide you through the process of creating your very own display case from scratch. Whether you're a seasoned DIY enthusiast or a beginner looking for a fun project, we've got you covered. Let's dive in and get started on this exciting journey of creating a custom display case for your cherished items!
Choosing the Right Materials
When it comes to making a display case, selecting the right materials is crucial for a successful outcome. Here's what you'll need to get started:
1. Wood
Choose a sturdy and visually appealing wood for the frame and shelves of your display case. Popular options include oak, cherry, or walnut for a classic look, or pine for a more rustic feel.
2. Glass or Acrylic Sheets
For the sides and front of the display case, you'll need transparent material to allow a clear view of your items. You can opt for traditional glass for a high-end look, or acrylic sheets for a lightweight and shatter-resistant alternative.
3. Wood Glue and Nails
To assemble the frame of the display case, you'll need a reliable wood glue for strong adhesion. Additionally, nails will provide extra reinforcement for the joints.
4. Hinges and Latch
If you want to add a door to your display case, you'll need hinges for smooth opening and closing, as well as a latch to keep your items secure.
5. Sandpaper and Finish
To achieve a professional look, sandpaper is essential for smoothing out rough edges and surfaces. A finish of your choice, such as varnish or paint, will not only enhance the appearance of the display case but also protect the wood from wear and tear.
By carefully selecting the right materials, you can ensure that your display case is not only visually appealing but also durable and functional. Now that you have your materials ready, let's move on to the next step in creating your custom display case.
Measuring and Cutting the Pieces
Before you start cutting into your materials, it's crucial to take accurate measurements to ensure that all the pieces fit together perfectly. Here's a step-by-step guide to measuring and cutting the pieces for your display case:
-
Measure Twice, Cut Once: This timeless advice holds true in the world of DIY. Use a tape measure to carefully measure the dimensions for the frame, shelves, and any other components of your display case. Double-check your measurements to avoid costly mistakes.
-
Marking the Wood: Once you have your measurements, use a pencil to mark the cutting lines on the wood. This will serve as a guide when you begin cutting, ensuring that you stay on track and achieve the precise dimensions you need.
-
Using the Right Tools: Depending on the type of wood you're working with, choose the appropriate saw for cutting. A table saw is ideal for long, straight cuts, while a circular saw or jigsaw can be used for more intricate cuts and angles.
-
Safety First: Always prioritize safety when using power tools. Wear protective gear, such as safety goggles and gloves, and follow the manufacturer's instructions for the tools you're using.
-
Precision Cutting: Take your time when cutting the wood pieces, following the marked lines as accurately as possible. If you're new to using power tools, practice on scrap wood first to gain confidence and ensure clean, precise cuts.
-
Cutting Glass or Acrylic: If your display case includes glass or acrylic panels, use a glass cutter or acrylic scoring tool to carefully cut the material to the required dimensions. Remember to wear protective gloves and eye protection when working with glass or acrylic.
By taking the time to measure accurately and cut with precision, you'll set the foundation for a well-crafted display case that showcases your items beautifully. With the pieces cut to perfection, you're ready to move on to the next exciting phase of assembling your custom display case.
Assembling the Display Case
With all the pieces cut to the correct dimensions, it's time to bring your display case to life by assembling the components. Follow these steps to ensure a seamless assembly process:
-
Dry Fit the Pieces: Before applying any glue or fasteners, perform a dry fit of the frame and shelves to ensure that everything aligns properly. This step allows you to make any necessary adjustments before committing to the final assembly.
-
Apply Wood Glue: Once you're satisfied with the fit, apply wood glue to the joints and edges of the frame and shelves. Use a brush or small roller to evenly spread the glue for maximum adhesion.
-
Secure with Nails: In addition to the wood glue, reinforce the joints by carefully driving nails into the wood. Be mindful of the nail length to prevent them from protruding through the visible surfaces.
-
Attach the Glass or Acrylic Panels: If your design includes glass or acrylic panels, carefully place them into the designated slots or grooves. Use caution to avoid damaging the transparent material during this step.
-
Install the Door (If Applicable): If your display case features a door, attach the hinges to the frame and door, ensuring smooth movement and proper alignment. Install the latch to keep the door securely closed.
-
Let It Set: Allow the assembled display case to dry and set according to the wood glue manufacturer's recommendations. This step is crucial for the structural integrity of the display case.
-
Sand and Smooth: Once the glue has dried, use sandpaper to smooth out any rough edges or uneven surfaces. This step prepares the display case for the finishing touches.
By following these steps, you'll be well on your way to creating a sturdy and visually appealing display case to showcase your cherished items. With the assembly complete, it's time to add the finishing touches to elevate the overall look and ensure that your display case complements your home decor seamlessly.
Adding Finishing Touches
After the assembly is complete, adding the finishing touches will elevate the overall look of your display case and ensure that it complements your home decor seamlessly. Here's how to add those final details:
-
Applying the Finish: Choose a finish that enhances the natural beauty of the wood and provides protection against wear and tear. Whether it's a clear varnish to showcase the wood's grain or a coat of paint to match your decor, applying the finish with a brush or roller will give your display case a polished appearance.
-
Adding Decorative Molding: To give your display case a touch of elegance, consider adding decorative molding to the edges. Crown molding or trim can create a sophisticated look, while simple beveled molding can provide a clean and modern aesthetic.
-
Installing LED Lighting: If you want to highlight your items and create a captivating display, consider installing LED lighting inside the case. LED strip lights or puck lights can be discreetly placed to illuminate your collectibles, adding a dramatic effect to the overall presentation.
-
Accessorizing with Hardware: Choose stylish knobs or handles for the door of your display case. Whether it's sleek metal handles for a contemporary look or ornate vintage knobs for a classic feel, the right hardware can enhance the visual appeal of your creation.
-
Incorporating Backing Material: Depending on the design of your display case, you may want to add a backing material such as fabric or wallpaper to create a striking backdrop for your items. This not only adds visual interest but also protects the wall behind the case.
-
Personalizing with Decorative Accents: Consider adding personal touches such as decals, stenciling, or hand-painted designs to the exterior of the display case. This allows you to infuse your personality into the piece and make it a unique focal point in your home.
By paying attention to these finishing touches, you can transform your DIY display case into a stunning and functional piece of furniture that proudly showcases your cherished items. With the right materials, precise measurements, careful assembly, and thoughtful finishing touches, your custom display case will undoubtedly become a standout feature in your home.
Conclusion
In conclusion, creating a custom display case is a rewarding DIY project that allows you to showcase your cherished items in a personalized and visually appealing manner. By carefully selecting the right materials, taking precise measurements, and assembling the components with attention to detail, you can craft a display case that not only highlights your collectibles but also adds a touch of elegance to your home decor. Adding the finishing touches, such as a protective finish, decorative molding, LED lighting, and stylish hardware, elevates the overall look of the display case and ensures that it seamlessly integrates into your living space. Whether you're a seasoned DIY enthusiast or a beginner looking for a fulfilling project, making a display case offers a creative outlet to display your treasures with pride. So, roll up your sleeves, gather your materials, and embark on the exciting journey of creating a custom display case that reflects your unique style and showcases your most beloved possessions.