
Home>Create & Decorate>DIY & Crafts>How To Build A Planter Box With Legs
DIY & Crafts
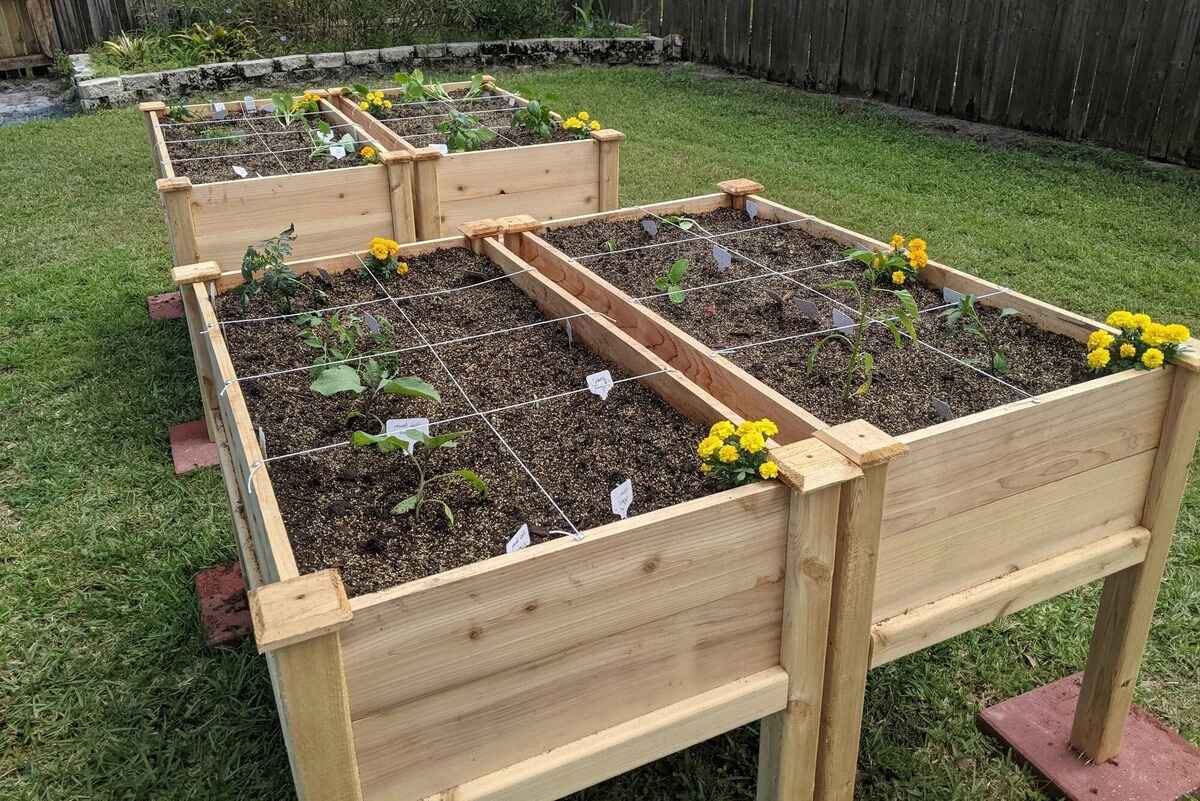
How To Build A Planter Box With Legs
Published: June 1, 2024

Senior Editor in Create & Decorate, Kathryn combines traditional craftsmanship with contemporary trends. Her background in textile design and commitment to sustainable crafts inspire both content and community.
Learn how to create a stylish DIY planter box with legs in this easy step-by-step guide. Perfect for your gardening and crafting needs.
(Many of the links in this article redirect to a specific reviewed product. Your purchase of these products through affiliate links helps to generate commission for Twigandthistle.com, at no extra cost. Learn more)
Introduction
So, you want to add some greenery to your patio or deck, but you're short on space? A planter box with legs could be the perfect solution! Not only does it provide a stylish way to display your favorite plants, but it also elevates them off the ground, making it easier to care for them. In this guide, we'll walk you through the steps to build your own planter box with legs, so you can bring a touch of nature to your outdoor living space. Let's get started!
Materials Needed
To build a planter box with legs, you'll need the following materials:
- Wood: Choose a durable and weather-resistant wood such as cedar, redwood, or pressure-treated lumber. You'll need boards for the sides, bottom, and legs of the planter box.
- Screws: Opt for exterior-grade screws that are suitable for outdoor use.
- Wood Glue: This will help reinforce the joints and ensure the planter box is sturdy.
- Measuring Tape: Essential for taking accurate measurements.
- Saw: A circular saw or miter saw will be necessary for cutting the wood to the correct dimensions.
- Drill: You'll need a drill to create pilot holes and drive the screws.
- Sandpaper: To smooth any rough edges and surfaces.
- Wood Stain or Paint: If you want to add a pop of color or protect the wood from the elements, you'll need stain or paint.
- Paintbrushes or Stain Applicators: For applying the wood finish.
- Protective Gear: Safety goggles and gloves are essential when working with wood and power tools.
Gather these materials before you begin, and you'll be all set to construct your planter box with legs.
Step 1: Cutting the Wood
-
Measure and Mark: Begin by measuring and marking the wood according to the dimensions of the planter box. You'll need to cut the boards for the sides and bottom of the box, as well as the legs. Use a measuring tape and a pencil to mark the cut lines accurately.
-
Cut the Side and Bottom Boards: Using a saw, carefully cut the boards for the sides and bottom of the planter box to the correct lengths. If you're using a miter saw, ensure that the blade is set to the appropriate angle for straight and clean cuts.
-
Cut the Legs: Next, cut the legs for the planter box to the desired height. The length of the legs will determine how elevated the planter box will be, so consider the overall look and functionality you want to achieve.
-
Sand the Edges: Once all the wood pieces are cut, use sandpaper to smooth any rough edges or surfaces. This will not only give the planter box a polished look but also prevent any splinters when handling the wood.
By carefully cutting the wood to the correct dimensions, you'll ensure that the pieces fit together seamlessly when assembling the planter box with legs. This step is crucial for the structural integrity and overall appearance of the finished product.
Step 2: Assembling the Box
-
Lay Out the Sides and Bottom: Begin by laying out the cut boards for the sides and bottom of the planter box. Arrange them to form a rectangular shape, ensuring that the edges align perfectly.
-
Apply Wood Glue: Once the boards are positioned correctly, apply wood glue to the edges that will be joined together. This will help reinforce the joints and add stability to the box.
-
Secure with Screws: Using a drill, create pilot holes in the boards where they meet. Then, drive exterior-grade screws through the pilot holes to secure the sides and bottom of the planter box together. Make sure the screws are driven in flush with the wood to avoid any protrusions.
-
Check for Squareness: After assembling the box, check for squareness by measuring the diagonals. If the measurements are equal, the box is square, and the corners are at right angles. This step is essential for ensuring that the planter box is symmetrical and stable.
-
Reinforce the Corners: To further reinforce the corners of the box, you can add corner brackets or L-brackets. These metal brackets can be attached to the inside of the planter box at each corner, providing additional support.
-
Drainage Holes: Depending on the type of plants you'll be placing in the planter box, consider drilling drainage holes in the bottom board to allow excess water to escape. Proper drainage is crucial for the health of the plants and the longevity of the planter box.
By following these steps, you'll successfully assemble the planter box, creating a sturdy and well-constructed base for the next phase of the project.
Step 3: Attaching the Legs
-
Position the Box: Place the assembled planter box in the desired location where you intend to display it. This will help you visualize how the legs will elevate the box and ensure that it is positioned correctly before attaching the legs.
-
Mark the Leg Placement: Using a pencil, mark the positions on the bottom of the planter box where the legs will be attached. Ensure that the marks are evenly spaced and aligned to provide balanced support for the box.
-
Attach the Legs: With the planter box positioned upside down, align the legs with the marked positions on the bottom of the box. Apply wood glue to the top of each leg to create a strong bond between the wood surfaces. Then, using exterior-grade screws, secure the legs to the bottom of the planter box. Make sure the screws are driven in firmly to ensure the legs are securely attached.
-
Reinforce the Joints: To further reinforce the attachment of the legs, consider adding metal braces or brackets where the legs meet the bottom of the planter box. This additional reinforcement will provide extra stability and support, especially if the planter box will be holding a substantial amount of soil and plants.
-
Stability Check: Once the legs are attached, carefully flip the planter box over to its upright position. Test the stability of the box by gently pressing down on each corner. The box should remain steady and level, indicating that the legs are securely attached and providing adequate support.
-
Finishing Touches: If desired, apply a coat of wood stain or paint to the planter box and legs to enhance their appearance and protect the wood from outdoor elements. Allow the finish to dry completely before adding soil and plants to the planter box.
By following these steps, you'll successfully attach the legs to the planter box, creating a raised platform for your plants and adding a stylish touch to your outdoor space.
Step 4: Finishing Touches
After completing the construction of the planter box with legs, it's time to add the finishing touches to enhance its appearance and ensure its longevity.
-
Apply Wood Finish: If you want to protect the wood from the elements and add a touch of color, consider applying a wood stain or paint to the planter box and legs. Choose a finish that is suitable for outdoor use and complements the aesthetic of your outdoor space. Use a paintbrush or stain applicator to apply the finish evenly, covering all exposed surfaces of the planter box and legs.
-
Allow for Drying: Once the wood finish is applied, allow sufficient time for it to dry completely. Follow the manufacturer's instructions regarding the drying time and any additional coats that may be necessary for optimal protection and appearance.
-
Add a Liner: To prevent soil from directly contacting the wood and potentially causing rot, consider adding a liner to the inside of the planter box. A plastic or fabric liner can help retain moisture and protect the wood from prolonged exposure to damp soil.
-
Select Plants: With the planter box ready, it's time to select the plants you want to showcase. Consider the sunlight conditions in the chosen location and choose plants that thrive in those conditions. Whether you prefer colorful flowers, aromatic herbs, or lush greenery, the choice of plants can bring your planter box to life.
-
Add Soil: Fill the planter box with high-quality potting soil, leaving enough space for the roots of the plants you've selected. Ensure that the soil is evenly distributed and gently pat it down to remove any air pockets.
-
Water and Maintain: Once the plants are in place, water them thoroughly and monitor their growth regularly. Depending on the types of plants you've chosen, ensure they receive the appropriate amount of water and sunlight to thrive.
By adding these finishing touches, you'll transform your planter box with legs into a vibrant and functional feature of your outdoor space, providing a beautiful home for your favorite plants while adding a touch of natural charm to your patio or deck.
Conclusion
Congratulations! You've successfully built your very own planter box with legs. By following the steps outlined in this guide and adding your personal touch, you've created a stylish and functional addition to your outdoor living space. Not only does your planter box with legs provide a raised platform for your favorite plants, but it also adds a decorative element to your patio, deck, or garden. Whether you've chosen vibrant flowers, aromatic herbs, or lush greenery, your planter box is now ready to showcase your botanical treasures. With proper care and maintenance, your planter box with legs will continue to bring natural beauty and charm to your outdoor environment for years to come. Enjoy the fruits of your labor and the refreshing touch of nature right at your doorstep!