
Home>Create & Decorate>DIY & Crafts>How To Build A House Of Cards
DIY & Crafts
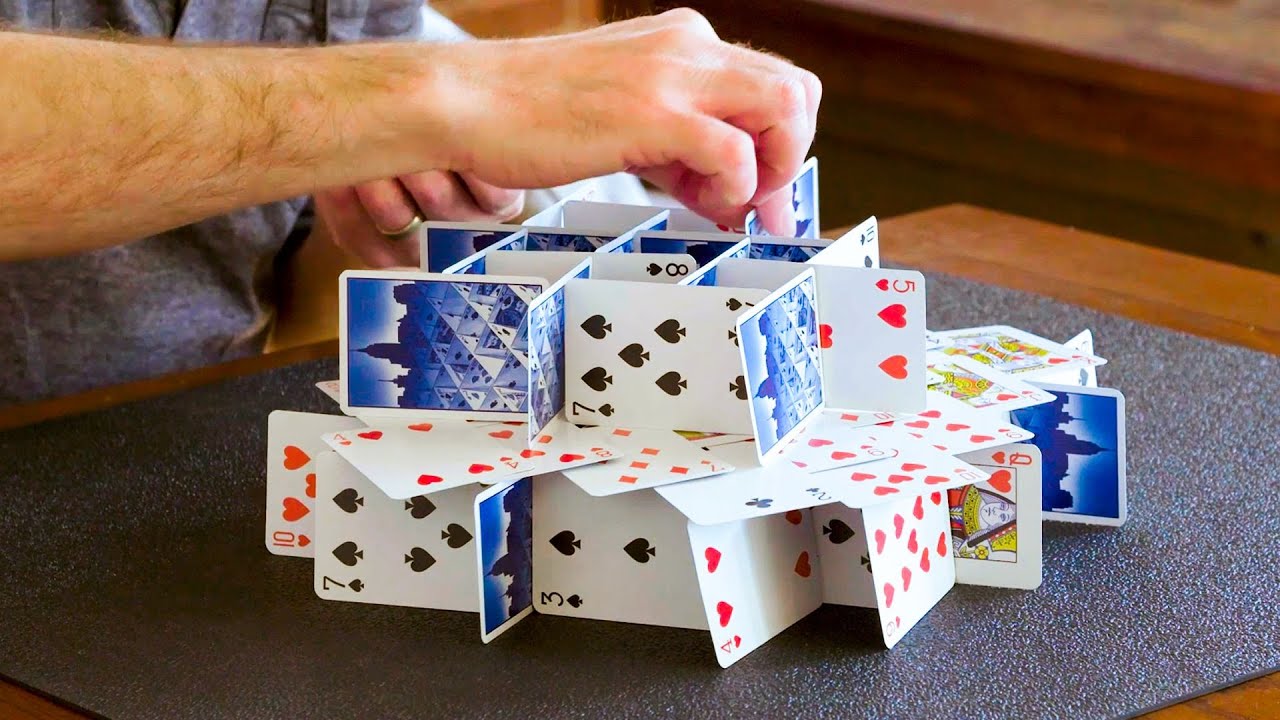
How To Build A House Of Cards
Published: May 25, 2024

Content Creator specializing in woodworking and interior transformations. Caegan's guides motivate readers to undertake their own projects, while his custom furniture adds a personal touch.
Learn the art of building a house of cards with our step-by-step DIY guide. Explore fun and creative crafts for all skill levels. Unlock your inner architect today!
(Many of the links in this article redirect to a specific reviewed product. Your purchase of these products through affiliate links helps to generate commission for Twigandthistle.com, at no extra cost. Learn more)
Introduction
So, you want to know how to build a house of cards? Well, you've come to the right place! Building a house of cards can be a fun and challenging DIY project that requires patience, precision, and a steady hand. In this article, we'll guide you through the process of creating your own impressive house of cards, from choosing the right cards to adding the finishing touches. Whether you're a beginner or a seasoned card stacker, we've got you covered with all the tips and tricks you need to create a sturdy and visually stunning structure. Let's dive in and get stacking!
Choosing the Right Cards
When it comes to building a house of cards, choosing the right cards is crucial for the success of your project. Here are some tips for selecting the perfect cards:
-
Standard Playing Cards: Start with a deck of standard playing cards. These cards are uniform in size and shape, making them ideal for creating a stable structure.
-
Quality and Thickness: Opt for cards that are of good quality and thickness. Thicker cards are less likely to bend or collapse under the weight of the structure.
-
Smooth Finish: Look for cards with a smooth finish. This will make it easier to slide the cards into place without catching on rough edges.
-
Stiffness: Choose cards that are stiff and not too flimsy. Flexible cards may not provide the necessary support for your house of cards.
-
Uniformity: Ensure that all the cards in your deck are uniform in size and shape. Consistency is key to achieving a balanced and stable structure.
By paying attention to these factors, you can set yourself up for success as you embark on the journey of building your own impressive house of cards.
Building the Base
Building a solid and stable base is the foundation of your house of cards. Here's how to get started:
-
Choose a Flat Surface: Find a flat and level surface to work on. A sturdy table or desk is ideal for building your house of cards. This will provide a stable foundation for your structure.
-
Position the First Cards: Take two cards and place them parallel to each other, with a small gap between them. These will serve as the base of your house of cards.
-
Add Cross Support: Carefully place two more cards on top of the first two, perpendicular to them, to create a cross shape. This will help distribute the weight evenly and provide stability to the base.
-
Continue Layering: Gradually add more cards in a crisscross pattern, alternating the direction of each layer. As you add more cards, the base will become stronger and more secure.
-
Check for Stability: Periodically check the base for any signs of wobbling or instability. Adjust the cards as needed to ensure that the base is level and well-supported.
By following these steps, you can establish a sturdy and reliable base for your house of cards, setting the stage for the construction of the rest of the structure.
Adding Floors and Walls
Once you have a solid base, it's time to start adding the floors and walls to your house of cards. This is where the real artistry and precision come into play. Here's how to proceed:
-
Lay the First Floor: Carefully place cards on top of the base in a parallel formation, creating the first floor of your structure. Ensure that the cards are aligned and evenly spaced to maintain stability.
-
Create Support Columns: As you add more floors, consider inserting additional cards vertically between the floors to act as support columns. This will help distribute the weight and prevent the structure from collapsing.
-
Alternate Card Directions: To enhance the stability and balance of your house of cards, alternate the direction of the cards with each new floor. For example, if the cards on one floor are laid horizontally, place the cards on the next floor vertically.
-
Build the Walls: Once you've added several floors, it's time to create the walls of your structure. Carefully stack cards on the edges of the floors, ensuring that they are aligned and tightly packed to form sturdy walls.
-
Maintain Symmetry: Pay attention to symmetry as you build the walls. Keeping the structure symmetrical will help distribute the weight evenly and prevent leaning or collapsing.
-
Use Precision and Patience: Building the floors and walls of a house of cards requires precision and patience. Take your time to ensure that each card is placed carefully and securely to maintain the integrity of the structure.
By following these steps, you can gradually construct the floors and walls of your house of cards, creating a visually impressive and structurally sound masterpiece.
Stabilizing the Structure
Now that you've built the base, added floors, and created the walls of your house of cards, it's time to focus on stabilizing the structure to ensure it can withstand any slight disturbances. Here's how to make sure your masterpiece stays intact:
-
Reinforce the Corners: Pay special attention to the corners of your house of cards. Add extra cards or create diagonal supports to reinforce the corners and prevent them from collapsing inward.
-
Check for Weak Spots: Carefully inspect the entire structure for any weak spots or areas that seem unstable. Reinforce these areas by adding additional cards or adjusting the placement of existing ones.
-
Add Cross-Bracing: Introduce cross-bracing by placing cards diagonally across the structure. This technique can significantly increase the stability of your house of cards by distributing the weight more evenly.
-
Utilize Support Beams: Insert support beams by placing cards horizontally across the structure at strategic intervals. These beams can provide crucial reinforcement and prevent the structure from swaying or buckling.
-
Minimize Vibrations: Minimize any potential vibrations or movements around the structure. Choose a stable surface and avoid sudden movements or disturbances that could compromise the stability of your house of cards.
-
Adjust as Needed: Continuously monitor the stability of your structure as you work on stabilizing it. Make adjustments as necessary to address any signs of instability and ensure that the entire house of cards is well-supported.
By implementing these stabilization techniques, you can fortify your house of cards and create a resilient structure that is less susceptible to unexpected collapses.
Finishing Touches
As you approach the final stages of building your house of cards, it's time to add the finishing touches that will elevate your creation from a simple stack of cards to a visually stunning masterpiece. Here's how to put the perfect finishing touches on your house of cards:
-
Decorate the Exterior: Consider adding decorative elements to the exterior of your structure. You can carefully place cards in creative patterns or formations to enhance the visual appeal of your house of cards.
-
Incorporate Design Details: Use your creativity to incorporate design details such as arches, windows, or even a rooftop. These details can add a touch of elegance and sophistication to your house of cards.
-
Fine-Tune the Structure: Take a moment to fine-tune the overall structure of your house of cards. Adjust any cards that may be slightly misaligned or leaning to ensure that the entire structure is balanced and visually pleasing.
-
Document Your Achievement: Before making any further adjustments, take a moment to document your impressive creation. Capture a photo or video of your completed house of cards to showcase your accomplishment and share it with others.
-
Display with Pride: Once you've added the finishing touches and documented your masterpiece, find a suitable location to display your house of cards. Whether it's on a shelf, table, or any other stable surface, proudly showcase your creation for others to admire.
By paying attention to these finishing touches, you can transform your house of cards into a work of art that reflects your dedication, patience, and precision. Now, step back and admire your remarkable creation!
Conclusion
In conclusion, building a house of cards is not just a simple pastime, but a test of patience, precision, and creativity. By carefully choosing the right cards, constructing a solid base, adding floors and walls, stabilizing the structure, and adding the finishing touches, you can create a remarkable and visually stunning house of cards. Whether you're a beginner or an experienced card stacker, the process of building a house of cards offers a rewarding sense of accomplishment and the opportunity to showcase your skills. So, gather your cards, find a steady surface, and embark on the journey of creating your own impressive house of cards. With dedication and attention to detail, you can stack, balance, and create a masterpiece that will captivate and inspire others.