
Home>Create & Decorate>DIY & Crafts>Drip Irrigation System Design: A DIY Guide For Efficient Watering
DIY & Crafts
Drip Irrigation System Design: A DIY Guide For Efficient Watering
Published: May 21, 2024

Senior Editor in Create & Decorate, Kathryn combines traditional craftsmanship with contemporary trends. Her background in textile design and commitment to sustainable crafts inspire both content and community.
Learn how to design a DIY drip irrigation system for efficient watering with our comprehensive guide. Perfect for DIY & Crafts enthusiasts.
(Many of the links in this article redirect to a specific reviewed product. Your purchase of these products through affiliate links helps to generate commission for Twigandthistle.com, at no extra cost. Learn more)
Introduction
Are you tired of spending hours watering your garden or lawn? Do you want to conserve water while ensuring your plants receive the right amount of hydration? If so, a drip irrigation system might be the perfect solution for you. In this DIY guide, we will walk you through the process of designing and installing a drip irrigation system for your outdoor space. Whether you're a seasoned gardener or a novice DIY enthusiast, this guide will equip you with the knowledge and confidence to create an efficient watering system that will save you time, water, and effort. Let's dive in and explore the world of drip irrigation!
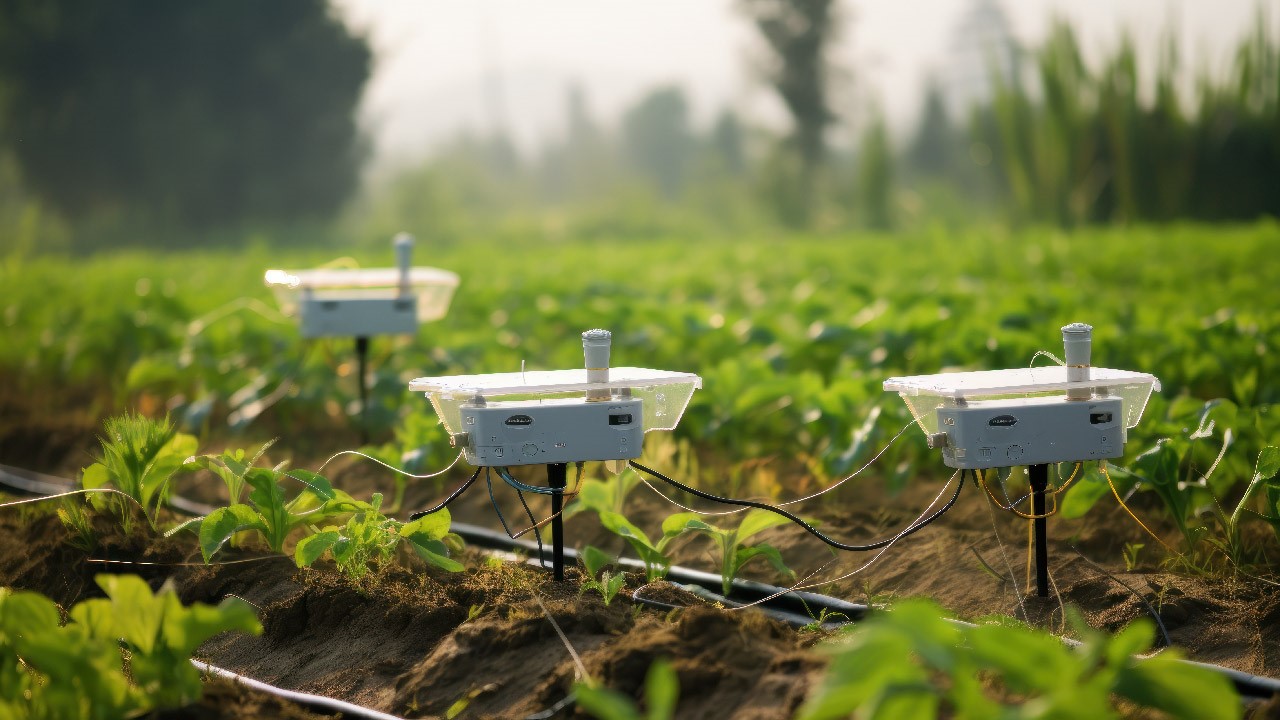
Understanding Drip Irrigation Systems
Drip irrigation systems, also known as trickle or micro-irrigation systems, are a method of delivering water directly to the base of plants, minimizing water wastage and maximizing efficiency. Unlike traditional sprinkler systems that spray water over a wide area, drip irrigation systems provide a slow and steady supply of water, allowing it to seep into the soil and reach the roots of plants. This targeted approach not only conserves water but also reduces the risk of water-related diseases and minimizes weed growth. Drip irrigation systems can be customized to suit various types of plants, including gardens, lawns, shrubs, and trees, making them a versatile and eco-friendly choice for any outdoor space.
Benefits of Drip Irrigation Systems
- Water Conservation: Drip irrigation systems deliver water directly to the roots, minimizing evaporation and runoff.
- Customizable: These systems can be tailored to meet the specific watering needs of different plants, ensuring optimal growth and health.
- Weed Control: By delivering water directly to the base of plants, drip irrigation systems discourage weed growth in surrounding areas.
- Time-Saving: Once installed, drip irrigation systems require minimal maintenance and can be set on timers for automated watering.
Components of a Drip Irrigation System
- Emitters: These are the devices that control the flow of water, ensuring it is released at a consistent rate.
- Tubing: The tubing carries water from the water source to the plants, with various diameters available to accommodate different flow rates and distances.
- Filters: Essential for preventing clogging of emitters and ensuring the system functions smoothly.
- Backflow Preventers: These components prevent water from flowing back into the main water supply, maintaining water quality and safety.
Understanding the basic components and benefits of a drip irrigation system is crucial before moving on to planning and installation. With this knowledge in hand, you'll be well-prepared to design a system that meets the specific needs of your garden or lawn.
Planning Your Drip Irrigation System
Planning is a crucial step in the process of setting up a drip irrigation system. Before you start digging or purchasing materials, take the time to assess your outdoor space and determine the specific watering needs of your plants. Here's how to plan your drip irrigation system effectively:
-
Assess Your Garden or Lawn: Take note of the layout of your outdoor space, including the types of plants, their locations, and their water requirements. Consider factors such as sun exposure, soil type, and plant size, as these will influence the design of your drip irrigation system.
-
Create a Watering Plan: Divide your garden or lawn into zones based on the water needs of the plants. Group together plants with similar watering requirements to ensure efficient water delivery. For example, plants that require more water, such as vegetables, may be placed in a separate zone from those that require less water, such as succulents.
-
Determine Water Pressure and Flow: Measure the water pressure and flow rate at your outdoor water source. This information will help you select the appropriate emitters and tubing for your drip irrigation system. Different plants may require different flow rates, so understanding your water supply is essential.
-
Consider Water Source and Accessibility: Identify the nearest water source and assess its accessibility for installing a drip irrigation system. You may need to invest in a hose bib or faucet timer to facilitate easy connection and automated watering.
-
Account for Slopes and Obstacles: If your garden or lawn has slopes or obstacles such as rocks or tree roots, take these into account when planning the layout of your drip irrigation system. Properly designed drip systems can accommodate these challenges and ensure even water distribution.
By carefully planning your drip irrigation system, you can tailor the design to suit the specific needs of your outdoor space, leading to efficient water usage and healthier plants. Once you have a clear plan in place, you can move on to selecting the right components for your system.
Choosing the Right Components
Selecting the appropriate components for your drip irrigation system is essential to ensure its effectiveness and longevity. Here's a detailed look at the key components you'll need to consider:
Emitters
Emitters are available in various types, including drip emitters, micro-sprayers, and soaker hoses. The choice of emitter depends on the specific watering needs of your plants. For example, drip emitters are ideal for individual plants or small areas, while micro-sprayers are suitable for larger coverage areas. Consider factors such as flow rate, coverage area, and adjustable features when selecting emitters for different zones in your garden or lawn.
Tubing
The tubing serves as the conduit for delivering water from the water source to the plants. It comes in different diameters and materials, such as polyethylene and vinyl. The diameter of the tubing affects the flow rate, with larger diameters allowing for higher flow rates over longer distances. When choosing tubing, consider the water pressure at your water source, the layout of your outdoor space, and the specific water requirements of your plants.
Filters
Filters are crucial for preventing clogging of emitters and ensuring the smooth operation of your drip irrigation system. Sediment, debris, and other particles in the water can cause blockages in the emitters, leading to uneven water distribution. Select filters based on the type and size of particles they can effectively remove, and consider installing them at the main water source and individual zones to protect the entire system.
Backflow Preventers
Backflow preventers are essential for maintaining the integrity of your water supply. They prevent contaminated water from flowing back into the main water source, safeguarding the quality and safety of the water. When choosing backflow preventers, ensure they comply with local regulations and standards to protect both your irrigation system and the public water supply.
Pressure Regulators
Pressure regulators are used to maintain consistent water pressure throughout the drip irrigation system. Fluctuations in water pressure can affect the performance of emitters and lead to uneven watering. By installing pressure regulators, you can ensure that each zone receives the appropriate water pressure for optimal plant hydration.
Connectors and Fittings
Selecting the right connectors and fittings is crucial for assembling and customizing your drip irrigation system. These components allow you to create a network of tubing, emitters, and other accessories, ensuring a secure and leak-free connection. Consider the compatibility of connectors and fittings with your chosen tubing and emitters, and opt for durable, UV-resistant materials to withstand outdoor conditions.
By carefully choosing the right components for your drip irrigation system, you can create a reliable and efficient watering solution for your garden or lawn. Each component plays a vital role in the overall performance of the system, so take the time to research and select high-quality materials that align with the specific needs of your outdoor space.
Installing Your Drip Irrigation System
Now that you have planned and gathered the necessary components for your drip irrigation system, it's time to roll up your sleeves and get into the installation process. Follow these steps to bring your efficient watering solution to life:
-
Prepare the Water Source: Begin by ensuring that your water source, whether it's a hose bib or faucet, is equipped with a backflow preventer and a pressure regulator. These components will safeguard your water supply and maintain consistent pressure throughout the system.
-
Lay Out the Tubing: Unroll the tubing and lay it along the planned route, ensuring it reaches all the designated zones in your garden or lawn. Use stakes or clips to secure the tubing in place, keeping it slightly elevated to prevent water blockages and damage from soil or debris.
-
Install Emitters and Connectors: As you lay out the tubing, install emitters at the base of individual plants or in specific areas based on your watering plan. Use connectors and fittings to join the tubing segments, ensuring a secure and leak-free connection at each junction.
-
Add Filters and Pressure Regulators: Install filters and pressure regulators at the appropriate locations along the tubing, typically near the water source and at the beginning of each zone. These components will protect the system from clogging and ensure consistent water pressure for optimal performance.
-
Connect to the Water Source: Once the tubing, emitters, and essential components are in place, connect the main line to the water source using the appropriate adapters and fittings. Double-check the connections to ensure they are tight and secure.
-
Test the System: Before burying the tubing or covering it with mulch, test the system to check for leaks, proper water flow, and emitter functionality. Turn on the water and observe the entire system, making adjustments as needed to ensure even water distribution.
-
Secure and Conceal the Tubing: Once the system has been tested and any necessary adjustments have been made, bury the tubing or cover it with mulch to protect it from exposure and create a neat, unobtrusive appearance in your garden or lawn.
-
Set Up Timers (Optional): If you prefer automated watering, consider installing timers or controllers to regulate the watering schedule and duration for each zone. Timers can help conserve water and ensure consistent watering, especially during periods of absence or busy schedules.
By following these steps, you can successfully install a drip irrigation system that caters to the specific watering needs of your plants while promoting water conservation and efficient hydration. With the system in place, you can look forward to healthier, thriving plants and a more manageable approach to garden and lawn maintenance.
Maintaining and Troubleshooting Your System
Once your drip irrigation system is up and running, it's essential to perform regular maintenance to ensure its continued efficiency and address any potential issues that may arise. Here's how you can maintain and troubleshoot your system to keep it in optimal working condition:
Regular Inspections
- Check for Leaks: Inspect the entire system, including tubing, connectors, and emitters, for any signs of leaks. Leaks can lead to water wastage and uneven watering, so prompt repairs are crucial.
- Clear Obstructions: Remove any debris, dirt, or plant growth that may obstruct the flow of water or clog the emitters. Regularly clear the area around the emitters to maintain uninterrupted water distribution.
Flushing and Cleaning
- Flush the System: Periodically flush the system to remove sediment and mineral buildup that can affect the performance of emitters and filters. This is especially important if you have hard water in your area.
- Clean Filters: Clean or replace filters as needed to prevent clogging and ensure the smooth flow of water through the system. Clogged filters can lead to uneven watering and reduced system efficiency.
Adjustments and Repairs
- Check Emitter Functionality: Regularly inspect the emitters to ensure they are delivering water as intended. Adjust or replace any malfunctioning emitters to maintain consistent watering.
- Repair Damaged Components: If you notice any damaged tubing, connectors, or emitters, make the necessary repairs or replacements to prevent water loss and maintain the integrity of the system.
Seasonal Considerations
- Adjust Watering Schedule: Modify the watering schedule and duration based on seasonal changes and the evolving needs of your plants. During hot and dry periods, plants may require more frequent watering, while reduced watering may be suitable during cooler seasons.
- Winterization: Before the onset of winter, prepare your system for the colder months by draining the water from the tubing and protecting exposed components from freezing temperatures.
Troubleshooting Common Issues
- Uneven Watering: If certain areas receive more or less water than desired, check for clogged emitters, damaged tubing, or uneven water pressure. Adjust the system to ensure uniform water distribution.
- Low Water Pressure: Inspect the pressure regulators and filters for blockages or malfunctions. Ensure that the water source is providing adequate pressure for the system to operate effectively.
- Clogging: If you notice frequent clogging of emitters or filters, consider installing additional filtration or flushing the system more regularly to prevent buildup.
By staying proactive with maintenance and promptly addressing any issues, you can ensure that your drip irrigation system continues to deliver efficient and targeted watering to your plants. Regular care and troubleshooting will contribute to the longevity and effectiveness of your system, allowing you to enjoy the benefits of a healthy and thriving outdoor space.
Conclusion
In conclusion, designing and installing a drip irrigation system can revolutionize the way you approach watering your garden or lawn. By embracing the targeted and efficient nature of drip irrigation, you can conserve water, promote plant health, and simplify your outdoor maintenance routine. From understanding the components and benefits of drip irrigation systems to planning, selecting, and installing the right components, this DIY guide has equipped you with the knowledge and confidence to embark on this water-saving journey.
As you venture into the world of drip irrigation, remember that regular maintenance and troubleshooting are essential for the continued success of your system. By staying proactive and addressing any issues that may arise, you can ensure that your plants receive the precise hydration they need while minimizing water wastage and promoting a sustainable approach to gardening.
With the guidance provided in this DIY guide, you are well-prepared to embark on your drip irrigation journey and create a thriving outdoor oasis that reflects your commitment to water conservation and plant care. Embrace the efficiency and eco-friendliness of drip irrigation, and enjoy the benefits of a lush and vibrant garden or lawn for years to come.