
Home>Create & Decorate>DIY & Crafts>DIY Ship Building: Build Your Own Ship
DIY & Crafts
DIY Ship Building: Build Your Own Ship
Published: June 2, 2024

Content Creator specializing in woodworking and interior transformations. Caegan's guides motivate readers to undertake their own projects, while his custom furniture adds a personal touch.
Discover the ultimate guide to DIY ship building and craft your own ship with our step-by-step instructions and creative ideas. Dive into the world of DIY & Crafts and set sail on your own handmade vessel today!
(Many of the links in this article redirect to a specific reviewed product. Your purchase of these products through affiliate links helps to generate commission for Twigandthistle.com, at no extra cost. Learn more)
Introduction
So, you've always dreamt of sailing the high seas on your very own ship, but buying one is just too expensive. Well, why not build your own ship? It may seem like a daunting task, but with the right guidance and a bit of elbow grease, it's entirely possible. In this guide, we'll walk you through the process of DIY ship building step by step, from choosing the right materials to launching and testing your masterpiece. Let's set sail on this epic adventure!
Choosing the Right Materials
When embarking on the journey of DIY ship building, selecting the right materials is crucial for the success and safety of your project. Here are the key materials you'll need to consider:
1. Wood
Wood is a traditional and popular choice for building a ship. Hardwoods like oak, cedar, and mahogany are durable and resistant to water, making them ideal for constructing the hull and other structural components.
2. Fiberglass
Fiberglass is a lightweight and versatile material that is commonly used in modern boat building. It offers high strength and is relatively easy to work with, making it a practical choice for DIY ship building.
3. Steel
For larger vessels, steel is a sturdy and resilient option. While working with steel requires specialized tools and skills, it provides excellent structural integrity and is well-suited for ocean-going ships.
4. Aluminum
Aluminum is another lightweight and corrosion-resistant material suitable for building smaller ships and boats. It offers the advantage of being low-maintenance and is often favored for its ease of handling.
5. Composite Materials
Composite materials, such as carbon fiber and epoxy, offer a modern alternative for constructing ship components. They are known for their high strength-to-weight ratio and are increasingly popular in the marine industry.
When choosing materials, consider factors such as the size and type of ship you intend to build, your budget, and the availability of materials in your area. It's essential to select materials that align with your skill level and the specific requirements of your DIY ship building project.
Designing Your Ship
Designing your ship is a critical phase in the DIY ship building process. It involves creating a blueprint that outlines the vessel's structure, layout, and functionality. Here are the key steps to consider when designing your ship:
-
Determine the Purpose: Before diving into the design, clarify the purpose of your ship. Are you building a small sailboat for leisurely cruises, or a sturdy fishing vessel for commercial use? Understanding the intended use will guide the overall design and feature requirements.
-
Sketch the Layout: Begin by sketching the basic layout of your ship. Consider the placement of essential components such as the hull, deck, cabins, and storage areas. Take into account the ergonomics and practicality of the layout to ensure optimal functionality.
-
Incorporate Safety Features: Safety should be a top priority in ship design. Integrate safety features such as railings, non-slip surfaces, and emergency equipment storage. Additionally, ensure that the vessel complies with relevant maritime safety regulations.
-
Consider Aesthetics: While functionality is paramount, don't overlook the aesthetics of your ship. Incorporate design elements that reflect your personal style and vision for the vessel. Whether it's a sleek, modern look or a classic, timeless design, the aesthetics contribute to the overall appeal of your DIY creation.
-
Consult with Experts: If you're new to ship design, seeking advice from experienced naval architects or marine engineers can provide valuable insights. They can offer guidance on structural integrity, stability, and hydrodynamics, ensuring that your design is both safe and seaworthy.
-
Utilize Design Software: Take advantage of modern design software to create detailed 3D models and simulations of your ship. This allows you to visualize the final product, identify potential design flaws, and make necessary adjustments before construction begins.
By carefully designing your ship, you lay the foundation for a successful DIY building project. A well-thought-out design not only ensures the functionality and safety of the vessel but also adds a personal touch to your maritime masterpiece.
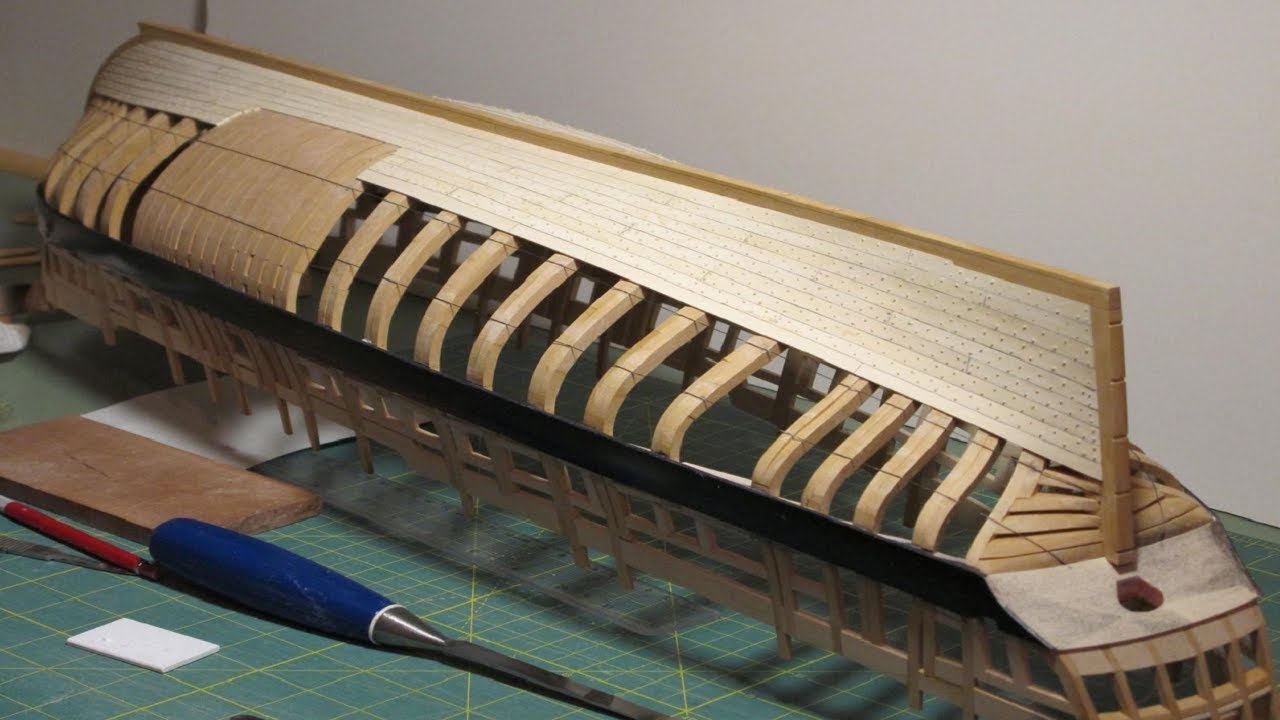
Constructing the Hull
Constructing the hull is a pivotal phase in DIY ship building, as it forms the core structure of the vessel. Here's a detailed guide on how to construct the hull of your ship:
-
Selecting the Hull Type: The first step is to determine the type of hull that best suits your ship. Common hull types include displacement hulls, planing hulls, and catamaran hulls. Each type has distinct characteristics that impact the vessel's performance and stability.
-
Preparing the Framework: Once the hull type is chosen, prepare the framework for the hull construction. This involves creating a sturdy skeleton that will serve as the foundation for the hull. The framework provides the shape and support necessary for the hull's integrity.
-
Laying the Keel: The keel is the backbone of the ship's hull. It runs along the bottom centerline and provides structural strength and stability. Carefully lay and secure the keel, ensuring it aligns with the design specifications and is securely attached to the framework.
-
Assembling the Planking: Traditional wooden ships often feature planked hulls, where wooden planks are meticulously fitted and fastened to form the hull's exterior. When using fiberglass or steel, the hull may be constructed using welded or molded panels. Pay close attention to the alignment and symmetry of the planking to achieve a smooth and uniform hull surface.
-
Reinforcing the Hull: Depending on the size and intended use of the ship, reinforcing the hull may be necessary to withstand the forces encountered at sea. This can involve adding internal bracing, bulkheads, and ribs to enhance the hull's structural integrity and resistance to torsion and bending.
-
Sealing and Waterproofing: Once the hull is constructed, it's essential to seal and waterproof it to prevent water intrusion and rot. Apply suitable sealants, coatings, or fiberglass resin to the hull's exterior, ensuring a watertight and durable finish.
-
Quality Assurance and Inspection: Before proceeding to the next phase, thoroughly inspect the constructed hull for any defects, weak points, or irregularities. Conduct quality assurance checks to verify that the hull meets safety standards and design specifications.
By meticulously constructing the hull of your ship, you establish a solid foundation for the rest of the DIY building process. The hull not only contributes to the vessel's structural integrity but also plays a significant role in its performance, buoyancy, and seaworthiness.
Installing the Deck and Superstructure
After successfully constructing the hull, the next crucial phase in DIY ship building is the installation of the deck and superstructure. This phase adds functionality, aesthetics, and essential features to your vessel. Here's a comprehensive guide on how to install the deck and superstructure of your ship:
-
Deck Installation:
- Begin by carefully measuring and cutting the deck materials to fit the hull's contours. Whether using wood, fiberglass, or other materials, ensure a precise fit to create a seamless and secure deck.
- Secure the deck to the hull using appropriate fastening methods, such as screws, bolts, or adhesives, depending on the chosen materials. This step is critical to ensure the deck's stability and watertight integrity.
-
Superstructure Construction:
- The superstructure encompasses the cabins, bridge, and any additional compartments above the main deck. Design and construct the superstructure according to the layout and functionality outlined in the ship's design phase.
- Utilize suitable materials for the superstructure, considering factors such as weight, durability, and resistance to environmental elements. Ensure proper insulation and ventilation for enclosed spaces within the superstructure.
-
Integration of Components:
- Integrate essential components into the deck and superstructure, such as hatches, windows, doors, and access points. These components contribute to the functionality, accessibility, and safety of the ship.
- Install railings, guardrails, and safety features to enhance the security of the deck and superstructure, especially in areas where individuals will be moving or working.
-
Electrical and Plumbing Systems:
- If applicable, incorporate electrical wiring, lighting, and plumbing systems into the deck and superstructure. Ensure compliance with marine electrical and plumbing standards to guarantee safety and functionality.
-
Finishing Touches:
- Apply suitable coatings, paints, or finishes to the deck and superstructure to enhance their appearance and protect them from the marine environment. Consider non-slip coatings for deck surfaces to prevent accidents and improve traction.
-
Quality Assurance and Testing:
- Thoroughly inspect the installed deck and superstructure for structural integrity, proper fit, and adherence to design specifications. Conduct tests for water tightness, stability, and functionality to identify and address any issues before proceeding to the next phase.
By meticulously installing the deck and superstructure, you transform the hull into a fully functional and habitable vessel. This phase not only enhances the practicality and comfort of the ship but also contributes to its overall aesthetic appeal and seaworthiness.
Adding the Finishing Touches
Adding the finishing touches to your DIY-built ship is the stage where you bring your vision to life and transform it into a seaworthy masterpiece. This phase involves the integration of essential components, aesthetic enhancements, and final preparations before the vessel's maiden voyage. Here's a detailed breakdown of the finishing touches for your ship:
-
Navigation and Communication Equipment:
- Install navigation instruments such as GPS systems, compasses, and nautical charts to ensure safe and accurate navigation.
- Incorporate communication devices such as marine radios and distress signaling equipment for emergency situations.
-
Safety and Emergency Equipment:
- Equip the ship with life jackets, life rafts, and firefighting apparatus to comply with maritime safety regulations.
- Install emergency beacons, flares, and signaling devices for distress situations.
-
Interior Furnishings and Amenities:
- Furnish the ship's interior with comfortable seating, sleeping quarters, and storage compartments to enhance onboard comfort.
- Integrate amenities such as a galley, bathroom facilities, and climate control systems for extended voyages.
-
Deck and Superstructure Enhancements:
- Add aesthetic elements such as handcrafted railings, decorative lighting, and custom fittings to personalize the deck and superstructure.
- Consider the installation of sunshades, awnings, and outdoor seating areas to optimize the ship's outdoor living spaces.
-
Customization and Personalization:
- Incorporate personalized elements such as custom insignia, names, or decorative motifs to imbue the ship with individual character.
- Consider custom paint schemes, hull decorations, and personalized signage to make your ship stand out on the water.
-
Final Inspections and Testing:
- Conduct thorough inspections of all installed components to ensure proper functionality and compliance with safety standards.
- Perform sea trials and tests to evaluate the ship's performance, stability, and handling characteristics in real-world conditions.
-
Documentation and Compliance:
- Prepare all necessary documentation, including registration, licensing, and compliance certificates, to legally operate the ship.
- Ensure that the ship meets all regulatory requirements and safety standards before its official launch.
By meticulously adding the finishing touches to your DIY-built ship, you elevate it from a construction project to a fully functional and personalized vessel. These final details not only enhance the ship's functionality and safety but also reflect your creativity and passion for the maritime craft.
Launching and Testing Your Ship
After the arduous process of DIY ship building, the moment of truth arrives with the launching and testing of your meticulously crafted vessel. This phase marks the culmination of your efforts and the transition from a construction project to a fully operational ship. Here's a comprehensive guide on how to successfully launch and test your ship:
-
Pre-Launch Preparations:
- Conduct a thorough inspection of the entire vessel, ensuring that all components are securely installed and functioning correctly.
- Verify that safety equipment, including life-saving devices and emergency systems, is in place and operational.
- Check the vessel's documentation, including registration, licensing, and compliance certificates, to ensure legal readiness for launch.
-
Selecting the Launch Site:
- Choose a suitable location for the ship's launch, such as a boat ramp, shipyard slipway, or waterfront area with adequate water depth.
- Ensure that the chosen site provides a safe and clear path for the vessel's entry into the water, minimizing the risk of obstructions or grounding.
-
Preparing for Launch:
- Coordinate with a qualified launch team or professionals experienced in ship launching to oversee the process.
- Secure the vessel to a launching cradle or trailer, ensuring stability and proper alignment for a smooth transition into the water.
-
Launching the Ship:
- Gradually release the restraints or supports holding the vessel in place, allowing it to move steadily into the water.
- Monitor the vessel's descent and ensure that it enters the water evenly and without excessive tilting or imbalance.
-
Post-Launch Inspections:
- Immediately conduct a thorough inspection of the vessel's hull, deck, and superstructure for any signs of damage or water ingress.
- Verify the functionality of onboard systems, including propulsion, steering, and electrical components, to ensure they remain operational after the launch.
-
Sea Trials and Testing:
- Once the vessel is afloat, initiate sea trials to evaluate its performance, maneuverability, and handling characteristics.
- Test the vessel's propulsion systems, navigation instruments, and safety equipment under real-world conditions to identify any issues or areas for improvement.
-
Stability and Buoyancy Checks:
- Assess the ship's stability and buoyancy by simulating various sea conditions, including waves, wind, and maneuvers, to ensure it maintains equilibrium and seaworthiness.
-
Performance Evaluation:
- Evaluate the vessel's speed, fuel efficiency, and overall performance to gauge its suitability for intended use, whether for leisurely cruising or commercial operations.
-
Safety and Compliance Verification:
- Confirm that the vessel complies with maritime safety regulations and standards, addressing any deficiencies or non-conformities identified during testing.
- Ensure that all safety equipment and emergency systems are fully functional and accessible in case of unforeseen circumstances at sea.
-
Final Adjustments and Refinements:
- Address any issues or deficiencies identified during testing, making necessary adjustments to enhance the vessel's performance and safety.
- Fine-tune onboard systems, controls, and amenities to optimize the ship's functionality and comfort for future voyages.
By meticulously executing the launching and testing phase, you validate the success of your DIY ship building endeavor and ensure the seaworthiness and operational readiness of your vessel. This critical phase not only marks the official entry of your ship into the water but also signifies the beginning of its maritime journey, ready to conquer the waves and fulfill your seafaring dreams.
Conclusion
In conclusion, DIY ship building is a challenging yet immensely rewarding endeavor that allows individuals to bring their maritime dreams to life. From selecting the right materials and designing the vessel to constructing the hull, installing the deck and superstructure, adding the finishing touches, and finally launching and testing the ship, each phase demands dedication, craftsmanship, and attention to detail. The process of building a ship from scratch not only fosters a deep sense of accomplishment but also provides an opportunity for personal expression and creativity. Whether embarking on a small-scale boat project or undertaking the construction of a larger vessel, the journey of DIY ship building is a testament to human ingenuity and the timeless allure of the open sea. As the waves beckon and the horizon calls, may your DIY-built ship carry you on unforgettable voyages and adventures, embodying the spirit of craftsmanship and the thrill of maritime exploration.