
Home>Create & Decorate>DIY & Crafts>DIY Rolling Cart: Adding Wheels For Easy Mobility
DIY & Crafts
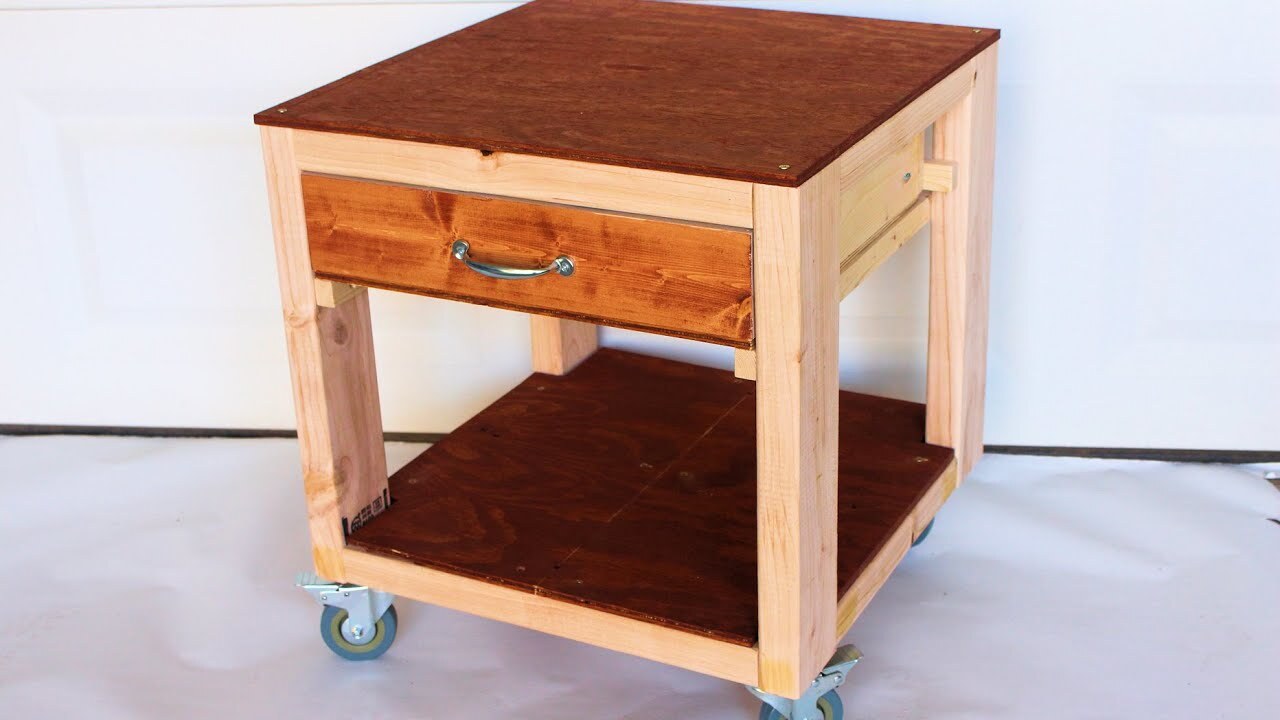
DIY Rolling Cart: Adding Wheels For Easy Mobility
Published: June 12, 2024

Senior Editor in Create & Decorate, Kathryn combines traditional craftsmanship with contemporary trends. Her background in textile design and commitment to sustainable crafts inspire both content and community.
Learn how to add wheels to your DIY rolling cart for easy mobility with this simple tutorial. Perfect for DIY & Crafts enthusiasts.
(Many of the links in this article redirect to a specific reviewed product. Your purchase of these products through affiliate links helps to generate commission for Twigandthistle.com, at no extra cost. Learn more)
Materials Needed
To get started on your DIY rolling cart project, you will need the following materials:
-
Cart: Choose a sturdy and spacious cart that will serve as the base for your project. This could be an old utility cart, a wooden crate, or even a metal storage cart.
-
Wheels: Look for a set of durable and reliable wheels that can support the weight of the cart and its contents. You can opt for swivel wheels for better maneuverability or fixed wheels for stability.
-
Screws and Bolts: Make sure to have a variety of screws and bolts on hand to secure the wheels to the cart securely.
-
Drill: A power drill will be essential for making holes and attaching the wheels to the cart.
-
Screwdriver: Have a screwdriver ready for tightening the screws and bolts.
-
Measuring Tape: Accurate measurements are crucial for ensuring that the wheels are properly aligned and attached to the cart.
-
Pencil: A pencil will come in handy for marking the positions where the wheels will be attached.
-
Safety Gear: Don't forget to prioritize safety by wearing gloves and safety goggles while working with tools and materials.
Gathering these materials will set you on the right path to transforming your ordinary cart into a convenient and mobile storage solution.
Step 1: Preparing the Cart
Before you can add wheels to your cart, it's essential to prepare the cart itself. Here's how to get started:
-
Clear the Cart: Remove any items or clutter from the cart to create a clear working space. This will also make it easier to access all sides of the cart during the wheel attachment process.
-
Clean the Surface: Wipe down the cart to remove any dust, dirt, or debris. A clean surface will ensure that the wheels can be attached securely without any interference.
-
Inspect the Cart: Take a close look at the cart to check for any damage or weak spots. It's important to address any structural issues before adding the wheels to ensure the cart can support the additional weight and movement.
-
Mark the Wheel Placement: Use a measuring tape and a pencil to mark the positions where the wheels will be attached. Make sure the markings are evenly spaced and aligned to ensure balanced mobility.
By preparing the cart thoroughly, you'll create a solid foundation for the wheel attachment process, setting the stage for a successful DIY rolling cart transformation.
Step 2: Attaching the Wheels
Once the cart is prepped and ready, it's time to move on to the exciting step of attaching the wheels. Follow these detailed instructions to ensure a smooth and secure attachment process:
-
Align the Wheels: Place the wheels at the marked positions on the cart. Ensure that they are evenly spaced and aligned according to your markings. This step is crucial for balanced mobility and stability.
-
Mark the Screw Holes: With the wheels in position, use a pencil to mark the spots where the screws will be inserted to attach the wheels. Make sure the marks are clear and accurately placed.
-
Drill Pilot Holes: Using a drill bit that is slightly smaller than the diameter of the screws, carefully drill pilot holes at the marked spots. Pilot holes help prevent the wood from splitting and make it easier to drive the screws in.
-
Attach the Wheels: Place the wheels back in position and use screws and bolts to secure them to the cart. A power drill or screwdriver will come in handy for this step. Ensure that the wheels are tightly and securely attached to the cart.
-
Double-Check the Alignment: Once the wheels are attached, double-check their alignment and stability. Give each wheel a gentle tug to ensure that they are firmly in place and can support the weight of the cart.
By following these steps with precision and care, you'll successfully attach the wheels to your cart, bringing you one step closer to enjoying the convenience of a mobile storage solution.
Step 3: Testing the Mobility
Now that the wheels are securely attached to the cart, it's time to put your DIY creation to the test. Follow these steps to ensure that the mobility of your rolling cart meets your expectations:
-
Load the Cart: Place some items or weight on the cart to simulate typical usage. This will give you a better sense of how the cart will perform when fully loaded and in motion.
-
Maneuver the Cart: Push and pull the cart in different directions to test its maneuverability. Check if the swivel wheels allow for smooth and easy navigation, especially around corners and obstacles.
-
Test on Different Surfaces: Roll the cart across various surfaces such as hardwood floors, carpets, and tiles. This will help you assess how well the wheels handle different terrains and whether any adjustments are needed.
-
Check for Stability: Ensure that the cart remains stable and balanced, especially when loaded. There should be minimal wobbling or tipping, indicating that the wheels are properly aligned and can support the weight.
-
Evaluate Noise and Friction: Pay attention to any unusual noises or excessive friction as you move the cart. Smooth and quiet mobility is a sign of well-functioning wheels.
By thoroughly testing the mobility of your DIY rolling cart, you can make any necessary adjustments and ensure that it meets your mobility needs. This step is crucial for confirming that your project has been a success and that your cart is ready to serve its purpose with ease and convenience.
Step 4: Adding Finishing Touches
With the wheels securely attached and the mobility tested, it's time to add the final touches to your DIY rolling cart. These finishing touches will not only enhance the functionality of the cart but also give it a polished and professional look.
-
Handle or Grip: Consider adding a handle or grip to the cart for easier maneuverability. This could be a simple handle attached to one end of the cart, allowing for better control when pushing or pulling the cart.
-
Protective Bumpers: Attach protective bumpers to the corners of the cart to prevent damage to walls, furniture, or other items in case of accidental bumps or collisions. These bumpers can be made of rubber or soft materials to absorb impact.
-
Storage Accessories: Depending on the purpose of the cart, you can customize it with additional storage accessories such as hooks, baskets, or compartments. These accessories can provide convenient storage for tools, supplies, or other items.
-
Personalization: Add a personal touch to the cart by painting it in a color of your choice or applying decorative decals. This not only adds visual appeal but also makes the cart easily identifiable if used in a shared space.
-
Maintenance Check: Before considering the project complete, perform a final maintenance check. Ensure that all screws and bolts are tightened, and the wheels are still securely attached. This step will help prevent any unexpected issues during use.
By adding these finishing touches, you can elevate your DIY rolling cart from a simple utility to a customized and functional piece that meets your specific needs. These details contribute to the overall usability and aesthetics of the cart, making it a valuable addition to your home or workspace.
Conclusion
In conclusion, transforming a standard cart into a mobile storage solution by adding wheels is a rewarding and practical DIY project. By following the steps outlined in this guide and paying attention to the details, you can create a versatile and convenient rolling cart that meets your specific needs. From preparing the cart and attaching the wheels to testing its mobility and adding finishing touches, each step contributes to the overall success of the project. Whether used for organizing tools in a workshop, storing supplies in a craft room, or serving as a portable serving cart, the addition of wheels enhances the functionality and versatility of the cart. With careful planning and execution, your DIY rolling cart will become a valuable asset in your home or workspace, providing ease of mobility and efficient storage solutions.