
Home>Create & Decorate>DIY & Crafts>DIY RC Plane: Step-by-Step Guide To Building Your Own Remote Control Aircraft
DIY & Crafts
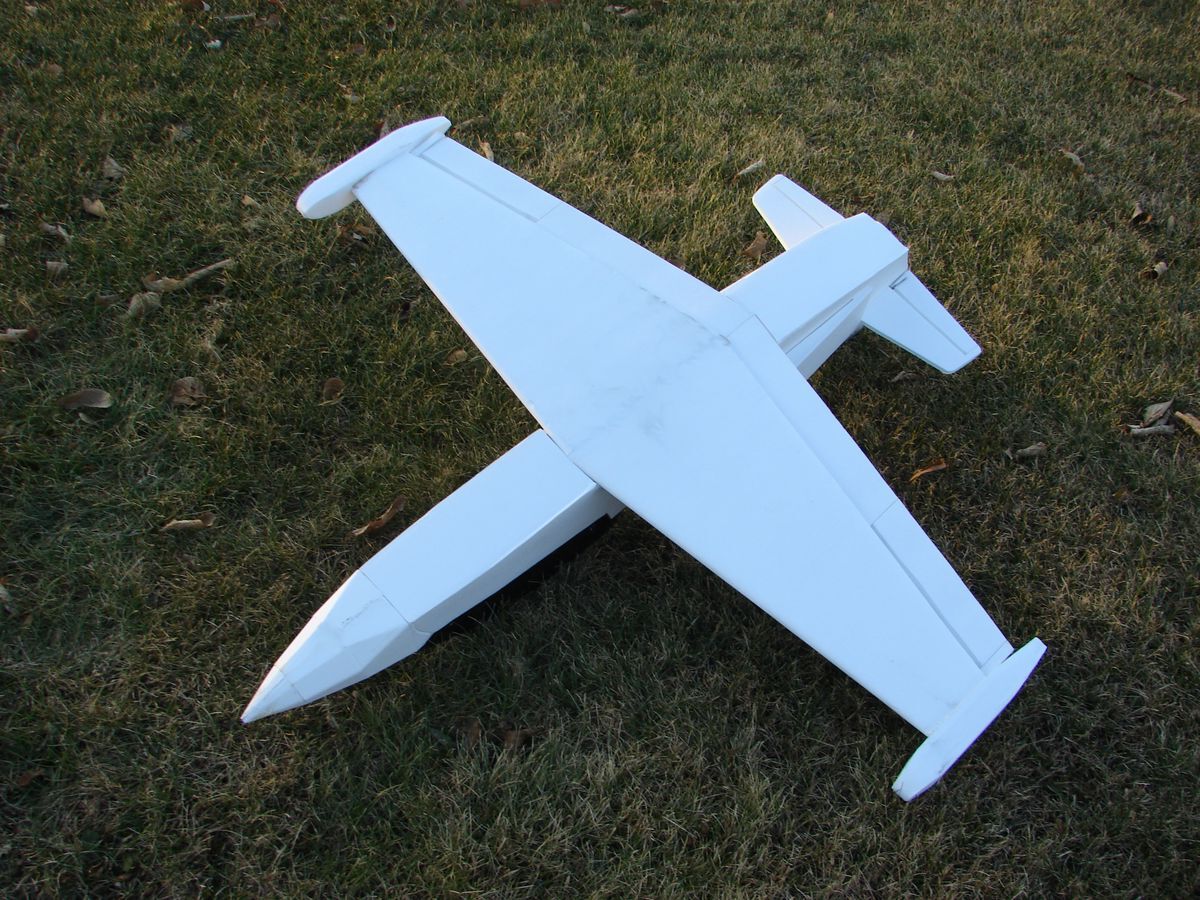
DIY RC Plane: Step-by-Step Guide To Building Your Own Remote Control Aircraft
Published: June 17, 2024

Senior Editor in Create & Decorate, Kathryn combines traditional craftsmanship with contemporary trends. Her background in textile design and commitment to sustainable crafts inspire both content and community.
Learn how to build your own remote control aircraft with our step-by-step DIY guide. Get ready to take to the skies with your custom-built RC plane!
(Many of the links in this article redirect to a specific reviewed product. Your purchase of these products through affiliate links helps to generate commission for Twigandthistle.com, at no extra cost. Learn more)
Introduction
Have you ever dreamed of taking to the skies with your own DIY RC plane? Building your own remote control aircraft can be a rewarding and exhilarating experience. Whether you're a seasoned hobbyist or a beginner looking for a new challenge, constructing your own RC plane allows you to customize every aspect of the aircraft to your liking. In this step-by-step guide, we will walk you through the process of building your very own DIY RC plane, from understanding the basics to testing and fine-tuning your creation. So, buckle up and get ready to embark on an exciting journey into the world of remote control aviation!
Understanding the Basics of RC Planes
When it comes to building a DIY RC plane, understanding the basics of remote control aviation is crucial. Here are some key points to consider:
-
Aerodynamics: Understanding the principles of aerodynamics is essential for designing an efficient and stable RC plane. Factors such as airfoil shape, wing loading, and center of gravity play a critical role in the performance of the aircraft.
-
Power Systems: RC planes are powered by electric motors, gas engines, or even jet turbines. Choosing the right power system for your DIY RC plane depends on factors such as size, weight, and desired flight characteristics.
-
Control Surfaces: The control surfaces of an RC plane, including ailerons, elevators, and rudders, are responsible for maneuvering the aircraft. Understanding how these surfaces work together to control the plane's movement is essential for successful flight.
-
Materials: The choice of materials, such as balsa wood, foam, or composite materials, can significantly impact the performance and durability of your RC plane. Understanding the properties of different materials will help you make informed decisions during the construction process.
By familiarizing yourself with these fundamental aspects of RC planes, you'll be better equipped to tackle the construction of your DIY aircraft with confidence and precision.
Gathering the Necessary Materials and Tools
Before diving into the construction of your DIY RC plane, it's essential to gather all the materials and tools you'll need for the project. Here's a comprehensive list to get you started:
Materials
- Balsa Wood: This lightweight and versatile wood is commonly used for building the frame and wings of RC planes.
- Foam: Expanded polystyrene (EPS) foam or depron foam can be used for constructing lightweight and durable components.
- Adhesives: Epoxy, cyanoacrylate (CA) glue, and wood glue are essential for bonding various parts of the aircraft.
- Covering Material: Heat-shrink plastic film or lightweight fabric covering is used to cover the wings and fuselage for added strength and aerodynamics.
- Control Linkages: Pushrods, control horns, and clevises are necessary for connecting the control surfaces to the servos.
Tools
- Cutting Tools: A sharp hobby knife, razor saw, and sanding blocks are essential for shaping and cutting materials with precision.
- Measuring and Marking Tools: A ruler, calipers, and a marking pen will help you accurately measure and mark the components during assembly.
- Power Tools: A rotary tool with cutting and sanding attachments can expedite the shaping and sanding process.
- Heat Gun: If using heat-shrink covering material, a heat gun is necessary for applying and shrinking the covering to the aircraft's surfaces.
- Soldering Iron: For assembling electronic components and soldering connections for the remote control system.
By ensuring you have all the necessary materials and tools at your disposal, you'll be well-prepared to embark on the exciting journey of building your very own DIY RC plane.
Building the Fuselage
The fuselage serves as the central structure of the RC plane, housing the electronic components and providing stability during flight. Here's a step-by-step guide to building the fuselage of your DIY RC plane:
-
Frame Construction: Begin by cutting balsa wood or foam sheets into the desired fuselage shape. Use a sharp hobby knife to carefully carve out the main fuselage components, including the top, bottom, and sides. Ensure precise measurements to maintain symmetry and structural integrity.
-
Assembly: Once the individual components are cut, assemble the fuselage frame using epoxy or wood glue. Secure the joints with reinforcing materials such as carbon fiber rods or additional balsa wood to enhance the overall strength of the structure.
-
Internal Components: Create compartments within the fuselage to accommodate the electronic components, such as the receiver, battery, and servos. Carefully plan the layout to ensure proper weight distribution and accessibility for maintenance.
-
Reinforcement: Strengthen critical areas of the fuselage, such as the wing mounting area and landing gear attachment points, with additional layers of balsa or carbon fiber. This reinforcement will help withstand the forces experienced during takeoff, landing, and in-flight maneuvers.
-
Access Hatches: Incorporate access hatches or removable sections in the fuselage design to facilitate easy access to the internal components for maintenance and adjustments. Secure these hatches with magnets or small latches for quick and convenient access.
-
Finishing Touches: Sand the entire fuselage to achieve smooth and aerodynamic contours. Apply a lightweight covering material, such as heat-shrink plastic film, to the exterior of the fuselage for added durability and a polished finish.
By following these steps, you can construct a sturdy and well-designed fuselage for your DIY RC plane, setting the foundation for the next phases of the aircraft assembly.
Constructing the Wings and Tail
Constructing the wings and tail of your DIY RC plane is a critical phase that significantly influences the aircraft's flight performance and stability. Here's a detailed guide to constructing these essential components:
Wings
-
Wing Design: Begin by selecting a suitable wing design based on the desired flight characteristics of your RC plane. Whether it's a high-wing, mid-wing, or low-wing configuration, the wing design plays a crucial role in the plane's stability and maneuverability.
-
Wing Structure: Cut the wing ribs and spars from balsa wood or foam, ensuring precision and symmetry. Assemble the wing structure by carefully aligning the ribs and securing them to the spars using adhesive. Consider incorporating dihedral or polyhedral angles for improved stability during flight.
-
Wing Covering: Once the wing structure is assembled, apply a lightweight covering material, such as heat-shrink plastic film or fabric, to the wing surfaces. Use a heat gun to shrink the covering, ensuring a smooth and taut finish. This covering enhances the wing's strength and aerodynamic performance.
-
Ailerons: If your RC plane incorporates aileron control surfaces, carefully cut and hinge the ailerons to the wing structure. Install servo mounts and linkages to connect the ailerons to the remote control system, allowing precise control of the aircraft's roll movements.
Tail
-
Horizontal Stabilizer: Construct the horizontal stabilizer using balsa wood or foam, ensuring a symmetrical and airfoil-shaped design. Attach the stabilizer to the fuselage, ensuring proper alignment and secure bonding to maintain the aircraft's longitudinal stability.
-
Vertical Stabilizer and Rudder: Similarly, construct the vertical stabilizer and rudder components, considering the desired rudder authority for steering control. Install the rudder servo and linkages to enable precise directional control during flight maneuvers.
-
Tail Covering: Apply the same lightweight covering material used for the wings to the tail surfaces, ensuring a consistent and aerodynamically smooth finish. The covering material adds structural integrity and protects the tail components during flight.
By meticulously constructing the wings and tail of your DIY RC plane, you lay the foundation for a well-balanced and aerodynamically efficient aircraft, setting the stage for the next phase of the assembly process.
Installing the Remote Control System
Installing the remote control system is a pivotal step in bringing your DIY RC plane to life, as it enables you to command the aircraft's movements with precision. Here's a comprehensive guide to installing the remote control system:
-
Receiver Placement: Begin by determining the optimal location for the receiver within the fuselage. Ensure that the receiver is positioned securely and is easily accessible for future maintenance and adjustments. Consider factors such as weight distribution and interference with other electronic components when finalizing the receiver's placement.
-
Servo Installation: Install the servos in the designated locations within the fuselage or wing structure, depending on the control surfaces they will actuate. Secure the servos using mounting hardware and ensure that the control linkages can move freely without binding or excessive play.
-
Control Linkages: Connect the control linkages from the servos to the respective control surfaces, such as ailerons, elevators, and rudder. Adjust the linkages to achieve neutral control surface positions and ensure smooth and precise movement in response to servo commands.
-
Receiver Binding: If using a radio system that requires binding, follow the manufacturer's instructions to bind the transmitter to the receiver. This process establishes a secure and unique connection between the two components, enabling seamless communication during flight.
-
Power System Integration: Connect the power supply, typically the aircraft's battery, to the receiver and servos. Ensure that the polarity is correct and that all connections are secure. Test the control surfaces' movements to verify proper servo operation and responsiveness to transmitter inputs.
-
Range Testing: Before finalizing the installation, perform a range test to ensure that the remote control system maintains a reliable connection with the transmitter throughout the aircraft's intended operating range. Follow the manufacturer's guidelines for conducting a thorough range check to verify signal strength and integrity.
-
Transmitter Setup: Configure the transmitter settings to match the control surface movements and direction of the aircraft. Adjust control surface throws, exponential rates, and dual rates as needed to achieve the desired flight characteristics and responsiveness.
By meticulously installing the remote control system, you empower your DIY RC plane with the capability to execute your piloting commands with precision and agility, paving the way for the exciting phase of testing and fine-tuning the aircraft's performance.
Testing and Fine-Tuning Your DIY RC Plane
Once the construction of your DIY RC plane is complete, it's time to put your creation to the test and fine-tune its performance for optimal flight characteristics. Here's a detailed guide to testing and fine-tuning your aircraft:
Pre-Flight Checks
Before taking your DIY RC plane to the skies, it's crucial to conduct thorough pre-flight checks to ensure the aircraft's airworthiness and safety. Here are the essential pre-flight checks to perform:
-
Control Surface Movements: Verify that all control surfaces, including ailerons, elevators, and rudder, move freely and respond accurately to the transmitter inputs. Check for any binding, excessive play, or interference that may affect the control surface movements.
-
Center of Gravity (CG): Confirm that the aircraft's CG is within the specified range as per the design guidelines. Adjust the battery or additional ballast as necessary to achieve the recommended CG position for stable flight.
-
Power System Test: Run a comprehensive test of the power system, including the motor, propeller, and electronic speed controller (ESC). Ensure that the motor operates smoothly and that the ESC's programming aligns with the desired throttle response.
-
Radio Range Check: Perform a radio range check to verify the transmitter's signal strength and the receiver's responsiveness at various distances within the intended operating range. Address any signal loss or interference issues before proceeding with flight testing.
Maiden Flight
The maiden flight of your DIY RC plane marks a significant milestone in the aircraft's journey from the workbench to the skies. Here's how to approach the maiden flight with caution and confidence:
-
Ideal Flying Conditions: Choose a day with calm weather and minimal wind for the maiden flight. Smooth air and clear visibility will provide an optimal environment for evaluating the aircraft's flight characteristics.
-
Takeoff and Trim: Perform a gradual takeoff and assess the aircraft's stability and trim. Make necessary adjustments to the control surface trims to achieve level flight and neutral control surface positions.
-
Flight Testing: Conduct gentle maneuvers, including straight and level flight, gentle turns, and gradual climbs and descents, to evaluate the aircraft's handling and responsiveness. Pay close attention to any tendencies for pitching, rolling, or yawing that may require trim adjustments.
Fine-Tuning and Adjustments
After the maiden flight, it's time to fine-tune your DIY RC plane based on the observed flight behavior. Here's how to approach fine-tuning and making necessary adjustments:
-
Control Surface Throws: Adjust the control surface throws, such as aileron, elevator, and rudder deflections, to achieve the desired responsiveness and maneuverability without inducing instability or excessive sensitivity.
-
Center of Gravity Refinement: Fine-tune the aircraft's CG by making incremental adjustments to the battery position or additional ballast. Strive to achieve a balanced CG that promotes stable flight characteristics and predictable handling.
-
Power System Optimization: Fine-tune the power system settings, such as throttle response, motor timing, and propeller selection, to optimize the aircraft's performance and efficiency during flight.
-
Flight Performance Evaluation: Continuously evaluate the aircraft's flight performance and make iterative adjustments to control surface trims, CG, and power system settings to achieve the desired flight behavior.
By methodically testing and fine-tuning your DIY RC plane, you can refine its performance and handling characteristics, ultimately ensuring an enjoyable and rewarding flying experience.
Conclusion
In conclusion, building your own DIY RC plane is a fulfilling and exhilarating endeavor that allows you to unleash your creativity and passion for aviation. By understanding the basics of RC planes, gathering the necessary materials and tools, and meticulously constructing the fuselage, wings, and tail, you lay the foundation for a well-crafted and aerodynamically efficient aircraft. Installing the remote control system and conducting thorough testing and fine-tuning further enhance the performance and responsiveness of your creation.
As you embark on this journey, remember that patience and attention to detail are key virtues in the construction and refinement of your DIY RC plane. Each phase of the process, from shaping the fuselage to adjusting control surface throws, contributes to the overall success and enjoyment of piloting your custom-built aircraft.
Whether you're a seasoned hobbyist or a newcomer to the world of remote control aviation, the satisfaction of seeing your DIY RC plane take to the skies for its maiden flight is an experience like no other. So, roll up your sleeves, embrace the challenges, and soar into the realm of DIY RC plane construction with confidence and enthusiasm. Happy flying!