
Home>Create & Decorate>DIY & Crafts>DIY Outdoor Sauna: Step-by-Step Guide To Building Your Own Relaxation Retreat
DIY & Crafts
DIY Outdoor Sauna: Step-by-Step Guide To Building Your Own Relaxation Retreat
Published: February 29, 2024

Senior Editor in Create & Decorate, Kathryn combines traditional craftsmanship with contemporary trends. Her background in textile design and commitment to sustainable crafts inspire both content and community.
Create your own DIY outdoor sauna with our step-by-step guide. Relax and unwind in your homemade relaxation retreat. Perfect for DIY & Crafts enthusiasts.
(Many of the links in this article redirect to a specific reviewed product. Your purchase of these products through affiliate links helps to generate commission for Twigandthistle.com, at no extra cost. Learn more)
Introduction
Welcome to the world of DIY outdoor saunas, where relaxation and rejuvenation await! Building your own outdoor sauna is an exciting and rewarding project that can transform your backyard into a tranquil retreat. Whether you're a seasoned DIY enthusiast or a newcomer to the world of construction, this step-by-step guide will equip you with the knowledge and inspiration to embark on this fulfilling endeavor.
Imagine stepping out into your garden and being greeted by the comforting warmth of your personal sauna. The gentle steam envelops you, melting away the stresses of the day as you unwind in the serene ambiance. With a DIY outdoor sauna, you have the freedom to design a space that perfectly suits your preferences, from the size and layout to the choice of materials and aesthetic details.
Not only does a homemade sauna offer a luxurious escape, but it also provides numerous health benefits. The heat from the sauna can help relax muscles, improve circulation, and promote a sense of well-being. Additionally, the process of building the sauna itself can be a form of therapy, allowing you to unleash your creativity and craftsmanship while immersing yourself in a hands-on project.
Throughout this guide, you'll discover the essential steps to bring your outdoor sauna vision to life. From selecting the ideal location in your yard to assembling the necessary materials and tools, each stage of the construction process will be carefully outlined. Whether you're seeking a solo sanctuary or a social space to share with friends and family, the versatility of a DIY outdoor sauna makes it a valuable addition to any home.
So, roll up your sleeves, gather your enthusiasm, and get ready to embark on a journey of creation and relaxation. By the end of this guide, you'll be well-equipped to construct your very own outdoor sauna, where you can bask in the warmth and serenity of your personal oasis. Let's dive into the first step: choosing the right location for your outdoor sauna retreat.
Step 1: Choosing the Right Location
Selecting the perfect location for your DIY outdoor sauna is a crucial first step in creating a tranquil and functional space. Consider these key factors to ensure an optimal setting for your relaxation retreat:
-
Privacy and Serenity: Look for a secluded spot in your backyard that offers privacy and a peaceful ambiance. This will allow you to fully immerse yourself in the sauna experience without external distractions.
-
Accessibility: Choose a location that is easily accessible from your home, ensuring convenience when you want to indulge in a rejuvenating sauna session. Additionally, consider the pathway leading to the sauna to ensure safe and comfortable access.
-
Ventilation and Drainage: It's essential to position the sauna in an area with proper ventilation to allow for the release of steam and heat. Additionally, ensure that the location has adequate drainage to prevent water accumulation around the sauna.
-
Sunlight and Shade: Assess the sun's movement throughout the day to determine the ideal balance of sunlight and shade for your outdoor sauna. Consider the positioning of the sauna in relation to the sun's path to achieve the desired level of natural light and warmth.
-
Aesthetic Integration: Integrate the sauna seamlessly into your backyard landscape, taking into account the overall aesthetics of your outdoor space. Consider how the sauna will complement the existing elements and enhance the visual appeal of your backyard.
-
Regulatory Compliance: Check local building codes and regulations to ensure compliance with any restrictions or requirements related to the construction of outdoor structures. This step is essential to avoid any potential legal or safety issues in the future.
By carefully evaluating these factors, you can identify the optimal location for your DIY outdoor sauna, setting the stage for a harmonious and rejuvenating addition to your backyard oasis. Once you've chosen the right location, you'll be ready to move on to the next step: gathering the materials and tools needed to bring your sauna vision to life.
Step 2: Gathering Materials and Tools
Gathering the necessary materials and tools is a pivotal phase in the journey of building your DIY outdoor sauna. By ensuring that you have all the essential components at your disposal, you can streamline the construction process and minimize interruptions. Here's a comprehensive list of the materials and tools you'll need to embark on this fulfilling project:
Materials:
- Lumber: Select high-quality, durable lumber for framing the sauna walls and constructing the benches. Cedar and redwood are popular choices due to their natural resistance to moisture and decay.
- Insulation: Choose appropriate insulation materials to maintain the sauna's heat efficiency. Mineral wool or fiberglass insulation are commonly used for this purpose.
- Sauna Door: Invest in a specially designed sauna door that can withstand high temperatures and provide a tight seal to retain heat.
- Vapor Barrier: A vapor barrier is essential to prevent moisture from penetrating the sauna walls. Select a high-quality barrier to ensure optimal performance.
- Sauna Heater: Select a sauna heater that suits the size of your sauna and complies with safety standards. Electric and wood-burning heaters are popular options, each offering unique benefits.
- Ventilation: Install a ventilation system to ensure proper air circulation and maintain a comfortable environment inside the sauna.
- Bench Material: Choose suitable wood for constructing the sauna benches, ensuring it can withstand high temperatures and frequent use.
Tools:
- Measuring Tools: Accurate measurements are crucial in the construction process. Ensure you have a tape measure, level, and square to maintain precision.
- Saw: A circular saw or a miter saw will be essential for cutting lumber to the required dimensions.
- Drill and Bits: A power drill with various drill bits is necessary for assembling the sauna frame, attaching components, and installing fixtures.
- Hammer and Nails: Basic hand tools such as a hammer and nails will be used for securing framing members and other components.
- Screwdriver Set: Have a set of screwdrivers on hand for assembling the sauna door, benches, and other fixtures.
- Insulation Knife: An insulation knife will be useful for cutting and shaping insulation materials to fit the sauna walls accurately.
- Safety Gear: Prioritize safety by equipping yourself with protective gear, including gloves, safety goggles, and a dust mask.
By procuring these materials and tools, you'll be well-prepared to commence the construction of your outdoor sauna. With careful planning and attention to detail during this phase, you can set the stage for a smooth and efficient building process. Once you've gathered all the necessary components, you'll be ready to progress to the next step: building the sauna foundation.
Step 3: Building the Sauna Foundation
The sauna foundation serves as the sturdy base upon which the entire structure rests, providing stability and support for the sauna walls and roof. Building a solid foundation is essential to ensure the longevity and structural integrity of your outdoor sauna. Here's a detailed overview of the steps involved in constructing the sauna foundation:
1. Site Preparation:
Begin by clearing and leveling the ground where the sauna will be situated. Remove any debris, rocks, or vegetation to create a smooth and even surface for the foundation. Use a shovel and a rake to achieve the desired levelness, taking care to compact the soil thoroughly.
2. Foundation Framework:
Construct a framework for the foundation using pressure-treated lumber or concrete blocks. The framework should outline the perimeter of the sauna, providing a boundary for pouring the foundation material. Ensure that the framework is square and level to maintain uniformity and stability.
3. Choosing Foundation Material:
Select an appropriate material for the sauna foundation, such as concrete or compacted gravel. Concrete offers exceptional durability and strength, making it a popular choice for sauna foundations. Alternatively, compacted gravel provides adequate support and drainage for the sauna base.
4. Pouring the Foundation:
If using concrete, prepare the concrete mix according to the manufacturer's instructions. Pour the concrete into the framed area, ensuring an even distribution and smooth surface. Use a screed board to level the concrete and eliminate any excess. Allow the concrete to cure and harden as per the recommended timeframe.
5. Insulation Considerations:
Incorporate insulation into the foundation design to prevent heat loss and maintain a consistent temperature within the sauna. Insulation can be placed beneath the concrete slab or within the framework to enhance the sauna's energy efficiency.
6. Ventilation Openings:
During the foundation construction, incorporate openings or vents to facilitate air circulation beneath the sauna. Proper ventilation helps prevent moisture buildup and ensures a healthy environment within the sauna structure.
By meticulously executing these steps, you'll establish a robust and reliable foundation for your outdoor sauna, laying the groundwork for the subsequent phases of construction. With the foundation in place, you'll be ready to progress to the next stage: constructing the sauna walls and roof, bringing you one step closer to realizing your personalized relaxation retreat.
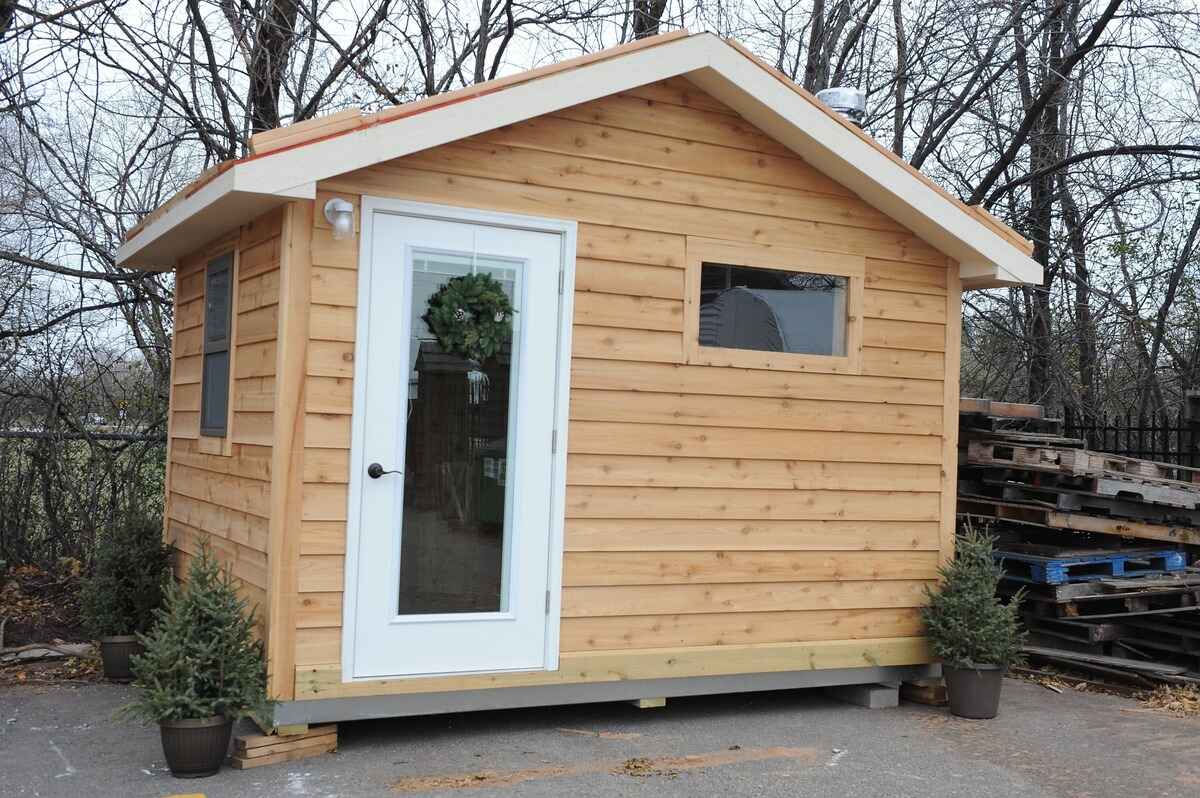
Step 4: Constructing the Sauna Walls and Roof
With the solid foundation in place, the focus now shifts to the construction of the sauna walls and roof, pivotal elements that define the structure and functionality of your outdoor sauna. This phase requires meticulous attention to detail and precision to ensure a well-insulated, weather-resistant, and aesthetically pleasing sauna enclosure. Here's a comprehensive overview of the steps involved in this crucial stage of the construction process:
1. Framing the Walls:
Begin by framing the walls of the sauna using the selected lumber, ensuring that the framework is sturdy and dimensionally accurate. The framing should accommodate the placement of insulation materials while providing structural support for the sauna walls. Carefully measure and cut the lumber to create the framework, ensuring that the corners are square and the vertical members are aligned.
2. Insulation Installation:
Once the wall framing is in place, proceed to install the insulation material within the wall cavities. Proper insulation is essential for retaining heat within the sauna and creating a comfortable and energy-efficient environment. Fit the insulation snugly within the framing, taking care to fill any gaps or voids to maximize thermal performance.
3. Exterior Cladding:
After insulating the walls, apply the chosen exterior cladding material to encase the sauna structure. Cedar or redwood paneling is a popular choice for its natural resistance to moisture and durability. Secure the cladding to the wall framing using appropriate fasteners, ensuring a tight and uniform installation. The exterior cladding not only enhances the visual appeal of the sauna but also provides protection against the elements.
4. Roof Construction:
Constructing the sauna roof involves framing, insulation, and roofing material installation. Similar to the walls, frame the roof structure using lumber, ensuring that it aligns with the dimensions of the sauna enclosure. Install insulation within the roof framework to maintain consistent heat retention. Once insulated, apply the selected roofing material, such as cedar shingles or metal roofing, to provide weatherproofing and aesthetic appeal.
5. Door and Window Installation:
Incorporate the sauna door and any desired windows into the wall framework. The sauna door should be specially designed to withstand high temperatures and provide a tight seal to retain heat. Windows can enhance natural lighting and ventilation within the sauna, contributing to a comfortable and inviting atmosphere.
By meticulously executing these steps, you'll bring the sauna walls and roof to fruition, creating a well-insulated, weather-resistant, and visually appealing enclosure for your outdoor sauna. With the walls and roof in place, the focus will shift to the installation of the sauna heater and ventilation system, marking a significant stride toward the completion of your personalized relaxation retreat.
Step 5: Installing the Sauna Heater and Ventilation
The installation of the sauna heater and ventilation system is a critical phase in the construction of your DIY outdoor sauna, as it directly impacts the comfort, functionality, and overall sauna experience. Careful consideration and precise execution are essential to ensure optimal heat distribution and air circulation within the sauna environment.
1. Selecting the Sauna Heater:
Choose a sauna heater that aligns with the size of your sauna and meets your specific preferences. Electric heaters are popular for their ease of use and precise temperature control, while wood-burning heaters offer a traditional sauna experience and a unique ambiance. Consider factors such as heater capacity, heating time, and energy efficiency when making your selection.
2. Heater Placement and Installation:
Position the sauna heater according to the manufacturer's guidelines, ensuring adequate clearance from combustible materials and proper ventilation. Install the heater securely, following the provided instructions and safety precautions. Electrical heaters will require a dedicated power supply, while wood-burning heaters necessitate a flue for smoke exhaust.
3. Ventilation System Integration:
Incorporate a ventilation system to maintain air quality and circulation within the sauna. Proper ventilation helps regulate humidity levels and prevents the buildup of stagnant air. Install vents or a ventilation fan to facilitate the inflow of fresh air and the expulsion of excess heat and moisture. The ventilation system should complement the sauna heater to create a comfortable and invigorating sauna environment.
4. Temperature and Airflow Optimization:
Fine-tune the sauna heater and ventilation settings to achieve the desired temperature and airflow. Test the functionality of the heater and ventilation system to ensure consistent heat distribution and efficient air exchange. Adjust the positioning of vents or the fan to optimize airflow patterns within the sauna, creating a balanced and comfortable atmosphere for relaxation.
5. Safety Considerations:
Prioritize safety by adhering to all safety guidelines and regulations during the installation of the sauna heater and ventilation system. Ensure that electrical connections are secure and comply with building codes. For wood-burning heaters, implement proper fire safety measures and maintain clearances from combustible materials to prevent potential hazards.
By meticulously installing the sauna heater and ventilation system, you'll create a harmonious and inviting sauna environment that promotes relaxation, rejuvenation, and overall well-being. With these essential components in place, your DIY outdoor sauna will be poised to deliver a personalized and indulgent retreat in the comfort of your own backyard.
Step 6: Adding Finishing Touches
As you approach the final phase of constructing your DIY outdoor sauna, attention to detail and thoughtful embellishments will elevate the overall aesthetic and functionality of the space. Adding finishing touches not only enhances the visual appeal of the sauna but also contributes to the comfort and convenience of the sauna experience. Here's a detailed exploration of the key elements involved in this pivotal stage:
1. Interior Finishes:
Create a welcoming and inviting interior by applying a protective finish to the sauna walls and benches. Consider using sauna-specific wood treatments or natural oils that enhance the wood's natural beauty while providing durability and moisture resistance. The interior finishes should be heat-resistant and non-toxic, ensuring a safe and comfortable environment for sauna users.
2. Lighting Solutions:
Incorporate suitable lighting fixtures to illuminate the sauna interior, creating a warm and inviting ambiance. LED lights designed for high-temperature environments are an excellent choice, offering energy efficiency and a soft, soothing glow. Thoughtfully positioned lighting can enhance the overall atmosphere and contribute to a relaxing sauna experience.
3. Seating and Comfort:
Ensure the sauna benches are meticulously crafted for comfort and functionality. Smooth the bench surfaces to eliminate rough edges and splinters, providing a comfortable seating area for sauna users. Consider the ergonomic positioning of the benches to accommodate varying preferences for heat exposure and relaxation.
4. Accessory Integration:
Integrate essential accessories such as towel hooks, a bucket, and ladle for water dispersion, and a thermometer to monitor the sauna temperature. These accessories not only contribute to the functionality of the sauna but also add a touch of authenticity to the overall sauna experience. Select accessories that complement the sauna's design and align with your personal preferences.
5. Exterior Enhancements:
Enhance the exterior of the sauna with thoughtful landscaping, such as strategically placed plants or shrubs to create a serene and secluded ambiance around the sauna. Consider incorporating a pathway leading to the sauna, using materials that harmonize with the overall aesthetic of your backyard space.
6. Personalized Touches:
Add personal elements such as artwork, decorative accents, or a personalized sign to infuse the sauna with your unique style and personality. These personalized touches create a sense of ownership and make the sauna a truly bespoke retreat tailored to your preferences.
By meticulously attending to these finishing touches, you'll transform your DIY outdoor sauna into a captivating and functional space that beckons relaxation and rejuvenation. Each detail contributes to the overall allure and comfort of the sauna, ensuring that it becomes a cherished sanctuary in your backyard oasis.
Conclusion
Congratulations on reaching the culmination of your DIY outdoor sauna construction journey! As you stand amidst the tranquil ambiance of your personalized relaxation retreat, you've not only created a luxurious haven in your backyard but also embarked on a fulfilling and transformative endeavor. The completion of your outdoor sauna marks the realization of a vision, a testament to your creativity, craftsmanship, and dedication to enhancing your living space.
Your outdoor sauna is more than just a structure; it's a sanctuary that beckons you to unwind, rejuvenate, and indulge in moments of tranquility. The careful selection of the location has resulted in a secluded oasis, offering privacy and serenity as you immerse yourself in the comforting warmth of the sauna. The accessibility, ventilation, and integration with the natural elements of your backyard have harmonized to create a space that seamlessly blends with its surroundings.
The meticulous gathering of materials and tools, the precise construction of the foundation, walls, and roof, and the thoughtful installation of the sauna heater and ventilation system have all converged to bring your vision to life. Each step has been a testament to your attention to detail and your commitment to creating a space that not only exudes comfort and elegance but also prioritizes safety and functionality.
As you add the finishing touches, from interior treatments and lighting solutions to personalized accessories and exterior enhancements, your outdoor sauna becomes a reflection of your unique style and preferences. It stands as a testament to your dedication to creating a space that not only meets your relaxation needs but also enriches your daily life with its inviting charm.
With the completion of your DIY outdoor sauna, you've not only crafted a space for personal rejuvenation but also opened the door to countless moments of serenity and well-being. Whether you choose to savor solitary moments of introspection or share the warmth of the sauna with loved ones, your creation stands as a testament to the power of DIY craftsmanship and the transformative impact of personalized spaces.
As you bask in the warmth and serenity of your outdoor sauna, may it serve as a constant reminder of your ability to turn dreams into reality and create havens of tranquility within your own backyard. Embrace the comfort, revel in the luxury, and cherish the moments of relaxation that your DIY outdoor sauna has brought into your life.