
Home>Create & Decorate>DIY & Crafts>DIY Media Wall: Transform Your Space With This Crafty Project
DIY & Crafts
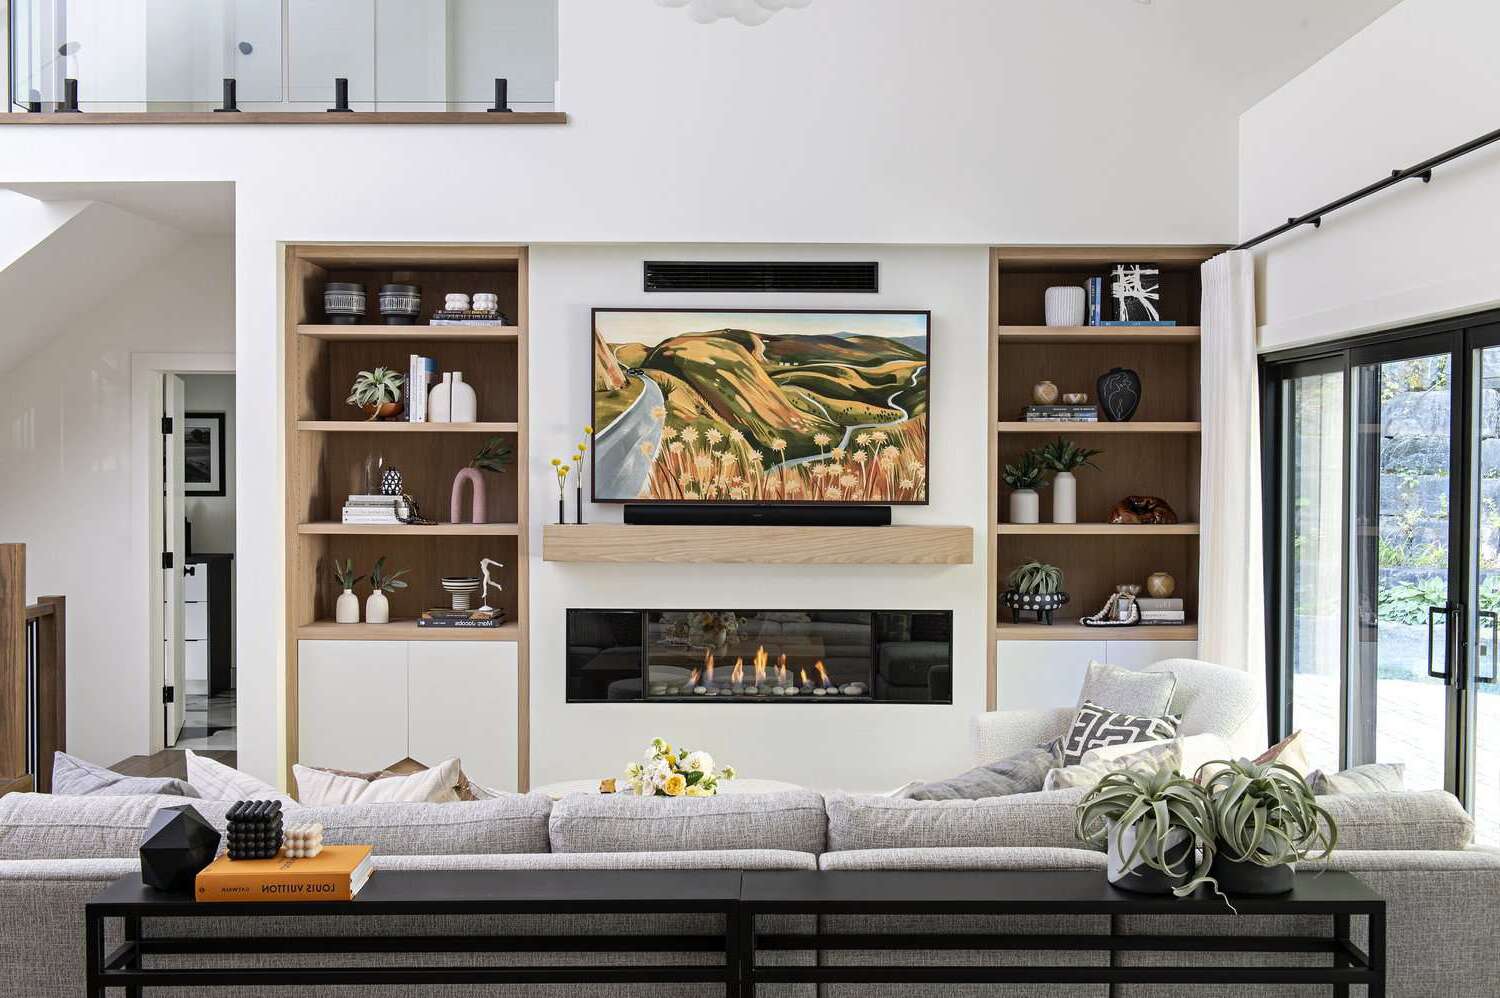
DIY Media Wall: Transform Your Space With This Crafty Project
Published: June 8, 2024

Content Creator specializing in woodworking and interior transformations. Caegan's guides motivate readers to undertake their own projects, while his custom furniture adds a personal touch.
Transform your space with this crafty DIY media wall project. Get inspired and create a unique focal point for your home with our DIY & Crafts guide.
(Many of the links in this article redirect to a specific reviewed product. Your purchase of these products through affiliate links helps to generate commission for Twigandthistle.com, at no extra cost. Learn more)
Introduction
Are you looking to add a touch of creativity and functionality to your living space? A DIY media wall might just be the perfect project for you. This crafty endeavor not only allows you to showcase your favorite books, photos, and decorative items but also provides a designated area for your media equipment. Whether you're a seasoned DIY enthusiast or a novice looking for a fun and rewarding project, creating a media wall can be a fantastic way to transform your space while adding a personal touch to your home. So, let's dive into the materials needed and the step-by-step process to bring this project to life!
Materials Needed
To embark on your DIY media wall project, you'll need the following materials and tools:
- Wooden Shelves: Choose sturdy, well-crafted wooden shelves that can accommodate your media equipment and decorative items.
- Mounting Brackets: Opt for durable mounting brackets that can securely hold the weight of the shelves and their contents.
- Stud Finder: This tool will help you locate the studs in your wall, ensuring that your shelves are anchored properly.
- Level: A level is essential for ensuring that your shelves are installed straight and evenly.
- Screws and Anchors: Select screws and anchors that are suitable for the type of wall you have, whether it's drywall, plaster, or another material.
- Paint and Brushes: If you plan to paint or touch up the shelves, be sure to have the necessary paint and brushes on hand.
- Decorative Items: Gather decorative items such as photo frames, artwork, and other ornaments to personalize your media wall.
- Media Equipment: If you're incorporating media equipment, such as a TV or sound system, ensure that you have the necessary cables and accessories.
By having these materials ready, you'll be well-prepared to commence the construction of your DIY media wall.
Step 1: Measure and Plan
Before diving into the physical aspects of building your DIY media wall, it's crucial to start with careful measurements and a well-thought-out plan. Here's how to approach this critical first step:
-
Assess the Wall Space: Begin by identifying the wall where you intend to create your media wall. Take note of its dimensions and consider any existing furniture or fixtures that may impact the layout.
-
Determine Shelf Placement: Decide on the placement of your shelves, considering factors such as the height of your media equipment and the spacing between shelves. Use a pencil to mark the desired positions on the wall.
-
Account for Wiring and Outlets: If you plan to incorporate media equipment, take into account the location of electrical outlets and any necessary wiring. Ensure that the shelves are positioned to accommodate these requirements.
-
Consider Aesthetic Balance: Think about the overall aesthetic you want to achieve. Visualize how the shelves and decorative items will come together to create an appealing and balanced display.
-
Create a Detailed Plan: With all the measurements and considerations in mind, sketch out a detailed plan for your media wall. This plan should include the precise dimensions of the shelves, their placement on the wall, and any additional decorative elements you intend to include.
By taking the time to measure and plan meticulously, you'll set the stage for a successful and visually pleasing DIY media wall.
Step 2: Prepare the Wall
Once you have your measurements and plan in place, it's time to prepare the wall for the installation of your media wall components. Follow these steps to ensure that your wall is ready for the next phase of the project:
-
Clear the Area: Begin by removing any existing wall decor, such as frames or artwork, from the designated wall. Clearing the area will provide you with a clean canvas to work with.
-
Locate Wall Studs: Use a stud finder to locate the studs within the wall. Mark the positions of the studs with a pencil, as these will be the points where you'll anchor the mounting brackets for your shelves.
-
Prepare the Mounting Brackets: Depending on the type of shelves and mounting brackets you have, you may need to assemble the brackets according to the manufacturer's instructions. Ensure that the brackets are securely put together and ready for installation.
-
Mark Mounting Points: With the help of your plan and measurements, mark the precise points on the wall where the mounting brackets will be installed. Use a level to ensure that the markings are straight and aligned.
-
Pre-Drill Holes: Before attaching the mounting brackets, pre-drill pilot holes at the marked points. This will make it easier to insert the screws and anchors, especially if you're dealing with harder wall materials.
-
Install Mounting Brackets: Securely attach the mounting brackets to the wall using the appropriate screws and anchors. Double-check that the brackets are level and firmly anchored to the wall.
By properly preparing the wall, you'll create a stable and reliable foundation for the installation of your media wall components. This meticulous preparation will contribute to the overall durability and aesthetic appeal of your DIY media wall.
Step 3: Install Shelves and Mounting Hardware
With the wall prepared and the mounting brackets in place, it's time to proceed with the installation of the shelves and the remaining mounting hardware. Follow these steps to ensure a secure and visually appealing arrangement:
-
Attach Shelves to Brackets: Carefully place the wooden shelves onto the installed mounting brackets. Ensure that the shelves are level and positioned according to your initial plan. Depending on the type of brackets, you may need to secure the shelves in place using screws or other fastening mechanisms provided with the brackets.
-
Secure the Shelves: Once the shelves are in position, secure them to the mounting brackets according to the manufacturer's guidelines. This step is crucial for ensuring that the shelves can safely support the weight of your media equipment and decorative items.
-
Add Additional Support: For longer or heavier shelves, consider adding additional support in the form of L-brackets or other reinforcement. This extra support can enhance the stability and load-bearing capacity of the shelves, providing added peace of mind.
-
Install Cable Management: If you're incorporating media equipment such as a TV or sound system, consider installing cable management solutions to keep wires and cables organized and out of sight. This can contribute to a cleaner and more polished look for your media wall.
-
Test the Stability: Once the shelves and mounting hardware are in place, carefully test the stability of the entire structure. Gently place items on the shelves to ensure that they can support the intended weight without any signs of strain or instability.
By following these steps, you'll successfully install the shelves and mounting hardware, bringing your DIY media wall one step closer to completion. This phase of the project is crucial for ensuring that your media wall is not only visually appealing but also functional and safe for everyday use.
Step 4: Arrange and Decorate
Now that the structural elements of your DIY media wall are in place, it's time to infuse it with personality and style through thoughtful arrangement and decoration. Follow these steps to bring your media wall to life:
-
Arrange Decorative Items: Begin by arranging your chosen decorative items on the shelves. This could include photo frames, artwork, potted plants, or any other ornaments that reflect your personal style. Experiment with different arrangements until you find a layout that is visually appealing and balanced.
-
Incorporate Media Equipment: If your media wall is designed to accommodate media equipment such as a TV, sound system, or gaming consoles, carefully integrate these items into the overall arrangement. Ensure that the placement of the equipment complements the decorative elements and contributes to a cohesive look.
-
Create Visual Interest: Consider incorporating elements that add visual interest to the media wall. This could involve mixing various textures, incorporating decorative lighting, or adding a pop of color through strategically placed items. The goal is to create a dynamic and engaging display.
-
Maintain Functional Accessibility: While arranging and decorating, keep in mind the functional aspect of your media wall. Ensure that media equipment is easily accessible for operation and maintenance, and that decorative items do not obstruct the practical use of the space.
-
Fine-Tune the Display: Step back and assess the overall arrangement. Make any necessary adjustments to achieve a harmonious and visually appealing display. Pay attention to details such as spacing between items, symmetry, and overall cohesiveness.
-
Personalize the Space: Infuse the media wall with personal touches that reflect your interests and preferences. Whether it's displaying cherished mementos, favorite books, or unique collectibles, incorporating personal elements will make the media wall feel distinctly yours.
By following these steps, you'll be able to transform your DIY media wall into a captivating focal point that not only serves a functional purpose but also showcases your creativity and style. The arrangement and decoration phase is where your vision for the media wall truly comes to fruition, adding a unique and personalized touch to your living space.
Conclusion
In conclusion, creating a DIY media wall is a rewarding and creative endeavor that can significantly enhance the aesthetic appeal and functionality of your living space. By carefully measuring and planning, preparing the wall, installing shelves and mounting hardware, and thoughtfully arranging and decorating, you can bring your vision to life. The DIY media wall not only provides a designated area for media equipment but also serves as a showcase for your favorite decorative items and personal touches. Whether you're a seasoned DIY enthusiast or a novice looking for a fun project, the process of crafting a media wall allows you to infuse your living space with your unique style and personality. Embrace the opportunity to transform your space with this crafty project and enjoy the satisfaction of creating a functional and visually captivating focal point in your home.