
Home>Create & Decorate>DIY & Crafts>DIY Fireplace Wall: Transform Your Space With A Stunning Feature
DIY & Crafts
DIY Fireplace Wall: Transform Your Space With A Stunning Feature
Published: May 4, 2024

Content Creator specializing in woodworking and interior transformations. Caegan's guides motivate readers to undertake their own projects, while his custom furniture adds a personal touch.
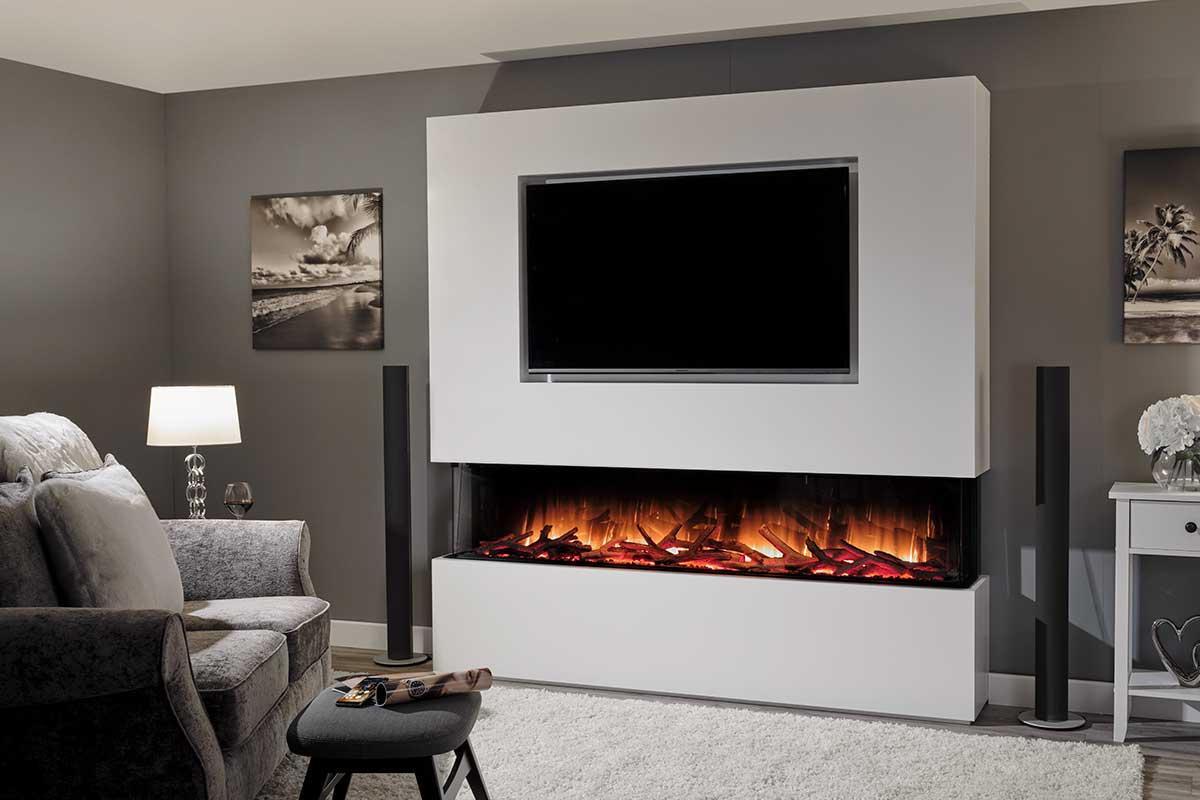
Transform your space with a stunning DIY fireplace wall. Get inspired with our DIY & Crafts ideas to create a beautiful feature in your home.
(Many of the links in this article redirect to a specific reviewed product. Your purchase of these products through affiliate links helps to generate commission for Twigandthistle.com, at no extra cost. Learn more)
Introduction
Are you looking to add a touch of warmth and elegance to your living space? A DIY fireplace wall might just be the perfect project for you. Creating a stunning fireplace wall can completely transform the ambiance of a room, providing a cozy focal point that draws people in and creates a welcoming atmosphere. Whether you're a seasoned DIY enthusiast or a newcomer to home improvement projects, building a fireplace wall can be a rewarding and achievable endeavor. In this guide, we'll walk you through the steps to create a beautiful fireplace wall that will become the heart of your home.
Choosing the Right Location for Your DIY Fireplace Wall
When considering the location for your DIY fireplace wall, it's essential to assess the layout and flow of the room. Here are some key factors to keep in mind:
-
Visibility and Focal Point: Choose a wall that is easily visible from various areas of the room. The fireplace wall should ideally serve as a focal point, drawing attention and creating a sense of coziness.
-
Safety and Clearance: Ensure that the chosen location complies with safety regulations and provides adequate clearance from combustible materials. Keep in mind the proximity to furniture, curtains, and other flammable items.
-
Structural Considerations: Assess the structural integrity of the wall. It should be capable of supporting the weight of the fireplace and withstand the heat generated.
-
Aesthetic Harmony: Consider how the fireplace wall will complement the overall aesthetic of the room. It should seamlessly integrate with the existing decor and architectural features.
-
Accessibility to Utilities: If you plan to install a gas or electric fireplace, ensure that the chosen location allows for easy access to the necessary utility connections.
By carefully evaluating these factors, you can select the perfect location for your DIY fireplace wall, ensuring that it enhances both the visual appeal and functionality of your living space.
Selecting the Perfect Fireplace Design
When it comes to selecting the perfect fireplace design for your DIY fireplace wall, there are numerous options to consider. The design you choose will significantly impact the overall aesthetic and ambiance of the room. Here are some popular fireplace designs to inspire your project:
1. Traditional Wood-Burning Fireplace
A classic choice, a traditional wood-burning fireplace exudes warmth and nostalgia. It creates a cozy, rustic atmosphere and provides the comforting crackle of burning wood. Keep in mind that this option requires a chimney or flue for proper ventilation.
2. Gas Fireplace
For those seeking convenience and ease of use, a gas fireplace offers a clean and efficient alternative. Gas fireplaces come in various styles, including traditional logs, modern flames, or even contemporary fire glass designs. They provide instant warmth at the flick of a switch and eliminate the need for storing and handling firewood.
3. Electric Fireplace
Ideal for spaces where traditional fuel options are impractical, electric fireplaces offer versatility and low maintenance. They come in a wide range of designs, from wall-mounted units to realistic built-in firebox models. Electric fireplaces are energy-efficient and can be operated with or without heat, allowing for year-round enjoyment.
4. Ethanol Fireplace
For a sleek and modern look, consider an ethanol fireplace. These eco-friendly fire features burn clean and do not require a chimney or venting. Ethanol fireplaces are often designed as wall-mounted units or freestanding models, making them a versatile choice for various room layouts.
5. Customized Design
If you have a specific vision in mind for your fireplace wall, consider a customized design. Whether it's a bespoke mantel, a unique surround, or a personalized combination of materials, a custom fireplace design allows you to tailor the look to your exact preferences and the style of your home.
When selecting the perfect fireplace design, take into account the architectural style of your home, the existing decor, and the desired ambiance. Whether you opt for a traditional, contemporary, or eclectic design, the fireplace will undoubtedly become the centerpiece of your DIY fireplace wall, adding both beauty and functionality to your living space.
Gathering Materials and Tools
Before diving into the construction of your DIY fireplace wall, it's crucial to gather all the necessary materials and tools. Having everything at hand will streamline the building process and ensure a smoother execution of the project. Here's a comprehensive list of materials and tools you'll need to bring your fireplace wall to life:
Materials
-
Fireplace Insert: Depending on the type of fireplace you've chosen, whether it's a traditional wood-burning unit, a gas fireplace, an electric model, or an ethanol burner, ensure you have the appropriate insert for installation.
-
Framing Lumber: Select high-quality lumber for constructing the frame of the fireplace wall. The dimensions and quantity will depend on the size and design of the fireplace.
-
Drywall: Purchase drywall sheets to cover the frame and create a smooth surface for finishing.
-
Fireproof Backer Board: If your fireplace wall will be exposed to heat, such as with a wood-burning or gas fireplace, fireproof backer board is essential to protect the surrounding walls from heat damage.
-
Mantel and Surround Materials: If you plan to include a mantel or surround, gather the necessary materials, such as wood, stone, tile, or other decorative elements.
-
Fasteners and Hardware: Stock up on screws, nails, anchors, and other fasteners required for securing the materials in place.
-
Primer and Paint: Choose high-quality primer and paint suitable for the fireplace wall's surface. Opt for heat-resistant paint if necessary.
-
Decorative Finishes: If you plan to add decorative elements such as tile, stone veneer, or other finishes, ensure you have the required materials on hand.
Tools
-
Circular Saw: A reliable circular saw will be indispensable for cutting lumber, drywall, and other materials to the desired dimensions.
-
Level: Ensure your fireplace wall is perfectly straight and aligned by using a level throughout the construction process.
-
Screwdriver and Drill: A power drill with screwdriver bits will expedite the assembly of the frame and installation of the fireplace insert.
-
Tape Measure: Accurate measurements are crucial for a precise and professional-looking fireplace wall.
-
Safety Gear: Prioritize safety by wearing protective gear, including goggles, gloves, and a dust mask, especially during cutting and sanding.
-
Trowel and Grout Float: If you're incorporating tile or stone finishes, these tools will be essential for applying adhesive and grout.
-
Paintbrushes and Rollers: Ensure you have the necessary brushes and rollers for priming and painting the fireplace wall.
By gathering the right materials and tools, you'll set yourself up for a successful DIY fireplace wall project. With everything in place, you'll be ready to move on to the next steps of preparing the wall and building the frame for your stunning fireplace feature.
Preparing the Wall for Installation
Before embarking on the installation of your DIY fireplace wall, it's crucial to prepare the existing wall to ensure a solid foundation for the new structure. Proper preparation will contribute to the longevity and stability of the fireplace wall. Here's a detailed guide on how to prepare the wall for the installation process:
-
Clear the Area: Begin by removing any furniture, wall decor, or obstructions from the vicinity of the chosen wall. Clearing the area will provide ample space to work and maneuver during the preparation and construction phases.
-
Inspect the Wall: Thoroughly inspect the wall where the fireplace will be installed. Look for any signs of damage, such as cracks, holes, or uneven surfaces. Address any structural issues before proceeding with the installation.
-
Protect Surrounding Surfaces: If the fireplace wall is adjacent to other walls, floors, or ceilings, consider protecting these surfaces from dust and debris. Use drop cloths or plastic sheeting to cover and secure the surrounding areas.
-
Turn Off Utilities: If you're installing a gas or electric fireplace, ensure that the utilities supplying the area are turned off. Safety should always be a top priority when working with gas and electrical connections.
-
Mark the Layout: Use a pencil and level to mark the precise layout of the fireplace wall on the existing wall. This will serve as a guide for the subsequent framing and installation steps.
-
Remove Baseboards: Carefully remove the baseboards along the bottom of the wall where the fireplace will be installed. This will allow for a seamless integration of the fireplace wall with the floor, providing a polished and professional finish.
-
Address Electrical Outlets and Wiring: If there are electrical outlets or wiring on the wall, take the necessary precautions to relocate or modify them as needed. Consult a qualified electrician if you're unsure about handling electrical components.
-
Prepare the Surface: Depending on the type of finish you plan to apply to the fireplace wall, such as paint, tile, or stone veneer, prepare the surface accordingly. This may involve sanding, priming, or applying a backer board to ensure proper adhesion of the finishing materials.
By meticulously preparing the wall for installation, you'll create a solid and secure foundation for your DIY fireplace wall. Taking the time to address any underlying issues and set the stage for the construction process will ultimately contribute to the success and durability of your stunning fireplace feature.
Building the Frame for the Fireplace
Building the frame for the fireplace is a critical step in the construction of your DIY fireplace wall. The frame provides the structural support for the fireplace and serves as the framework for the surrounding finishes and decorative elements. Here's a detailed guide on how to build the frame for the fireplace, ensuring a sturdy and well-constructed foundation for your stunning feature.
-
Measure and Cut the Lumber: Begin by measuring and cutting the framing lumber to the required dimensions. Use a reliable circular saw to achieve precise cuts, ensuring that the pieces fit together seamlessly to form the frame. The dimensions of the frame will depend on the size and design of the fireplace, as well as any additional features such as a mantel or surround.
-
Assemble the Frame: Once the lumber is cut to size, assemble the frame according to the marked layout on the wall. Use a level to ensure that the frame is perfectly straight and plumb. Secure the pieces together using appropriate fasteners, such as screws or nails, to create a rigid and stable frame structure.
-
Consider Fireproofing: If your fireplace wall will accommodate a wood-burning or gas fireplace, consider incorporating fireproof backer board within the frame. This essential layer provides protection against heat and ensures the safety and integrity of the surrounding walls.
-
Support for the Fireplace Insert: Ensure that the frame includes a designated area to support the fireplace insert. The dimensions and specifications for this section should align with the requirements of the chosen fireplace type, allowing for a seamless and secure installation of the insert.
-
Integrate Design Elements: If you plan to include a mantel, hearth, or other design elements within the frame, incorporate the necessary support and structure to accommodate these features. The frame should be tailored to accommodate the specific design elements that will enhance the visual appeal of the fireplace wall.
-
Verify Alignment and Stability: Before proceeding to the next phase of the installation, carefully verify the alignment and stability of the frame. Ensure that it is securely attached to the wall and capable of supporting the weight of the fireplace and any additional components.
By meticulously constructing the frame for the fireplace, you'll establish a solid and reliable structure that forms the backbone of your DIY fireplace wall. The frame sets the stage for the installation of the fireplace insert and the application of finishes, bringing you one step closer to creating a captivating and inviting focal point in your living space.
Installing the Fireplace Insert
Installing the fireplace insert is a pivotal step in bringing your DIY fireplace wall to life. The fireplace insert serves as the heart of the feature, providing warmth, ambiance, and visual allure. Whether you've opted for a traditional wood-burning unit, a gas fireplace, an electric model, or an ethanol burner, the installation process requires precision and attention to detail. Here's a comprehensive guide on how to install the fireplace insert, tailored to the specific type you've chosen for your stunning fireplace wall.
Traditional Wood-Burning Fireplace Insert
-
Prepare the Hearth: If your fireplace design includes a hearth, ensure that it is constructed of fireproof materials such as brick, stone, or concrete. The hearth should extend beyond the front of the fireplace opening to provide a safe and durable foundation.
-
Position the Insert: Carefully position the wood-burning fireplace insert within the designated area of the frame. Ensure that it aligns with the dimensions and clearances specified by the manufacturer and complies with local building codes.
-
Connect the Flue: If your wood-burning fireplace requires a flue, follow the manufacturer's instructions to connect the flue collar of the insert to the flue or chimney. Proper venting is crucial for the safe and efficient operation of the wood-burning fireplace.
-
Seal and Insulate: Seal any gaps between the insert and the surrounding frame using fireproof materials such as refractory cement. Additionally, insulate the spaces around the insert to enhance its efficiency and prevent heat transfer to combustible materials.
Gas or Electric Fireplace Insert
-
Gas Line or Electrical Connection: If you're installing a gas fireplace, enlist the services of a licensed professional to connect the gas line to the fireplace insert. For electric fireplaces, ensure that the electrical connection is carried out in accordance with local codes and safety standards.
-
Secure the Insert: Position the gas or electric fireplace insert within the frame, ensuring a snug and secure fit. Follow the manufacturer's guidelines for clearances and ventilation requirements, especially for gas units, to maintain safe operation.
-
Test the Functionality: Once the insert is in place, test the functionality of the gas or electric fireplace. Ensure that the ignition, flame presentation, and heat output, if applicable, are operating as intended. Address any issues promptly to guarantee a fully functional and safe fireplace feature.
Ethanol Fireplace Insert
-
Ventless Design: Ethanol fireplaces are typically ventless, requiring no chimney or flue. Position the ethanol burner within the designated area of the frame, ensuring that it is level and securely supported.
-
Safety Considerations: As with any fireplace insert, prioritize safety when installing an ethanol burner. Ensure that the surrounding materials are non-combustible and that the burner is installed in accordance with the manufacturer's specifications for clearances and ventilation.
-
Test for Leaks: Before using the ethanol fireplace, conduct a thorough inspection to check for any leaks or spills. Test the burner to verify that it ignites and burns cleanly, without emitting excessive fumes or odors.
By following these tailored guidelines for installing the specific type of fireplace insert you've chosen, you'll bring your DIY fireplace wall one step closer to becoming the captivating centerpiece of your living space. Each type of fireplace insert offers its unique charm and functionality, and the installation process is a crucial stage in realizing the vision of your stunning fireplace wall.
Adding Finishing Touches and Decorative Elements
Once the frame is in place and the fireplace insert is installed, it's time to add the finishing touches and decorative elements that will elevate your DIY fireplace wall to a stunning focal point in your home. The following steps will guide you through the process of enhancing the visual appeal and cohesiveness of your fireplace wall:
1. Apply Finishes
Whether you've chosen to paint the wall, apply tile, or install stone veneer, now is the time to bring your vision to life. Apply the selected finish to the surrounding areas of the fireplace, ensuring a seamless and polished appearance. Use high-quality materials and techniques to achieve a professional result that complements the overall aesthetic of the room.
2. Install the Mantel and Surround
If your design includes a mantel or surround, carefully install these elements to frame the fireplace and create a focal point. The mantel provides an opportunity to display cherished items, artwork, or seasonal decor, adding a personal touch to the space. Choose a design that harmonizes with the style of your home and complements the fireplace wall.
3. Incorporate Lighting
Strategically placed lighting can accentuate the features of your fireplace wall and create a warm and inviting ambiance. Consider installing sconces, recessed lighting, or a picture light above the mantel to highlight the architectural details and decorative elements. The right lighting can enhance the overall atmosphere of the room and draw attention to your captivating fireplace wall.
4. Personalize with Decor
Add personality and charm to your fireplace wall by incorporating decorative elements that reflect your style and preferences. Consider placing a decorative screen in front of the fireplace, arranging art pieces or mirrors on the wall, or adorning the mantel with candles, vases, or seasonal greenery. These personal touches will infuse the space with character and warmth.
5. Ensure Symmetry and Balance
As you add finishing touches and decorative elements, strive for symmetry and balance in the arrangement. Whether it's the placement of decor items, the alignment of the mantel, or the distribution of lighting, maintaining visual harmony will contribute to the overall impact of your fireplace wall. Step back and assess the composition to make adjustments as needed.
6. Final Inspection
Once the finishing touches and decorative elements are in place, conduct a final inspection of the fireplace wall. Check for any imperfections, ensure that all elements are securely installed, and verify that the overall presentation aligns with your vision. Making any necessary refinements at this stage will result in a polished and captivating fireplace feature.
By adding these finishing touches and decorative elements, you'll transform your DIY fireplace wall into a stunning and inviting focal point that enhances the ambiance of your living space. Each detail contributes to the overall impact, creating a captivating and personalized fireplace wall that will be cherished for years to come.
Safety Considerations for Your DIY Fireplace Wall
Ensuring the safety of your DIY fireplace wall is paramount to the enjoyment and functionality of this stunning feature. By incorporating essential safety measures, you can create a secure and worry-free environment around your fireplace. Here are crucial safety considerations to keep in mind:
-
Clearances and Ventilation: Different types of fireplace inserts require specific clearances from combustible materials such as walls, furniture, and curtains. It's vital to adhere to the manufacturer's guidelines for clearances to prevent the risk of fire. Additionally, proper ventilation is essential, especially for wood-burning and gas fireplaces, to facilitate the safe release of combustion byproducts.
-
Fireproofing and Insulation: If your fireplace wall will be exposed to heat, such as with a wood-burning or gas fireplace, incorporating fireproof materials and insulation is crucial. Fireproof backer board and insulation around the fireplace insert can protect the surrounding walls and minimize the transfer of heat to combustible materials, reducing the risk of fire hazards.
-
Professional Installation of Gas and Electrical Components: When installing a gas or electric fireplace, it's imperative to enlist the services of licensed professionals for the connection of gas lines or electrical components. This ensures that the installation complies with safety codes and standards, minimizing the risk of gas leaks, electrical hazards, or improper combustion.
-
Carbon Monoxide and Smoke Detectors: Install carbon monoxide detectors and smoke alarms in the vicinity of the fireplace wall. These devices provide early warnings in the event of gas leaks, smoke, or carbon monoxide emissions, alerting occupants to potential hazards and allowing for prompt action to mitigate risks.
-
Childproofing and Pet Safety: If you have children or pets in the household, consider implementing safety measures to prevent accidental contact with the fireplace. Installing a protective screen or barrier in front of the fireplace can create a physical barrier, reducing the risk of burns or injuries.
-
Regular Maintenance and Inspections: Schedule regular maintenance and inspections of the fireplace and chimney by qualified professionals. This includes cleaning the chimney, inspecting the flue, and ensuring that the fireplace insert and venting systems are in optimal working condition. Regular maintenance helps identify and address potential safety issues before they escalate.
-
Educate Household Members: Educate household members, especially children, about the potential hazards associated with the fireplace. Establish clear guidelines for safe interaction with the fireplace, emphasizing the importance of adult supervision and the avoidance of direct contact with the hot surfaces.
By prioritizing these safety considerations, you can create a secure and enjoyable environment around your DIY fireplace wall. Implementing these measures not only enhances the safety of the space but also provides peace of mind, allowing you to fully appreciate the warmth and beauty of your stunning fireplace feature.
Conclusion
In conclusion, embarking on a DIY fireplace wall project offers the opportunity to transform your living space into a warm and inviting haven. By carefully selecting the location, choosing the perfect fireplace design, gathering the necessary materials and tools, and meticulously following the installation steps, you can create a stunning focal point that enhances the ambiance and visual appeal of your home. The addition of finishing touches, decorative elements, and safety considerations further elevates the functionality and allure of your fireplace wall. Whether you opt for a traditional wood-burning fireplace, a sleek gas or electric model, or a modern ethanol burner, the process of creating a DIY fireplace wall is a rewarding endeavor that adds both beauty and practicality to your living space. With the right planning, attention to detail, and safety measures in place, your DIY fireplace wall will undoubtedly become the heart of your home, providing warmth, charm, and lasting memories for years to come.