
Home>Create & Decorate>DIY & Crafts>DIY Fence Panels: Step-by-Step Guide To Building Your Own
DIY & Crafts
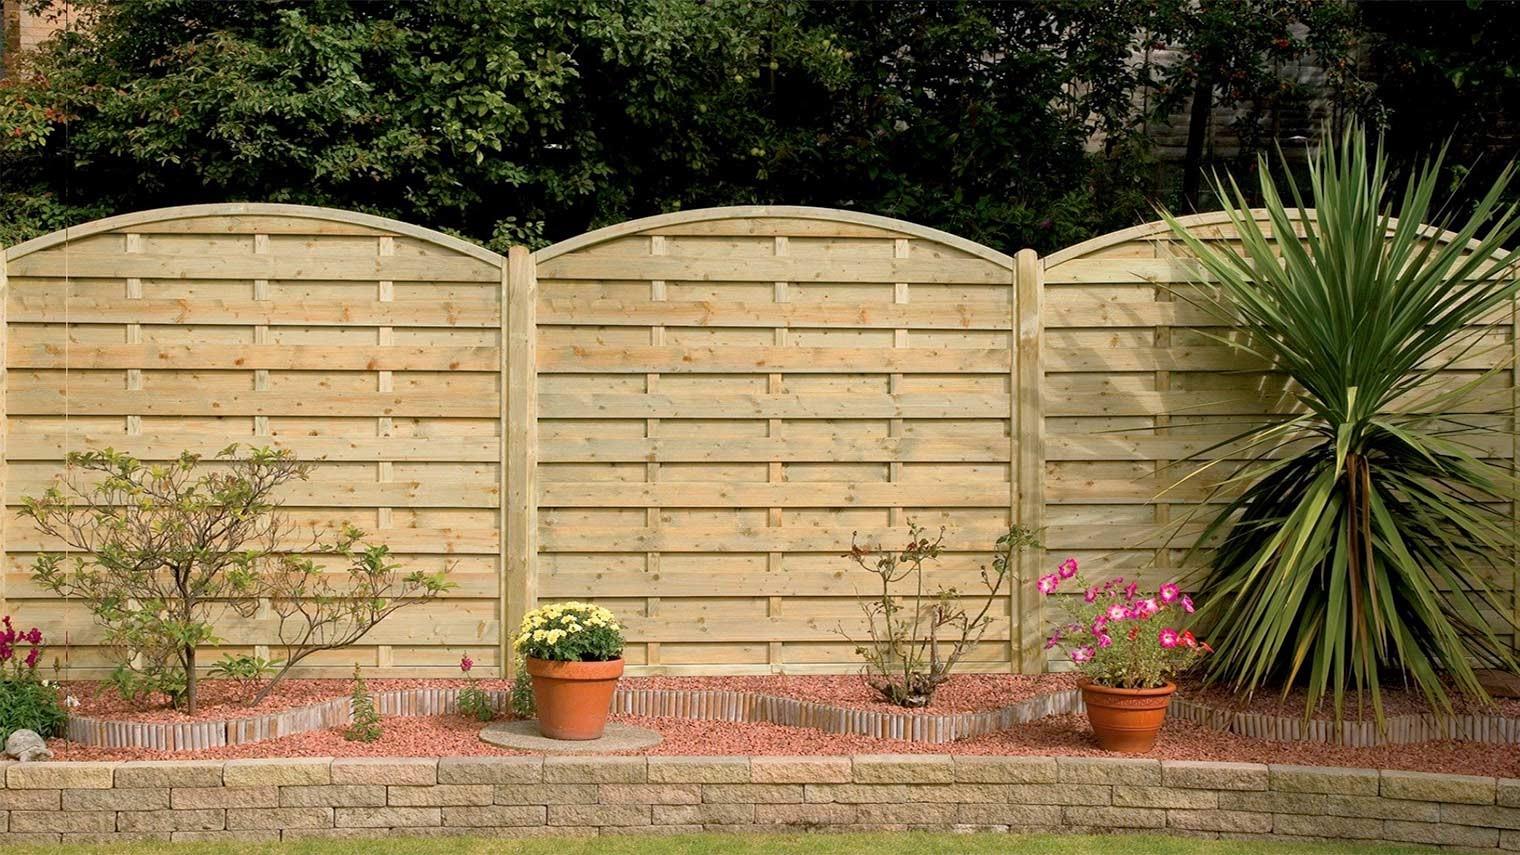
DIY Fence Panels: Step-by-Step Guide To Building Your Own
Published: May 30, 2024

Senior Editor in Create & Decorate, Kathryn combines traditional craftsmanship with contemporary trends. Her background in textile design and commitment to sustainable crafts inspire both content and community.
Learn how to build your own DIY fence panels with our step-by-step guide. Perfect for DIY & Crafts enthusiasts looking to create a custom fence for their home.
(Many of the links in this article redirect to a specific reviewed product. Your purchase of these products through affiliate links helps to generate commission for Twigandthistle.com, at no extra cost. Learn more)
Introduction
Are you looking to enhance the privacy and security of your property while adding a touch of style to your outdoor space? Building your own fence panels can be a rewarding and cost-effective DIY project. Whether you're a seasoned DIY enthusiast or a novice looking to take on a new challenge, this step-by-step guide will walk you through the process of creating custom fence panels that perfectly suit your needs and style preferences. From planning and material selection to assembly and installation, you'll learn everything you need to know to tackle this project with confidence. So, grab your tools and let's get started on creating the perfect fence for your home!
Planning Your DIY Fence Project
Before diving into the construction of your DIY fence panels, it's crucial to start with a well-thought-out plan. Here's how to get started:
-
Determine the Purpose: First, consider the primary purpose of your fence. Are you aiming to enhance privacy, secure your property, or simply add aesthetic appeal to your outdoor space? Understanding the main goal will help you make informed decisions throughout the planning and construction process.
-
Check Local Regulations: Check with your local municipality or homeowners' association to understand any regulations or restrictions related to fence height, materials, and property lines. Ensuring compliance with local guidelines will save you from potential headaches down the road.
-
Set a Budget: Determine how much you're willing to invest in your DIY fence project. Setting a clear budget will guide your material and design choices, helping you stay on track financially.
-
Sketch Your Design: Take the time to sketch out your ideal fence design. Consider the overall style, height, and any decorative elements you'd like to incorporate. This visual representation will serve as a valuable reference as you move forward with the project.
-
Consider Maintenance: Think about the level of maintenance you're willing to commit to. Certain materials may require more upkeep than others, so factor this into your decision-making process.
By carefully planning your DIY fence project, you'll set the stage for a successful and satisfying construction process. With a clear vision and understanding of your requirements, you'll be well-prepared to move on to the next steps of material selection and preparation.
Choosing the Right Materials
When it comes to building durable and visually appealing DIY fence panels, selecting the right materials is paramount. Here's a comprehensive guide to help you make informed choices:
1. Selecting the Wood
- Pressure-Treated Pine: Known for its affordability and resistance to rot and insects, pressure-treated pine is a popular choice for DIY fence projects. It can be easily stained or painted to match your desired aesthetic.
- Cedar: Renowned for its natural beauty and durability, cedar is a premium option that offers both aesthetic appeal and resistance to decay and insect damage.
- Redwood: If you're seeking a high-end, long-lasting material, redwood is an excellent choice. Its natural resistance to decay and stunning appearance make it a standout option for DIY fence panels.
2. Considering Alternative Materials
- Vinyl: For low-maintenance and long-lasting fence panels, vinyl is a practical choice. It's available in various styles and colors, offering versatility and durability.
- Composite: Combining wood fibers and recycled plastic, composite materials provide the look of wood with minimal maintenance requirements and exceptional durability.
3. Evaluating Metal Options
- Steel: Ideal for a modern or industrial aesthetic, steel fence panels offer strength and longevity. They can be powder-coated for added protection and visual appeal.
- Aluminum: Lightweight and resistant to corrosion, aluminum fence panels are a durable and low-maintenance option that can be customized to suit your design preferences.
4. Assessing Additional Components
- Fasteners: Opt for corrosion-resistant screws or nails to ensure the longevity of your fence panels.
- Post Caps: Consider adding decorative post caps to enhance the visual appeal of your fence while protecting the exposed ends of the posts.
By carefully considering the characteristics and maintenance requirements of each material, you can make an informed decision that aligns with your budget, design preferences, and long-term maintenance expectations. Once you've chosen the right materials, you'll be ready to move on to the next steps of measuring and cutting your fence panels.
Measuring and Cutting Your Fence Panels
Accurate measurements and precise cuts are essential for creating professional-looking DIY fence panels. Here's a detailed guide to help you tackle this crucial phase of the construction process:
1. Gather Your Tools and Safety Gear
Before you begin measuring and cutting your fence panels, gather the necessary tools and safety gear. You'll need a measuring tape, carpenter's square, circular saw or miter saw, safety goggles, and ear protection. Ensuring that you have the right tools and protective equipment will contribute to a safe and efficient cutting process.
2. Measure the Fence Line
Start by measuring the length of the fence line where the panels will be installed. Use a measuring tape to determine the exact distance, accounting for any variations in terrain or property boundaries. It's crucial to measure multiple points along the fence line to accommodate any irregularities in the landscape.
3. Determine Panel Width
Based on your design and the selected materials, determine the width of each fence panel. If you're using standard-sized materials, such as pre-cut pickets or lumber, this step may involve minimal cutting. However, if you're customizing the width of the panels, precise measurements will be necessary to achieve uniformity and a professional finish.
4. Mark and Cut the Panels
Using the measurements obtained, mark the cutting lines on the selected materials. A carpenter's square can help ensure straight and accurate lines. When cutting the panels, follow all safety guidelines for the specific cutting tool being used. Whether using a circular saw or miter saw, prioritize safety by wearing goggles and ear protection.
5. Check for Consistency
After cutting the first panel, use it as a template to mark and cut the remaining panels. Consistency in panel width and height is crucial for a seamless and polished appearance. Double-check each cut to maintain uniformity throughout the construction process.
6. Address Special Cuts and Angles
If your fence design includes special cuts or angles, take the time to measure and cut these sections with precision. Whether it's accommodating sloping terrain or incorporating decorative elements, attention to detail during this phase will contribute to the overall visual appeal and functionality of your DIY fence panels.
By following these steps and taking the time to measure and cut your fence panels accurately, you'll lay the foundation for a successful assembly and installation process. With the panels ready for assembly, you'll be one step closer to bringing your custom fence to life.
Assembling Your Fence Panels
With your fence panels cut to size, it's time to move on to the assembly phase. Follow these steps to ensure a smooth and efficient assembly process:
-
Lay Out the Panels: Start by laying out the fence panels in the order in which they will be installed. This will give you a clear visual guide and help you identify any potential issues before beginning the assembly.
-
Prepare the Work Area: Clear a spacious work area where you can lay the panels flat and have easy access to your tools and fasteners. A clean and organized workspace will streamline the assembly process.
-
Position the Rails: If your fence design includes horizontal rails, begin by positioning them on a flat surface. Use a level to ensure that the rails are perfectly horizontal, as this will impact the overall alignment and stability of the panels.
-
Attach the Pickets or Boards: Once the rails are in place, begin attaching the pickets or boards to create the main body of the fence panels. Use a measuring tape to maintain consistent spacing between each picket, ensuring a uniform and visually appealing result.
-
Secure the Fasteners: Whether you're using screws or nails, make sure to secure the fasteners firmly to ensure the stability and longevity of the fence panels. Consider using a power drill or nail gun for efficiency, but exercise caution to avoid damaging the materials.
-
Check for Alignment and Stability: As you progress with the assembly, periodically check the alignment and stability of the panels. Use a level to ensure that the panels are plumb and adjust as needed to maintain a straight and uniform appearance.
-
Add Decorative Elements: If your design includes decorative elements such as lattice or trim pieces, incorporate them into the assembly process according to your initial design plan. These details can elevate the visual appeal of your fence panels.
-
Repeat the Process: Once the first panel is assembled, repeat the process for the remaining panels. Consistency in assembly is key to achieving a cohesive and professional-looking fence line.
By following these steps and taking the time to assemble your fence panels with precision and care, you'll be well on your way to completing this rewarding DIY project. With the panels assembled, the next phase involves installing them to bring your custom fence to life.
Installing Your DIY Fence Panels
Now that your fence panels are assembled, it's time to proceed with the installation process. Follow these steps to ensure a successful and secure installation of your DIY fence panels:
-
Prepare the Post Holes: Start by marking the locations for the post holes along the fence line. Use a post hole digger to create holes of the appropriate depth and diameter, taking into account the type of posts and the recommended installation guidelines for your chosen materials.
-
Set the Posts: Place the fence posts in the prepared holes, ensuring that they are plumb and properly aligned. Use a level to confirm that each post is vertically straight before backfilling the holes with concrete or gravel. Secure the posts in position and allow the concrete to cure as per the manufacturer's instructions.
-
Attach the Panels to the Posts: With the posts securely in place, it's time to attach the assembled fence panels. Depending on your design, you may use brackets, nails, or screws to affix the panels to the posts. Ensure that the panels are level and properly aligned as you proceed with the attachment process.
-
Check for Stability and Alignment: Once the panels are attached to the posts, check for overall stability and alignment. Use a level to confirm that the panels are plumb and adjust the attachment points as needed to achieve a uniform and visually pleasing result.
-
Secure the Panels: To enhance the stability and longevity of your fence, consider adding additional support or reinforcement as necessary. This may involve installing cross braces or tension bands, especially for larger or taller fence panels, to prevent sagging or shifting over time.
-
Add Gate and Hardware: If your fence design includes a gate, proceed with installing the gate posts and attaching the gate to ensure smooth operation. Install hinges, latches, and any additional hardware according to the manufacturer's instructions, paying attention to proper alignment and functionality.
-
Apply Finishing Treatments: Once the fence panels are securely installed, consider applying any desired finishing treatments, such as paint, stain, or sealant, to enhance the appearance and protect the materials from the elements. Follow the product recommendations for application and drying times.
By following these steps and taking the time to install your DIY fence panels with attention to detail and precision, you'll be able to enjoy the benefits of a professionally installed fence that adds value and functionality to your outdoor space. With the panels securely in place, you can admire the results of your hard work and craftsmanship.
Adding Finishing Touches
After the successful installation of your DIY fence panels, it's time to add the finishing touches that will elevate the overall appearance and longevity of your project. Here's how to ensure that your fence is not only functional but also visually appealing:
-
Apply Protective Coating: Depending on the material you've chosen for your fence panels, applying a protective coating such as paint, stain, or sealant can enhance the durability and weather resistance of the panels. For wood panels, a high-quality exterior wood stain or paint can provide protection against moisture, UV rays, and rot. Similarly, vinyl and metal panels may benefit from specialized coatings that offer UV protection and prevent corrosion.
-
Consider Decorative Elements: To infuse your fence with personality and style, consider adding decorative elements such as post caps, finials, or ornamental accents. These details can transform a standard fence into a standout feature of your outdoor space. Whether you opt for classic wooden post caps, sleek metal finials, or intricate wrought iron embellishments, these decorative touches can make a significant impact on the overall aesthetic of your fence.
-
Landscaping and Greenery: Enhance the visual appeal of your fence by incorporating landscaping and greenery around its perimeter. Planting climbing vines, colorful flowers, or lush shrubs along the fence line can soften its appearance and create a harmonious blend with the surrounding environment. Additionally, strategically placed potted plants or hanging baskets can add a touch of greenery and charm to your outdoor space.
-
Maintenance Considerations: As you complete your DIY fence project, it's essential to consider the long-term maintenance requirements. Regular inspections, cleaning, and upkeep will contribute to the longevity and appearance of your fence. Establish a maintenance routine that includes tasks such as checking for loose fasteners, cleaning the panels, and addressing any signs of wear or damage. By staying proactive with maintenance, you can preserve the beauty and functionality of your fence for years to come.
-
Lighting and Security Features: If your fence serves a dual purpose of security and aesthetics, consider integrating lighting and security features into its design. Solar-powered lights, motion-activated floodlights, or low-voltage landscape lighting can illuminate the fence line, enhancing safety and creating a welcoming ambiance during the evening hours. Additionally, security enhancements such as sturdy gate locks and surveillance camera mounts can provide peace of mind while complementing the overall design of your fence.
By adding these finishing touches to your DIY fence project, you'll not only enhance its visual appeal but also ensure that it remains a durable and functional asset to your property. With careful attention to detail and a focus on both aesthetics and practicality, your custom-built fence will stand as a testament to your craftsmanship and creativity.
Conclusion
In conclusion, embarking on a DIY fence panel project offers a rewarding opportunity to customize your outdoor space while enhancing privacy, security, and visual appeal. By carefully planning the project, selecting the right materials, measuring and cutting with precision, assembling with attention to detail, and installing with care, you can create a fence that reflects your unique style and meets your specific needs. Adding finishing touches such as protective coatings, decorative elements, landscaping, and security features will elevate the overall impact of your fence, ensuring that it remains a valuable and attractive addition to your property for years to come. Whether you're a seasoned DIY enthusiast or a first-time fence builder, this guide equips you with the knowledge and confidence to tackle the construction of your own custom fence panels. With dedication and a bit of creativity, you can transform your outdoor space with a beautifully crafted fence that stands as a testament to your craftsmanship and vision.