
Home>Create & Decorate>DIY & Crafts>DIY Dump Trailer: How To Build Your Own
DIY & Crafts
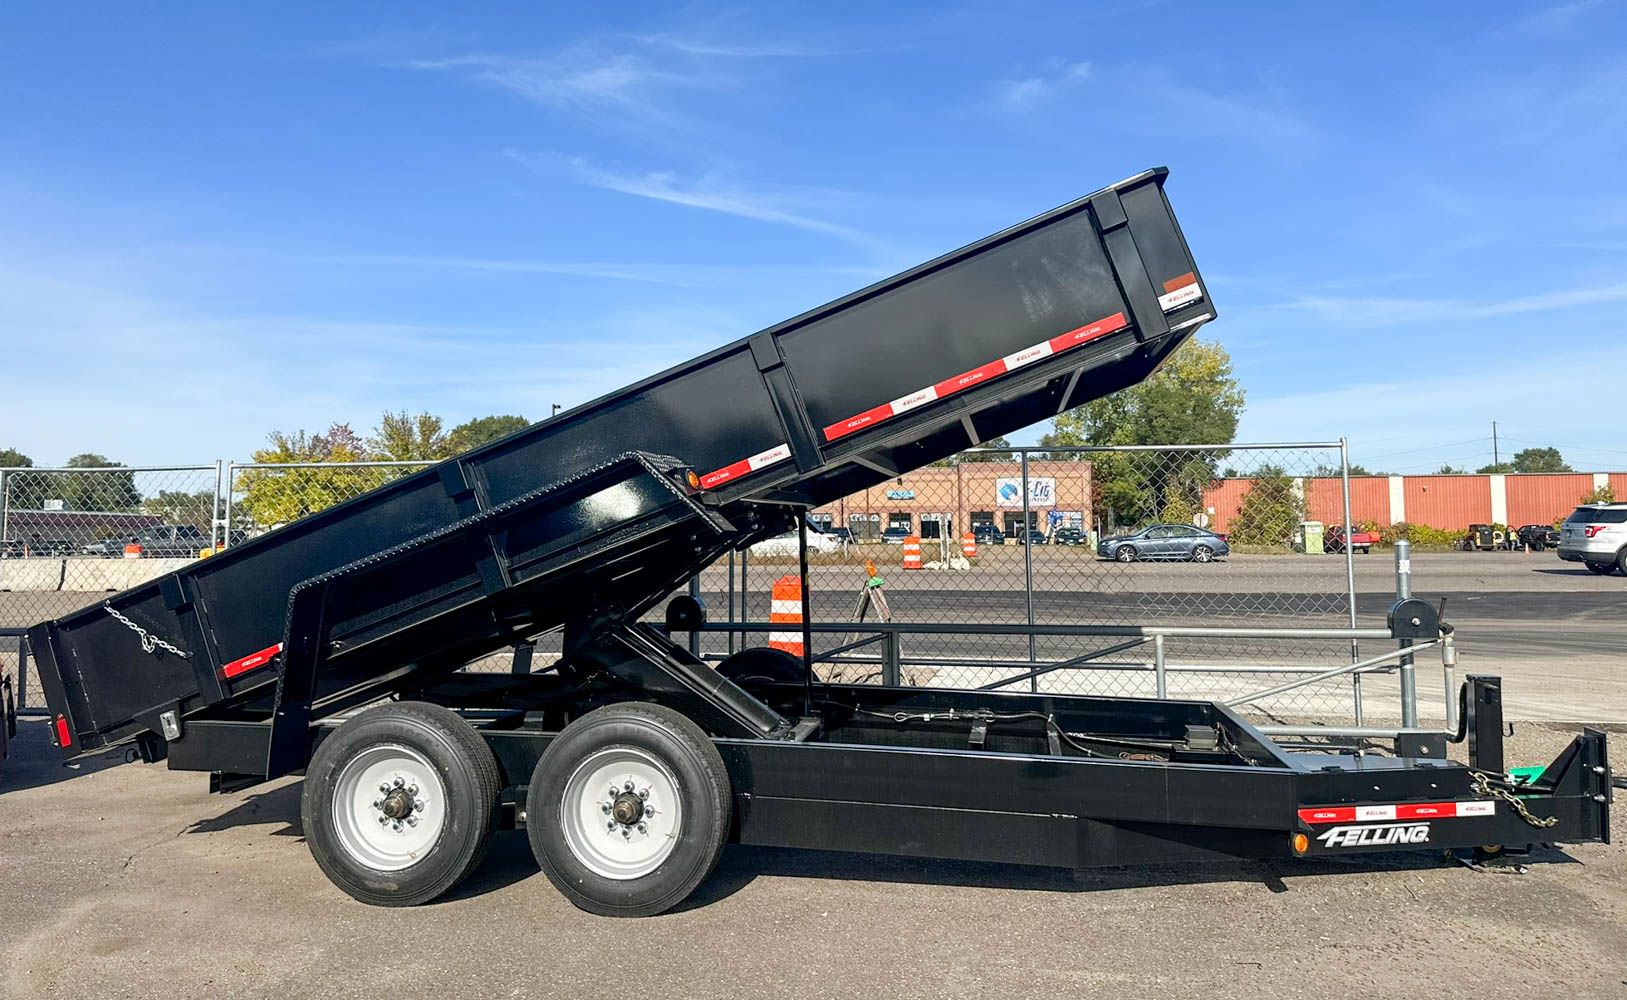
DIY Dump Trailer: How To Build Your Own
Published: May 19, 2024

Content Creator specializing in woodworking and interior transformations. Caegan's guides motivate readers to undertake their own projects, while his custom furniture adds a personal touch.
Learn how to build your own DIY dump trailer with our step-by-step guide. Get creative with our DIY & Crafts project and save money!
(Many of the links in this article redirect to a specific reviewed product. Your purchase of these products through affiliate links helps to generate commission for Twigandthistle.com, at no extra cost. Learn more)
Introduction
Are you in need of a versatile and practical trailer for hauling materials, debris, or equipment? Building your own DIY dump trailer can be a rewarding and cost-effective project. Whether you're a seasoned DIY enthusiast or a beginner looking for a challenging yet achievable task, constructing your own dump trailer can be a fulfilling endeavor. In this guide, we'll walk you through the step-by-step process of building your very own dump trailer, from planning and design to the final safety checks. Let's dive in and explore how you can create a functional and customized dump trailer to suit your specific needs.
Planning and Design
Before diving into the construction of your DIY dump trailer, it's crucial to start with a solid plan and design. Here's how to get started:
-
Determine Your Needs: Consider the intended use of your dump trailer. Will you be hauling heavy materials, landscaping debris, or equipment? Understanding your specific hauling needs will help you design a trailer that meets those requirements.
-
Legal Requirements: Research the legal requirements for trailers in your area. This may include size restrictions, weight limits, and lighting regulations. Ensure that your design complies with these regulations to avoid any legal issues down the road.
-
Sketch Your Design: Take the time to sketch out your trailer design. Consider the dimensions, the type of dump mechanism you want to incorporate, and any additional features such as side rails or a tarp system. This will serve as a visual guide as you move forward with the construction process.
-
Material Selection: Choose the appropriate materials for your trailer. Consider the weight of the materials you'll be hauling and select sturdy, durable materials that can withstand the intended use of the trailer.
-
Budget Considerations: Set a budget for your project and research the cost of materials. This will help you make informed decisions during the design phase and prevent overspending as you gather the necessary materials.
By carefully planning and designing your dump trailer, you'll set the stage for a successful construction process and ensure that the end result meets your specific needs and requirements.
Gathering Materials and Tools
Gathering the necessary materials and tools is a crucial step in the construction of your DIY dump trailer. Here's a comprehensive list to help you prepare for the project:
Materials
- Steel Tubing: Select high-quality steel tubing for the trailer frame. Ensure that the tubing is strong enough to support the intended load capacity of the trailer.
- Axle and Wheels: Choose a suitable axle and wheels that align with the weight capacity of your trailer. Consider the terrain on which the trailer will be used to determine the appropriate wheel size and tread pattern.
- Dump Bed Material: Depending on your preferences, you can opt for steel, wood, or a combination of both for the dump bed. Ensure that the material is durable and capable of withstanding heavy loads.
- Hydraulic System: Acquire a hydraulic cylinder, pump, and hoses for the dump mechanism. Ensure that the hydraulic components are compatible with the size and weight of the dump bed.
- Electrical Components: Purchase wiring, lights, and connectors for the trailer's lighting system. Opt for weather-resistant components to ensure longevity.
- Safety Equipment: Invest in safety chains, a breakaway kit, and reflective tape to enhance the safety features of your trailer.
Tools
- Welder: A MIG welder is essential for joining the steel tubing and fabricating the trailer frame.
- Cutting Tools: Angle grinders, chop saws, and cutting torches will be necessary for cutting and shaping the steel tubing and other materials.
- Drill and Bits: A drill with various drill bits will be used for creating holes for bolts, wiring, and other components.
- Clamps and Squares: These tools are essential for ensuring precise and accurate assembly during the construction process.
- Hydraulic Tools: If you plan to install the hydraulic system yourself, hydraulic crimpers and a hydraulic hose crimper will be required.
- Measuring Tools: Tape measures, squares, and levels will aid in achieving accurate dimensions and alignments during construction.
By gathering the right materials and tools, you'll be well-equipped to commence the construction of your DIY dump trailer with confidence and efficiency.
Building the Frame
Building the frame of your DIY dump trailer is a critical step that forms the foundation for the entire structure. Here's a detailed guide to help you construct a sturdy and reliable frame for your trailer:
-
Cutting and Shaping the Steel Tubing: Begin by cutting the steel tubing to the required lengths using a chop saw or angle grinder. Ensure precise measurements and use a square to verify the accuracy of the cuts. Once cut, deburr the edges to remove any sharp burrs that may cause injury or compromise the structural integrity.
-
Assembling the Main Frame: Lay out the cut pieces of steel tubing according to your design and begin tack welding them together. Use clamps and squares to ensure that the frame is aligned and square before fully welding the joints. Pay close attention to the structural integrity of the frame, as it will bear the weight of the dump bed and its contents.
-
Reinforcement and Cross Bracing: To enhance the strength and rigidity of the frame, consider adding cross braces at strategic points. This will prevent flexing and twisting during transportation and dumping. Weld the cross braces securely to the main frame, ensuring that they are positioned to provide optimal support.
-
Tongue and Hitch Assembly: If your design includes a tongue and hitch assembly, ensure that it is integrated securely into the frame. The tongue should extend to the front of the trailer and be reinforced to withstand the forces exerted during towing.
-
Mounting Attachment Points: Depending on your design, you may need to weld attachment points for the dump bed, hydraulic system, and other components. These attachment points should be strategically positioned and securely welded to the frame to ensure stability and functionality.
-
Inspect and Test: Once the frame is fully welded and assembled, thoroughly inspect the welds for any signs of weakness or defects. Perform a structural integrity test by applying pressure and verifying that the frame maintains its shape and stability.
By following these steps and paying close attention to the construction of the frame, you'll lay a solid groundwork for the rest of the trailer assembly. A well-built frame is essential for the overall safety and performance of your DIY dump trailer.
Installing the Axle and Wheels
Installing the axle and wheels is a crucial step in the construction of your DIY dump trailer. Proper installation ensures the stability, maneuverability, and weight-bearing capacity of the trailer. Here's a detailed guide to help you complete this essential phase of the project:
-
Positioning the Axle: Begin by positioning the axle at the appropriate location on the trailer frame. Ensure that the axle is centered and aligned with the frame to maintain balance and stability. Use a tape measure and level to verify the precise positioning before proceeding.
-
Attaching the Leaf Springs: Secure the leaf springs to the axle using U-bolts and spring plates. The number of leaf springs required will depend on the weight capacity of your trailer and the anticipated load. Ensure that the leaf springs are evenly spaced and aligned to distribute the load effectively.
-
Mounting the Wheels: With the axle in place, proceed to mount the wheels onto the axle hubs. Ensure that the wheels are aligned and securely attached using lug nuts. Consider using a torque wrench to tighten the lug nuts to the manufacturer's specifications for optimal safety and performance.
-
Installing Fenders (Optional): If your design includes fenders to cover the wheels, install them at this stage. Fenders provide protection from debris and enhance the overall appearance of the trailer. Secure the fenders to the frame using appropriate fasteners and brackets.
-
Checking Alignment and Clearance: Once the wheels are installed, check the alignment and clearance to ensure that the wheels rotate freely without any obstructions. Verify that the wheels are parallel to each other and perpendicular to the ground to prevent uneven wear and handling issues.
-
Adding Wheel Bearings and Grease: If the axle requires wheel bearings, ensure that they are installed and properly greased. Wheel bearings play a critical role in the smooth rotation of the wheels and should be maintained according to the manufacturer's recommendations.
-
Testing and Adjusting: After the installation is complete, perform a test by rolling the trailer to ensure that the wheels rotate smoothly and that the axle is properly aligned. Make any necessary adjustments to the alignment and wheel tightness to achieve optimal performance.
By following these steps, you'll successfully install the axle and wheels, setting the stage for the functional and reliable operation of your DIY dump trailer. Proper installation is essential for the safe and efficient transportation of materials and equipment.
Constructing the Dump Bed
Constructing the dump bed of your DIY dump trailer is a pivotal stage that directly impacts the functionality and versatility of the trailer. Here's a comprehensive guide to help you construct a durable and efficient dump bed for your project:
-
Selecting the Material: Choose the material for the dump bed based on your specific needs and preferences. Steel and wood are common choices, each offering unique benefits. Steel provides exceptional strength and durability, while wood offers a lighter alternative with natural shock-absorption properties.
-
Cutting and Shaping: If you opt for a steel dump bed, cut the steel sheets to the required dimensions using a plasma cutter, torch, or metal cutting saw. Ensure precise measurements and smooth edges to facilitate seamless assembly. For a wooden dump bed, cut the lumber to the desired lengths and angles using a circular saw or table saw.
-
Assembling the Bed Frame: Begin by assembling the frame of the dump bed using the cut steel or wood components. Weld the steel frame together using a MIG welder, ensuring strong and secure joints. If using wood, construct a sturdy frame using appropriate fasteners and woodworking techniques.
-
Adding Side Rails and Supports: Depending on your design, consider adding side rails to contain the materials during transportation. Weld or fasten the side rails to the dump bed frame, ensuring that they are securely attached and aligned. Additionally, incorporate supports within the bed frame to enhance its structural integrity and load-bearing capacity.
-
Installing the Bed Floor: Whether using steel or wood, install the bed floor onto the frame, ensuring a secure and even fit. Weld or fasten the steel bed floor to the frame, or attach the wooden planks using suitable fasteners. The bed floor should be capable of withstanding the anticipated loads and provide a stable surface for the transported materials.
-
Reinforcement and Bracing: To further reinforce the dump bed, consider adding cross braces or additional supports as needed. These reinforcements will prevent flexing and ensure that the bed can withstand the forces exerted during loading, transportation, and dumping.
-
Prepping for the Dump Mechanism: If incorporating a hydraulic dump mechanism, ensure that the dump bed is designed to accommodate the necessary components. This may include mounting points for the hydraulic cylinder, pump, and hoses, as well as reinforcement to support the dumping action.
By following these steps, you'll successfully construct a robust and functional dump bed for your DIY dump trailer. The dump bed serves as the primary component for transporting and unloading materials, and a well-built bed is essential for the overall performance and utility of the trailer.
Adding Hydraulic System
Integrating a hydraulic system into your DIY dump trailer is a significant step that enables the efficient and controlled dumping of materials. Here's a detailed guide to help you add a hydraulic system to your trailer:
-
Selecting Hydraulic Components: Begin by selecting the appropriate hydraulic components, including a hydraulic cylinder, pump, reservoir, hoses, and control valve. Ensure that the components are compatible with the size and weight capacity of your dump bed.
-
Mounting the Hydraulic Cylinder: Position the hydraulic cylinder at the designated location on the trailer frame. Securely mount the cylinder using suitable brackets and fasteners, ensuring that it is aligned to facilitate the dumping action.
-
Connecting the Hoses: Install hydraulic hoses to connect the cylinder to the hydraulic pump and reservoir. Use high-quality, pressure-rated hoses and fittings to prevent leaks and ensure the proper flow of hydraulic fluid.
-
Installing the Hydraulic Pump: Mount the hydraulic pump in a suitable location, such as near the trailer tongue or on the frame. Ensure that the pump is securely attached and aligned with the hydraulic cylinder to facilitate efficient operation.
-
Routing the Hydraulic Lines: Carefully route the hydraulic lines from the pump to the cylinder, avoiding sharp bends and potential pinch points. Secure the lines using clamps and brackets to prevent interference with other trailer components.
-
Adding a Control Valve: Install a control valve within easy reach of the trailer operator. The control valve allows for the manual operation of the hydraulic system, enabling precise control over the dumping process.
-
Hydraulic Fluid and Testing: Fill the hydraulic reservoir with the appropriate hydraulic fluid as recommended by the manufacturer. Once the system is fully assembled, test the hydraulic operation to ensure that the cylinder extends and retracts smoothly without any issues.
-
Safety Considerations: Incorporate safety features such as a pressure relief valve and hydraulic fluid filter to protect the system from overpressure and contamination. Additionally, ensure that all hydraulic components are securely mounted and free from potential hazards.
By following these steps, you'll successfully integrate a hydraulic system into your DIY dump trailer, enabling efficient and controlled dumping of materials with ease and precision. A well-designed hydraulic system enhances the functionality and versatility of your trailer, making it a valuable asset for various hauling tasks.
Wiring and Lights
The wiring and lighting system of your DIY dump trailer are essential for safety, visibility, and compliance with legal requirements. Here's a detailed guide to help you set up the wiring and lights for your trailer:
-
Electrical Components: Begin by gathering the necessary electrical components, including wiring, lights, connectors, and a junction box. Opt for weather-resistant components to ensure longevity and reliability, especially when exposed to the elements during outdoor use.
-
Designing the Lighting Layout: Plan the layout for the trailer lights, including brake lights, turn signals, running lights, and license plate illumination. Ensure that the lighting configuration complies with the legal requirements for trailers in your area.
-
Routing the Wiring: Carefully route the wiring harness along the trailer frame, securing it with suitable clips and fasteners to prevent damage and interference with other components. Avoid sharp edges and potential pinch points that could compromise the integrity of the wiring.
-
Connecting the Lights: Install the appropriate lights at the designated locations on the trailer. Securely mount the lights using durable brackets and ensure that they are aligned and angled for optimal visibility. Connect the lights to the wiring harness, following the manufacturer's instructions for proper connections.
-
Junction Box Installation: Mount a junction box on the trailer frame to serve as a centralized connection point for the wiring. The junction box provides a secure and organized location for joining the various electrical connections, protecting them from damage and exposure.
-
Wiring Connections: Use crimp connectors or soldering to make secure and reliable electrical connections within the junction box. Ensure that the connections are insulated and protected from moisture to prevent corrosion and electrical issues.
-
Grounding the System: Establish a solid ground connection for the lighting system by attaching the ground wire to the trailer frame. A clean and secure ground connection is essential for the proper operation of the lights and the overall electrical system.
-
Testing and Adjustment: Once the wiring and lights are installed, thoroughly test the lighting system to verify proper functionality. Test the brake lights, turn signals, and running lights to ensure that they operate as intended. Make any necessary adjustments to the wiring or light positioning to achieve optimal visibility and compliance with regulations.
By following these steps, you'll successfully set up the wiring and lights for your DIY dump trailer, ensuring that it meets safety standards and provides reliable illumination for safe operation, especially during low-light conditions or inclement weather.
Final Touches and Safety Checks
After completing the major construction and installation phases of your DIY dump trailer, it's crucial to focus on the final touches and conduct thorough safety checks to ensure the trailer's reliability and compliance with safety standards. Here's a detailed guide to help you complete the finishing touches and perform essential safety checks:
Paint and Finish
- Surface Preparation: Before applying paint, thoroughly clean the trailer frame and components to remove any dirt, grease, or debris. Consider using a wire brush or sandpaper to smooth any rough surfaces.
- Primer and Paint: Apply a high-quality primer to protect the metal components from corrosion. Once the primer is dry, apply a durable paint that is suitable for outdoor use. Choose a color that enhances visibility and complements the overall aesthetics of the trailer.
- Rust Prevention: Consider applying a rust-inhibiting coating to vulnerable areas to provide an additional layer of protection against corrosion.
Reflective Tape and Markings
- Reflective Tape: Install reflective tape on the sides and rear of the trailer to enhance visibility, especially during low-light conditions or nighttime operation. The reflective tape should be strategically placed to outline the trailer's perimeter and improve its detectability on the road.
- Safety Markings: If required by regulations, add safety markings such as reflective triangles or other warning signs to alert other drivers to the presence of the trailer.
Safety Features
- Safety Chains: Ensure that the trailer is equipped with sturdy safety chains that are properly attached to the towing vehicle. The safety chains provide a critical backup in the event of a hitch failure and are essential for safe towing.
- Breakaway Kit: If your trailer exceeds a certain weight threshold, consider installing a breakaway kit. This safety feature activates the trailer brakes in the event of a separation from the towing vehicle, preventing the trailer from becoming a hazard on the road.
- Emergency Tools: Equip the trailer with essential emergency tools such as a jack, lug wrench, and tire repair kit to address potential roadside issues.
Weight Distribution and Balance
- Load Distribution: Ensure that the weight of the dump bed and any transported materials is evenly distributed to prevent excessive strain on the trailer's components. Improper weight distribution can affect handling and stability.
- Tongue Weight: Verify that the tongue weight, the downward force exerted on the hitch ball by the trailer, falls within the recommended range for safe towing.
Safety Checks
- Brake System: Test the trailer's brake system to ensure that it functions as intended. Verify that the brakes engage and disengage smoothly and that the brake lights activate when the brakes are applied.
- Tire Pressure and Condition: Check the tire pressure and inspect the tires for signs of wear, damage, or deterioration. Ensure that the tires are inflated to the recommended pressure and that they are in good condition for safe operation.
- Lighting and Electrical: Conduct a final inspection of the trailer's lighting and electrical system. Verify that all lights, including brake lights, turn signals, and running lights, are operational and properly connected.
- Hydraulic System: If equipped with a hydraulic dump mechanism, thoroughly test the system to ensure that it extends and retracts smoothly without any leaks or malfunctions.
By focusing on these final touches and conducting comprehensive safety checks, you'll ensure that your DIY dump trailer is not only functional and reliable but also compliant with safety regulations and equipped to provide safe and efficient hauling for your intended purposes.
Conclusion
In conclusion, building your own DIY dump trailer can be a rewarding and fulfilling project that results in a versatile and practical hauling solution tailored to your specific needs. By following the step-by-step process outlined in this guide, from planning and design to the final safety checks, you can create a customized dump trailer that meets safety standards and provides reliable performance. The careful selection of materials, precise construction of the frame and dump bed, integration of hydraulic and electrical systems, and attention to safety details are essential for the successful completion of your DIY dump trailer. With the right tools, materials, and a methodical approach, you can embark on this DIY endeavor with confidence, knowing that you have the knowledge and guidance to bring your vision of a functional and efficient dump trailer to life. Whether you're hauling landscaping materials, construction debris, or equipment, your DIY dump trailer can become an indispensable asset for various projects and tasks.