
Home>Create & Decorate>DIY & Crafts>DIY Duck Coop: Step-by-Step Guide To Building A Cozy Home For Your Feathered Friends
DIY & Crafts
DIY Duck Coop: Step-by-Step Guide To Building A Cozy Home For Your Feathered Friends
Published: June 12, 2024

Senior Editor in Create & Decorate, Kathryn combines traditional craftsmanship with contemporary trends. Her background in textile design and commitment to sustainable crafts inspire both content and community.
Discover how to build a cozy duck coop with our step-by-step DIY guide. Perfect for DIY & Crafts enthusiasts looking to create a comfortable home for their feathered friends.
(Many of the links in this article redirect to a specific reviewed product. Your purchase of these products through affiliate links helps to generate commission for Twigandthistle.com, at no extra cost. Learn more)
Introduction
So, you've decided to take on the challenge of building a DIY duck coop. Congratulations! Creating a cozy and safe home for your feathered friends can be a rewarding and enjoyable project. Whether you're a seasoned DIY enthusiast or a beginner looking for a new adventure, this step-by-step guide will walk you through the process of constructing a duck coop from start to finish. Get ready to roll up your sleeves, grab your tools, and embark on a fun and fulfilling journey to provide a comfortable dwelling for your quacking companions.
Choosing the Right Location for Your Duck Coop
When it comes to building a duck coop, the location is key. Ducks thrive in a peaceful and secure environment, so selecting the right spot for their coop is crucial for their well-being. Here are some essential factors to consider when choosing the perfect location for your DIY duck coop:
-
Accessibility to Water: Ducks love to splash and swim, so it's ideal to place the coop near a water source such as a pond or a gentle stream. If a natural water feature isn't available, consider incorporating a small duck pond within the coop area.
-
Protection from Predators: Ducks are vulnerable to predators such as foxes, raccoons, and birds of prey. Position the coop in an area that can be easily monitored and where predators are less likely to lurk. Installing motion-activated lights or alarms can also help deter unwanted visitors.
-
Ventilation and Sunlight: Ensure that the coop receives ample natural light and is well-ventilated. Ducks thrive in environments with good air circulation and exposure to sunlight, which helps maintain a healthy living space for them.
-
Drainage: Select a location with good natural drainage to prevent waterlogging, especially if you live in an area prone to heavy rainfall. Proper drainage will help keep the coop dry and comfortable for your ducks.
-
Proximity to Your Home: Placing the duck coop within sight of your home can make it easier to keep an eye on your feathered friends and provide quick assistance if needed. It also allows you to enjoy watching the ducks as they go about their daily activities.
By carefully considering these factors, you can choose a location that not only meets the needs of your ducks but also makes the maintenance of the coop more convenient for you. Once you've found the perfect spot, you can move on to the next exciting step in building your DIY duck coop.
Designing and Planning Your Duck Coop
Designing and planning your duck coop is a crucial step that sets the foundation for a comfortable and functional living space for your feathered companions. Here are some key considerations to keep in mind as you embark on this phase of the project:
-
Space and Layout: Determine the size of your duck coop based on the number of ducks you plan to accommodate. Ducks require ample space to move around, so ensure that the coop provides at least 4 square feet of floor space per duck. Consider incorporating separate areas for nesting, feeding, and swimming to cater to their various needs.
-
Protection and Security: Design the coop with predator-proof features such as sturdy wire mesh, lockable doors, and a secure roof. Ensure that the coop is well-protected from potential threats to keep your ducks safe and secure.
-
Ventilation and Light: Plan for adequate ventilation to maintain good air quality within the coop. Incorporate windows or vents that can be opened and closed as needed. Additionally, ensure that the coop receives natural light during the day to promote a healthy environment for your ducks.
-
Accessibility and Maintenance: Design the coop with easy access points for cleaning, feeding, and egg collection. Consider incorporating removable panels or doors to facilitate regular maintenance tasks and make the coop more user-friendly.
-
Materials and Aesthetics: Choose durable and weather-resistant materials for the construction of the coop. Consider the aesthetic appeal of the coop by adding personal touches such as colorful paint, decorative elements, or landscaping around the exterior.
-
Environmental Considerations: Take into account the local climate and weather conditions when designing the coop. Ensure that the structure can withstand seasonal changes and provide adequate shelter for your ducks throughout the year.
By carefully planning and designing your duck coop, you can create a comfortable and secure home that meets the specific needs of your feathered friends. Once you have a clear vision of the coop's design and layout, you can proceed to gather the necessary materials and tools to bring your plans to life.
Gathering Materials and Tools
Before diving into the construction of your DIY duck coop, it's essential to gather all the necessary materials and tools to ensure a smooth and efficient building process. Here's a comprehensive list of the items you'll need to bring your duck coop to life:
Materials
- Lumber: Purchase high-quality lumber for framing, flooring, and siding. Opt for treated or weather-resistant wood to ensure durability and longevity.
- Hardware Cloth or Wire Mesh: Invest in sturdy hardware cloth or wire mesh to create secure enclosures and predator-proof barriers for the coop and outdoor run.
- Roofing Materials: Select appropriate roofing materials such as corrugated metal, asphalt shingles, or durable plastic panels to provide weather protection for the coop.
- Fasteners: Stock up on screws, nails, and other fasteners suitable for outdoor construction. Stainless steel or galvanized hardware is recommended to prevent rusting.
- Insulation (Optional): If you live in a region with extreme temperatures, consider adding insulation to regulate the temperature inside the coop.
- Plywood or Sheathing: Purchase plywood or sheathing for interior walls, flooring, and additional structural support.
- Paint and Sealant: Choose non-toxic paint and sealant to add a pop of color to the coop and protect the wood from moisture and weather damage.
- Nesting Materials: Prepare nesting materials such as straw, hay, or wood shavings to create comfortable nesting boxes for your ducks.
Tools
- Circular Saw or Miter Saw: A reliable saw for cutting lumber to the desired dimensions accurately.
- Hammer and Nail Gun: Essential for securing framing and attaching siding and roofing materials.
- Wire Cutters: Needed for cutting and shaping hardware cloth or wire mesh to fit specific areas of the coop.
- Drill and Bits: A power drill with assorted drill bits for creating pilot holes and driving screws.
- Level and Measuring Tape: Tools for ensuring accurate and level construction throughout the building process.
- Staple Gun: Useful for attaching wire mesh and securing other materials with staples.
- Paintbrushes and Rollers: Equipment for applying paint and sealant to the coop's exterior and interior surfaces.
- Work Gloves and Safety Gear: Ensure you have protective gear such as gloves, safety goggles, and a dust mask for safe construction practices.
By gathering these materials and tools in advance, you'll be well-prepared to tackle the construction of your DIY duck coop with confidence and efficiency. With everything in hand, you're ready to move on to the exciting phase of building the foundation and frame of your duck coop.
Building the Foundation and Frame
The foundation and frame of your duck coop serve as the backbone of the entire structure, providing stability and support for the living space. Here's a detailed breakdown of the steps involved in building the foundation and frame for your DIY duck coop:
1. Site Preparation
Before constructing the foundation, ensure that the chosen site is level and free from any debris or obstructions. Use a shovel and a level to clear the area and create a flat surface for the foundation.
2. Foundation Construction
Depending on your preference and the local climate, you can opt for a variety of foundation types, including concrete piers, wooden skids, or a solid concrete slab. Each option offers different benefits in terms of stability and longevity. If you choose to use concrete piers, dig holes at designated intervals and pour concrete to create sturdy supports for the coop.
3. Framing the Walls
Once the foundation is in place, begin framing the walls of the duck coop. Use the pre-cut lumber to construct the wall frames according to the dimensions of your design. Secure the framing members together using appropriate fasteners, ensuring that the corners are square and the structure is level.
4. Adding Windows and Doors
If your design includes windows and doors, frame the openings accordingly during the wall framing process. Ensure that the dimensions of the openings align with the size of the windows and doors you intend to install. This step allows for seamless integration of these elements into the wall structure.
5. Attaching the Roof Rafters
With the walls framed, it's time to install the roof rafters. Cut the rafters to the specified length and attach them to the top plates of the wall frames. Ensure that the rafters are evenly spaced and securely fastened to provide a stable framework for the roof.
6. Roof Sheathing
Once the rafters are in place, add the roof sheathing to create a solid base for the roofing material. Use plywood or oriented strand board (OSB) to cover the entire roof area, ensuring that the sheathing is properly secured to the rafters.
7. Bracing and Reinforcement
To enhance the structural integrity of the frame, add diagonal bracing to the walls and roof. This reinforcement helps prevent swaying and shifting, especially in areas prone to high winds or seismic activity.
By following these steps, you can establish a robust foundation and frame for your duck coop, setting the stage for the next phases of construction. With the framework in place, you're ready to proceed with adding flooring, walls, and other essential components to create a comfortable and secure home for your ducks.
Adding Flooring and Walls
After completing the foundation and frame of your DIY duck coop, the next crucial step is to add the flooring and walls to enclose the living space and provide a comfortable interior for your feathered friends.
1. Flooring Installation
Begin by installing the flooring material of your choice, ensuring that it is durable, easy to clean, and provides insulation against the cold ground. Options such as plywood, vinyl flooring, or rubber mats are suitable for duck coops. Secure the flooring material to the foundation or floor joists using appropriate fasteners, ensuring a smooth and level surface for the ducks to walk on.
2. Wall Construction
With the flooring in place, it's time to construct the walls of the duck coop. Use weather-resistant plywood, oriented strand board (OSB), or exterior-grade sheathing to cover the wall frames, providing a protective barrier against the elements. Secure the wall panels to the framing using screws or nails, ensuring a snug fit and proper alignment. Consider adding insulation between the wall studs to regulate the interior temperature and provide a cozy environment for your ducks.
3. Ventilation and Windows
Incorporate ventilation openings into the walls to ensure adequate air circulation within the coop. Install vents or small windows that can be opened and closed to control the airflow and maintain optimal ventilation. Proper ventilation is essential for preventing moisture buildup and maintaining a healthy living environment for the ducks.
4. Interior Finishing
Once the walls are in place, consider adding finishing touches to the interior of the coop. Apply a non-toxic sealant or paint to the walls to protect the wood and add a splash of color to the interior. Ensure that the interior surfaces are smooth and free from any protruding nails or sharp edges that could pose a hazard to the ducks.
By completing the flooring and walls of the duck coop, you create a secure and comfortable living space for your feathered companions. With these essential components in place, you can now focus on installing roosts, nesting boxes, and other features to further enhance the functionality and coziness of the coop.
Installing Roosts and Nesting Boxes
Installing roosts and nesting boxes is a crucial aspect of creating a functional and comfortable living space for your ducks. Here's a detailed guide on how to incorporate these essential features into your DIY duck coop:
1. Roosts
Roosts provide elevated perching areas for ducks to rest, sleep, and observe their surroundings. When installing roosts in your duck coop, consider the following:
-
Placement: Position the roosts at a suitable height above the floor, allowing enough space for the ducks to perch comfortably without touching the ceiling. Ensure that the roosts are securely attached to the walls or framing to prevent wobbling or instability.
-
Material: Choose sturdy and smooth materials for the roosts, such as wooden dowels or branches. Avoid using materials with rough edges or splinters that could cause discomfort or injury to the ducks' feet.
-
Spacing: Provide enough space between roosts to accommodate the size of your ducks and prevent overcrowding. Allow approximately 12-15 inches of roosting space per duck to ensure they have ample room to perch without feeling cramped.
2. Nesting Boxes
Nesting boxes are essential for providing a designated area where ducks can lay and brood their eggs in a secure and private space. Here's how to incorporate nesting boxes into your duck coop:
-
Size and Quantity: Design the nesting boxes to be spacious enough for a duck to comfortably enter, turn around, and nest. Aim for dimensions of approximately 14-16 inches in width, depth, and height. Depending on the number of ducks in your flock, provide one nesting box for every 3-4 ducks to minimize competition for nesting space.
-
Location: Install the nesting boxes in a quiet and secluded area of the coop to offer privacy and reduce disturbances during the egg-laying process. Position the boxes off the ground and secure them to the walls to prevent tipping or shifting.
-
Bedding Material: Line the nesting boxes with suitable bedding material such as straw, hay, or wood shavings to create a comfortable and inviting nesting environment for the ducks. Ensure that the bedding is clean, dry, and regularly replaced to maintain hygiene and egg quality.
By incorporating well-designed roosts and nesting boxes into your duck coop, you provide essential elements that cater to the natural behaviors and needs of your feathered companions. These features contribute to a harmonious and functional living space that promotes the well-being and productivity of your duck flock.
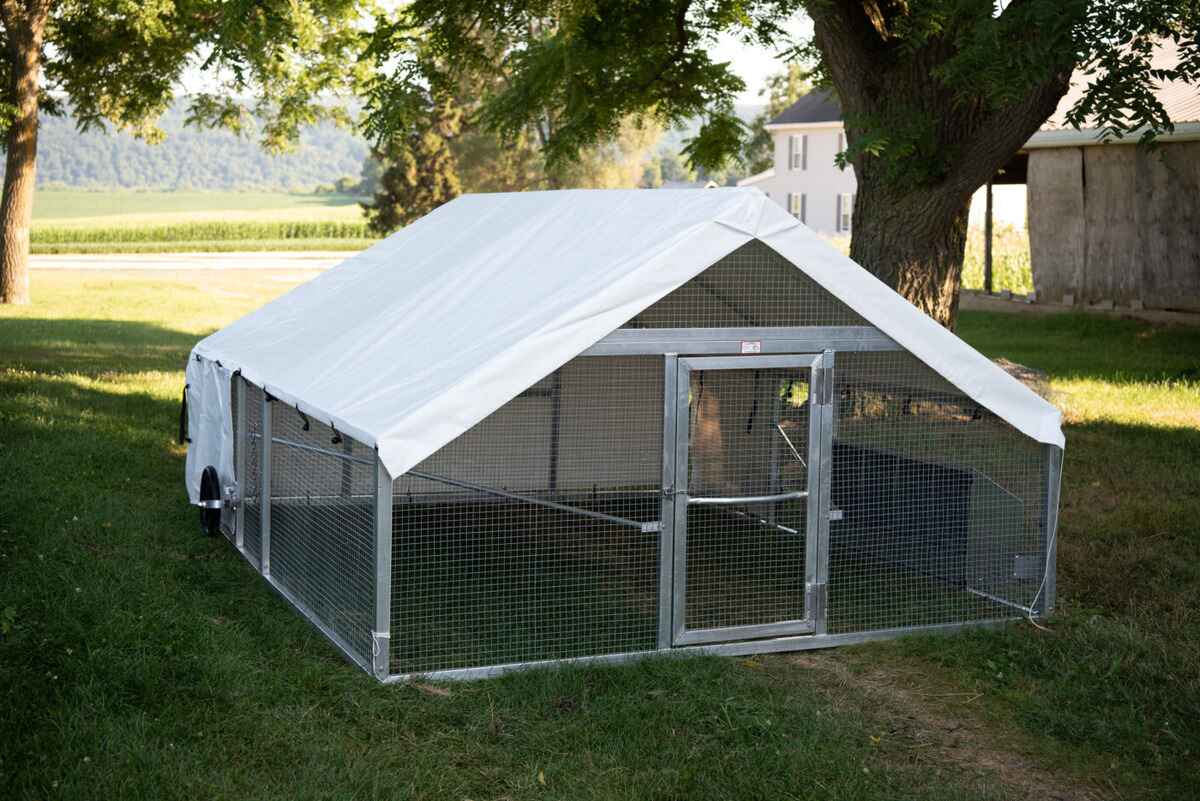
Creating a Secure Outdoor Run
Designing a secure outdoor run for your ducks is essential to provide them with access to fresh air, sunlight, and space for exercise while ensuring their safety from potential predators. Here's a detailed guide on creating a secure outdoor run for your DIY duck coop:
1. Fencing and Enclosure
- Choose sturdy wire fencing or hardware cloth to enclose the outdoor run, ensuring that it is tall enough to prevent the ducks from flying over and predators from gaining access. A height of at least 3-4 feet is recommended for most duck breeds.
- Bury the bottom of the fencing or hardware cloth underground or use an apron of wire mesh to deter digging predators such as foxes and raccoons. This prevents them from burrowing under the enclosure to reach the ducks.
2. Gate and Entry
- Install a secure gate or entry point that allows easy access for cleaning and maintenance while providing a reliable barrier to keep predators out. Ensure that the gate is equipped with latches or locks to prevent unauthorized entry.
3. Shelter and Shade
- Incorporate a sheltered area within the outdoor run to provide protection from the elements and a shaded space for the ducks to rest. This can be achieved by attaching a roof or canopy to part of the run or placing a small shelter structure within the enclosure.
4. Swimming and Foraging Areas
- If space allows, consider including a shallow, secure pond or water feature within the outdoor run to allow the ducks to engage in their natural behavior of swimming and foraging. Ensure that the water source is regularly cleaned and maintained to prevent stagnation and the spread of disease.
5. Predator-Proofing
- Inspect the outdoor run regularly for any potential weak points or vulnerabilities in the fencing, gates, or other structures. Reinforce any areas that may be susceptible to intrusion by predators, such as gaps, loose panels, or compromised sections of the enclosure.
6. Enrichment and Entertainment
- Introduce enriching elements such as logs, stumps, or hanging treats within the outdoor run to provide mental stimulation and entertainment for the ducks. This encourages natural behaviors and helps prevent boredom.
By creating a secure outdoor run that offers ample space, protection, and enrichment for your ducks, you provide them with a safe and stimulating environment to explore and enjoy. This outdoor extension to their coop enhances their overall well-being and contributes to a fulfilling and enriching living experience for your feathered friends.
Adding Final Touches and Decorations
After completing the essential construction and functional elements of your DIY duck coop, it's time to add the final touches and decorations that will not only enhance the aesthetic appeal of the coop but also contribute to the overall comfort and well-being of your ducks.
1. Exterior Finishes
Consider applying a weather-resistant and non-toxic paint or stain to the exterior of the coop to protect the wood from moisture and prolong its lifespan. Choose colors that complement the surrounding environment and add a touch of personality to the coop. Additionally, decorative elements such as window boxes, shutters, or trim can further enhance the visual appeal of the exterior.
2. Landscaping
Incorporate landscaping around the exterior of the coop to create a more natural and inviting setting for your ducks. Planting shrubs, flowers, or grasses around the coop can provide visual interest and create a more harmonious integration with the surrounding landscape. Ensure that any plants chosen are safe for ducks and do not pose a risk if ingested.
3. Signage and Personalization
Add a personalized touch to the coop by creating a custom sign with the name of your duck flock or a whimsical message. This not only adds a charming element to the coop but also helps personalize the space and make it feel like a true home for your ducks.
4. Cozy Additions
Consider adding cozy and functional elements such as curtains for the windows, decorative lighting, or hanging plants to create a warm and inviting atmosphere within the coop. These small details can contribute to a sense of comfort and homeliness for your ducks.
5. Maintenance and Upkeep
Incorporate practical elements such as hooks for hanging tools, a storage area for feed and supplies, and a designated space for cleaning equipment. These additions not only contribute to the functionality of the coop but also make maintenance tasks more convenient and efficient.
6. Safety and Security
Ensure that all final touches and decorations are safe and secure for your ducks. Avoid using any materials or decorations that could pose a hazard, such as sharp edges, toxic substances, or small parts that could be ingested. Prioritize the well-being and safety of your feathered friends in all decorative decisions.
By adding these final touches and decorations, you can transform your DIY duck coop into a charming and inviting space that not only meets the practical needs of your ducks but also reflects your creativity and care as a duck owner. These thoughtful details contribute to a welcoming and comfortable environment that your ducks will be delighted to call home.
Conclusion
Congratulations on completing the construction of your DIY duck coop! By following this step-by-step guide, you've not only created a safe and comfortable home for your feathered friends but also embarked on a fulfilling journey of craftsmanship and care. Your dedication to providing a cozy and secure living space for your ducks reflects your commitment to their well-being and happiness. As you observe your ducks enjoying their new home, take pride in the knowledge that you've created a space where they can thrive and flourish. Whether you're a seasoned DIY enthusiast or a first-time builder, the experience of constructing a duck coop is a testament to your passion for creating a nurturing environment for your beloved ducks. As you continue to care for and enjoy the company of your feathered companions, may your DIY duck coop stand as a symbol of your dedication to their welfare and the joy they bring to your life.