
Home>Create & Decorate>DIY & Crafts>DIY: Build A Hobbit House
DIY & Crafts
DIY: Build A Hobbit House
Published: May 3, 2024

Senior Editor in Create & Decorate, Kathryn combines traditional craftsmanship with contemporary trends. Her background in textile design and commitment to sustainable crafts inspire both content and community.
Discover how to build your own Hobbit house with our DIY & Crafts guide. Create a magical retreat with step-by-step instructions and creative inspiration. Start your adventure today!
(Many of the links in this article redirect to a specific reviewed product. Your purchase of these products through affiliate links helps to generate commission for Twigandthistle.com, at no extra cost. Learn more)
Introduction
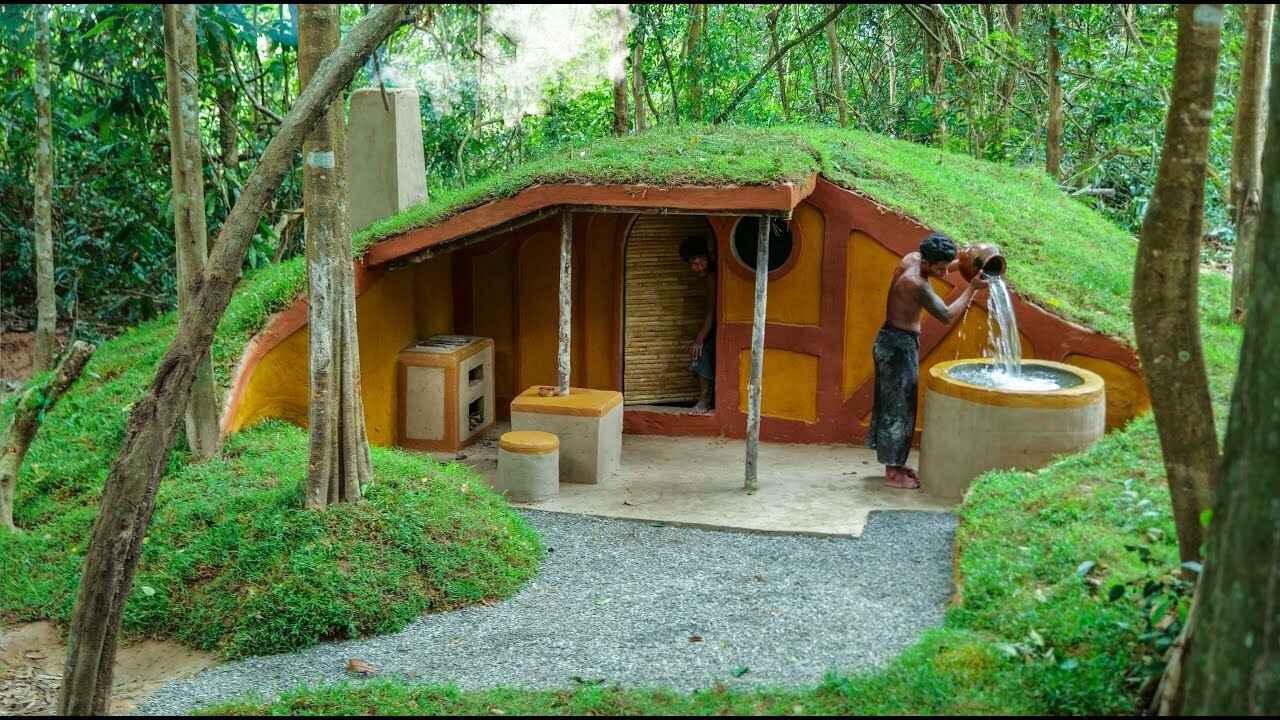
Have you ever dreamed of escaping to the Shire and living in a cozy hobbit house? Well, with a little bit of creativity and some DIY skills, you can make that dream a reality! In this article, we will guide you through the process of building your very own hobbit house right in your backyard. From planning and design to adding the finishing touches, we've got you covered. So, grab your gardening tools and get ready to embark on this exciting DIY adventure!
Planning and Design
-
Research and Inspiration: Before you start building your hobbit house, take some time to research and gather inspiration. Look for images of hobbit houses from the movies or books, and take note of the key design elements that you want to incorporate into your own project. This could include the round door, circular windows, and a cozy, earthy feel.
-
Sketch Your Ideas: Grab a pencil and some paper, and start sketching out your ideas for the design of your hobbit house. Consider the size, shape, and layout of the structure. Think about how you want to integrate it into your backyard landscape. Don't worry about making it perfect – this is just a rough draft to help you visualize your project.
-
Create a Budget: Building a hobbit house can be a fun and rewarding project, but it's important to set a budget before you get started. Consider the cost of materials, tools, and any professional help you might need. By setting a budget from the beginning, you can avoid overspending and ensure that your project stays on track.
-
Check Local Regulations: Depending on where you live, there may be regulations or permits required for building a structure in your backyard. Check with your local government or homeowner's association to make sure you are in compliance with any building codes or zoning laws.
-
Gather Inspiration: Look for inspiration from various sources such as movies, books, and online platforms. This will help you in getting a clear idea of the design and layout you want for your hobbit house.
-
Consider the Landscape: Take a good look at your backyard and consider how the hobbit house will fit into the existing landscape. You may want to choose a location that is nestled among trees or near a garden to create a more natural and whimsical setting.
By carefully planning and designing your hobbit house, you can ensure that the end result is a charming and magical retreat right in your own backyard.
Choosing the Right Location
When it comes to building your hobbit house, choosing the right location is crucial for creating an enchanting and whimsical atmosphere. Here are some key considerations to keep in mind when selecting the perfect spot for your hobbit haven:
-
Nestled Among Nature: Look for a location in your backyard that is nestled among trees or near a garden. This will help create a natural and magical setting for your hobbit house, making it feel like a true retreat into the Shire.
-
Consider the Landscape: Take into account the natural landscape of your backyard. If you have a hill or slope, this could be the ideal location for your hobbit house, as it will blend seamlessly into the surroundings and add to the charm of the overall design.
-
Accessibility: While you want your hobbit house to feel secluded and hidden, it's also important to consider accessibility. Choose a location that is easily accessible from your main living area, but still feels tucked away from the hustle and bustle of everyday life.
-
Sunlight and Shade: Take note of the sunlight and shade patterns in your backyard throughout the day. Consider how the positioning of your hobbit house will affect natural light and shade, and choose a location that offers a comfortable balance.
-
Privacy: If you have neighbors nearby, consider the privacy of your chosen location. You may want to position your hobbit house in a way that provides a sense of seclusion and privacy, allowing you to fully immerse yourself in the enchanting atmosphere.
By carefully considering these factors, you can choose the perfect location for your hobbit house, creating a magical and inviting space that feels like a true escape to the Shire.
Gathering Materials
Gathering the right materials is essential for bringing your hobbit house to life. Here's a list of materials you'll need to get started on your DIY adventure:
-
Natural Building Materials: Embrace the hobbit spirit by using natural materials such as cob, straw, and reclaimed wood. These materials not only add to the charm of your hobbit house but also contribute to a more sustainable and eco-friendly construction.
-
Tools: Make sure you have the necessary tools on hand, including a shovel, wheelbarrow, hammer, nails, saw, and level. These basic tools will help you with the construction process and ensure that everything is built to last.
-
Round Door and Windows: To achieve the iconic hobbit house look, you'll need a round door and circular windows. You can either purchase these or get creative and make them yourself using reclaimed materials.
-
Roofing Materials: Consider using thatch, wooden shingles, or recycled metal for the roof of your hobbit house. Each material adds its own unique charm and character to the overall design.
-
Decorative Elements: Add whimsical touches to your hobbit house with decorative elements such as rustic lanterns, handcrafted signs, and climbing vines. These details will enhance the magical atmosphere of your hobbit haven.
-
Interior Furnishings: Don't forget to gather furnishings for the interior of your hobbit house. Look for cozy, earthy textiles, comfortable seating, and warm lighting to create a welcoming and snug retreat.
By gathering these materials, you'll be well-equipped to begin the construction of your hobbit house and bring your enchanting vision to life.
Building the Structure
Now that you have your materials gathered and your design planned out, it's time to roll up your sleeves and start building the structure of your hobbit house. Here's a step-by-step guide to help you bring your enchanting retreat to life:
-
Prepare the Foundation: Begin by preparing the foundation for your hobbit house. Depending on the size and design of your structure, you may need to dig a shallow trench for the walls to sit in. Consider using natural and sustainable materials such as cob or rammed earth to form the foundation.
-
Construct the Walls: Once the foundation is in place, it's time to start building the walls of your hobbit house. If you're using cob, you can mix clay-rich soil with straw to create a sturdy and natural building material. Pack the cob mixture into place, layer by layer, to form the walls of your hobbit house. For added strength and insulation, consider incorporating recycled glass bottles into the walls.
-
Create the Roof: The roof of a hobbit house is typically covered with earth, grass, or thatch to blend seamlessly with the natural surroundings. Consider using reclaimed wooden beams to create a sturdy frame for the roof, and then layer on a waterproof membrane before adding a layer of soil and grass. This not only provides insulation but also helps your hobbit house blend into the landscape.
-
Install the Door and Windows: Once the basic structure is in place, it's time to install the iconic round door and circular windows. These elements are essential for achieving the classic hobbit house look. You can either purchase pre-made doors and windows or get creative and craft them yourself using reclaimed materials.
-
Add the Final Touches: With the main structure in place, it's time to add the final touches to your hobbit house. Consider adding decorative elements such as handcrafted signs, lanterns, and climbing vines to enhance the whimsical and magical atmosphere. Don't forget to furnish the interior with cozy textiles, comfortable seating, and warm lighting to create a welcoming retreat.
By following these steps, you can bring your vision of a charming and enchanting hobbit house to life right in your own backyard. Get ready to step into your own little piece of the Shire and enjoy the magical ambiance of your DIY hobbit haven.
Adding the Finishing Touches
Once the main structure of your hobbit house is in place, it's time to add the final touches that will truly bring the magic of the Shire to life in your backyard retreat. Here are some essential steps to consider when adding the finishing touches to your hobbit house:
-
Landscaping: Surround your hobbit house with lush, natural landscaping to create a whimsical and enchanting atmosphere. Plant wildflowers, shrubs, and climbing vines to blend the structure seamlessly into its surroundings. Consider adding a winding stone path leading up to the round door to enhance the fairytale-like ambiance.
-
Exterior Decor: Add decorative elements to the exterior of your hobbit house to enhance its charm. Hang rustic lanterns, birdhouses, or whimsical signs to create a welcoming and magical atmosphere. Consider incorporating natural elements such as driftwood, moss, and river stones to add texture and visual interest to the exterior.
-
Cozy Seating Area: Create a cozy seating area outside your hobbit house where you can relax and enjoy the tranquility of your magical retreat. Arrange comfortable seating, such as wooden benches or Adirondack chairs, around a small fire pit or under a shady tree to provide a peaceful outdoor space for unwinding.
-
Warm Lighting: Install warm, soft lighting both inside and outside your hobbit house to create a cozy and inviting atmosphere, especially in the evenings. Consider using string lights, lanterns, or solar-powered pathway lights to illuminate the exterior and create a magical glow around your hobbit haven.
-
Personal Touches: Add personal touches to make your hobbit house feel like a true reflection of your personality and style. Hang artwork, wind chimes, or handmade crafts that bring joy and character to the space. Consider incorporating elements that hold sentimental value or tell a story, adding depth and meaning to your enchanting retreat.
By adding these finishing touches, you can transform your hobbit house into a captivating and magical sanctuary that feels like a true escape to the Shire. Embrace the whimsy and charm of hobbit living as you put the final details in place, and get ready to enjoy the enchanting ambiance of your DIY hobbit haven.
Enjoying Your Hobbit House
Now that your enchanting hobbit house is complete, it's time to step into your own little piece of the Shire and immerse yourself in the magical ambiance of your DIY creation. Here are some delightful ways to enjoy and make the most of your hobbit haven:
-
Relaxation and Meditation: Create a serene and tranquil space inside your hobbit house where you can unwind, meditate, or simply enjoy a moment of peaceful solitude. Add comfortable cushions, soft blankets, and perhaps a small meditation altar to create a soothing retreat within your whimsical abode.
-
Gatherings and Entertaining: Invite friends and family to share in the enchantment of your hobbit house. Host intimate gatherings, tea parties, or storytelling nights, surrounded by the cozy and inviting atmosphere of your magical retreat. The unique charm of your hobbit house is sure to spark joy and wonder in all who visit.
-
Creative Pursuits: Embrace your creative side within the charming confines of your hobbit house. Set up a small art studio, writing nook, or crafting corner where you can let your imagination soar. The enchanting ambiance of your hobbit haven is the perfect setting for igniting inspiration and creativity.
-
Nature Connection: Use your hobbit house as a base for connecting with nature. Enjoy your morning coffee on the doorstep, listen to the birdsong, or simply bask in the natural beauty that surrounds your magical retreat. Your hobbit house provides a unique opportunity to deepen your connection with the outdoors.
-
Reading Nook: Create a cozy reading nook inside your hobbit house, complete with a comfortable chair, soft lighting, and shelves filled with your favorite books. Lose yourself in the pages of a good book while nestled within the charming and earthy embrace of your hobbit haven.
-
Stargazing: On clear nights, take advantage of the secluded and peaceful setting of your hobbit house to indulge in some stargazing. Set up a blanket outside, away from any light pollution, and marvel at the twinkling night sky from the enchanting vantage point of your own little slice of the Shire.
By savoring these delightful experiences within your hobbit house, you can fully appreciate the magic and charm of your DIY creation. Whether it's a place for relaxation, creativity, or connection with nature, your hobbit house offers a unique and enchanting retreat right in your own backyard.