
Home>Create & Decorate>DIY & Crafts>DIY Breakfast Nook Bench: Step-by-Step Guide To Building Your Own Cozy Seating
DIY & Crafts
DIY Breakfast Nook Bench: Step-by-Step Guide To Building Your Own Cozy Seating
Modified: November 28, 2024

Content Creator specializing in woodworking and interior transformations. Caegan's guides motivate readers to undertake their own projects, while his custom furniture adds a personal touch.
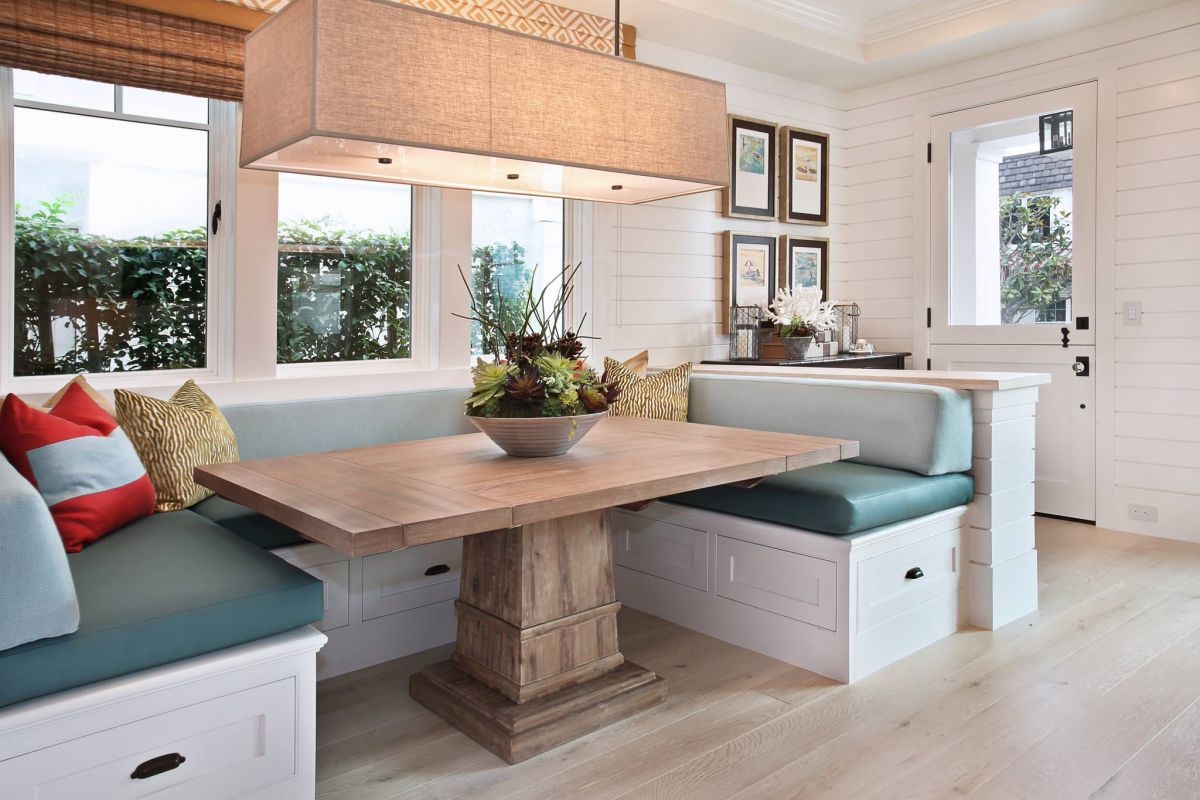
Learn how to build your own cozy breakfast nook bench with our step-by-step DIY guide. Perfect for DIY & Crafts enthusiasts.
(Many of the links in this article redirect to a specific reviewed product. Your purchase of these products through affiliate links helps to generate commission for Twigandthistle.com, at no extra cost. Learn more)
Introduction
Are you looking to add a cozy and inviting touch to your kitchen or dining area? Building your own breakfast nook bench can be a rewarding and budget-friendly way to create a comfortable seating space for your family and guests. Whether you're a seasoned DIY enthusiast or a beginner looking for a fun project, constructing a breakfast nook bench can be a fulfilling endeavor. In this step-by-step guide, we'll walk you through the process of building your own breakfast nook bench, from planning and measuring to adding the finishing touches. So, roll up your sleeves and get ready to create a charming and functional seating area for your home!
Materials and Tools Needed
Before diving into the construction process, it's essential to gather all the necessary materials and tools for building your DIY breakfast nook bench. Here's a comprehensive list to ensure you have everything at your fingertips:
Materials:
- Lumber: Select high-quality lumber for the bench frame, seat, and backrest. Opt for sturdy wood such as pine, oak, or maple.
- Wood Screws: Choose durable wood screws in various sizes to secure the bench components.
- Wood Glue: Invest in a reliable wood glue to reinforce the joints and enhance the bench's sturdiness.
- Finishing Nails: These will be essential for attaching trim and decorative elements.
- Sandpaper: Get a variety of sandpaper grits to ensure smooth and polished surfaces.
- Wood Finish: Select a wood finish or paint of your choice to protect and enhance the appearance of the bench.
Tools:
- Measuring Tape: A precise measuring tape is crucial for accurate dimensions and cuts.
- Circular Saw or Miter Saw: Either of these saws will be necessary for cutting the lumber to the required lengths.
- Drill and Bits: A power drill with a set of drill bits is essential for creating pilot holes and driving screws.
- Screwdriver: Have both manual and electric screwdrivers on hand for assembling the bench components.
- Clamps: Clamps will aid in securing the wood pieces during assembly and glue application.
- Paintbrushes or Rollers: If you plan to finish or paint the bench, ensure you have the appropriate brushes or rollers for the job.
- Safety Gear: Don't forget safety goggles, gloves, and a dust mask to protect yourself during the construction process.
By gathering these materials and tools, you'll be well-prepared to embark on the construction of your breakfast nook bench. Once everything is in place, you can move on to the exciting phase of measuring and planning.
Step 1: Measuring and Planning
The initial step in building your DIY breakfast nook bench involves meticulous measuring and thoughtful planning. Before making any cuts or assembling any components, take the time to measure the designated area where the bench will be placed. Use a measuring tape to determine the length, width, and height available for the bench. Consider the number of people you intend to accommodate and ensure that the bench dimensions align with your seating requirements.
Once you have the precise measurements, it's time to translate them into a detailed plan. Sketch out the design of your bench, including the dimensions of the frame, seat, and backrest. Take into account any additional features such as armrests or storage compartments if you wish to incorporate them into the design. Planning ahead will help you visualize the final product and make informed decisions about the materials and cuts required for the construction process.
After finalizing the design plan, create a comprehensive list of the lumber and hardware needed for the project. This list should be based on the measurements and design specifications, ensuring that you have the right amount of materials to bring your breakfast nook bench to life. With the measuring and planning phase completed, you're ready to move on to the next step: cutting the wood.
Step 2: Cutting the Wood
With your design plan and measurements in hand, it's time to proceed to the crucial step of cutting the wood for your DIY breakfast nook bench. Ensure that you have all the necessary safety gear, including safety goggles, gloves, and a dust mask, before you begin the cutting process.
Start by laying out the lumber according to your design plan, and use a measuring tape to mark the precise lengths and angles for each component of the bench. If your design includes angled cuts for the backrest or decorative elements, use a protractor or angle gauge to achieve accurate cuts.
Once the measurements are marked, carefully use a circular saw or miter saw to cut the lumber to the required lengths and angles. Take your time to ensure precision, and always prioritize safety when operating power tools. If you're not confident in your ability to make precise cuts, consider seeking assistance from a professional or experienced individual.
After cutting all the wood components, organize them based on their respective parts of the bench, such as the frame, seat, and backrest. Labeling the pieces can help you stay organized during the assembly phase. With the wood cut to perfection, you're now ready to progress to the next step: assembling the frame.
Step 3: Assembling the Frame
Assembling the frame is a pivotal stage in constructing your DIY breakfast nook bench. Begin by laying out the lumber pieces for the frame according to your design plan. Use a measuring tape to ensure that the pieces are aligned correctly and that the frame will match the dimensions outlined in your plan.
Next, apply wood glue to the joints of the frame components to reinforce the structure. Secure the joints by using wood screws, ensuring that the frame is sturdy and well-constructed. A power drill with the appropriate drill bits will be essential for creating pilot holes and driving the screws into place.
As you assemble the frame, utilize clamps to hold the pieces together firmly while the wood glue sets. This will help maintain the alignment of the components and ensure a strong bond between the joints. Double-check the angles and measurements to guarantee that the frame is square and level, making any necessary adjustments before the glue dries.
Once the frame is fully assembled, allow the wood glue to dry completely before proceeding to the next step. This will ensure that the frame is solid and secure, providing a stable foundation for the seat and backrest. With the frame successfully assembled, you're ready to move on to the exciting phase of attaching the seat and backrest.
Step 4: Attaching the Seat and Backrest
Attaching the seat and backrest is a crucial phase in bringing your DIY breakfast nook bench to completion. Begin by positioning the assembled frame in the designated area, ensuring that it is level and stable. Place the seat on top of the frame, aligning it carefully to achieve a seamless fit. Use wood screws to secure the seat to the frame, driving them through the underside of the frame into the seat to create a strong connection.
For the backrest, position it against the rear of the frame, ensuring that it is centered and aligned with the seat. Once the backrest is in the desired position, use wood screws to attach it to the frame, securing it firmly in place. Pay attention to the angle at which the backrest is positioned, ensuring that it provides optimal comfort and support for anyone seated on the bench.
As you attach the seat and backrest, periodically check for stability and make any necessary adjustments to ensure a snug and secure fit. The goal is to create a cohesive and well-constructed bench that will provide comfort and durability for years to come. Once the seat and backrest are securely attached, you can proceed to the next step: sanding and finishing.
Step 5: Sanding and Finishing
Sanding and finishing are essential steps that add the final touches to your DIY breakfast nook bench, enhancing its appearance and ensuring a smooth and polished surface. Begin by using sandpaper with a medium grit to sand the entire surface of the bench, including the seat, backrest, and frame. This step aims to remove any rough edges, uneven surfaces, or imperfections in the wood. Sand in the direction of the wood grain to achieve a uniform and professional finish.
After sanding with the medium grit sandpaper, switch to a finer grit to further smooth the wood and prepare it for the finishing process. Focus on achieving a consistent texture and eliminating any remaining blemishes. Be thorough in your sanding to create a surface that is not only visually appealing but also comfortable to the touch.
Once the sanding process is complete, it's time to apply the chosen finish to the bench. Whether you opt for a wood stain, paint, or clear sealant, ensure that the finish complements the overall aesthetic of your kitchen or dining area. Use a paintbrush or roller to apply the finish evenly, covering the entire surface of the bench. Pay attention to any intricate details or decorative elements, ensuring that the finish enhances the natural beauty of the wood.
Allow the finish to dry completely according to the manufacturer's instructions. Depending on the type of finish used, this may involve applying multiple coats and allowing sufficient drying time between each coat. Once the finish has dried, inspect the bench for any areas that may require additional touch-ups or refinishing.
Sanding and finishing not only contribute to the visual appeal of the bench but also serve to protect the wood from moisture, wear, and tear. By investing time and effort into this step, you'll ensure that your DIY breakfast nook bench remains a stunning and durable addition to your home for years to come. With the sanding and finishing process complete, you're now ready to add the final decorative elements to your cozy seating area.
Step 6: Adding Cushions and Pillows
After completing the construction and finishing of your DIY breakfast nook bench, the final step involves adding cushions and pillows to enhance comfort and style. The addition of cushions and pillows not only provides a cozy seating experience but also allows you to infuse personality and color into the space.
Begin by selecting cushions and pillows that complement the overall design and color scheme of your kitchen or dining area. Consider the dimensions of the bench seat and backrest to ensure that the cushions fit comfortably and securely. Opt for high-quality, durable fabrics that are easy to clean and maintain, especially if the bench will be frequently used.
Place the seat cushion on the bench, ensuring that it aligns with the edges and provides ample support. Depending on your preference, you can choose a single large cushion or multiple smaller cushions to cover the seat. For the backrest, select pillows that offer both comfort and lumbar support, enhancing the ergonomic design of the bench.
To prevent the cushions from shifting or sliding, consider using non-slip pads or Velcro strips to secure them in place. This will ensure that the cushions remain neatly arranged and provide consistent comfort for anyone seated on the bench.
In addition to comfort, the cushions and pillows present an opportunity to introduce decorative elements to the seating area. Choose fabrics, patterns, and textures that complement the overall aesthetic of the space, adding a touch of warmth and charm to your breakfast nook.
By adding cushions and pillows to your DIY breakfast nook bench, you'll create an inviting and comfortable space for enjoying meals, engaging in conversations, or simply relaxing. The combination of functional seating and stylish accessories will transform your kitchen or dining area into a welcoming and cozy environment for family and guests. With this final step completed, step back and admire your handiwork as you enjoy the delightful ambiance of your newly constructed breakfast nook bench.
Conclusion
Congratulations on successfully completing the construction of your DIY breakfast nook bench! By following this step-by-step guide, you've not only created a functional and inviting seating area but also honed your woodworking skills. Your dedication and craftsmanship have resulted in a charming addition to your home, where family and friends can gather and enjoy memorable moments.
As you reflect on the journey from planning and measuring to adding the final decorative touches, take pride in the effort and attention to detail that went into building your breakfast nook bench. The satisfaction of crafting a piece of furniture that enhances your living space is truly rewarding.
With your new cozy seating area in place, you've not only added practical value to your home but also infused it with your personal touch. Whether it's savoring breakfast with loved ones or unwinding with a good book, your DIY breakfast nook bench is sure to be a cherished feature of your home for years to come.
As you embark on future DIY projects, may the skills and creativity you've cultivated in this endeavor continue to inspire and bring joy to your home improvement pursuits. Keep exploring, building, and transforming your living space with the passion and ingenuity that make DIY projects such a fulfilling endeavor.