
Home>Create & Decorate>DIY & Crafts>DIY Bookshelf: How To Build Your Own Stylish Storage Solution
DIY & Crafts
DIY Bookshelf: How To Build Your Own Stylish Storage Solution
Published: February 27, 2024

Senior Editor in Create & Decorate, Kathryn combines traditional craftsmanship with contemporary trends. Her background in textile design and commitment to sustainable crafts inspire both content and community.
Discover step-by-step instructions for creating a stylish DIY bookshelf as a practical and decorative storage solution for your home. Explore the best DIY & Crafts techniques to build your own unique piece.
(Many of the links in this article redirect to a specific reviewed product. Your purchase of these products through affiliate links helps to generate commission for Twigandthistle.com, at no extra cost. Learn more)
Introduction
Welcome to the world of do-it-yourself (DIY) woodworking, where creativity meets functionality. Building your own bookshelf is not only a rewarding and practical endeavor, but it also allows you to customize a stylish storage solution that perfectly fits your space and personal aesthetic. Whether you're a seasoned DIY enthusiast or a newcomer to the craft, this step-by-step guide will empower you to create a beautiful bookshelf that showcases your woodworking skills.
A DIY bookshelf is more than just a piece of furniture; it's a statement of craftsmanship and individuality. By embarking on this project, you have the opportunity to transform raw materials into a functional work of art that will proudly display your favorite books, decorative items, and cherished mementos. As you delve into the world of DIY woodworking, you'll discover the joy of bringing your vision to life through hands-on construction and design.
Throughout this guide, you'll learn how to select the right materials, accurately measure and cut wood, assemble a sturdy frame, add shelves for storage, and apply a professional finish. Additionally, we'll explore the final touches and styling options that will elevate your DIY bookshelf from a simple storage unit to a focal point of your living space.
Whether you're seeking to maximize storage in a cozy apartment, add a touch of rustic charm to a country home, or create a modern statement piece for a contemporary living room, this DIY bookshelf project can be tailored to suit your specific needs and preferences. With a bit of creativity, patience, and the right tools, you'll soon be on your way to constructing a stylish and functional bookshelf that reflects your unique style and woodworking prowess.
So, roll up your sleeves, gather your tools, and let's embark on this woodworking adventure together. Get ready to unleash your creativity and craftsmanship as we guide you through the process of building your very own DIY bookshelf.
Step 1: Gather Your Materials
Before diving into the construction of your DIY bookshelf, it's essential to gather all the necessary materials and tools. By ensuring that you have everything at hand, you'll streamline the building process and minimize interruptions. Here's a comprehensive list of materials and tools you'll need for this project:
Materials:
- Wood: Select high-quality lumber that suits your design preferences and fits the dimensions of your desired bookshelf. Common options include pine, oak, or plywood. Ensure that the wood is straight, smooth, and free from defects.
- Wood Screws: Choose screws of appropriate length and gauge to securely fasten the components of the bookshelf frame and shelves.
- Wood Glue: Opt for a strong, reliable wood glue to reinforce the joints and enhance the structural integrity of the bookshelf.
- Wood Filler: This will come in handy for filling any gaps, cracks, or imperfections in the wood before applying the finish.
- Sandpaper: Invest in a variety of grits, including coarse and fine sandpaper, to smooth the wood surfaces and prepare them for finishing.
- Finish: Whether you prefer paint, stain, or a clear sealant, choose a finish that complements your decor and protects the wood from wear and tear.
- Optional Accessories: Depending on your design, you may want to include decorative hardware, such as knobs or pulls, to add a personalized touch to your bookshelf.
Tools:
- Measuring Tape: A reliable measuring tape is essential for accurately determining the dimensions of the bookshelf components.
- Saw: Depending on your preference and the type of wood you're using, you may need a circular saw, miter saw, or handsaw for cutting the wood to size.
- Drill: A power drill with a set of drill bits will be indispensable for creating pilot holes and driving screws into the wood.
- Screwdriver: Ensure you have both a manual screwdriver and screwdriver bits for your drill to facilitate the assembly process.
- Clamps: These will help hold the wood pieces together securely while the glue dries and when assembling the frame.
- Safety Gear: Prioritize safety by wearing protective goggles, a dust mask, and hearing protection when working with power tools and wood.
By gathering these materials and tools, you'll be well-prepared to embark on the construction of your DIY bookshelf. With everything in place, you can proceed to the next step with confidence, knowing that you have the essentials to bring your woodworking vision to life.
Step 2: Measure and Cut Your Wood
Accurate measurements and precise cuts are crucial for the successful construction of your DIY bookshelf. Before you begin cutting the wood, take the time to carefully measure and mark each piece according to your design specifications. This meticulous approach will ensure that the components fit together seamlessly, resulting in a sturdy and visually appealing bookshelf.
Start by referring to your detailed plans or design sketches to determine the dimensions of the bookshelf's frame and shelves. Using a measuring tape, measure the length, width, and thickness of the wood pieces required for the frame and shelves. Double-check your measurements to avoid errors that could compromise the overall structure of the bookshelf.
Once you have accurately measured the wood, use a pencil and a square to mark the cutting lines. Ensure that the lines are straight and clearly visible, as they will serve as your guide during the cutting process. Whether you're using a circular saw, miter saw, or handsaw, align the blade with the cutting lines and proceed with confidence, maintaining a steady hand to achieve clean and precise cuts.
When cutting the wood, prioritize safety by following proper procedures and using appropriate safety gear. If you're using a power saw, position the wood securely on a stable surface and maintain a firm grip as you guide the saw along the cutting lines. For added precision, consider using clamps to secure the wood in place before making the cuts.
After cutting each piece of wood, take a moment to inspect the edges for any roughness or splinters. Use sandpaper to smooth the cut edges, ensuring that they are free from imperfections and ready for assembly. By taking the time to measure and cut your wood with precision, you'll set the foundation for a well-constructed bookshelf that reflects your attention to detail and craftsmanship.
As you progress through this step, maintain a methodical approach and double-check your measurements and cuts to guarantee the accuracy of each component. With the wood pieces cut to the correct dimensions, you'll be ready to move on to the next phase of assembling the frame, bringing you one step closer to completing your DIY bookshelf.
Step 3: Assemble the Frame
With the wood pieces cut to precision, it's time to bring the frame of your DIY bookshelf to life. Assembling the frame is a pivotal step that lays the groundwork for the overall stability and structural integrity of the bookshelf. By following a systematic approach and utilizing the right techniques, you'll create a robust frame that forms the backbone of your stylish storage solution.
Begin by arranging the cut wood pieces according to your design layout. Whether you're constructing a simple, open-frame bookshelf or a more intricate design with dividers and compartments, ensure that the pieces are organized in a clear and accessible manner. This preparatory step will streamline the assembly process and minimize confusion as you progress.
Next, apply wood glue along the edges of the wood pieces that will form the frame. The wood glue will act as a strong adhesive, bonding the joints together and reinforcing the overall stability of the frame. As you join the pieces, use clamps to hold them securely in place, allowing the wood glue to set and create a firm bond. This step is crucial for ensuring that the frame is solid and capable of supporting the weight of the shelves and contents.
Once the wood glue has dried and the joints are securely bonded, it's time to reinforce the frame further by driving wood screws into the assembled joints. Pre-drill pilot holes to prevent the wood from splitting, and then carefully drive the screws into place using a drill or screwdriver. This additional reinforcement will fortify the frame, providing extra strength and durability to withstand the demands of everyday use.
As you progress through the assembly process, periodically check for squareness and alignment to ensure that the frame is true and level. Making adjustments as needed will result in a well-balanced and visually appealing frame that forms the foundation of your DIY bookshelf.
By methodically assembling the frame with precision and attention to detail, you'll establish a sturdy and reliable structure that sets the stage for the next phase of adding shelves. With the frame securely in place, you're one step closer to completing your DIY bookshelf and witnessing your woodworking vision come to fruition.
Step 4: Add Shelves
With the frame of your DIY bookshelf securely assembled, it's time to introduce the shelves that will transform it into a functional storage unit. Adding shelves not only enhances the practicality of the bookshelf but also contributes to its aesthetic appeal, providing designated spaces to showcase books, decor, and personal belongings. By following a systematic approach and paying attention to detail, you'll create well-structured and visually pleasing shelving that complements the overall design of your bookshelf.
Begin by determining the desired placement of the shelves within the frame. Whether you opt for evenly spaced shelves or a customized configuration to accommodate varying heights of items, take the time to visualize the layout and mark the positions where the shelves will be installed. Using a measuring tape and a level, ensure that the markings are accurate and aligned to maintain a balanced and harmonious appearance.
Next, prepare the wood pieces that will serve as the shelves, ensuring that they are cut to the precise dimensions required for a snug fit within the frame. Prior to installing the shelves, consider adding decorative touches such as rounded edges or decorative trim to enhance the visual appeal of the bookshelf.
To secure the shelves in place, apply wood glue along the edges where the shelves will rest within the frame. Carefully position each shelf according to the markings, ensuring that they are level and properly aligned. Utilize clamps to hold the shelves securely in place as the wood glue sets, allowing for a strong and durable bond to form between the shelves and the frame.
For additional reinforcement, drive wood screws through the frame and into the edges of the shelves, anchoring them firmly in place. Pre-drill pilot holes to prevent the wood from splitting and then drive the screws with precision, ensuring that the shelves are securely attached and capable of supporting the weight of items placed upon them.
As you progress through this step, periodically assess the stability and alignment of the shelves to guarantee that they are level and well-integrated into the frame. Making any necessary adjustments will result in a cohesive and functional shelving arrangement that enhances the overall utility and visual appeal of your DIY bookshelf.
By methodically adding the shelves with precision and attention to detail, you'll elevate your DIY bookshelf from a simple frame to a fully functional and visually striking storage solution. With the shelves securely in place, you're one step closer to completing your woodworking project and enjoying the satisfaction of a well-crafted and personalized bookshelf.
Step 5: Sand and Finish
After assembling the frame and adding the shelves, the next crucial step in creating a stunning DIY bookshelf is to sand the wood surfaces and apply a professional finish. Sanding serves to smooth out any rough edges, imperfections, or uneven surfaces, while the finishing process enhances the natural beauty of the wood and provides protection against wear and tear.
Begin by using coarse-grit sandpaper to gently sand the entire surface of the bookshelf, focusing on areas where the wood may be rough or uneven. This initial sanding stage helps to remove any splinters, rough patches, or excess wood filler, resulting in a smoother and more refined surface. As you progress, transition to finer-grit sandpaper to achieve a silky-smooth finish, paying attention to detail and ensuring that all surfaces are uniformly sanded.
Once the sanding process is complete, carefully remove any dust and debris from the wood surfaces using a clean, dry cloth or a tack cloth. This preparatory step is essential for ensuring that the wood is clean and free from any particles that could affect the application of the finish.
When selecting a finish for your DIY bookshelf, consider your design aesthetic and the level of protection you desire for the wood. Options include paint, wood stain, or a clear sealant. If you prefer a natural look that showcases the wood's grain and color, a clear sealant or wood oil may be the ideal choice. Alternatively, if you wish to add a pop of color or create a specific aesthetic, paint or wood stain can provide a personalized touch.
Apply the chosen finish evenly to the wood surfaces, following the manufacturer's instructions regarding application and drying times. Whether using a brush, roller, or cloth, ensure that the finish is spread smoothly and uniformly, allowing the wood's natural beauty to shine through. Multiple coats may be necessary to achieve the desired level of coverage and protection, so exercise patience and attention to detail during the application process.
As the finish dries, inspect the bookshelf for any unevenness or imperfections, addressing them promptly to ensure a flawless final result. Once the finish has fully cured, admire the transformation of the wood, reveling in the enhanced beauty and durability of your DIY bookshelf.
By meticulously sanding and applying a professional finish, you'll elevate your DIY bookshelf to a new level of sophistication and craftsmanship. The smooth, lustrous surfaces and protective coating will not only enhance the visual appeal of the bookshelf but also ensure its longevity and resilience in everyday use. With the sanding and finishing process complete, your DIY bookshelf is ready to take its place as a stylish and functional centerpiece in your living space.
Step 6: Final Touches and Styling
With the construction and finishing of the DIY bookshelf complete, the final step involves adding personal touches and styling elements to elevate its visual appeal and ensure it seamlessly integrates into your living space. This phase allows you to infuse your unique personality and design preferences into the bookshelf, transforming it from a functional piece of furniture into a captivating focal point.
Consider incorporating decorative elements such as ornamental trim, beveled edges, or routed details to add a touch of sophistication to the bookshelf. These embellishments can enhance the overall aesthetic and create a sense of refinement, elevating the bookshelf from a simple storage unit to a statement piece that reflects your attention to detail.
Furthermore, the choice of hardware, such as knobs, pulls, or handles, presents an opportunity to customize the bookshelf to align with your decor style. Whether you opt for sleek and modern hardware or prefer vintage-inspired accents, selecting the right hardware can impart a sense of cohesiveness and personality to the bookshelf, tying it into the existing design scheme of your space.
Incorporating lighting elements, such as LED strip lights or discreet spotlights, can accentuate the bookshelf and draw attention to its contents, creating a visually striking display. Strategic lighting not only enhances the ambiance of the space but also showcases the items on the shelves, adding depth and dimension to the overall aesthetic.
To further personalize the bookshelf, consider arranging books, decorative objects, and keepsakes in a visually appealing manner. By curating the items displayed on the shelves, you can create an inviting and dynamic composition that reflects your interests and style. Experiment with different arrangements, varying heights, and complementary colors to achieve a balanced and visually captivating display.
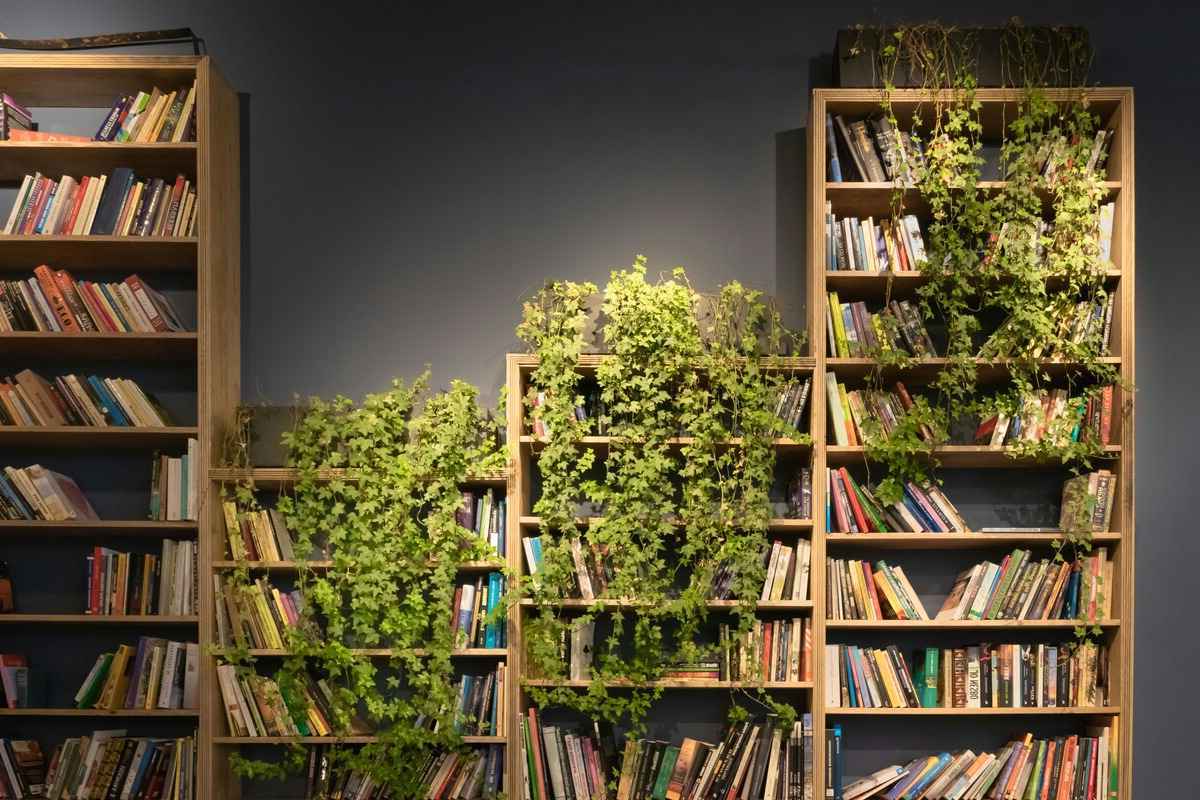
Additionally, integrating greenery, such as potted plants or succulents, can infuse a touch of nature into the bookshelf, adding vibrancy and texture to the overall design. The presence of greenery not only enlivens the space but also contributes to a sense of harmony and warmth, creating a welcoming atmosphere.
By paying attention to these final touches and styling details, you can transform your DIY bookshelf into a personalized and visually stunning addition to your home. The thoughtful integration of decorative elements, hardware, lighting, and curated displays will imbue the bookshelf with character and charm, making it a reflection of your individual style and creativity.
Conclusion
Congratulations on successfully completing the construction of your DIY bookshelf! Through meticulous planning, precise woodworking techniques, and a creative touch, you have transformed raw materials into a stylish and functional storage solution that reflects your craftsmanship and individuality.
As you reflect on the journey from gathering materials to adding the final styling touches, it's evident that your dedication and attention to detail have culminated in the creation of a truly unique piece of furniture. Your DIY bookshelf not only serves as a practical storage unit but also stands as a testament to your woodworking skills and creative vision.
By embarking on this woodworking adventure, you have not only expanded your DIY repertoire but also gained a deeper appreciation for the art of crafting functional and visually appealing furniture. The process of measuring, cutting, assembling, and finishing the bookshelf has provided valuable hands-on experience and a sense of accomplishment that comes with bringing a project to fruition.
As you admire the completed bookshelf in its designated space, take pride in the fact that you have personalized your living environment with a piece that is a reflection of your style and ingenuity. The DIY bookshelf stands as a symbol of your ability to transform ideas into tangible creations, adding a touch of warmth and character to your home.
Moving forward, the skills and knowledge gained from this project will continue to inspire future DIY endeavors, whether it involves woodworking, home improvement, or creative pursuits. The confidence and satisfaction derived from building your own bookshelf serve as a reminder of the endless possibilities that come with embracing the world of hands-on craftsmanship.
As you enjoy the functionality and visual appeal of your DIY bookshelf, may it also serve as a source of inspiration for others to embark on their own woodworking journeys. Your creation stands as a testament to the joy of DIY craftsmanship and the fulfillment that comes with bringing a vision to life through dedication and creativity.
With your DIY bookshelf proudly on display, you have not only added a practical and stylish piece of furniture to your home but also enriched your surroundings with a touch of your own personality and skill. Embrace the sense of accomplishment and the satisfaction of a job well done, knowing that your DIY bookshelf is a testament to your creativity and craftsmanship.