
Home>Create & Decorate>DIY & Crafts>Baking Soda Volcano: A Fun And Easy DIY Craft Project
DIY & Crafts
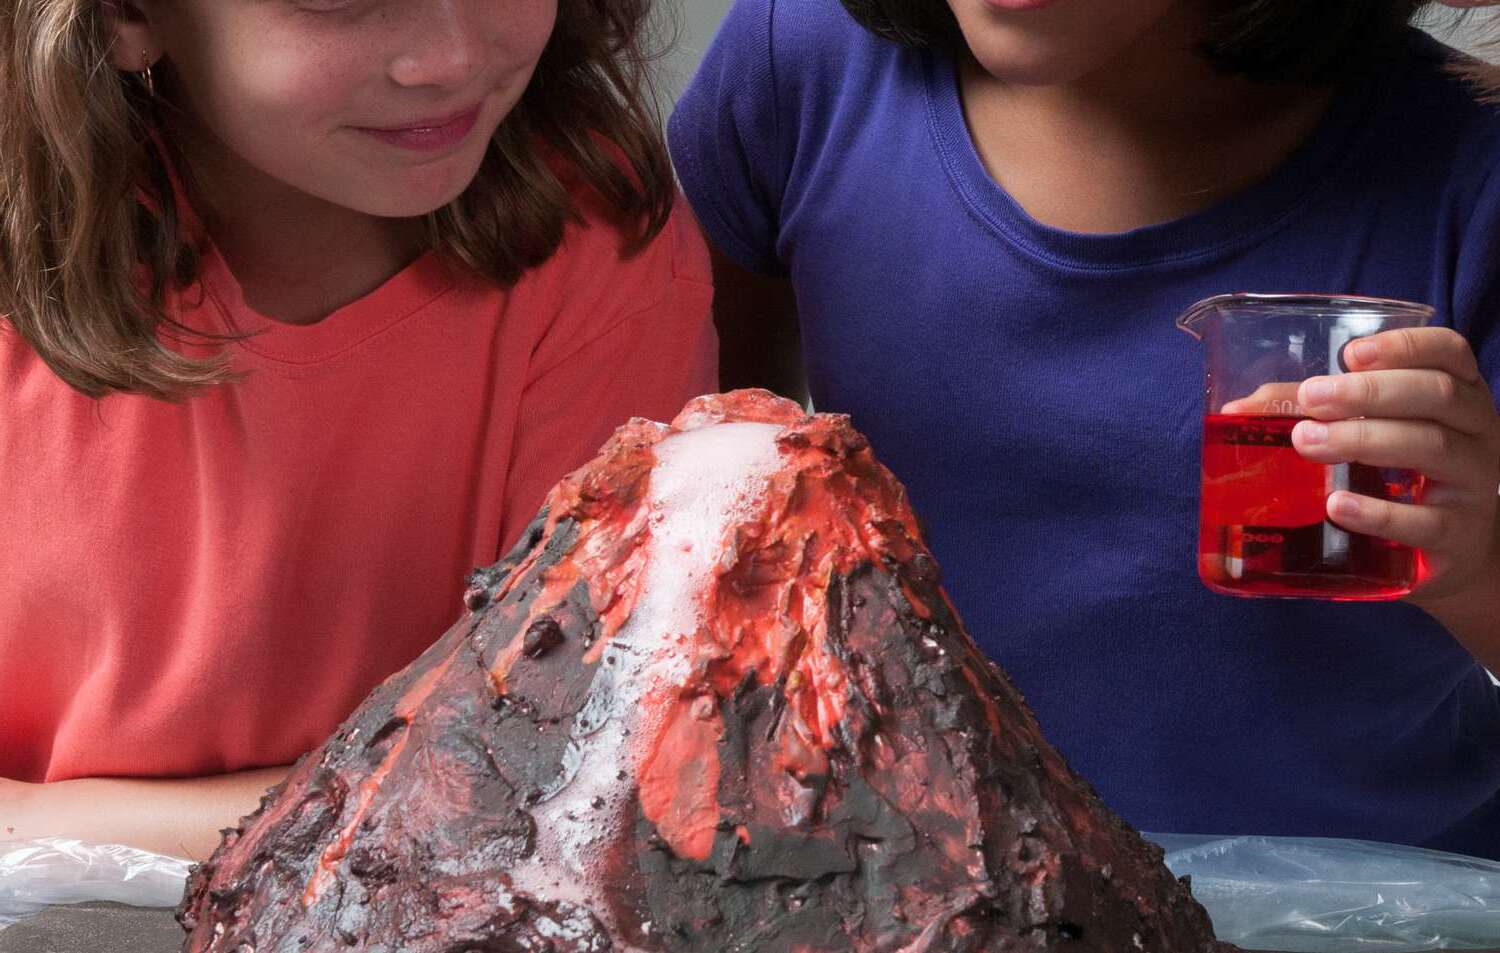
Baking Soda Volcano: A Fun And Easy DIY Craft Project
Published: May 24, 2024

Content Creator specializing in woodworking and interior transformations. Caegan's guides motivate readers to undertake their own projects, while his custom furniture adds a personal touch.
Create a DIY baking soda volcano for a fun and educational craft project. Perfect for kids and adults alike. Learn how to make it now!
(Many of the links in this article redirect to a specific reviewed product. Your purchase of these products through affiliate links helps to generate commission for Twigandthistle.com, at no extra cost. Learn more)
Introduction
Are you looking for a fun and educational DIY craft project to do with your kids? Look no further than the baking soda volcano! This classic experiment is not only entertaining but also a great way to teach children about chemical reactions in a hands-on and exciting way. By creating a miniature volcano that erupts with the help of simple household ingredients, you can turn an ordinary afternoon into a memorable and educational experience for the whole family. So, gather your supplies and get ready to make a mess (in a controlled and fun way, of course) with this exciting baking soda volcano project!
Materials Needed
To get started on your baking soda volcano project, you'll need a few basic materials that you likely already have in your kitchen or can easily find at a grocery or convenience store. Here's what you'll need:
- Baking Soda: This will be the main ingredient that creates the "lava" in your volcano eruption.
- Vinegar: When combined with the baking soda, vinegar creates a chemical reaction that produces the fizzing and bubbling effect of the eruption.
- Dish Soap: Adding a small amount of dish soap to the mixture can create a foamy and realistic lava flow.
- Food Coloring: To make your volcano eruption visually appealing, choose a food coloring that resembles lava, such as red, orange, or yellow.
- Water: You'll need water to create the right consistency for your "lava" mixture.
- Container: Use a small plastic bottle or a cup to build the structure of your volcano.
- Modeling Clay or Playdough: This will be used to mold the shape of the volcano around the container.
- Optional Decorations: If you want to add some extra flair to your volcano, consider using rocks, small plants, or other decorative elements to create a more realistic scene.
Gather these materials, and you'll be well on your way to creating an impressive and exciting baking soda volcano!
Step-by-Step Instructions
-
Prepare the Volcano Structure: Start by placing your small plastic bottle or cup in the center of a tray or a flat surface. Use modeling clay or playdough to mold and shape the volcano around the container. Build up the clay to create a cone shape, resembling a real volcano. Be creative and add texture to the clay to make it look more realistic.
-
Mix the Eruption Ingredients: In a separate container, mix together 1-2 tablespoons of baking soda, a few drops of dish soap, and a few drops of food coloring. Add a small amount of water to create a thick, but pourable, consistency. Stir the mixture until the ingredients are well combined.
-
Prepare for Eruption: Once the volcano structure and eruption mixture are ready, carefully move the volcano to a location where you can make a bit of a mess. Place the tray or a large bowl under the volcano to catch any overflow during the eruption.
-
Erupt the Volcano: Pour the prepared eruption mixture into the plastic bottle or cup at the center of the volcano structure. Quickly pour in some vinegar, and watch as the chemical reaction causes the eruption! The baking soda and vinegar will react, creating a foamy and colorful lava flow that spills down the sides of the volcano.
-
Repeat and Experiment: After the initial eruption, feel free to repeat the process and experiment with different amounts of baking soda, vinegar, and food coloring to see how it affects the eruption. You can also try using different types of containers and eruption mixtures to create various volcanic effects.
-
Clean Up: Once you've finished with the eruptions, make sure to clean up any spills and dispose of the materials properly. The baking soda and vinegar mixture is safe and non-toxic, but it's always a good idea to clean up after your DIY project.
By following these step-by-step instructions, you can create an exciting and visually stunning baking soda volcano that will entertain and educate both kids and adults alike. Get ready to witness the explosive power of a chemical reaction right in your own home!
Safety Precautions
When conducting the baking soda volcano experiment, it's essential to prioritize safety to ensure a fun and risk-free experience for everyone involved. Here are some important safety precautions to keep in mind:
-
Protective Eyewear: While the materials used in the experiment are generally safe, it's a good idea to wear protective eyewear, especially for the person conducting the eruption. This precaution can help prevent any accidental splashes or spills from coming into contact with the eyes.
-
Supervision: If children are participating in the project, adult supervision is crucial. Ensure that an adult is present to oversee the experiment and guide the kids through the process. This will help prevent any mishaps and ensure that the activity remains safe and enjoyable.
-
Ventilation: The chemical reaction between baking soda and vinegar produces carbon dioxide, which can cause mild irritation if inhaled in large quantities. Conduct the experiment in a well-ventilated area to allow any gases produced during the eruption to disperse safely.
-
Skin Protection: While the materials used are non-toxic, it's a good practice to protect the skin, especially if anyone has sensitive skin or allergies. Wearing gloves can help prevent any potential irritation from handling the ingredients.
By following these safety precautions, you can ensure that the baking soda volcano experiment is not only entertaining but also conducted in a safe and responsible manner. With the right safety measures in place, everyone can enjoy the excitement of creating a mini volcanic eruption without any unnecessary risks.
Tips for Making the Volcano Erupt
-
Experiment with Ratios: Adjust the amount of baking soda and vinegar to achieve the desired eruption height and duration. More baking soda will result in a larger eruption, while varying the vinegar quantity can control the speed and intensity of the reaction.
-
Use Warm Water: Using warm water to mix with the baking soda can help it dissolve more effectively, leading to a smoother and more consistent eruption.
-
Create Multiple Eruptions: Set up multiple volcanoes and conduct simultaneous eruptions to create a spectacular and immersive experience. This can be especially exciting for group activities or science fairs.
-
Add Glitter or Sequins: For an extra touch of visual appeal, consider adding glitter or sequins to the eruption mixture. This can create a sparkling and mesmerizing lava effect that enhances the overall experience.
-
Incorporate Scented Oils: Enhance the sensory experience by adding a drop of scented oil to the eruption mixture. Choose a fragrance that complements the theme, such as tropical fruit for a vibrant lava color or a smoky scent for a more realistic volcanic atmosphere.
-
Capture the Eruption on Camera: Document the eruptions by capturing photos or videos. This not only preserves the memories but also allows for further analysis and discussion of the chemical reactions involved.
-
Discuss the Science Behind It: Take the opportunity to explain the science behind the eruption to children, discussing concepts such as chemical reactions, gas production, and the role of acids and bases. This can turn the activity into an educational experience that fosters curiosity and learning.
-
Encourage Creativity: Encourage participants to get creative with their volcano designs and eruption mixtures. This can inspire imaginative and unique interpretations of volcanic activity, fostering a sense of individuality and artistic expression.
By incorporating these tips, you can elevate the baking soda volcano project into an engaging and memorable experience that combines scientific exploration with creative expression. Get ready to unleash the power of the baking soda volcano and witness the awe-inspiring eruptions!
Conclusion
In conclusion, the baking soda volcano project offers an exciting and educational way to explore the science of chemical reactions while unleashing creativity. By following the step-by-step instructions and incorporating safety precautions, you can create a visually stunning eruption that captivates both kids and adults. With the flexibility to experiment with different ratios, additives, and visual enhancements, the baking soda volcano becomes a customizable and engaging DIY craft project. Whether it's for a family activity, a school science experiment, or a fun gathering with friends, the baking soda volcano is sure to leave a lasting impression and spark curiosity about the wonders of science. So, gather your materials, unleash your imagination, and get ready to make your very own baking soda volcano erupt in a spectacular display of fizzy, foamy, and colorful lava flow!