
Home>Organize & Storage>Closet Organization>How to Transform Spare Room into DIY Closet
Closet Organization
How to Transform Spare Room into DIY Closet
Published: September 5, 2024
Transform your spare room into a stylish DIY closet with our step-by-step guide. Maximize space, organize efficiently, and create a personalized wardrobe haven.
(Many of the links in this article redirect to a specific reviewed product. Your purchase of these products through affiliate links helps to generate commission for Twigandthistle.com, at no extra cost. Learn more)
Got a spare room that’s just gathering dust or crammed with random stuff? Why not turn it into a stylish DIY closet? It’s a fun project that can give you more space for your clothes, shoes, and accessories. Plus, you get to design it exactly how you want. Whether you have lots of items or just want a more organized space, this project can fit your needs. Don’t worry if you’re not a pro at home improvements—this guide will walk you through simple steps to make your dream closet a reality. Ready to get started? Let’s do this!
Getting Ready for Your DIY Closet
Measure the Space: Use a tape measure to get the dimensions of the room. Write down the height, width, and length.
Plan Layout: Sketch a rough layout of where shelves, rods, and drawers will go. Consider the types of clothes and accessories you have.
Gather Tools and Materials: Collect tools like a drill, screwdriver, level, and saw. Get materials such as wood, brackets, screws, and closet rods.
Clear the Room: Remove all furniture, decorations, and clutter. This will give you a clean slate to work with.
Safety Gear: Wear safety goggles, gloves, and a dust mask to protect yourself while working.
Mark Studs: Use a stud finder to locate wall studs. Mark them with a pencil; these will support heavy shelves.
Prep Walls: Patch any holes and sand rough spots. Consider painting the walls for a fresh look.
Set Up Workspace: Arrange tools and materials in an organized manner. Ensure good lighting and ventilation.
Cut Materials: Measure and cut wood for shelves and rods. Double-check measurements before cutting.
Install Shelves and Rods: Follow your layout plan. Use a level to ensure everything is straight. Secure shelves and rods to wall studs for stability.
Essential Materials and Tools
- Measuring Tape: Essential for measuring the dimensions of your room and ensuring everything fits perfectly.
- Pencil and Notepad: Useful for jotting down measurements and sketching your closet layout.
- Level: Ensures shelves and rods are installed straight.
- Stud Finder: Helps locate wall studs for securely mounting shelves and rods.
- Drill and Drill Bits: Necessary for making holes in the wall for screws and anchors.
- Screws and Wall Anchors: Securely attach shelves, rods, and other fixtures to the wall.
- Shelving Units: Provide storage space for folded clothes, shoes, and accessories.
- Clothing Rods: Hang clothes and maximize vertical space.
- Brackets: Support shelves and rods.
- Saw: Cut shelves and rods to the desired length.
- Sandpaper: Smooth rough edges on cut shelves and rods.
- Paint and Paintbrushes: Customize the look of your closet by painting shelves or walls.
- Storage Bins and Baskets: Organize smaller items like accessories or seasonal clothing.
- Mirror: Adds functionality and helps you see your outfit choices.
- Lighting Fixtures: Improve visibility inside your closet.
- Screwdriver: Tighten screws and assemble shelving units.
- Hammer: Useful for tapping in wall anchors or nails.
- Step Ladder: Reach higher areas safely.
- Vacuum or Broom: Clean up dust and debris after installation.
These materials and tools will help you transform your spare room into a functional and stylish DIY closet.
Required Skills and Time Commitment
Skill Level: Intermediate
Time Required: 2-3 days
- Planning and Measuring: 2-3 hours
- Shopping for Materials: 3-4 hours
- Assembling Shelving Units: 4-6 hours
- Installing Rods and Hooks: 2-3 hours
- Painting and Finishing Touches: 4-5 hours
Detailed Step-by-Step Guide
Clear the Room:
- Remove all furniture, decorations, and clutter.
- Clean the space thoroughly.
Measure the Space:
- Measure walls, floor, and ceiling.
- Note dimensions for planning.
Plan the Layout:
- Sketch a rough design.
- Decide where to place shelves, rods, and drawers.
Gather Materials:
- Purchase shelves, rods, brackets, and storage bins.
- Get tools like a drill, screws, level, and measuring tape.
Install Shelving:
- Mark where shelves will go.
- Use a level to ensure straight lines.
- Drill holes and attach brackets.
- Place shelves on brackets.
Install Hanging Rods:
- Decide rod height for long and short items.
- Mark spots for brackets.
- Drill holes and attach brackets.
- Insert rods into brackets.
Add Drawers and Bins:
- Place drawers or bins in designated spots.
- Secure them if necessary.
Organize Clothes and Accessories:
- Hang clothes on rods.
- Fold and place items in drawers or bins.
- Arrange shoes, bags, and accessories.
Add Finishing Touches:
- Install hooks for belts, scarves, or hats.
- Add a mirror or lighting if desired.
Enjoy Your New Closet:
- Step back and admire your work.
- Make adjustments as needed.
Helpful Tips and Tricks
Measure your space first. Knowing exact dimensions helps plan storage solutions. Use vertical space by installing shelves up to the ceiling. This maximizes storage without taking up floor area. Install adjustable rods for hanging clothes at different heights. This allows flexibility for long dresses or short jackets.
Common mistakes include not measuring correctly. This can lead to buying shelves or rods that don't fit. Another mistake is not considering lighting. A dark closet makes finding clothes difficult. Avoid overcrowding. Too many items make the space feel cramped and messy.
Alternatives for materials include using tension rods instead of fixed ones. They are easier to install and adjust. Instead of expensive shelving, use stackable plastic bins. They are budget-friendly and versatile. For a unique touch, repurpose old furniture like dressers or bookshelves for storage.
Estimating the Cost
Materials:
- Shelving units: $100-$300
- Clothing rods: $20-$50
- Storage bins: $30-$60
- Hooks and hangers: $15-$40
- Paint: $20-$50 per gallon
- Lighting fixtures: $50-$150
Tools:
- Drill: $40-$100
- Screwdriver set: $10-$30
- Measuring tape: $5-$15
- Level: $10-$20
- Paintbrushes/rollers: $10-$30
Total cost: $310-$895
Budget-friendly alternatives:
- Repurpose old shelves: Free or minimal cost
- Use tension rods: $10-$20
- Dollar store bins: $10-$20
- DIY hooks from nails: $5-$10
- Second-hand paint: $10-$20 per gallon
- Inexpensive LED lights: $20-$50
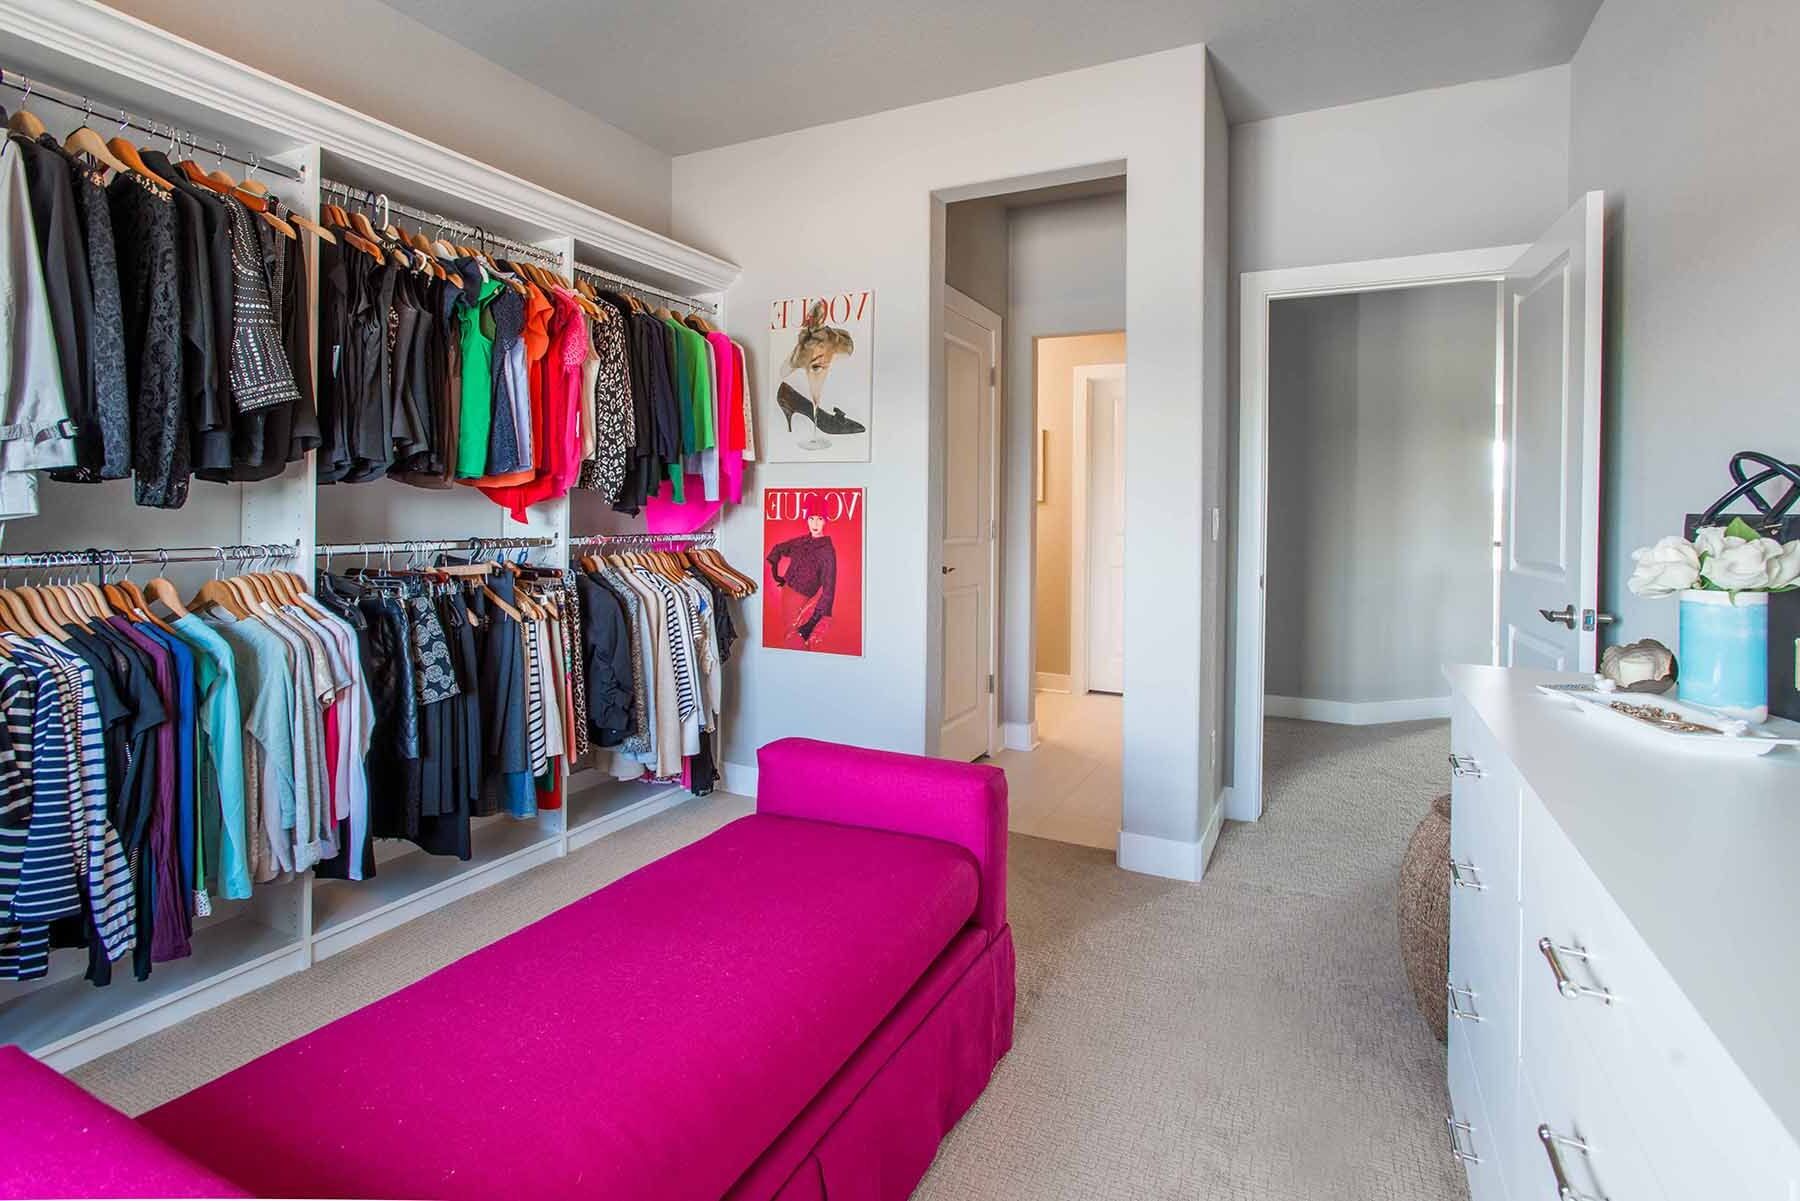
Creative Variations and Customizations
Shelving: Use wooden shelves for a classic look or metal shelves for an industrial vibe. Floating shelves can save space and look modern.
Hanging Rods: Install adjustable rods for flexibility. Use copper pipes for a trendy, rustic feel or stainless steel for a sleek appearance.
Storage Bins: Choose woven baskets for a cozy touch or clear plastic bins to easily see contents. Fabric bins add color and texture.
Lighting: Add LED strip lights for a bright, even glow. Use chandeliers for a touch of elegance or recessed lighting for a clean, unobtrusive look.
Mirrors: Install a full-length mirror for practicality. Use mirrored panels on doors to make the space feel larger.
Paint Colors: Opt for neutral tones like beige or gray for a calm atmosphere. Use bold colors like navy or emerald for a dramatic effect.
Flooring: Choose hardwood for a timeless look or carpet for added comfort. Vinyl planks can mimic wood but are more budget-friendly.
Doors: Use sliding barn doors for a rustic charm. Bi-fold doors save space, while curtains can add a soft, airy feel.
Hooks and Racks: Install decorative hooks for accessories. Use wall-mounted racks for shoes or bags.
Seating: Add a small bench for convenience. Use a plush ottoman for a touch of luxury or a simple stool for minimalism.
Decor: Incorporate artwork or photos to personalize the space. Use plants for a fresh, natural touch.
Eco-Friendly Sustainability Tips
Repurpose old furniture like dressers or bookshelves to create storage. Use reclaimed wood for shelves and racks. Paint walls with low-VOC (volatile organic compounds) paint to reduce harmful emissions. Install energy-efficient LED lighting. Opt for bamboo or cork flooring instead of traditional hardwood. Reuse old boxes or containers for organizing accessories. Thrift or buy second-hand items to reduce waste. Use fabric scraps to make drawer liners or storage bins. Recycle any leftover materials properly.
Your DIY Closet Awaits
Transforming a spare room into a DIY closet is a rewarding project. With some creativity and effort, you can create a space that’s both functional and stylish. Start by planning the layout, then gather your materials and tools. Don’t forget to measure twice before cutting anything. Shelving, hanging rods, and storage bins can make a world of difference. Personalize the space with paint, lighting, and decor that reflect your style. Remember, the key is to make it work for you. Whether you’re a fashionista with tons of clothes or just need a bit more storage, this project can be tailored to fit your needs. So grab your tools, roll up your sleeves, and get started. Your dream closet is just a few steps away. Happy building!
How much space do I need to turn a spare room into a closet?
You don't need a ton of space. Even a small room can work if you plan well. Measure your room and think about what you need to store. Shelves, hanging rods, and drawers can fit into tight spaces.
What tools will I need for this project?
Basic tools like a tape measure, level, drill, screwdriver, and a saw should do the trick. You might also need a stud finder if you're mounting heavy shelves.
How do I start planning the layout?
First, decide what you need most: hanging space, shelves, or drawers. Sketch a rough layout on paper. Think about where you want to place each item for easy access.
Can I use pre-made closet systems?
Absolutely! Pre-made systems can save time and effort. They come in various sizes and styles, so you can find one that fits your room and needs.
How do I make sure everything is sturdy?
Use wall anchors and screws to secure shelves and rods. Make sure to attach them to wall studs for extra support. Double-check everything with a level to keep it straight.
What about lighting?
Good lighting is key. Consider installing overhead lights or adding LED strips under shelves. Make sure your lighting is bright enough to see everything clearly.
How can I make it look nice?
Paint the walls a fresh color, add some decorative bins or baskets, and maybe even a rug. Mirrors can make the space look bigger and help you check your outfits.