
Home>Home & Furniture>Roof>How to Install DIY Metal Roof Snow Guards
Roof
How to Install DIY Metal Roof Snow Guards
Published: August 21, 2024
Learn how to install DIY metal roof snow guards with our step-by-step guide. Ensure your roof's safety and prevent snow damage with these easy-to-follow instructions.
(Many of the links in this article redirect to a specific reviewed product. Your purchase of these products through affiliate links helps to generate commission for Twigandthistle.com, at no extra cost. Learn more)
Winter can bring beautiful snowy landscapes, but snow on a metal roof can be a hazard. Installing snow guards is a smart way to prevent large amounts of snow from sliding off your roof, which can cause damage or injury. Luckily, installing these guards is a project you can do yourself with some basic tools and a bit of patience. In this guide, we'll walk you through the steps needed to install metal roof snow guards. Whether you’re a seasoned DIYer or a beginner, you’ll find the instructions clear, straightforward, and easy to follow. Let's get started!
Getting Ready for the Project
Gather Materials: Collect snow guards, screws, drill, measuring tape, ladder, safety harness, and gloves.
Check Weather: Ensure a clear, dry day to avoid slippery surfaces.
Inspect Roof: Look for any damage or weak spots that need fixing before installation.
Measure and Mark: Use measuring tape to mark where each snow guard will go. Space them evenly for best results.
Set Up Workspace: Place tools and materials within easy reach. Ensure the ladder is stable and on solid ground.
Wear Safety Gear: Put on gloves, a safety harness, and non-slip shoes to prevent accidents.
Drill Pilot Holes: Pre-drill holes where the snow guards will be attached. This makes screwing them in easier and prevents metal from cracking.
Install Snow Guards: Secure each guard with screws, making sure they are tight and properly aligned.
Double-Check Work: Ensure all guards are firmly attached and there are no loose screws.
Clean Up: Remove any debris or leftover materials from the roof and surrounding area.
What You Need: Materials and Tools
Snow Guards: These are the main components that prevent snow from sliding off the roof. Choose ones compatible with your metal roof type.
Screws: Use stainless steel or galvanized screws to secure the snow guards. They resist rust and provide long-lasting durability.
Sealant: A high-quality roofing sealant ensures a watertight installation. It prevents leaks around the screws.
Measuring Tape: Accurate measurements are crucial for even spacing of the snow guards. A sturdy measuring tape helps achieve this.
Marker: Use a permanent marker to mark the spots where the snow guards will be installed. This ensures precise placement.
Drill: A power drill with the appropriate bit size makes it easier to drive screws into the metal roof.
Ladder: A stable ladder provides safe access to the roof. Ensure it’s tall enough to reach comfortably.
Safety Gear: Wear gloves, safety glasses, and non-slip shoes to protect yourself while working on the roof.
Level: A small level helps ensure the snow guards are installed straight. This maintains both function and appearance.
Wrench or Socket Set: These tools tighten the screws securely. They ensure the snow guards stay in place during heavy snowfalls.
How Much Skill and Time You Need
Skill Level: Intermediate
Time Required: 3-5 hours
- Measure and Mark: 30 minutes
- Gather Tools and Materials: 15 minutes
- Install Brackets: 1-2 hours
- Attach Snow Guards: 1-2 hours
- Inspect and Adjust: 15-30 minutes
Follow These Steps
Gather Materials and Tools
- Snow guards
- Screws or adhesive
- Drill
- Measuring tape
- Marker
- Ladder
- Safety gear (gloves, harness)
Measure and Mark Placement
- Use the measuring tape to find the correct spacing for the snow guards.
- Mark spots where each snow guard will go. Typically, place them in staggered rows.
Prepare the Roof
- Clean the areas where the snow guards will be installed. Remove any dirt or debris.
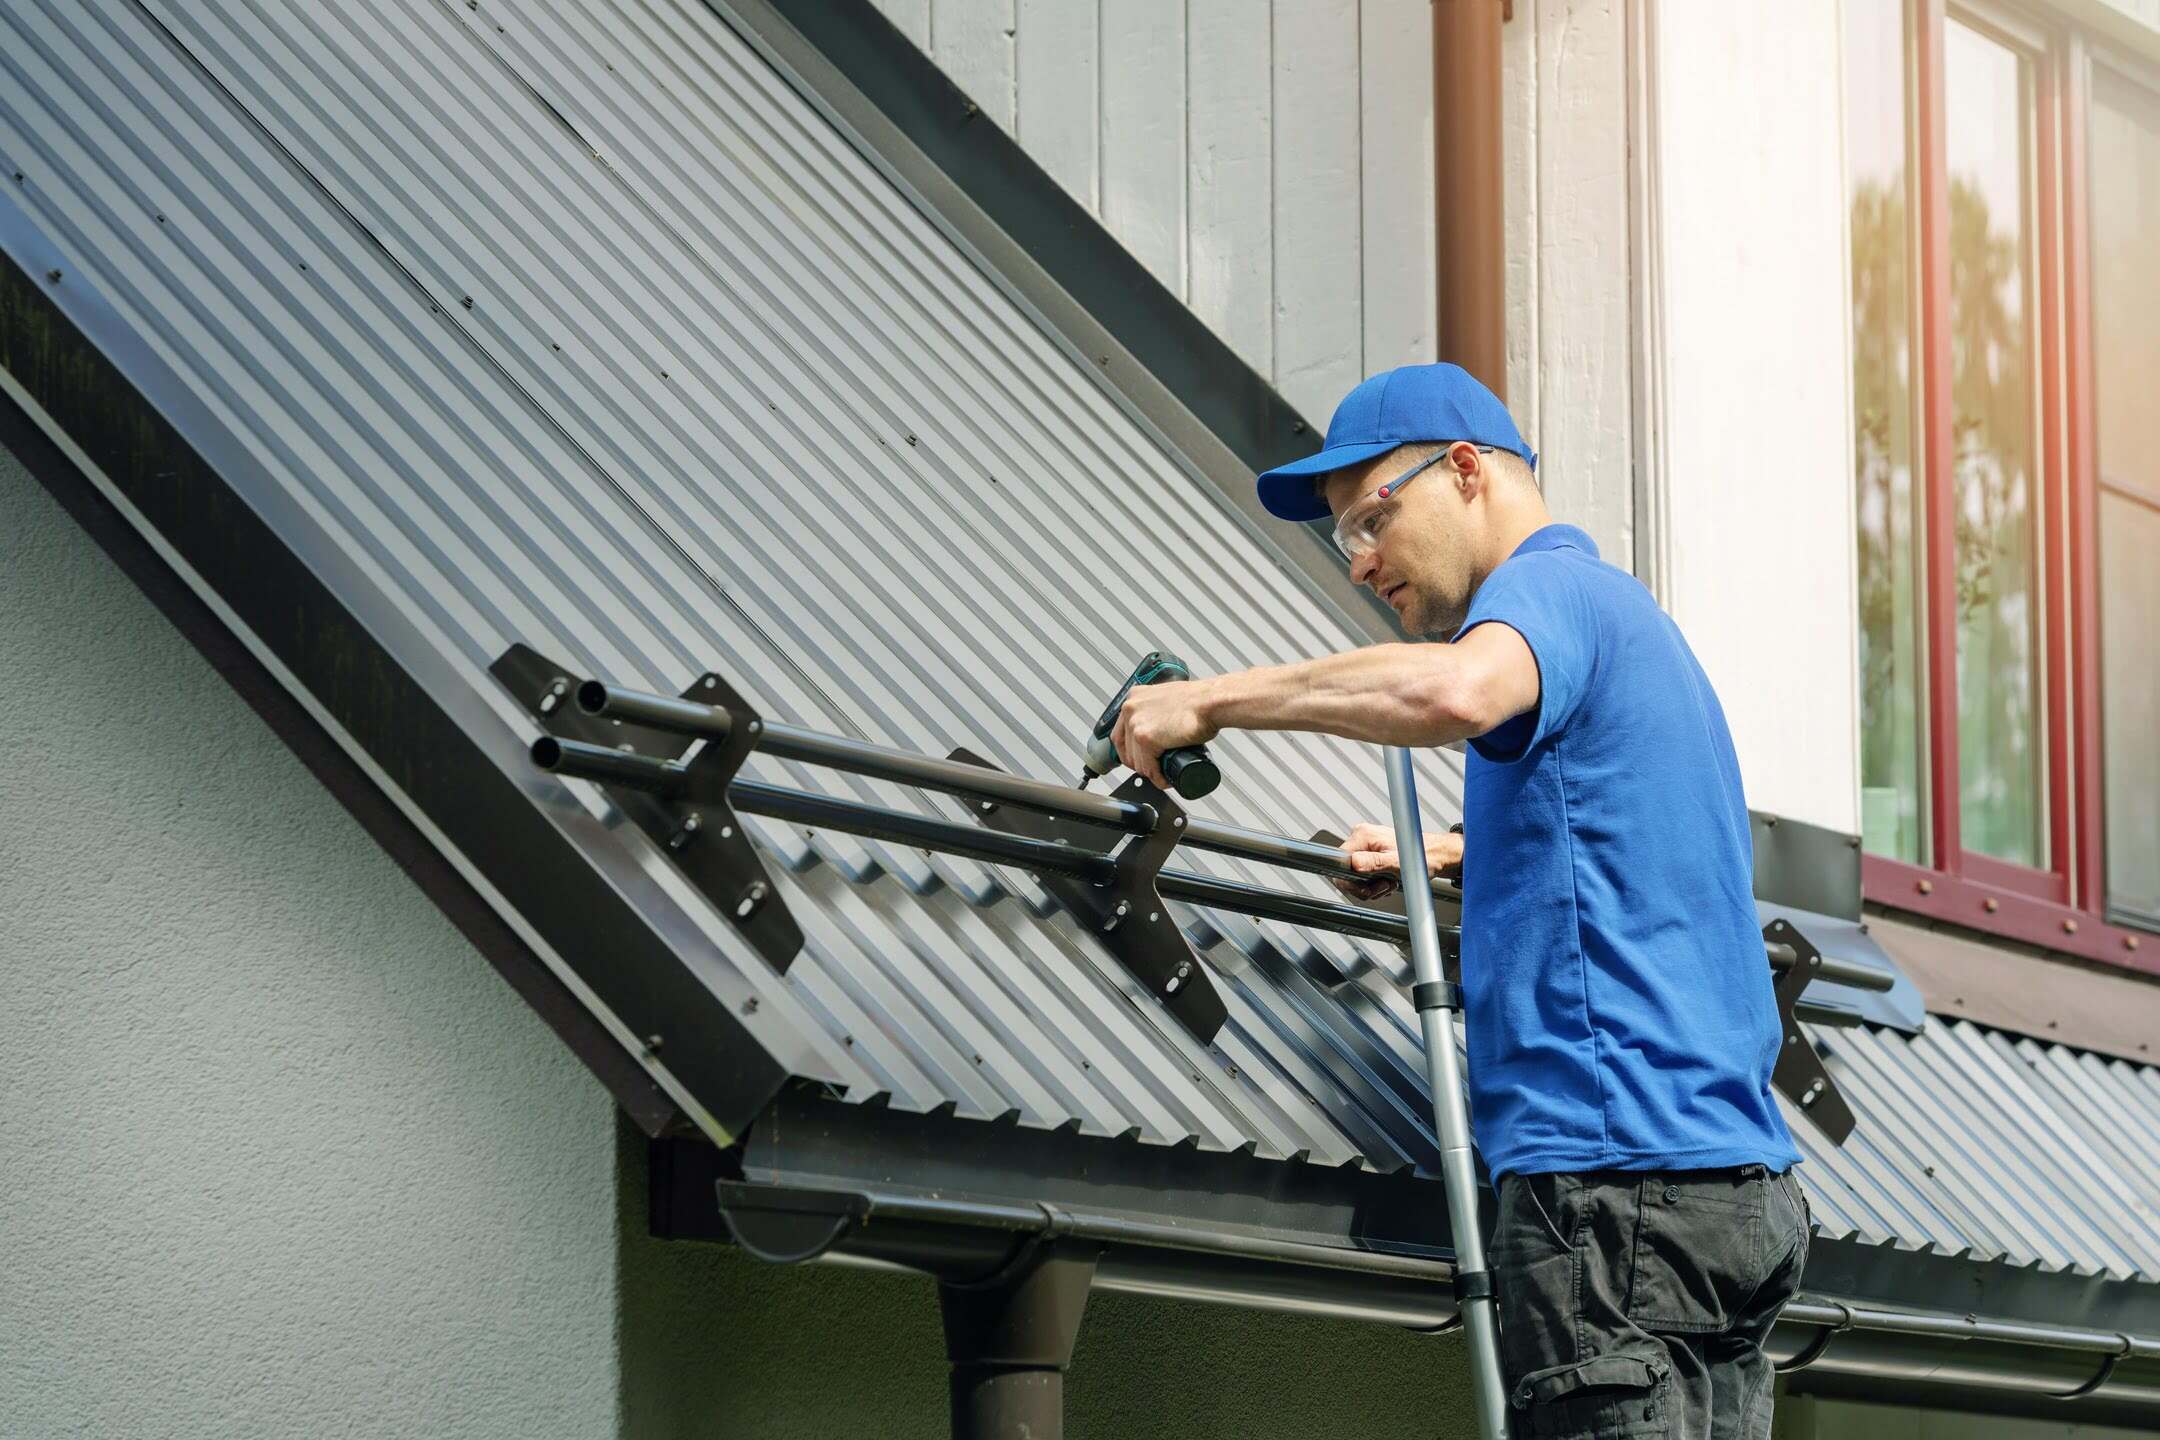
Install Snow Guards
- Screw Method:
- Drill pilot holes at the marked spots.
- Align the snow guard with the holes.
- Secure it with screws.
- Adhesive Method:
- Apply adhesive to the base of the snow guard.
- Press it firmly onto the marked spot.
- Hold in place until the adhesive sets.
- Screw Method:
Check Alignment
- Ensure all snow guards are aligned properly.
- Adjust if necessary before the adhesive or screws fully set.
Safety Check
- Inspect each snow guard to ensure they are securely attached.
- Test a few by gently tugging to confirm stability.
Clean Up
- Remove any leftover materials or tools from the roof.
- Safely descend the ladder.
Final Inspection
- Look over the entire roof to ensure all snow guards are in place and secure.
- Make any final adjustments if needed.
Helpful Tips and Tricks
Measure carefully before buying snow guards. Ensure they fit your roof's dimensions.
Use a chalk line to mark where each guard will go. This keeps them aligned.
Space the guards evenly. Place them in staggered rows to distribute snow weight.
Pre-drill holes if using screw-on guards. This prevents metal from warping.
Apply a sealant around screws. This stops water from leaking into your roof.
Wear safety gear. Use a harness and non-slip shoes when working on the roof.
Check weather conditions. Install guards on a dry, calm day to avoid accidents.
Common mistakes to avoid:
Overloading one area with too many guards. Spread them out to balance the load.
Ignoring manufacturer instructions. Follow guidelines for the best results.
Using the wrong type of guard for your roof. Make sure they are compatible with metal roofing.
Alternatives:
Adhesive snow guards. These stick on and don't require drilling.
Snow fences. Install these at the roof's edge to catch snow.
Heated cables. These melt snow before it can slide off.
How Much Will It Cost?
Metal roof snow guards help prevent snow from sliding off your roof all at once. Here’s a rough estimate of the total cost of materials and tools:
- Snow Guards: $5 to $15 each. For a standard roof, you might need around 20 to 30 guards. Total: $100 to $450.
- Screws and Fasteners: $10 to $20 per pack.
- Sealant: $5 to $10 per tube.
- Drill: $50 to $100 if you don't already have one.
- Drill Bits: $10 to $20.
- Measuring Tape: $5 to $15.
- Ladder: $100 to $200 if you need one.
Total estimated cost: $280 to $815.
Budget-friendly alternatives:
- Plastic Snow Guards: $2 to $5 each. Total: $40 to $150.
- Borrow Tools: Ask friends or family to borrow a drill, ladder, or measuring tape.
- Buy Used Tools: Check local classifieds or online marketplaces for used tools.
Different Ways to Customize
Materials: Instead of standard metal, consider using stainless steel for added durability or copper for a unique look that develops a patina over time. Plastic snow guards can be a budget-friendly option, though they may not last as long.
Colors: Match the snow guards to your roof color for a seamless look. Powder-coated options come in various colors like black, white, green, or red. You can also paint metal guards with rust-resistant paint to match your roof.
Styles: Choose from different styles like bar-style, pad-style, or fence-style snow guards. Bar-style guards run horizontally across the roof, while pad-style guards are individual pieces placed in rows. Fence-style guards create a barrier along the edge of the roof.
Installation Patterns: Customize the installation pattern based on your roof's slope and snow load. For heavy snow areas, install guards in a staggered pattern for better coverage. In milder climates, a single row near the roof edge might suffice.
Spacing: Adjust the spacing between guards to fit your needs. Closer spacing offers more protection but requires more guards. Wider spacing can reduce costs but may not be as effective in heavy snow.
Additional Features: Some snow guards come with rubber gaskets to prevent leaks. Others have decorative elements like scrolls or finials for added visual appeal.
Eco-Friendly Tips
Metal roof snow guards help prevent snow from sliding off your roof all at once. Using eco-friendly materials and methods can make this project more sustainable.
First, consider reusing old metal. If you have leftover metal from another project, cut it into the shapes needed for snow guards. This reduces waste and saves money.
For new materials, choose recycled metal. Many suppliers offer metal products made from recycled content. This option is better for the environment than using new, raw materials.
Use non-toxic sealants and adhesives. Some products contain harmful chemicals that can leach into the environment. Look for eco-friendly alternatives that are safe for both you and the planet.
When installing, use solar-powered tools if possible. These tools reduce your carbon footprint by using renewable energy instead of electricity from non-renewable sources.
Finally, recycle any leftover materials. Metal scraps can often be taken to a recycling center. This keeps them out of landfills and allows them to be reused in future projects.
Keep Your Roof Safe and Sound
Installing DIY metal roof snow guards isn't just a smart move, it's a necessity for protecting your home. By following the steps, you can prevent snow and ice from sliding off your roof, potentially causing damage or injury. Remember to gather all necessary tools, measure accurately, and follow the manufacturer's instructions closely.
Taking the time to install these guards can save you a lot of trouble down the road. Plus, it's a project you can tackle over a weekend. So, grab your tools, get up there, and make your roof safer. Your future self will thank you when winter hits hard.
Don't forget to check your work periodically to ensure everything stays secure. With a bit of effort, you'll have peace of mind knowing your roof is well-protected against winter's worst.
What are snow guards?
Snow guards are devices installed on roofs to prevent snow and ice from sliding off in large sheets. They help protect people, pets, and property below.
Why should I install metal roof snow guards?
Installing metal roof snow guards helps prevent damage to gutters, landscaping, and vehicles. They also reduce the risk of injury from falling snow and ice.
Can I install snow guards myself?
Yes, you can install snow guards yourself with some basic tools and a bit of patience. It's a great DIY project if you follow the instructions carefully.
What tools do I need for installation?
You'll need a drill, screws, measuring tape, and sealant. Some snow guards might come with their own installation kits, so check the package.
How do I determine the placement of snow guards?
Place snow guards evenly across the roof, usually above entryways, walkways, and areas where snow tends to accumulate. Follow the manufacturer's guidelines for spacing.
How often should I check my snow guards?
Inspect snow guards at least once a year, preferably before winter. Look for any loose screws or damage and make necessary repairs to ensure they function properly.
Are there different types of snow guards?
Yes, there are various types like bar-style, pad-style, and fence-style. Choose the type that best suits your roof's design and your specific needs.