
Home>Home & Furniture>Roof>How to Build a DIY Greenhouse Roof
Roof
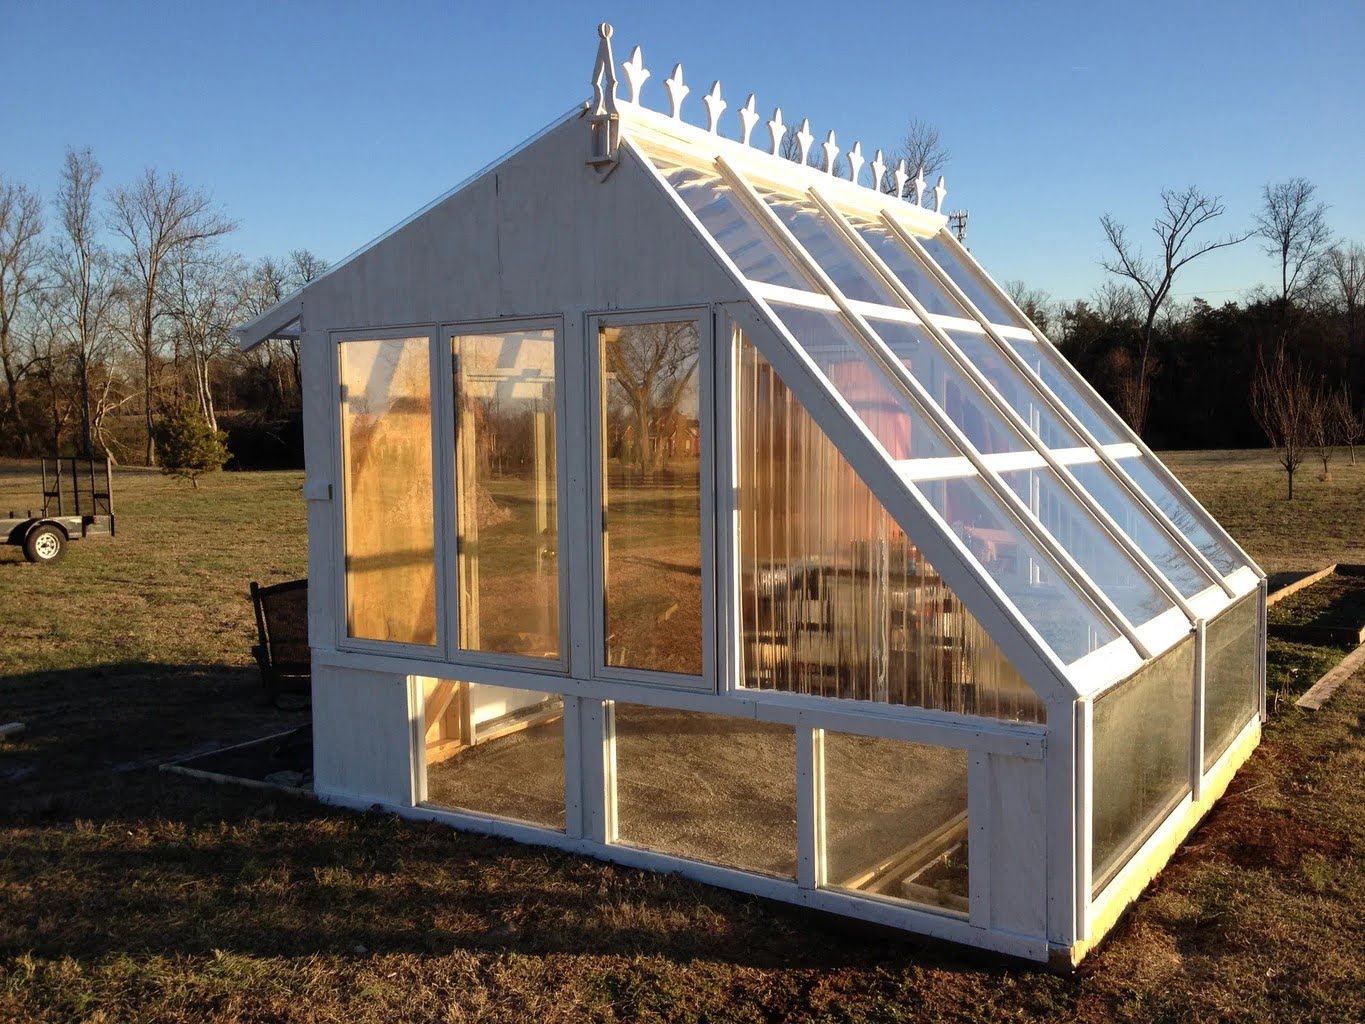
How to Build a DIY Greenhouse Roof
Published: August 19, 2024
Learn how to build a DIY greenhouse roof with our step-by-step guide. Discover materials, tools, and tips to create an efficient and durable greenhouse roof.
(Many of the links in this article redirect to a specific reviewed product. Your purchase of these products through affiliate links helps to generate commission for Twigandthistle.com, at no extra cost. Learn more)
Building your own greenhouse roof may seem tricky at first, but it’s quite doable with the right tools and a bit of planning. Imagine having a space perfect for growing plants year-round, no matter the weather. This project can save money and give a sense of accomplishment. Whether expanding your garden or starting from scratch, crafting a greenhouse roof is a rewarding task. Let’s walk through what you need, from materials to step-by-step instructions, so you can begin building your own greenhouse roof with confidence.
Getting Ready for Your Project
Gather Materials: Collect all necessary items like wood, plastic sheeting, screws, and tools. Make sure everything is within reach before starting.
Measure and Cut: Measure the dimensions of your greenhouse. Cut the wood to fit the frame. Double-check measurements to avoid mistakes.
Safety Gear: Wear gloves, safety goggles, and a dust mask. These protect your hands, eyes, and lungs from debris.
Clear Workspace: Ensure your workspace is clean and free of obstacles. This helps prevent accidents and keeps tools organized.
Check Weather: Choose a day with good weather. Rain or strong winds can make the project difficult and unsafe.
Pre-drill Holes: Pre-drill holes in the wood to make screwing easier and prevent splitting.
Lay Out Materials: Arrange all materials in the order you will use them. This saves time and keeps the process smooth.
Secure Frame: Make sure the greenhouse frame is stable and secure. This provides a solid base for the roof.
Test Fit: Place the cut wood on the frame to ensure it fits properly. Adjust if necessary before final assembly.
Plan for Ventilation: Decide where vents will go. Proper ventilation is crucial for plant health.
Have a Helper: If possible, have someone assist you. Extra hands make lifting and positioning easier.
Read Instructions: If using a kit, read the instructions thoroughly. Follow each step carefully to avoid errors.
Gathering Materials and Tools
- Lumber: Used for the frame. Choose treated wood to resist moisture.
- Polycarbonate Panels: These clear panels allow sunlight in while providing insulation.
- Screws and Nails: Essential for securing the frame and panels together.
- Drill: Needed for making holes in the wood and panels.
- Saw: Used to cut the lumber to the required lengths.
- Measuring Tape: Ensures accurate measurements for cutting and assembling.
- Level: Ensures the frame is even and straight.
- Hammer: Useful for driving nails into the wood.
- Screwdriver: Needed for tightening screws.
- Ladder: Helps reach higher areas safely.
- Safety Glasses: Protects eyes from debris while cutting and drilling.
- Gloves: Protects hands from splinters and sharp edges.
- Pencil: Marks measurements on the lumber.
- Brackets: Provides extra support at the joints of the frame.
- Weatherstripping: Seals gaps to keep out drafts and moisture.
Required Skills and Time Commitment
Skill Level: Intermediate
Time Required: 1-2 days
Steps:
- Gather Materials: Polycarbonate panels, wood, screws, sealant, and tools.
- Measure and Cut: Ensure panels and wood fit your greenhouse dimensions.
- Build Frame: Assemble the wooden frame for the roof.
- Attach Panels: Secure polycarbonate panels to the frame with screws.
- Seal Edges: Use sealant to waterproof the edges.
- Install Roof: Place the completed roof on the greenhouse structure.
Instructions for Building Your Roof
Gather Materials:
- Wooden beams (for the frame)
- Polycarbonate panels (for the roof)
- Screws and nails
- Drill
- Saw
- Measuring tape
- Ladder
Measure and Cut:
- Measure the length and width of the greenhouse.
- Cut the wooden beams to fit these dimensions.
Build the Frame:
- Lay out the beams on the ground.
- Assemble them into a rectangular frame using screws and nails.
Install Support Beams:
- Place additional beams across the frame for extra support.
- Secure them with screws.
Attach the Frame to the Greenhouse:
- Lift the frame onto the greenhouse walls.
- Use screws to attach the frame securely.
Cut Polycarbonate Panels:
- Measure the roof dimensions.
- Cut the polycarbonate panels to fit.
Install Polycarbonate Panels:
- Place panels on the frame.
- Secure panels with screws, ensuring they overlap slightly to prevent leaks.
Seal the Edges:
- Use weatherproof tape or sealant along the edges of the panels.
- Ensure all gaps are sealed to keep out moisture.
Check Stability:
- Ensure all screws are tight.
- Check that the roof is stable and secure.
Clean Up:
- Remove any debris or leftover materials.
- Ensure the area is safe and tidy.
Helpful Tips and Tricks
Measure twice, cut once. Accurate measurements prevent wasted materials and ensure a snug fit. Use treated wood for the frame to resist rot and pests. Polycarbonate panels are a great alternative to glass; they’re lightweight, durable, and provide excellent insulation. Seal gaps with weatherstripping to maintain temperature control. Install vents to allow proper airflow and prevent overheating. Use screws instead of nails for better stability and easier adjustments.
Common mistakes to avoid: Skipping the foundation can lead to an unstable structure. Using untreated wood can result in rot. Overlooking ventilation can cause plants to overheat. Not sealing gaps can lead to temperature fluctuations.
Alternatives: Instead of polycarbonate, consider using polyethylene film for a more budget-friendly option. For the frame, PVC pipes can be a lightweight and cost-effective alternative to wood.
Estimating the Cost
Lumber: $100-$200. Use pressure-treated wood for durability.
Polycarbonate Panels: $150-$300. These are strong and provide good insulation.
Screws and Nails: $20-$30. Get rust-resistant ones for outdoor use.
Hinges and Latches: $15-$25. Needed if you want a roof that opens.
Sealant: $10-$20. Keeps the roof watertight.
Saw: $30-$50. A hand saw works, but a circular saw is faster.
Drill: $40-$60. Essential for making holes and driving screws.
Measuring Tape: $5-$10. Ensures accurate cuts.
Safety Gear: $20-$30. Includes gloves, goggles, and a dust mask.
Total Cost: $390-$775.
Budget-Friendly Alternatives:
- Use recycled wood or pallets for lumber.
- Consider plastic sheeting instead of polycarbonate panels.
- Borrow tools from friends or rent them from a local hardware store.
Different Variations and Customizations
Materials: Instead of using traditional polycarbonate panels, try corrugated plastic or greenhouse film. Both options are lighter and can be easier to install. For a more natural look, consider bamboo or wooden slats covered with clear plastic sheeting.
Colors: Use tinted panels to control the amount of sunlight entering the greenhouse. Green or blue tints can reduce heat while still allowing light for plant growth. Paint the frame in bright colors like yellow or red to add a cheerful touch.
Styles: For a modern look, use metal framing with sleek, clear panels. If you prefer a rustic style, opt for a wooden frame with reclaimed windows as the roof. For a more artistic approach, create a mosaic roof using pieces of colored glass or plastic.
Ventilation: Add ventilation windows or roof vents to improve air circulation. Automatic vent openers can be installed to open the vents when the temperature rises.
Insulation: Use bubble wrap or thermal screens to insulate the roof during colder months. This helps maintain a stable temperature inside the greenhouse.
Rainwater Collection: Install gutters along the edges of the roof to collect rainwater. This water can be stored in barrels and used for watering plants.
Solar Panels: Incorporate solar panels into the roof design to generate electricity for heating, lighting, or other greenhouse needs.
Shape: Experiment with different roof shapes like gable, arched, or lean-to designs. Each shape offers unique benefits in terms of space and light distribution.
Skylights: Add skylights to the roof for extra natural light. These can be fixed or operable, depending on your needs.
Green Roof: Create a green roof by planting low-maintenance plants or succulents on top. This adds insulation and helps with water management.
Eco-Friendly Tips
Reclaimed wood can be used for the frame. It’s sturdy and gives a rustic look. Old windows or glass doors make excellent panels. They let in plenty of light and are often discarded during home renovations.
Polycarbonate sheets are another option. They’re lightweight, durable, and provide good insulation. Look for recycled polycarbonate to keep it eco-friendly.
Bamboo is a sustainable choice for framing. It grows quickly and is very strong. Recycled metal can also be used for support beams. It’s durable and can be found at scrap yards.
For sealing gaps, use natural rubber or recycled silicone. These materials are flexible and long-lasting. Rainwater collection systems can be added to the roof. This helps water your plants and reduces water waste.
Solar panels can be installed on the roof. They provide energy for heating and lighting inside the greenhouse. Green roofing materials like sedum mats can be used. They help with insulation and reduce rainwater runoff.
Compostable materials like straw or wool can be used for insulation. They’re natural and break down over time. Low-VOC paints or stains can be used to treat the wood. They’re better for the environment and your health.
Using locally sourced materials reduces the carbon footprint. It supports local businesses and cuts down on transportation emissions. Upcycling old materials not only saves money but also gives your greenhouse a unique character.
Your Greenhouse Roof Awaits
Building a DIY greenhouse roof isn't just about saving money. It's about creating something with your own hands. You've learned how to choose the right materials, measure accurately, and assemble everything securely. Now, it's time to put those skills to use. Remember, patience and precision are your best friends. Don't rush the process. Take your time to ensure each step is done correctly. If you hit a snag, don't get discouraged. Every mistake is a learning opportunity. Soon enough, you'll have a sturdy, functional roof over your greenhouse. Imagine the satisfaction of seeing your plants thrive under something you built. So, grab your tools, roll up your sleeves, and get started. Your plants will thank you, and you'll have a project to be proud of. Happy building!
How do I choose the right materials for a DIY greenhouse roof?
Pick materials that are durable and weather-resistant. Common choices include polycarbonate panels, glass, and plastic sheeting. Each has its pros and cons, so consider your climate and budget.
What tools will I need to build a greenhouse roof?
Basic tools include a saw, drill, screwdriver, measuring tape, and safety gear like gloves and goggles. Depending on your materials, you might also need specialized tools like a polycarbonate cutter.
How do I ensure proper ventilation in my greenhouse?
Include vents or windows in your design. Automatic vent openers can help regulate temperature. Proper ventilation prevents overheating and mold growth.
Can I build a greenhouse roof by myself, or do I need help?
While it's possible to build it solo, having an extra pair of hands can make the process easier and safer. Some parts, like lifting heavy panels, are much simpler with help.
How do I maintain my greenhouse roof?
Regularly clean the roof to remove dirt and debris. Check for leaks or damage after storms. Replace any broken panels or seals promptly to maintain efficiency.
What angle should the greenhouse roof be?
The angle depends on your location. Generally, a pitch of 30-45 degrees works well for most areas, allowing for snow runoff and maximum sunlight.
How do I make my greenhouse roof energy-efficient?
Use insulated materials and seal gaps to prevent heat loss. Consider adding thermal mass like water barrels to store heat during the day and release it at night.