
Home>Home & Furniture>Roof>DIY Spray Foam Roofing Guide
Roof
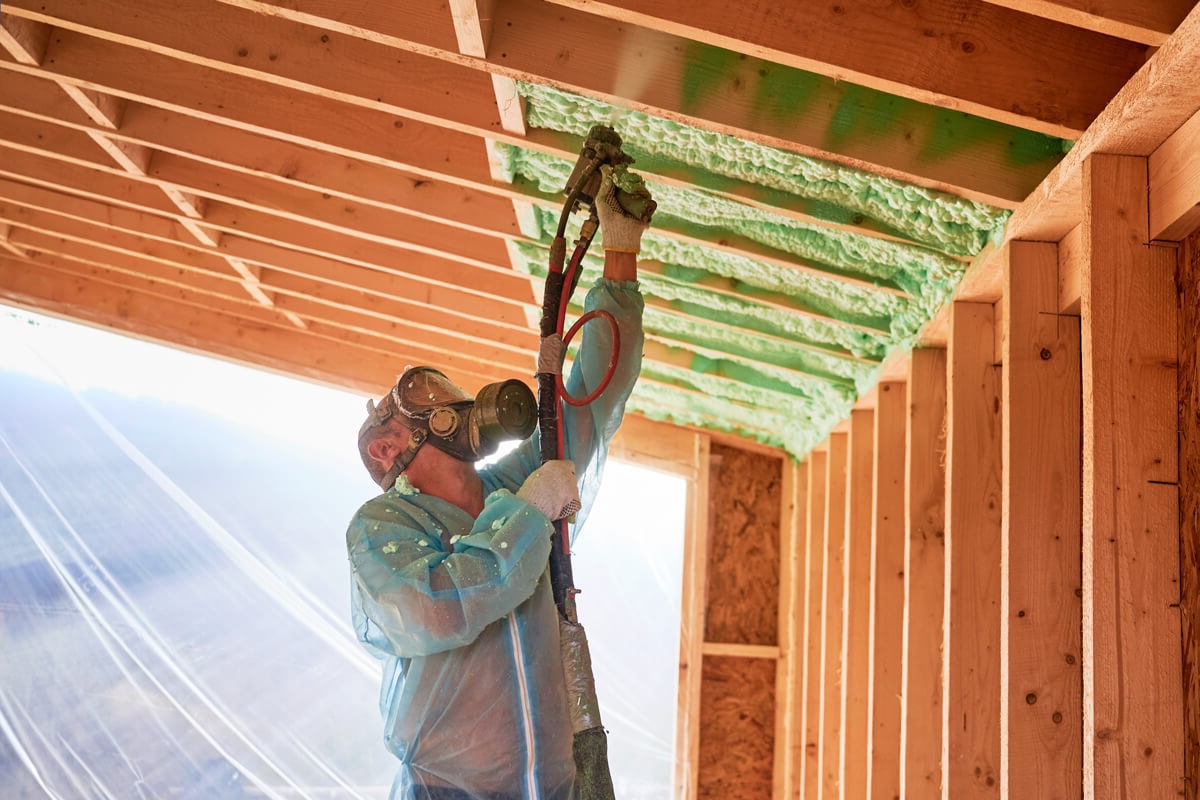
DIY Spray Foam Roofing Guide
Published: August 22, 2024
Discover the ultimate DIY Spray Foam Roofing Guide! Learn step-by-step instructions, essential tools, and expert tips to achieve a durable, energy-efficient roof.
(Many of the links in this article redirect to a specific reviewed product. Your purchase of these products through affiliate links helps to generate commission for Twigandthistle.com, at no extra cost. Learn more)
Thinking about fixing up your roof? Spray foam roofing might be just what you need. It's a great way to insulate your home, keep it cool in summer, and warm in winter. Plus, it can help you save on energy bills. Doing it yourself can seem like a big job, but with some planning and the right tools, you can tackle this project. This guide will help you understand the basics, what you'll need, and steps to take. Ready to get started on your DIY spray foam roofing journey? Let's jump in!
Getting Ready for Your Project
Safety Gear: Wear protective clothing, goggles, gloves, and a respirator to avoid inhaling fumes.
Weather Check: Ensure dry weather for at least 24 hours to allow proper curing.
Surface Cleaning: Clean the roof surface thoroughly. Remove debris, dirt, and any old roofing material.
Repair Damage: Fix any cracks, holes, or damaged areas on the roof.
Masking: Use tape and plastic sheets to cover areas you don't want foam on, like vents and skylights.
Ventilation: Ensure good airflow in the workspace to disperse fumes.
Equipment Check: Inspect your spray foam equipment. Ensure everything works properly and you have enough foam material.
Practice: Do a test spray on a small area to get a feel for the equipment and foam application.
Plan Application: Plan your spray pattern. Start from one end and work systematically to avoid missing spots.
Emergency Plan: Have a first aid kit and fire extinguisher nearby in case of accidents.
What You Need: Materials and Tools
- Spray Foam Kit: Contains the foam mixture and applicator. Essential for creating the insulating layer on the roof.
- Protective Gear: Includes gloves, goggles, and a respirator. Keeps you safe from chemicals and debris.
- Ladder: Needed to access the roof safely.
- Roof Cleaner: Prepares the surface by removing dirt and debris.
- Tape Measure: Ensures accurate measurements for even foam application.
- Utility Knife: Trims excess foam for a smooth finish.
- Caulk Gun: Applies sealant to gaps and cracks before spraying foam.
- Sealant: Fills gaps and cracks to prevent leaks.
- Drop Cloths: Protects surrounding areas from overspray.
- Mixing Nozzles: Ensures the foam components mix properly during application.
- Extension Cord: Provides power to electric tools if needed.
- Brush or Roller: Applies primer or additional coatings if required.
- Primer: Prepares the roof surface for better foam adhesion.
- Weatherproof Tape: Seals seams and edges for added protection.
- Bucket and Sponge: Cleans up any spills or excess material.
Each item plays a crucial role in ensuring a successful and safe spray foam roofing project.
How Much Skill and Time You Need
Skill Level: Advanced
Time Required:
- Preparation: 2-3 hours
- Application: 4-6 hours
- Curing Time: 24-48 hours
Total Time: Approximately 2-3 days
Follow These Steps
Gather Materials
- Spray foam kit
- Protective gear (gloves, goggles, mask)
- Ladder
- Utility knife
- Measuring tape
- Cleaning supplies
Prepare the Roof
- Clean the roof surface thoroughly.
- Remove debris, dirt, and old roofing materials.
- Ensure the surface is dry.
Inspect for Damage
- Check for cracks, holes, or weak spots.
- Repair any damage before applying spray foam.
Set Up Safety Measures
- Wear protective gear.
- Ensure the ladder is stable.
- Work with a partner if possible.
Measure the Area
- Use measuring tape to determine the roof area.
- Calculate the amount of spray foam needed.
Mix the Spray Foam
- Follow the instructions on the spray foam kit.
- Mix the components thoroughly.
Apply the Spray Foam
- Start at one corner of the roof.
- Spray in even, overlapping strokes.
- Maintain a consistent thickness.
Smooth the Foam
- Use a utility knife to trim excess foam.
- Smooth out any uneven areas.
Allow to Cure
- Let the foam cure according to the manufacturer's instructions.
- Avoid walking on the roof during this time.
Inspect the Finished Roof
- Check for any missed spots or thin areas.
- Apply additional foam if necessary.
Clean Up
- Dispose of any leftover materials properly.
- Clean your tools and workspace.
Regular Maintenance
- Inspect the roof periodically.
- Address any issues promptly to maintain the integrity of the spray foam.
Helpful Tips and Tricks
Preparation is Key: Clean the roof thoroughly before starting. Remove debris, dirt, and old roofing materials. A clean surface ensures better adhesion.
Weather Matters: Apply spray foam on a dry, warm day. Avoid windy conditions to prevent overspray and uneven application.
Safety First: Wear protective gear, including gloves, goggles, and a mask. Spray foam can be hazardous if inhaled or if it contacts skin.
Practice Makes Perfect: Test the spray foam on a small, inconspicuous area first. This helps you get a feel for the application process and adjust your technique.
Even Application: Apply the foam in thin, even layers. Start with a light coat and build up gradually. This prevents sagging and ensures a uniform finish.
Mind the Edges: Pay extra attention to edges and seams. These areas are prone to leaks if not properly sealed.
Common Mistakes to Avoid:
- Rushing the Job: Take your time. Rushing can lead to uneven application and missed spots.
- Ignoring Weather Conditions: Applying foam in wet or windy conditions can ruin the project.
- Skipping Safety Gear: Always wear protective equipment to avoid health risks.
Material Alternatives:
- Closed-Cell Foam: Offers better insulation and moisture resistance but is more expensive.
- Open-Cell Foam: Cheaper and easier to apply but less effective in extreme weather conditions.
Method Alternatives:
- Professional Installation: If unsure about DIY, hiring professionals ensures a high-quality job.
- Roof Coatings: Consider using roof coatings as an alternative. They are easier to apply and can extend the life of your roof.
How Much Will It Cost?
Spray Foam Insulation Kit: $600 - $800
Protective Gear (gloves, goggles, mask): $50 - $100
Roof Cleaner: $20 - $40
Primer: $30 - $50
Sealant: $20 - $40
Roof Coating: $100 - $200
Ladder: $100 - $150
Utility Knife: $10 - $20
Measuring Tape: $10 - $15
Paint Roller and Brushes: $20 - $30
Total Cost: $960 - $1,445
Budget-Friendly Alternatives:
Spray Foam Insulation Kit: Rent one for $300 - $400
Protective Gear: Use old clothes and buy only a mask for $10
Roof Cleaner: Use a homemade vinegar solution for $5
Primer: Skip if the roof is in good condition
Sealant: Use caulk for $10
Roof Coating: Use a cheaper brand for $50 - $100
Ladder: Borrow from a neighbor or rent for $20
Utility Knife: Use a kitchen knife
Measuring Tape: Borrow from a friend
Paint Roller and Brushes: Use old ones or buy a set for $10
Total Cost with Alternatives: $405 - $655
Different Ways to Customize
Materials: Instead of standard spray foam, try closed-cell foam for better insulation or open-cell foam for a more budget-friendly option.
Colors: Use white foam to reflect sunlight and keep your home cooler. For a unique look, consider tinted foam in shades like light gray or beige.
Styles: Add a top coat of elastomeric paint for extra protection and a sleek finish. For a textured look, apply a granulated coating over the foam.
Alternative Roofing: Combine spray foam with metal roofing panels for added durability. Use shingles over the foam for a traditional appearance.
Patterns: Create a patterned design by spraying foam in sections and using different colors or textures.
Thickness: Adjust the thickness of the foam layers to meet specific insulation needs. Thicker layers provide better insulation but may cost more.
Eco-Friendly Options: Choose eco-friendly spray foam made from renewable resources.
Safety Gear: Customize your safety gear with comfortable, reusable masks and gloves.
Application Tools: Use a high-quality spray gun for a smoother application. Consider extension wands for hard-to-reach areas.
Maintenance: Apply a UV-resistant coating to protect the foam from sun damage. Regularly inspect and reapply coatings as needed.
Weatherproofing: Enhance weatherproofing by adding a sealant around edges and seams.
Soundproofing: For soundproofing, use denser foam or add a sound barrier layer underneath the foam.
DIY Kits: Purchase DIY spray foam kits that include all necessary tools and materials.
Budget-Friendly Options: Opt for smaller kits for minor repairs or touch-ups.
Professional Help: If unsure, consult a professional for advice or assistance with complex areas.
Eco-Friendly Tips
Choose eco-friendly spray foam. Look for products with low or no VOCs (volatile organic compounds). These are better for the environment and your health.
Use recycled materials. If possible, use recycled or reclaimed materials for any additional roofing needs. This reduces waste and saves resources.
Proper insulation. Ensure the spray foam provides adequate insulation. This helps reduce energy consumption by keeping your home warmer in winter and cooler in summer.
Seal gaps and cracks. Before applying spray foam, seal any gaps or cracks in the roof. This prevents leaks and improves energy efficiency.
Apply in layers. Apply the spray foam in thin layers to avoid waste and ensure even coverage. This method also allows for better control over the application process.
Use a protective coating. After applying the spray foam, use a UV-resistant coating. This extends the life of the foam and reduces the need for frequent replacements.
Recycle leftover materials. After completing the project, recycle any leftover materials or dispose of them properly. This helps minimize environmental impact.
Maintain your roof. Regularly inspect and maintain your spray foam roof. This ensures it remains effective and reduces the need for repairs or replacements.
Your Roof's New Best Friend
Spray foam roofing is a game-changer for anyone looking to boost their home's energy efficiency and durability. It's not just about saving money on energy bills; it's about protecting your home from the elements. With a bit of patience and the right tools, you can tackle this project yourself. Remember to prep your roof properly, follow safety guidelines, and apply the foam evenly. Don't rush the process; take your time to ensure a smooth and even application. Once done, you'll have a sturdy, insulated, and weather-resistant roof that will last for years. So, grab your gear, roll up your sleeves, and get started on your spray foam roofing project. Your home will thank you for it!
What is spray foam roofing?
Spray foam roofing is a type of roofing made from polyurethane foam. It's sprayed onto the roof as a liquid, then expands into a foam, creating a solid layer.
How long does spray foam roofing last?
With proper maintenance, spray foam roofing can last 20 to 30 years. Regular inspections and re-coating every 10-15 years help extend its lifespan.
Is spray foam roofing energy-efficient?
Yes, it provides excellent insulation. It helps keep your home warm in winter and cool in summer, reducing energy bills.
Can I install spray foam roofing myself?
While possible, it's tricky. You need the right equipment and safety gear. Hiring a professional ensures proper application and safety.
How do I maintain spray foam roofing?
Regularly inspect for cracks or damage. Clean debris off the roof and re-coat every 10-15 years to keep it in good shape.
Is spray foam roofing waterproof?
Yes, once cured, it creates a seamless and waterproof barrier, protecting your home from leaks and moisture.
How much does spray foam roofing cost?
Costs vary, but expect to pay between $3 to $7 per square foot. Factors like roof size and condition affect the final price.