
Home>Home & Furniture>Roof>DIY Roof Replacement Guide
Roof
DIY Roof Replacement Guide
Published: August 17, 2024
Discover the ultimate DIY Roof Replacement Guide! Learn step-by-step instructions, essential tools, safety tips, and expert advice for a successful roof replacement project.
(Many of the links in this article redirect to a specific reviewed product. Your purchase of these products through affiliate links helps to generate commission for Twigandthistle.com, at no extra cost. Learn more)
Thinking about replacing your roof yourself? It might seem like a big task, but with the right tools and some patience, you can save money and gain new skills. This guide will walk you through each step, from choosing materials to the final touch. Safety is key, so always use proper gear and caution. Doing it yourself can be rewarding and satisfying. Ready to start? Let’s jump into the basics and get you on your way to a sturdy, new roof.
Getting Ready for the Project
Safety Gear: Wear gloves, safety goggles, and a hard hat. Use non-slip shoes to prevent falls.
Weather Check: Ensure clear skies for at least three days. Avoid working in rainy or windy conditions.
Workspace Setup: Clear the area around your house. Remove any obstacles or debris that might cause accidents.
Ladder Placement: Secure your ladder on a flat, stable surface. Ensure it extends at least three feet above the roof edge.
Tool Check: Gather all necessary tools like a hammer, nails, shingles, and a utility knife. Keep them within easy reach.
Material Inspection: Check all materials for defects. Ensure you have enough shingles, underlayment, and flashing.
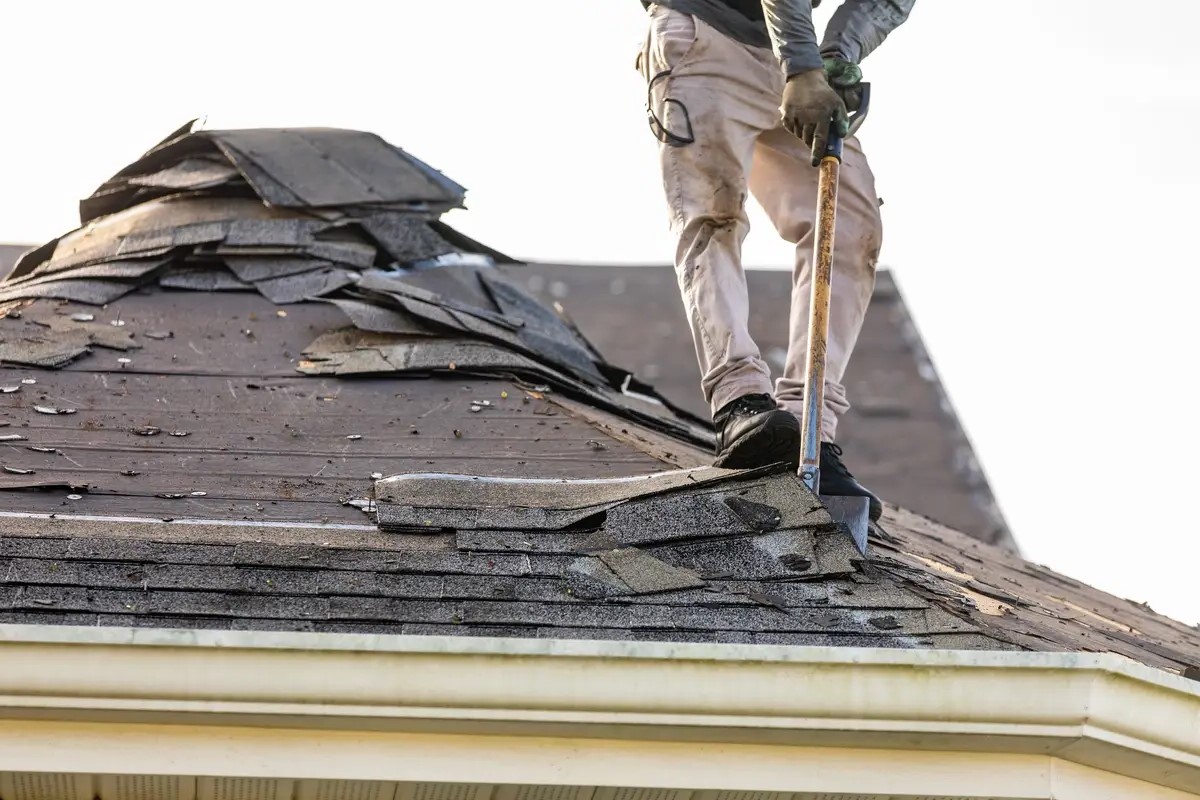
Old Roof Removal: Carefully remove old shingles and nails. Use a roofing shovel to make the job easier.
Surface Cleaning: Sweep the roof deck to remove any dust or debris. A clean surface ensures better shingle adhesion.
Underlayment Installation: Roll out the underlayment starting from the bottom edge. Secure it with roofing nails.
Flashing Check: Inspect and replace any damaged flashing around chimneys, vents, and valleys.
Shingle Layout: Plan your shingle layout. Start from the bottom and work your way up to ensure proper overlap.
Emergency Plan: Have a first aid kit and a charged phone nearby. Know the quickest route to the nearest hospital.
Essential Materials and Tools
Roofing Shingles: These are the main materials that cover your roof. Choose asphalt, wood, or metal shingles based on your preference and budget.
Roofing Nails: Essential for securing shingles to the roof deck. Make sure they are galvanized to prevent rust.
Roofing Felt: A protective layer placed under shingles to provide extra waterproofing.
Roofing Cement: Used to seal joints and edges, ensuring no water leaks through.
Flashing: Metal strips placed around chimneys, vents, and other roof penetrations to prevent water from seeping in.
Drip Edge: Metal strips installed along the edges of the roof to direct water away from the fascia and into the gutters.
Hammer: Basic tool for driving nails into shingles and other materials.
Utility Knife: Useful for cutting shingles and roofing felt to the right size.
Chalk Line: Helps mark straight lines on the roof to ensure shingles are aligned properly.
Measuring Tape: Necessary for measuring the roof area and cutting materials to the correct length.
Roofing Nailer: A specialized tool that speeds up the process of nailing shingles to the roof.
Pry Bar: Used for removing old shingles and nails from the roof.
Ladder: Essential for safely reaching the roof.
Safety Harness: Provides fall protection while working on the roof.
Work Gloves: Protect your hands from sharp edges and rough materials.
Roofing Boots: Shoes with good grip to prevent slipping while working on the roof.
Broom: For cleaning debris off the roof before installing new shingles.
Caulking Gun: Used to apply roofing cement or sealant in precise areas.
Tin Snips: For cutting metal flashing to the required size.
Circular Saw: Useful for cutting plywood or other materials for roof decking repairs.
Required Skills and Time Commitment
Skill Level: Advanced
Time Required: 3-5 days
Important Points:
- Safety Gear: Essential for protection.
- Weather Conditions: Check forecast to avoid rain.
- Materials: Shingles, nails, underlayment.
- Tools: Hammer, ladder, roofing nailer.
- Help: At least one other person needed.
- Permits: Check local regulations.
Steps:
- Remove Old Shingles: 1 day
- Inspect Roof Deck: 0.5 day
- Install Underlayment: 0.5 day
- Lay New Shingles: 1-2 days
- Clean Up: 0.5 day
Detailed Step-by-Step Guide
Safety First
- Wear safety gear: gloves, goggles, and a harness.
- Ensure ladders are stable and secure.
Remove Old Shingles
- Use a shingle remover or flat pry bar.
- Start at the top and work your way down.
- Dispose of old shingles properly.
Inspect the Roof Deck
- Check for damaged wood or rot.
- Replace any damaged sections with new plywood.
Install Underlayment
- Roll out roofing felt or synthetic underlayment.
- Secure with roofing nails or staples.
- Overlap each row by at least 2 inches.
Install Drip Edge
- Place the drip edge along the eaves.
- Nail it down every 12 inches.
Lay Starter Shingles
- Install starter shingles along the eaves.
- Ensure they overhang the drip edge slightly.
Install Shingles
- Start at the bottom edge of the roof.
- Nail each shingle 4-6 inches above the bottom edge.
- Overlap each row by half a shingle.
Install Flashing
- Place flashing around chimneys, vents, and valleys.
- Secure with roofing nails and seal with roofing cement.
Install Ridge Cap Shingles
- Place ridge cap shingles along the roof peak.
- Nail them down, ensuring they overlap.
Clean Up
- Remove all debris from the roof and surrounding area.
- Inspect the roof for any missed nails or loose shingles.
Helpful Tips and Tricks
Plan ahead: Check the weather forecast. Avoid working on rainy or windy days.
Safety first: Wear non-slip shoes, a safety harness, and gloves. Use a sturdy ladder.
Remove old shingles: Start from the top and work your way down. Use a shingle remover tool to make it easier.
Inspect the roof deck: Look for rotted wood or damage. Replace any bad sections before installing new shingles.
Install underlayment: Roll out roofing felt or synthetic underlayment. Overlap each row by a few inches.
Use starter shingles: Place these along the eaves to prevent water from getting under the shingles.
Lay shingles properly: Start from the bottom and work your way up. Overlap each row according to the manufacturer's instructions.
Nail correctly: Use roofing nails and place them in the designated spots on the shingles. Don't overdrive the nails.
Seal the edges: Apply roofing cement to the edges and around vents or chimneys to prevent leaks.
Ventilation: Ensure proper roof ventilation to extend the life of your shingles and prevent mold.
Common mistakes to avoid:
- Skipping the underlayment: This layer is crucial for preventing leaks.
- Improper nailing: Overdriven or underdriven nails can cause shingles to come loose.
- Ignoring ventilation: Poor ventilation can lead to heat buildup and damage.
Alternatives for materials or methods:
- Metal roofing: More durable and longer-lasting than shingles.
- Rubber roofing: Easier to install and good for flat roofs.
- Roofing membrane: Ideal for low-slope roofs, providing excellent waterproofing.
Estimating the Costs
Shingles: $80-$100 per bundle. A typical roof needs 20-30 bundles. Total: $1,600-$3,000.
Underlayment: $50 per roll. You need 4-6 rolls. Total: $200-$300.
Roofing nails: $30 per box. You need 2-3 boxes. Total: $60-$90.
Roofing cement: $15 per gallon. You need 2-3 gallons. Total: $30-$45.
Flashing: $10 per piece. You need 10-20 pieces. Total: $100-$200.
Drip edge: $2 per linear foot. You need 100-200 feet. Total: $200-$400.
Roofing felt: $20 per roll. You need 4-6 rolls. Total: $80-$120.
Roofing hammer: $25-$50.
Utility knife: $10-$20.
Ladder: $100-$200.
Safety harness: $50-$100.
Roofing shovel: $30-$50.
Tarps: $20-$40.
Gloves: $10-$20.
Goggles: $10-$20.
Total Cost: $2,525-$4,655.
Budget-friendly alternatives:
Shingles: Consider 3-tab shingles instead of architectural shingles. They cost $70-$90 per bundle.
Underlayment: Use synthetic underlayment which can be cheaper and more durable.
Roofing nails: Buy in bulk to save money.
Roofing cement: Look for discounted or bulk options.
Flashing: Use aluminum flashing instead of copper.
Drip edge: Consider plastic drip edge which can be cheaper.
Roofing felt: Use #15 felt instead of #30 felt. It’s cheaper but still effective.
Tools: Borrow or rent tools like the ladder, safety harness, and roofing shovel from friends or a local tool library.
Different Variations and Customizations
Shingles come in various materials like asphalt, metal, wood, and slate. Asphalt shingles are affordable and easy to install. Metal shingles last longer and resist weather damage. Wood shingles give a natural look but need more maintenance. Slate shingles are durable but heavy and expensive.
Colors can change the look of your roof. Choose light colors to reflect heat and keep your home cooler. Dark colors absorb heat, which can help in colder climates. Match the roof color with your house's exterior for a cohesive look.
Styles of shingles also vary. Three-tab shingles are flat and uniform. Architectural shingles have a more textured, layered look. Tile shingles offer a classic, Mediterranean style. Shake shingles provide a rustic, rugged appearance.
Underlayment options include felt paper and synthetic materials. Felt paper is traditional and cheaper. Synthetic underlayment is more durable and resistant to tearing.
Roof vents can be customized too. Ridge vents run along the peak of the roof. Box vents are square and placed near the roof's ridge. Turbine vents spin to pull hot air out.
Gutters come in different materials like aluminum, vinyl, and copper. Aluminum is lightweight and rust-resistant. Vinyl is easy to install but less durable. Copper is strong and adds a unique look but is more expensive.
Flashing can be made from aluminum, copper, or steel. Aluminum is easy to work with. Copper is durable and looks good. Steel is strong but can rust if not coated properly.
Roof coatings can add extra protection. Reflective coatings help keep your home cool. Waterproof coatings prevent leaks. Elastomeric coatings stretch and move with the roof, reducing cracks.
Eco-Friendly Roofing Tips
Metal roofing is an eco-friendly option. It lasts long and can be recycled. Reclaimed wood shingles add a rustic look and reuse old materials. Clay tiles are durable and made from natural resources. Solar shingles generate electricity, reducing energy bills. Cool roofs reflect sunlight, keeping homes cooler and saving energy.
When removing old roofing, salvage usable materials. Reuse nails, screws, and even some shingles. Recycle asphalt shingles at local facilities. Use eco-friendly sealants and adhesives. Choose insulation made from recycled materials.
Rainwater harvesting systems can be added to collect water runoff. Install green roofs with plants to improve air quality and insulation. Use low-VOC paints and coatings to reduce harmful emissions.
Plan for proper ventilation to extend roof life and improve energy efficiency. Opt for light-colored materials to reflect heat. Consider local climate when choosing materials to ensure durability and efficiency.
Your Roof, Your Rules
Replacing a roof yourself isn't a walk in the park, but it's doable with the right tools, materials, and a bit of elbow grease. You've learned how to assess damage, choose materials, and follow safety guidelines. Now, it's time to put that knowledge to use. Remember, patience and attention to detail are your best friends. Don't rush the process. Take breaks when needed, and double-check your work. If you hit a snag, don't hesitate to seek advice or consult a professional. Your roof is a crucial part of your home, so give it the care it deserves. With determination and effort, you'll have a sturdy, reliable roof that you can proudly say you installed yourself. Happy roofing!
How do I know if my roof needs replacing?
Look for missing shingles, leaks, or sagging spots. If your roof is over 20 years old, it might be time for a new one.
What materials do I need for a roof replacement?
You’ll need shingles, underlayment, nails, flashing, and sealant. Don’t forget safety gear like gloves and goggles.
Can I replace my roof myself?
Yes, but it’s a big job. Make sure you’re comfortable with heights and have the right tools. If not, consider hiring a pro.
How long does it take to replace a roof?
It usually takes 2-3 days for a standard-sized house. Weather and roof complexity can affect this timeline.
What’s the cost of replacing a roof?
Costs vary, but expect to spend between $5,000 and $10,000. Material choice and roof size will impact the price.
Do I need a permit to replace my roof?
Most places require a permit. Check with your local building department to avoid fines.
How do I dispose of old roofing materials?
Rent a dumpster or use a hauling service. Some areas have specific disposal rules, so check local regulations.