
Home>Home & Furniture>Roof>DIY Guide to Roof Installation
Roof
DIY Guide to Roof Installation
Published: August 22, 2024
Learn how to install a roof with our comprehensive DIY guide. From materials to step-by-step instructions, get expert tips for a successful roof installation project.
(Many of the links in this article redirect to a specific reviewed product. Your purchase of these products through affiliate links helps to generate commission for Twigandthistle.com, at no extra cost. Learn more)
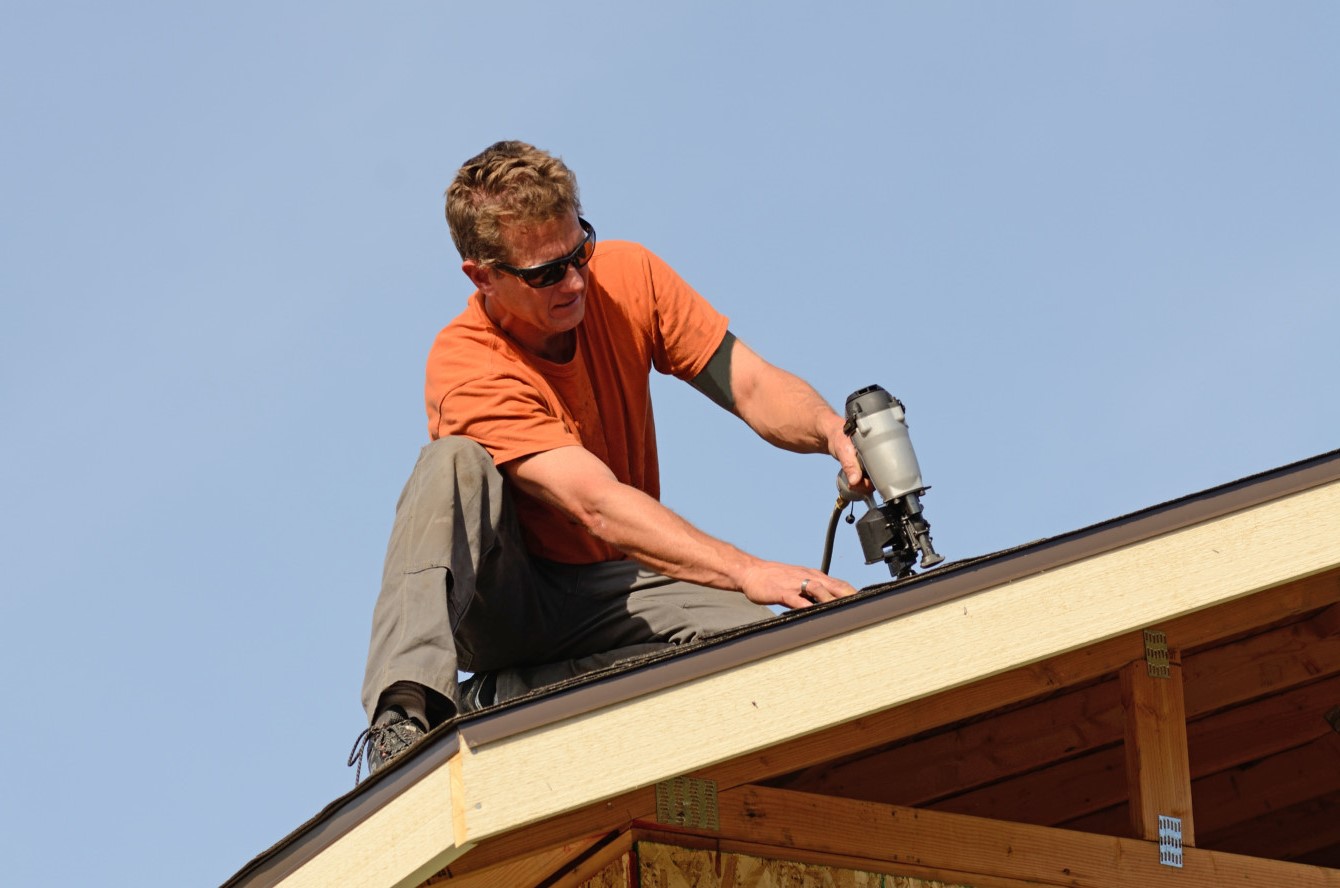
Taking on a roof installation yourself can be a major project, but with the right tools, it’s definitely doable. Whether you’re replacing an old roof or putting one on a new structure, understanding the basics will help you succeed. This guide will walk you through the essential steps and tips to ensure your roof not only looks great but also stands up to the elements. Remember, safety comes first. So, grab your gloves, ladder, and toolkit, and let's get started on creating a sturdy, reliable roof for your home.
Getting Ready for the Project
Safety Gear: Wear hard hats, gloves, safety glasses, and non-slip shoes. Use a harness if working on a steep roof.
Weather Check: Ensure clear skies. Avoid working during rain or high winds.
Workspace Setup: Clear the area around your house. Keep tools and materials organized and within reach.
Ladder Safety: Use a sturdy ladder. Place it on a flat surface and secure it properly.
Remove Old Roofing: Strip off old shingles or tiles. Dispose of debris safely.
Inspect Roof Deck: Check for damaged wood. Replace any rotten or weak sections.
Install Underlayment: Lay down a waterproof barrier to protect against leaks.
Gather Tools: Have a hammer, nails, roofing nails, utility knife, and measuring tape ready.
Plan Layout: Measure and mark where each shingle or tile will go. This ensures a straight and even installation.
Check Local Codes: Ensure your project meets local building codes and regulations.
Essential Materials and Tools
Roofing Shingles: These are the outermost layer of the roof, providing protection from weather elements. Choose asphalt, wood, metal, or tile based on your preference and budget.
Roofing Nails: Essential for securing shingles to the roof deck. Galvanized nails resist rust and corrosion.
Roofing Felt: Also known as underlayment, this material provides an extra layer of protection against moisture.
Roofing Cement: Used to seal joints and edges, preventing water leaks.
Drip Edge: Metal strips installed along the edges of the roof to direct water away from the fascia and into the gutters.
Flashing: Thin metal sheets placed around roof features like chimneys and vents to prevent water penetration.
Hammer: A basic tool for driving nails into the shingles and other materials.
Utility Knife: Useful for cutting shingles and roofing felt to size.
Chalk Line: Helps in marking straight lines on the roof for accurate shingle placement.
Measuring Tape: Ensures precise measurements for cutting and placing materials.
Ladder: Provides access to the roof. Ensure it’s sturdy and tall enough for safe use.
Roofing Harness: Safety gear to prevent falls while working on the roof.
Pry Bar: Useful for removing old shingles and nails.
Caulk Gun: Used to apply roofing cement or sealant.
Broom: Helps in cleaning the roof surface before installation.
Work Gloves: Protects hands from sharp edges and rough materials.
Safety Glasses: Shields eyes from debris and dust.
Tin Snips: Cuts metal flashing and drip edge to the required size.
Roofing Square: Ensures right angles and straight lines for accurate shingle placement.
Staple Gun: Secures roofing felt to the roof deck quickly and efficiently.
Required Skills and Time Commitment
Skill Level: Advanced
Time Required: 3-5 days
- Preparation: 1 day
- Removing Old Roof: 1 day
- Installing Underlayment: 0.5 day
- Laying Shingles: 1-2 days
- Finishing Touches: 0.5 day
Detailed Step-by-Step Guide
Gather Materials and Tools
- Shingles
- Roofing nails
- Hammer or nail gun
- Roofing felt
- Roofing cement
- Ladder
- Safety harness
- Utility knife
Remove Old Roofing
- Use a pry bar to lift old shingles.
- Remove nails and debris.
- Inspect roof deck for damage.
Install Roofing Felt
- Roll out felt paper starting at the bottom edge.
- Overlap each row by 2 inches.
- Secure with staples or roofing nails.
Install Drip Edge
- Place drip edge along eaves.
- Nail it down every 12 inches.
Lay Starter Shingles
- Cut shingles in half.
- Place along the edge of the roof.
- Nail down securely.
Install Shingles
- Start at the bottom corner.
- Lay shingles in a staggered pattern.
- Nail each shingle with four nails.
Install Ridge Cap Shingles
- Bend shingles over the ridge.
- Nail down each side.
Seal Roof
- Apply roofing cement to exposed nails.
- Check for any gaps or loose shingles.
Clean Up
- Remove all debris from the roof.
- Inspect the roof for any missed spots.
Safety Check
- Ensure all tools are removed.
- Double-check the stability of the roof.
Helpful Tips and Tricks
Measure Twice, Cut Once: Always double-check measurements before cutting materials. This saves time and reduces waste.
Use Quality Materials: Invest in good-quality shingles, underlayment, and nails. Cheap materials can lead to leaks and frequent repairs.
Safety First: Wear non-slip shoes, a hard hat, and use a safety harness. Working on a roof can be dangerous.
Start Early: Begin your work early in the day to avoid the hottest part of the afternoon. Heat can make roofing materials more difficult to handle.
Proper Ventilation: Ensure proper attic ventilation to extend the life of your roof and improve energy efficiency.
Nail Placement: Place nails correctly to avoid shingle blow-offs. Nails should be driven straight and flush with the shingle surface.
Use a Chalk Line: Mark straight lines with a chalk line to keep shingles aligned. This helps maintain a professional look.
Common Mistakes to Avoid:
Skipping Underlayment: Never skip installing underlayment. It provides an extra layer of protection against leaks.
Incorrect Slope: Ensure the roof has the correct slope for water drainage. Improper slope can cause water pooling and damage.
Overdriving Nails: Avoid driving nails too deep into shingles. This can damage them and reduce their effectiveness.
Ignoring Weather: Don’t install a roof during bad weather. Rain or snow can make the surface slippery and dangerous.
Alternatives for Materials or Methods:
Metal Roofing: Consider metal roofing for durability and low maintenance. It can last longer than traditional shingles.
Synthetic Underlayment: Use synthetic underlayment instead of felt. It’s more durable and resistant to tearing.
Rubber Roofing: For flat roofs, rubber roofing is a good alternative. It’s easy to install and provides excellent waterproofing.
Roof Coatings: Use roof coatings to extend the life of your roof. They can provide additional protection against UV rays and weather damage.
Estimating the Costs
Shingles: $1,000 - $2,000 for a standard 2,000 sq. ft. roof. Underlayment: $150 - $300. Roofing nails: $50 - $100. Roofing cement: $20 - $50. Flashing: $100 - $200. Roofing felt: $50 - $100. Drip edge: $100 - $200. Roofing hammer: $20 - $50. Utility knife: $10 - $20. Chalk line: $5 - $15. Safety harness: $50 - $100. Ladder: $100 - $300. Roofing shovel: $30 - $60. Gloves: $10 - $20. Goggles: $10 - $20. Total: $1,705 - $3,535.
Budget-friendly alternatives: Use asphalt shingles instead of more expensive materials like metal or tile. Borrow or rent tools like a ladder or roofing hammer. Buy generic brands for items like roofing nails and cement. Look for sales or discounts at local hardware stores.
Personalizing Your Roof
Materials: Instead of traditional asphalt shingles, consider using metal roofing for durability or wood shingles for a rustic look. Clay tiles offer a classic style, while slate tiles provide a high-end finish.
Colors: Choose light-colored shingles to reflect heat in warmer climates or dark-colored shingles to absorb heat in cooler areas. Earth tones like browns and greens blend with natural surroundings, while bold colors like red or blue make a statement.
Styles: Opt for architectural shingles for a textured, dimensional look. Three-tab shingles offer a more uniform appearance. Standing seam metal roofs give a modern, sleek finish, while corrugated metal adds an industrial touch.
Patterns: Create unique patterns by mixing different shingle shapes or colors. Consider a staggered pattern for a more dynamic look or a herringbone pattern for added visual interest.
Eco-Friendly Options: Use recycled shingles made from rubber or plastic. Install a green roof with vegetation for insulation and environmental benefits. Solar shingles can generate electricity while protecting your home.
Finishes: Add a reflective coating to reduce heat absorption. Use a textured finish for added grip and visual appeal. Glossy finishes can make colors pop, while matte finishes offer a more subdued look.
Accessories: Customize with decorative ridge caps or finials. Install skylights for natural light or solar tubes for energy efficiency. Add gutter guards to reduce maintenance and improve water flow.
Underlayment: Choose synthetic underlayment for better water resistance or felt paper for a traditional approach. Peel-and-stick underlayment offers extra protection in areas prone to leaks.
Ventilation: Install ridge vents for continuous airflow or gable vents for a classic look. Soffit vents can improve attic ventilation, while turbine vents offer a mechanical option.
Insulation: Add spray foam insulation for superior sealing or fiberglass batts for a cost-effective solution. Rigid foam boards provide high R-value and moisture resistance.
Trim: Use metal trim for a sleek, modern finish or wood trim for a traditional look. Vinyl trim offers low maintenance and durability. Custom trim can match your home’s architectural style.
Fasteners: Choose stainless steel nails for corrosion resistance or galvanized nails for cost-effectiveness. Screws provide extra holding power, especially in windy areas. Hidden fasteners offer a clean, seamless look.
Eco-Friendly Roofing Tips
Eco-friendly materials for roof installation include recycled shingles made from rubber or plastic. These shingles reduce waste and last long. Metal roofing is another great option. It reflects sunlight, keeping homes cooler. Metal roofs can be recycled at the end of their life.
Solar panels can be added to roofs for generating electricity. This reduces reliance on fossil fuels. Green roofs covered with plants help insulate homes and absorb rainwater. They also provide a habitat for wildlife.
Reusing materials saves money and helps the environment. Old wood from barns or pallets can be used for roof structures. Reclaimed tiles or slates add character to a home.
Insulation is key for energy efficiency. Use sheep wool or cotton insulation instead of synthetic materials. These natural options are biodegradable and safe.
Waterproofing can be done with eco-friendly sealants. Look for products with low VOCs (volatile organic compounds). These are better for health and the environment.
Proper ventilation extends roof life and improves energy efficiency. Install ridge vents or soffit vents to allow air circulation. This prevents moisture buildup and reduces cooling costs.
Regular maintenance keeps roofs in good condition. Clean gutters, check for leaks, and replace damaged shingles promptly. This prevents bigger problems and extends the roof's lifespan.
Your Roof, Your Rules
Installing your own roof can be challenging but rewarding. You've learned about materials, tools, and techniques. Now, it's time to put that knowledge to work. Remember, safety first. Always use proper gear and follow guidelines. Double-check your measurements and alignments to avoid leaks and damage. Don't rush the process; patience is key. If you hit a snag, don't hesitate to ask for help or consult a professional. Your hard work will pay off with a sturdy, long-lasting roof. Enjoy the satisfaction of knowing you did it yourself. Happy roofing!
How do I know if my roof needs replacing?
Look for missing shingles, leaks, or sagging spots. If your roof is over 20 years old, it might be time for a new one.
What materials do I need for roof installation?
You'll need shingles, underlayment, nails, flashing, and roofing cement. Don't forget safety gear like gloves and goggles.
Can I install a roof by myself?
Yes, but it's hard work and can be dangerous. Make sure you have the right tools and follow safety guidelines.
How long does it take to install a roof?
It usually takes a few days to a week, depending on the size of your roof and your experience level.
What's the best time of year to install a roof?
Spring and fall are ideal because of the mild weather. Avoid extreme heat or cold, which can make the job tougher.
How do I ensure my roof is waterproof?
Use quality underlayment and flashing around chimneys and vents. Make sure shingles are properly overlapped and sealed.
What should I do with old roofing materials?
Dispose of them at a local landfill or recycling center. Some areas have specific rules for roofing waste.