
Home>Home & Furniture>Roof>DIY Guide: Roof Shingle Repair
Roof
DIY Guide: Roof Shingle Repair
Published: August 20, 2024
Learn how to repair roof shingles with our step-by-step DIY guide. Save money and protect your home by fixing damaged shingles quickly and efficiently.
(Many of the links in this article redirect to a specific reviewed product. Your purchase of these products through affiliate links helps to generate commission for Twigandthistle.com, at no extra cost. Learn more)
Fixing roof shingles might seem tricky, but it's doable with some basic tools and a bit of patience. Whether you’re dealing with a few missing shingles or some that are damaged, handling it yourself can save money and give you a sense of accomplishment. This guide will cover tools, safety tips, and steps to get your roof looking good as new. Remember, working on a roof requires caution, so always prioritize safety. Ready to tackle that roof repair? Let’s get started on making those shingles secure and sturdy again.
Getting Ready for Roof Shingle Repair
Inspect the Roof: Check for damaged or missing shingles. Identify areas needing repair.
Gather Materials: Collect shingles, roofing nails, a hammer, a pry bar, a utility knife, and roofing cement.
Check Weather: Ensure a clear, dry day for the repair. Wet conditions can be dangerous.
Set Up Safety Gear: Wear non-slip shoes, gloves, and safety goggles. Use a safety harness if the roof is steep.
Prepare the Workspace: Clear debris from the roof. Set up a ladder on stable ground.
Remove Damaged Shingles: Use a pry bar to lift damaged shingles. Remove nails carefully.
Clean the Area: Clear old roofing cement and debris from the repair site.
Cut Replacement Shingles: Trim new shingles to fit the space using a utility knife.
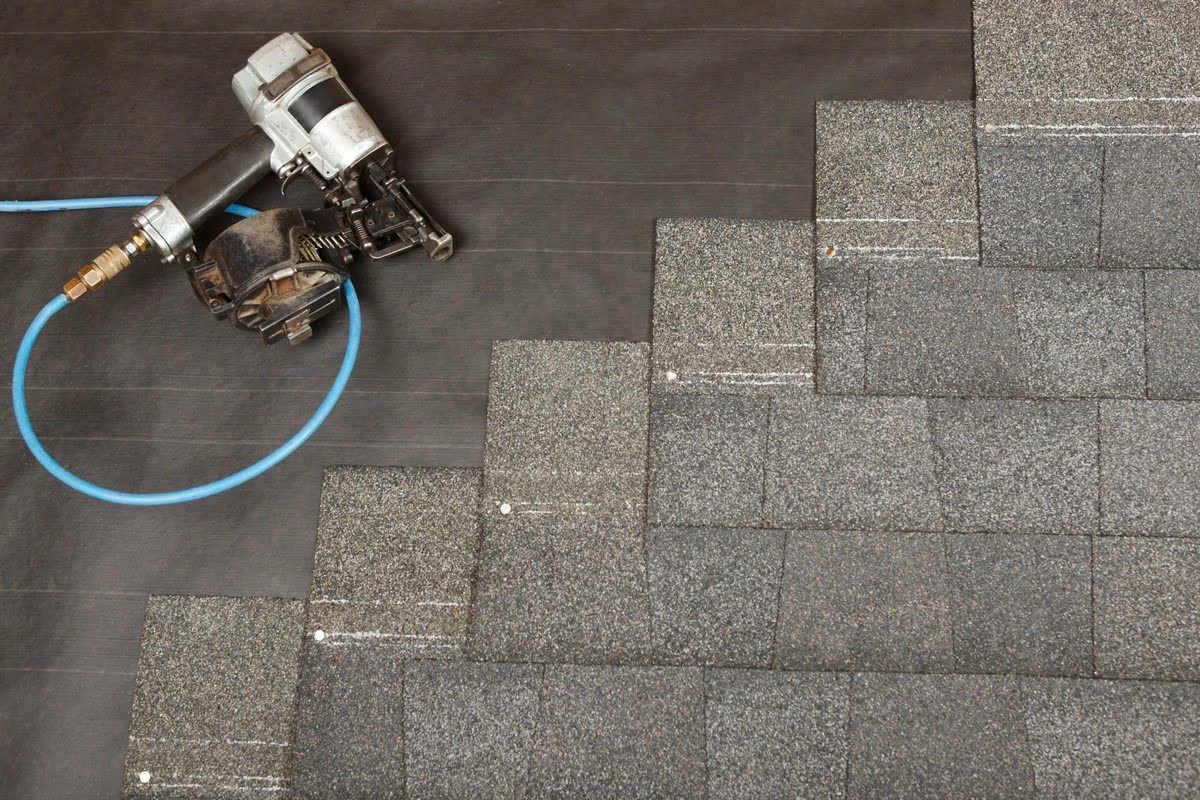
Install New Shingles: Slide new shingles into place. Nail them down securely.
Seal the Edges: Apply roofing cement to seal edges and prevent leaks.
Essential Materials and Tools
- Roofing Shingles: Replacement shingles matching the existing ones on your roof.
- Roofing Nails: Galvanized nails to prevent rust, typically 1¼ inches long.
- Hammer: Essential for driving nails into the shingles.
- Flat Pry Bar: Used to lift old shingles and remove nails.
- Utility Knife: For cutting shingles to the right size.
- Roofing Cement: Helps seal the edges of the shingles and prevents leaks.
- Caulking Gun: Needed to apply roofing cement neatly.
- Ladder: A sturdy ladder to safely reach the roof.
- Work Gloves: Protect your hands from sharp edges and rough surfaces.
- Safety Harness: Ensures safety while working at heights.
- Measuring Tape: For accurate measurements of shingles and roof areas.
- Chalk Line: Helps mark straight lines on the roof for proper shingle alignment.
- Broom: Sweeps away debris from the work area.
- Roofing Underlayment: Provides an extra layer of protection under the shingles.
- Tin Snips: Cuts through metal flashing if needed.
These materials and tools are essential for a successful roof shingle repair project.
Required Skills and Time Commitment
Skill Level: Intermediate
Time Required: 4-6 hours
Steps:
- Gather Materials: 30 minutes
- Remove Damaged Shingles: 1 hour
- Install New Shingles: 2-3 hours
- Clean Up: 30 minutes
Step-by-Step Repair Guide
Gather Materials and Tools
- Replacement shingles
- Roofing nails
- Hammer
- Pry bar
- Utility knife
- Ladder
- Safety gloves
Safety First
- Wear safety gloves.
- Ensure ladder stability.
- Avoid working on wet or windy days.
Inspect the Damage
- Climb the ladder carefully.
- Identify damaged shingles.
- Check for any underlying issues.
Remove Damaged Shingles
- Use the pry bar to lift the damaged shingle.
- Remove nails holding the shingle.
- Slide the damaged shingle out.
Prepare the Replacement Shingle
- Cut the new shingle to match the size of the old one using a utility knife.
- Ensure it fits properly.
Install the New Shingle
- Slide the new shingle into place.
- Align it with surrounding shingles.
- Nail it down using roofing nails.
Secure the Shingle
- Hammer nails into the top corners.
- Ensure nails are flush with the shingle surface.
- Check for any loose edges.
Inspect Your Work
- Ensure the new shingle is secure.
- Check for any gaps or misalignments.
- Make sure the roof looks uniform.
Clean Up
- Collect any debris or old shingles.
- Safely descend the ladder.
- Store tools properly.
Helpful Tips and Tricks
Inspect the roof regularly to catch problems early. Use a ladder stabilizer to avoid damaging gutters. Wear rubber-soled shoes for better grip. Replace shingles on a warm day; they are more flexible. Mark damaged areas with chalk to keep track.
Common mistakes include not checking the weather forecast. Rain can ruin your work. Overlapping shingles incorrectly can cause leaks. Nailing too high on the shingle can make it loose. Ignoring safety gear like gloves and goggles can lead to injuries.
Alternatives for materials include using synthetic underlayment instead of felt paper. It’s more durable. Metal shingles can replace asphalt for a longer-lasting roof. Adhesive strips can be used instead of nails for a cleaner look.
Estimating Repair Costs
Roof shingles: $30-$50 per bundle (covers about 33 square feet)
Roofing nails: $10-$15 per box (1-2 boxes needed)
Roofing cement: $10-$20 per gallon
Roofing felt: $20-$40 per roll (covers about 400 square feet)
Hammer: $10-$20
Utility knife: $5-$10
Ladder: $100-$200 (if you don't already have one)
Safety harness: $50-$100 (important for safety)
Gloves: $5-$10
Budget-friendly alternatives:
- Recycled shingles: $20-$30 per bundle
- Borrowing tools: Ask friends or neighbors to save on costs
- Renting a ladder: $20-$30 per day
Total estimated cost: $240-$495
Different Approaches and Customizations
Materials: Instead of traditional asphalt shingles, consider using metal shingles for a modern look or wood shingles for a rustic feel. Rubber shingles are another option, offering durability and eco-friendliness.
Colors: Choose shingles in a color that complements your home. Dark gray or black shingles give a sleek, contemporary appearance. Brown or red shingles can add warmth and a classic touch. For a unique look, try blue or green shingles.
Styles: Architectural shingles provide a textured, three-dimensional look. Slate shingles offer a high-end, elegant style. Solar shingles can be a great addition if you want to incorporate renewable energy into your home.
Patterns: Create a pattern by mixing different colors or types of shingles. A checkerboard or diamond pattern can add visual interest to your roof.
Finishes: Consider a matte finish for a subtle, understated look. A glossy finish can make your roof stand out and reflect more sunlight, potentially reducing cooling costs.
Edges: Use decorative edge shingles to add a unique border to your roof. Copper or metal flashing can also enhance the edges and provide extra protection.
Underlayment: Upgrade to a synthetic underlayment for better moisture resistance and durability compared to traditional felt paper.
Ventilation: Improve roof ventilation with ridge vents or solar-powered vents to extend the life of your shingles and improve energy efficiency.
Gutters: Coordinate your gutters with your new shingles. Copper gutters can add a touch of elegance, while vinyl gutters offer a budget-friendly option.
Eco-Friendly Repair Tips
Eco-friendly materials for roof shingle repair include recycled shingles made from post-consumer waste like plastic or rubber. These shingles reduce landfill waste and are durable. Metal shingles are another option; they are long-lasting, recyclable, and often made from recycled materials.
Reusing old shingles can save money and reduce waste. If some shingles are still in good condition, clean and reinstall them. For damaged shingles, consider repurposing them for other projects like garden paths or shed roofs.
Use eco-friendly sealants and adhesives. Look for products labeled as low-VOC (volatile organic compounds) to minimize harmful emissions. Solar-powered tools can also make your repair more sustainable by reducing electricity use.
When disposing of old shingles, recycle them if possible. Many communities have recycling programs for asphalt shingles. This keeps them out of landfills and allows the materials to be reused in new products.
Insulating your roof with sustainable materials like cellulose or wool can improve energy efficiency. This reduces the need for heating and cooling, lowering your carbon footprint.
Lastly, consider cool roofing materials that reflect more sunlight and absorb less heat. This can reduce your home's energy consumption and help combat urban heat islands.
Your Roof's New Look
Fixing roof shingles yourself isn't just about saving money. It's about taking control of your home's maintenance. With the right tools and a bit of patience, you can tackle those pesky leaks and damaged shingles. Remember, safety first. Always use a sturdy ladder and wear non-slip shoes. If you ever feel unsure, don't hesitate to call a professional. But for those who love a good DIY challenge, this project can be incredibly rewarding. Your roof will thank you, and you'll have the satisfaction of knowing you did it yourself. So grab your hammer, some nails, and get to work. Your home's protection is in your hands. Happy fixing!
How do I know if my roof shingles need repair?
Look for cracked, curled, or missing shingles. If you see granules in your gutters, that’s another sign. Water stains on your ceiling? Time to check the roof.
Can I repair roof shingles myself?
Absolutely! With some basic tools and safety gear, you can fix minor shingle issues. Just make sure you’re comfortable working on a ladder.
What tools will I need for shingle repair?
You’ll need a hammer, roofing nails, a utility knife, a flat pry bar, and some replacement shingles. Don’t forget safety gear like gloves and a harness.
How do I replace a damaged shingle?
First, lift the shingle above the damaged one. Use the pry bar to remove nails from the bad shingle. Slide the new shingle into place and nail it down. Seal it with roofing cement.
What if I see multiple damaged shingles?
If you spot several damaged shingles, it might be time for a professional inspection. Multiple issues could mean a bigger problem, like a leak or structural damage.
How often should I inspect my roof?
Check your roof twice a year, ideally in the spring and fall. Also, inspect it after major storms to catch any damage early.
Can weather affect my shingle repair?
Yes, it can. Avoid repairing shingles in extreme heat or cold. Mild, dry weather is best for ensuring the new shingles adhere properly.