
Home>Home & Furniture>Kitchen>DIY vs Contractor: Which is Right for Your Kitchen Remodel?
Kitchen
DIY vs Contractor: Which is Right for Your Kitchen Remodel?
Published: July 25, 2024
Discover whether a DIY kitchen remodel or hiring a contractor is the best choice for your project. Weigh the pros and cons to make an informed decision.
(Many of the links in this article redirect to a specific reviewed product. Your purchase of these products through affiliate links helps to generate commission for Twigandthistle.com, at no extra cost. Learn more)
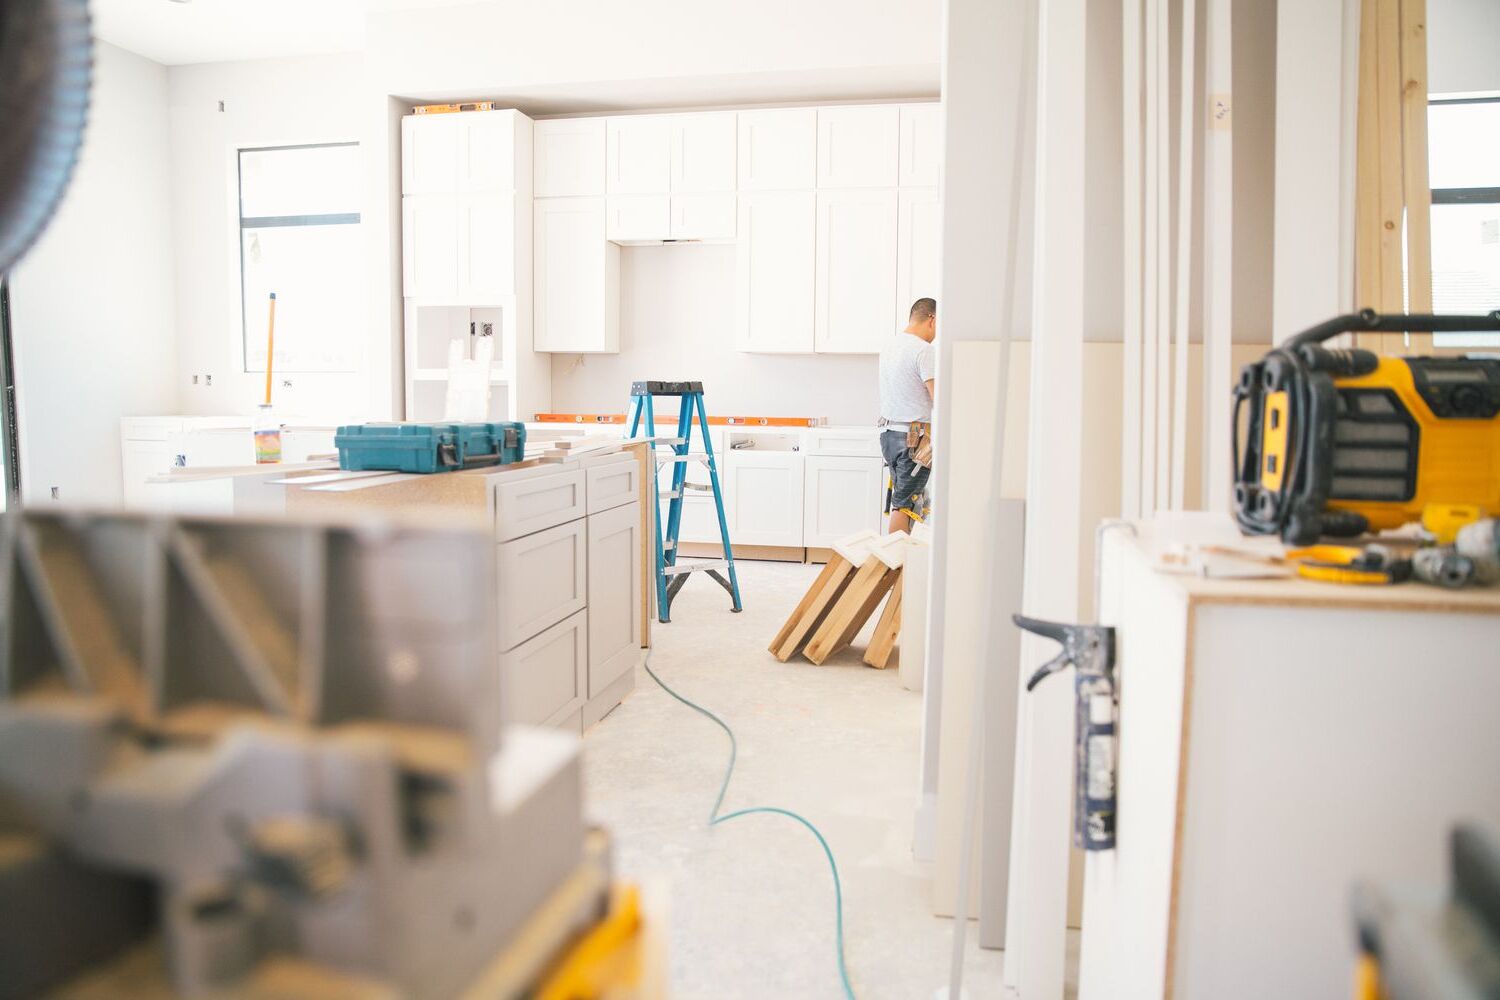
Thinking about remodeling your kitchen? Deciding whether to do it yourself or hire a contractor is a big choice. Both options have their pros and cons. Doing it yourself can save money and give you personal satisfaction. You might even learn new skills along the way. On the flip side, hiring a contractor can make the process smoother and quicker. Contractors bring expertise and experience to the table, which can be a huge benefit. In this article, we'll look at the ups and downs of each option to help you make the best choice for your kitchen remodel.
Getting Ready for Your Kitchen Remodel
Assess Your Skills: Determine if you have the necessary skills for a DIY kitchen remodel. Basic carpentry, plumbing, and electrical knowledge are essential.
Budget Planning: Calculate your budget. DIY projects can save money on labor but may require more time. Contractors might be more expensive but can complete the job faster.
Gather Tools and Materials: For DIY, ensure you have all necessary tools like saws, drills, and safety gear. Contractors usually bring their own tools.
Safety First: Always wear protective gear such as gloves, goggles, and masks. Ensure your workspace is well-ventilated and free of hazards.
Workspace Setup: Clear the kitchen area of all items. Set up a temporary kitchen in another part of your home to use during the remodel.
Permits and Regulations: Check local building codes. Some projects, especially those involving electrical or plumbing work, may require permits.
Timeline: Create a realistic timeline. DIY projects often take longer due to learning curves. Contractors can provide a more accurate completion date.
Consult Professionals: Even if you choose DIY, consulting a professional for advice can prevent costly mistakes. Contractors can offer insights and suggestions.
Emergency Plan: Have a plan in case something goes wrong. Know where your main water shutoff valve is and have emergency contact numbers handy.
Clean-Up Plan: Decide how you will dispose of debris. Renting a dumpster or scheduling regular trash pickups can keep your workspace tidy.
Essential Materials and Tools
Materials and Tools Needed:
- Measuring Tape: Essential for accurate measurements of cabinets, countertops, and appliances.
- Level: Ensures surfaces are even and straight.
- Screwdrivers: Both flathead and Phillips for assembling and disassembling fixtures.
- Hammer: Useful for nailing and minor demolition tasks.
- Power Drill: Speeds up the process of drilling holes and driving screws.
- Saw: A circular saw or jigsaw for cutting wood, countertops, and other materials.
- Utility Knife: Handy for cutting drywall, trimming edges, and other precise cuts.
- Pliers: Useful for gripping, bending, and cutting wires.
- Wrench Set: Needed for plumbing tasks and tightening bolts.
- Safety Gear: Includes gloves, goggles, and masks to protect against dust and debris.
- Paint and Brushes: For painting walls, cabinets, or trim.
- Tile Cutter: Necessary if installing or replacing tiles.
- Caulk and Caulking Gun: Seals gaps around sinks, countertops, and backsplashes.
- Sandpaper: Smooths surfaces before painting or staining.
- Stud Finder: Locates studs behind walls for secure mounting of cabinets and shelves.
- Bucket and Sponge: For cleaning up spills and wiping down surfaces.
- Adhesive and Sealant: Bonds materials and ensures waterproofing.
- Drop Cloths: Protects floors and furniture from paint and debris.
- Ladder: Reaches high places safely.
- Toolbox: Keeps all tools organized and easily accessible.
Each tool and material plays a crucial role in ensuring a successful kitchen remodel, whether doing it yourself or hiring a contractor.
Assessing Skill Level and Time Commitment
Skill Level:
DIY:
- Beginner to Intermediate: Simple tasks like painting, installing a backsplash, or changing cabinet hardware.
- Advanced: Tasks like plumbing, electrical work, or structural changes.
Contractor:
- All Levels: Suitable for any skill level, especially for complex tasks.
Time Required:
DIY:
- Beginner Tasks: 1-2 weekends.
- Intermediate Tasks: 2-4 weekends.
- Advanced Tasks: Several weeks to a few months.
Contractor:
- All Tasks: Typically 4-8 weeks, depending on project scope.
Detailed Step-by-Step Guide
1. Assess Your Skills and Time
- Evaluate your skills: Be honest about your abilities. Can you handle plumbing, electrical work, and carpentry?
- Consider your time: Do you have enough time to dedicate to this project? Kitchen remodels can take weeks or months.
2. Budget Planning
- Set a budget: Determine how much you can spend. Include costs for materials, tools, and any unexpected expenses.
- Compare costs: Research the cost of doing it yourself versus hiring a contractor.
3. Research and Plan
- Gather ideas: Look for inspiration online or in magazines. Decide on the layout, materials, and design.
- Create a plan: Draw up a detailed plan. Include measurements, materials needed, and a timeline.
4. Permits and Regulations
- Check local regulations: Find out if you need permits for your remodel. Some work, like electrical or plumbing, may require a licensed professional.
- Apply for permits: If needed, apply for permits before starting any work.
5. DIY Approach
- Gather tools and materials: Make a list of everything you need. Purchase or rent tools and buy materials.
- Start with demolition: Remove old cabinets, countertops, and appliances. Be careful not to damage plumbing or electrical systems.
- Install new elements: Follow your plan to install new cabinets, countertops, flooring, and appliances. Take your time to ensure everything is level and secure.
- Handle plumbing and electrical: If you’re comfortable, do minor plumbing and electrical work. For major tasks, consider hiring a professional.
6. Hiring a Contractor
- Research contractors: Look for reputable contractors in your area. Check reviews and ask for recommendations.
- Get quotes: Contact several contractors for quotes. Compare their prices and services.
- Check credentials: Ensure the contractor is licensed and insured. Ask for references and check their previous work.
- Sign a contract: Once you choose a contractor, sign a detailed contract. Include the scope of work, timeline, and payment schedule.
7. Supervise the Project
- Stay involved: Even if you hire a contractor, stay involved in the project. Regularly check progress and communicate any concerns.
- Inspect the work: Once the project is complete, inspect everything. Make sure it meets your expectations and the contract terms.
8. Final Touches
- Clean up: Whether you did it yourself or hired a contractor, clean up the space. Dispose of any debris and organize your tools.
- Add personal touches: Decorate your new kitchen with personal items, like artwork or plants. Enjoy your remodeled space!
Helpful Tips and Tricks
Budget: DIY can save money, but unexpected costs add up. Contractors provide estimates that help avoid surprises.
Time: DIY projects often take longer due to learning curves. Contractors complete tasks faster due to experience.
Skill Level: Basic tasks like painting or installing shelves suit DIY. Complex tasks like plumbing or electrical work require a contractor.
Permits: Contractors handle permits and inspections. DIYers must research local regulations to ensure compliance.
Tools: DIY requires buying or renting tools. Contractors bring their own, saving you the hassle.
Quality: Contractors often deliver higher quality due to expertise. DIY can result in mistakes if not done correctly.
Common Mistakes to Avoid: Underestimating time and cost, skipping permits, and overestimating your skill level.
Alternatives: For a middle ground, consider hiring a contractor for complex tasks and doing simpler tasks yourself. Another option is hiring a handyman for smaller jobs, which can be more cost-effective than a full contractor.
Estimating the Cost
DIY Kitchen Remodel:
Materials:
- Cabinets: $2,000 - $5,000
- Countertops: $1,500 - $4,000
- Flooring: $1,000 - $3,000
- Appliances: $2,000 - $5,000
- Paint: $100 - $300
- Lighting: $200 - $800
- Plumbing Fixtures: $300 - $1,000
Tools:
- Power Drill: $50 - $150
- Saw: $100 - $300
- Measuring Tape: $10 - $20
- Level: $20 - $50
- Screwdrivers: $20 - $50
- Wrenches: $30 - $70
- Paint Brushes/Rollers: $20 - $50
Total DIY Cost: $6,350 - $19,790
Contractor Kitchen Remodel:
Labor Costs:
- General Contractor: $5,000 - $15,000
- Electrician: $1,000 - $3,000
- Plumber: $1,000 - $3,000
- Painter: $500 - $1,500
Materials:
- Cabinets: $2,000 - $5,000
- Countertops: $1,500 - $4,000
- Flooring: $1,000 - $3,000
- Appliances: $2,000 - $5,000
- Lighting: $200 - $800
- Plumbing Fixtures: $300 - $1,000
Total Contractor Cost: $14,500 - $41,300
Budget-Friendly Alternatives:
DIY:
- Refinish Existing Cabinets: $200 - $600
- Laminate Countertops: $300 - $800
- Vinyl Flooring: $500 - $1,500
- Used Appliances: $500 - $1,500
Contractor:
- Basic Cabinet Models: $1,000 - $3,000
- Laminate Countertops: $300 - $800
- Vinyl Flooring: $500 - $1,500
- Basic Lighting Fixtures: $100 - $300
Creative Variations and Customizations
DIY Customizations:
Alternative Materials: Use reclaimed wood for cabinets or countertops. It's eco-friendly and adds character. Consider peel-and-stick tiles for a quick backsplash update.
Colors: Paint cabinets in bold colors like navy blue or forest green. Use chalkboard paint on one wall for a fun, functional space.
Styles: Go for a rustic look with open shelving and vintage hardware. Try a modern minimalist style with sleek, handle-less cabinets and neutral tones.
Contractor Customizations:
Alternative Materials: Opt for quartz countertops for durability and low maintenance. Use custom cabinetry made from high-quality materials like maple or oak.
Colors: Choose a two-tone color scheme for cabinets, such as white uppers and gray lowers. Consider a neutral palette with pops of color in accessories.
Styles: Go for a transitional style that blends traditional and contemporary elements. Try a luxury look with high-end finishes like marble countertops and brass fixtures.
Eco-Friendly Remodeling Tips
Eco-friendly materials can make a big difference in your kitchen remodel. For countertops, consider recycled glass or bamboo. Both are sustainable and look great. Cabinets made from reclaimed wood add character and reduce waste.
When painting, use low-VOC or zero-VOC paints. These paints release fewer harmful chemicals into the air. For flooring, cork and bamboo are excellent choices. They are renewable and durable.
DIY projects allow more control over material choices. You can reuse old cabinets by giving them a fresh coat of paint. Recycling old tiles for a backsplash can save money and reduce waste.
Hiring a contractor can be beneficial for larger projects. Make sure they use eco-friendly materials and methods. Ask them to salvage and reuse materials whenever possible.
Energy-efficient appliances are a must. They save energy and reduce your carbon footprint. Look for the Energy Star label when shopping for new appliances.
Lighting is another area to consider. LED bulbs use less energy and last longer than traditional bulbs. Install dimmers to control light levels and save energy.
Water-saving fixtures like low-flow faucets and dual-flush toilets can reduce water usage. These fixtures are easy to install and can make a big impact.
Whether you choose DIY or a contractor, focus on sustainability. Small changes can make a big difference.
Making the Choice
Choosing between DIY and hiring a contractor for your kitchen remodel boils down to your skills, time, and budget. If you love hands-on projects and have the know-how, DIY can save you money and give you a sense of accomplishment. However, if the project is complex or you’re short on time, a contractor might be the better route. Contractors bring expertise, speed, and professional results but come at a higher cost. Weigh the pros and cons of each option carefully. Consider your comfort level with tools, your availability, and how much you’re willing to spend. Whether you go DIY or hire a pro, the goal is to create a kitchen you’ll love. Happy remodeling!
What's the main advantage of doing a kitchen remodel yourself?
Cost savings. You can save a lot by not paying for labor. Plus, you get to choose materials that fit your budget.
Are there any tasks I should avoid doing myself?
Yes, plumbing and electrical work. These tasks require expertise and can be dangerous if done incorrectly. Better to hire pros for these.
How long does a DIY kitchen remodel usually take?
It depends on the project's scope, but several weeks to a few months is common. Be prepared for unexpected delays.
What are the benefits of hiring a contractor?
Professional quality and speed. Contractors have the experience and tools to get the job done efficiently and correctly.
Can I mix DIY and contractor work?
Absolutely! You can handle simple tasks like painting or installing cabinets, while a contractor tackles complex jobs like wiring or plumbing.
How do I choose the right contractor?
Look for licensed and insured professionals with good reviews. Ask for references and check their past work.
What should my budget include?
Factor in materials, labor, permits, and unexpected costs. Always add a buffer for surprises that might pop up.