
Home>Home & Furniture>Kitchen>DIY Spice Rack Organization Ideas
Kitchen
DIY Spice Rack Organization Ideas
Published: August 3, 2024
Discover creative DIY spice rack organization ideas to declutter your kitchen, maximize space, and keep your spices easily accessible. Get inspired with our expert tips!
(Many of the links in this article redirect to a specific reviewed product. Your purchase of these products through affiliate links helps to generate commission for Twigandthistle.com, at no extra cost. Learn more)
Organizing spices can make cooking more enjoyable and efficient. Instead of rummaging through cluttered shelves or drawers, why not create a DIY spice rack? Crafting your own spice rack allows you to customize it according to your kitchen space and style preferences. Whether you prefer a wall-mounted rack, a drawer organizer, or a rotating carousel, there's a solution that fits your needs. Plus, using clear jars or labels helps you quickly find spices when you need them. Let's dive into some simple, cost-effective DIY ideas to transform your spice storage and bring order to your culinary adventures.
Getting Ready for Your Project
Gather Supplies: Collect all necessary materials like wood, screws, nails, paint, and tools such as a saw, drill, and measuring tape.
Measure Space: Measure the area where the spice rack will be placed. Ensure it fits well and leaves enough room for easy access.
Design Plan: Sketch a simple design of the spice rack. Decide on the number of shelves and their spacing based on the size of your spice jars.
Safety Gear: Wear safety goggles, gloves, and a dust mask to protect yourself while cutting and assembling the wood.
Prepare Workspace: Set up a clean, well-lit workspace. Ensure you have a sturdy table or workbench to work on.
Cut Wood: Cut the wood pieces according to your design plan. Double-check measurements before cutting to avoid mistakes.
Sand Edges: Sand the edges of the wood pieces to smooth out any rough spots. This helps prevent splinters and gives a polished look.
Pre-drill Holes: Pre-drill holes for screws to prevent the wood from splitting when assembling the rack.
Assemble Rack: Assemble the pieces using screws and nails. Follow your design plan closely to ensure stability.
Paint or Stain: Paint or stain the assembled rack to match your kitchen decor. Let it dry completely before use.
Mount Rack: Securely mount the spice rack to the wall or inside a cabinet. Use appropriate anchors and screws for the wall type.
Organize Spices: Arrange your spices on the rack. Group them by type or frequency of use for easy access.
Gather Your Supplies
- Wooden Boards: Used for creating shelves. Choose sturdy wood like pine or oak.
- Screws: Essential for securing the shelves to the wall. Make sure they are the right length for your boards.
- Drill: Needed for making holes in the wall and the boards. A cordless drill is handy.
- Screwdriver: Used for tightening screws. A multi-bit screwdriver is versatile.
- Measuring Tape: Ensures accurate measurements for spacing and shelf placement.
- Level: Helps keep shelves straight. A small bubble level works well.
- Sandpaper: Smooths rough edges on the wooden boards. Medium-grit sandpaper is ideal.
- Paint or Stain: Adds color or finish to the wood. Choose based on your kitchen decor.
- Paintbrushes: Needed for applying paint or stain. Use different sizes for detailed work.
- Wall Anchors: Provide extra support for heavy spice jars. Use if mounting on drywall.
- Pencil: Marks measurements and drill points. A simple No. 2 pencil works fine.
- Clamps: Hold wood in place while drilling or painting. Small bar clamps are useful.
- Safety Glasses: Protect eyes from dust and debris. Always wear when drilling or sanding.
- Dust Mask: Prevents inhalation of wood dust. Especially important when sanding.
Skills and Time Needed
Skill Level: Beginner
Time Required: 1-2 hours
- Gather Materials: 10 minutes
- Measure Space: 15 minutes
- Install Shelves or Racks: 30-45 minutes
- Label and Arrange Spices: 20-30 minutes
How to Build It
Gather Supplies
- Small jars or containers
- Labels or a label maker
- A spice rack or shelf
- A funnel
- A marker or pen
Sort Spices
- Group similar spices together (e.g., all herbs, all baking spices).
- Discard expired spices.
Clean Containers
- Wash and dry jars or containers thoroughly.
- Ensure no moisture remains inside.
Transfer Spices
- Use a funnel to pour spices into clean jars.
- Fill each jar about three-quarters full.
Label Jars
- Write the name of each spice on a label.
- Attach labels to jars, ensuring they are easy to read.
Arrange on Rack
- Place jars on the spice rack or shelf.
- Organize by frequency of use or alphabetically.
Check for Stability
- Ensure jars are stable and won’t tip over.
- Adjust spacing if necessary.
Maintain Organization
- Return jars to their designated spots after use.
- Regularly check for expired spices and replace as needed.
Helpful Hints
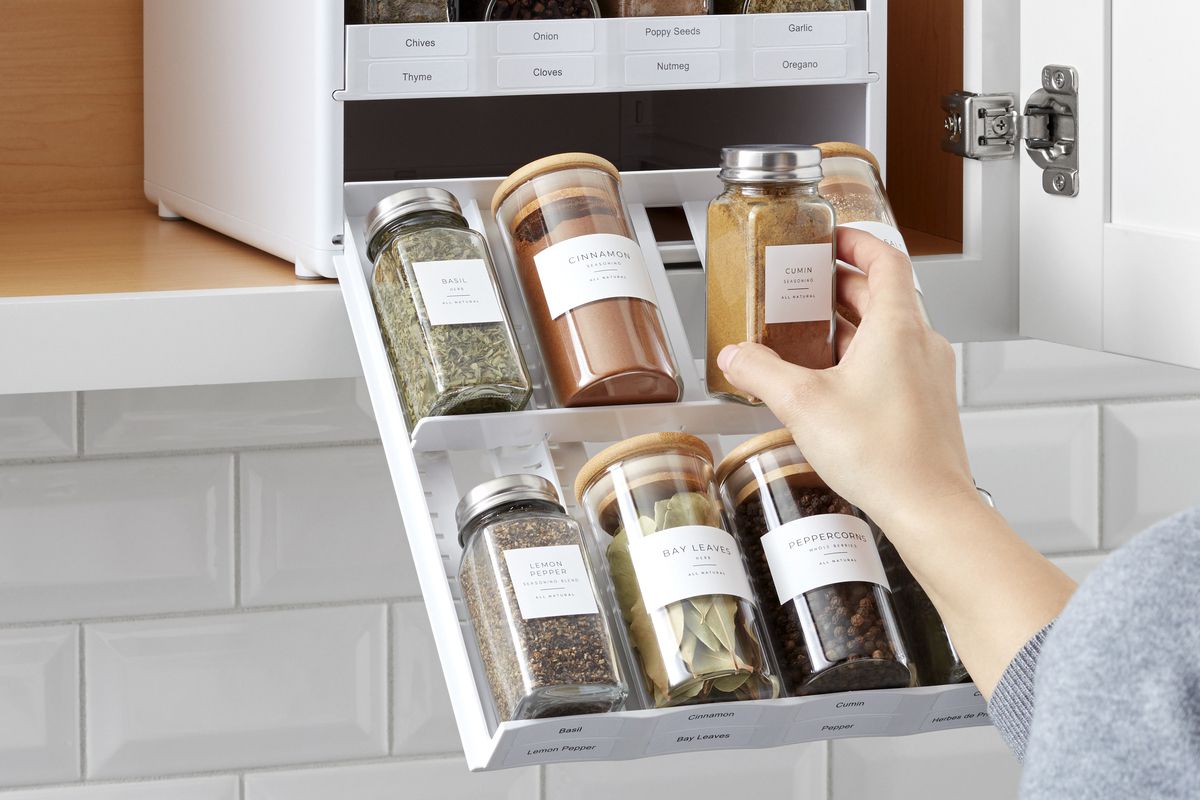
Use clear containers: Transfer spices into clear, uniform jars. This makes it easier to see what you have and looks neat.
Label everything: Use a label maker or write directly on jars. Include the spice name and expiration date.
Group by type: Organize spices by category, like baking, grilling, or international cuisine. This helps find what you need quickly.
Use drawer inserts: If you have a spare drawer, use inserts to keep jars from rolling around. This keeps everything in place.
Magnetic strips: Attach magnetic strips to the inside of cabinet doors or walls. Stick metal spice tins to them for easy access.
Tiered shelves: Use tiered shelves in cabinets to see all spices at once. This prevents jars from getting lost in the back.
Lazy Susan: Place a Lazy Susan in your pantry or cabinet. Spin it to reach spices in the back without knocking others over.
Repurpose items: Use old muffin tins, ice cube trays, or small baskets to organize spices in drawers or on shelves.
Common mistakes: Avoid storing spices near heat sources like stoves or ovens. Heat can degrade their flavor. Don’t forget to check expiration dates regularly. Old spices lose potency.
Alternative materials: Instead of buying new jars, repurpose baby food jars or small mason jars. Use chalkboard paint on lids for easy labeling.
Budgeting Your Project
Materials:
- Wood: $20-$30 for basic pine or plywood. For higher-quality wood like oak or maple, expect $40-$60.
- Screws/Nails: $5-$10.
- Wood Glue: $5.
- Paint/Stain: $10-$15.
- Sandpaper: $5.
Tools:
- Saw: $30-$50 for a basic hand saw. A power saw can cost $50-$100.
- Drill: $40-$60.
- Screwdriver: $10.
- Paintbrushes: $5-$10.
- Measuring Tape: $5-$10.
Total Cost:
- Basic Version: $135-$200.
- High-Quality Version: $170-$270.
Budget-Friendly Alternatives:
- Repurpose Old Wood: Free if you have scrap wood.
- Use Mason Jars: $1-$2 each.
- Buy a Second-hand Drill: $20-$30.
- Skip Paint/Stain: Use natural wood finish.
Personalize Your Spice Rack
Wooden Crates: Use small wooden crates for a rustic look. Paint them in bright colors or stain for a natural finish.
Mason Jars: Attach mason jars to a wooden board. Label the lids with chalkboard paint for easy identification.
Magnetic Strips: Install magnetic strips on the inside of a cabinet door. Use metal spice containers that stick to the strip.
PVC Pipes: Cut PVC pipes into short sections. Mount them horizontally on a wall for a modern, industrial vibe.
Repurposed Pallets: Use old pallets to create a tiered spice rack. Sand and paint for a polished appearance.
Floating Shelves: Install floating shelves in a corner of your kitchen. Arrange spices in uniform jars for a clean look.
Drawer Inserts: Use adjustable drawer inserts to keep spices organized. Opt for bamboo or plastic based on your kitchen’s style.
Hanging Baskets: Hang wire baskets on the wall. Place spices in small jars or containers within the baskets.
Lazy Susan: Place a Lazy Susan inside a cabinet. Arrange spices in a circular pattern for easy access.
Pegboard: Install a pegboard on a kitchen wall. Use hooks and small shelves to hold spice jars.
Vintage Boxes: Repurpose vintage wooden boxes. Stack them or mount them on the wall for a unique display.
Test Tubes: Use test tubes with cork stoppers. Mount them on a wooden frame for a quirky, scientific look.
Repurposed Bookshelves: Use small bookshelves or shadow boxes. Paint or stain to match your kitchen decor.
Wire Racks: Install wire racks inside cabinet doors. Use them to hold spice jars or small containers.
Tension Rods: Place tension rods inside a drawer. Use them to create compartments for different spices.
Chalkboard Labels: Use chalkboard labels on jars. Easily change the labels as needed.
Glass Jars: Use uniform glass jars with screw-on lids. Arrange them on a shelf for a clean, minimalist look.
Rotating Carousels: Use rotating carousels for easy access. Place them on countertops or inside cabinets.
Tiered Trays: Use tiered trays to save space. Place them on countertops or inside cabinets.
Repurposed Furniture: Use small pieces of furniture like old dressers. Repaint and repurpose them to hold spices.
Eco-Friendly Ideas
Repurpose old wooden crates or wine boxes into spice racks. Sand them down and paint with non-toxic paint for a fresh look.
Use recycled glass jars for storing spices. Label them with reusable chalkboard stickers.
Pallet wood can be transformed into a rustic spice rack. Disassemble a pallet, cut the wood to size, and assemble using nails or screws.
Mason jars can be attached to the underside of cabinets with hose clamps. This keeps spices accessible and saves counter space.
Upcycle tin cans by cleaning them thoroughly and decorating with eco-friendly paint. Attach them to a wooden board for a unique spice holder.
Old drawers from discarded furniture can be mounted on walls. Add small shelves inside for spice storage.
Bamboo is a sustainable material perfect for spice racks. It’s durable and grows quickly, making it an eco-friendly choice.
Corkboards can be used to pin small spice containers. Attach magnets to the lids for easy access.
Reclaimed wood from old furniture or construction sites can be cut and assembled into a spice rack. This reduces waste and gives the wood a new purpose.
Glass bottles with cork stoppers can be used for spices. They are easy to clean and can be reused indefinitely.
Spice Up Your Kitchen
Organizing your spices can make cooking way more enjoyable. A well-structured spice rack saves time, keeps your kitchen tidy, and makes it easier to find what you need. Whether you go for a magnetic board, a tiered shelf, or repurposed jars, each option has its perks. Customizing your spice storage to fit your space and style adds a personal touch to your kitchen. Plus, it’s a fun project that can be done in a weekend. So, grab your tools, pick your favorite idea, and get started. Your future self will thank you every time you reach for that perfect seasoning. Happy organizing!
How can I make a simple spice rack?
Use a wooden board and some small jars. Attach the jars to the board using screws or glue. Hang the board on your kitchen wall.
What materials do I need?
You’ll need a wooden board, small jars, screws or strong glue, and a drill if you’re using screws.
Can I use recycled materials?
Absolutely! Old jars, scrap wood, and even metal cans can be repurposed into a spice rack.
How do I label the jars?
Use chalkboard paint, stickers, or a label maker. You can also write directly on the jars with a permanent marker.
Where should I place my spice rack?
Hang it near your cooking area but away from heat sources like the stove. This keeps spices handy and fresh.
How do I keep my spices organized?
Arrange them alphabetically or by frequency of use. Group similar spices together, like all your baking spices in one section.
Can I make a portable spice rack?
Sure! Use a small wooden crate or a plastic container with dividers. This way, you can move it around your kitchen easily.
How do I clean my spice rack?
Wipe it down with a damp cloth regularly. Make sure jars are sealed tightly to prevent spills and keep everything tidy.