
Home>Home & Furniture>Garage & Basement>Man Cave Makeover: Transforming A Shed Into The Ultimate DIY Retreat
Garage & Basement
Man Cave Makeover: Transforming A Shed Into The Ultimate DIY Retreat
Published: February 21, 2024
Editor-in-Chief with a decade in home renovation and a passion for vintage furniture. Diane is known for her weekend treasure hunts at flea markets, enriching our content with unique style insights.
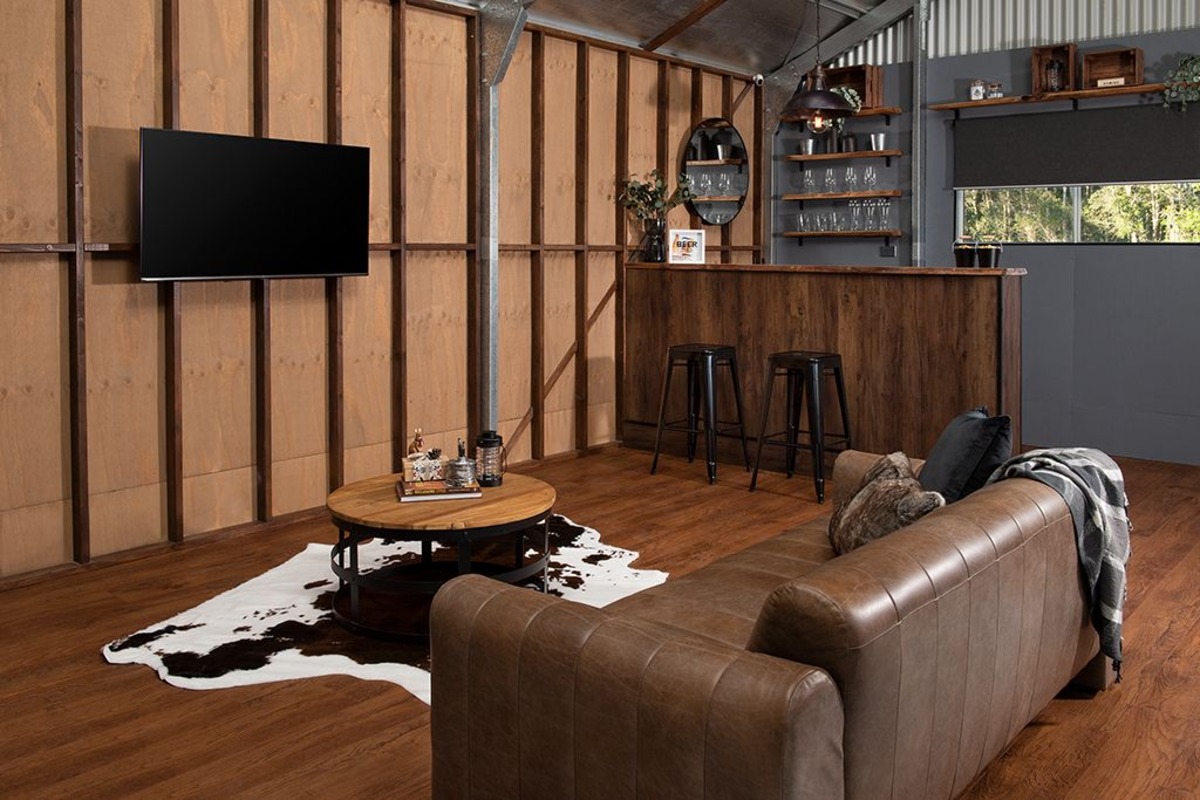
Transform your garage or basement into the ultimate DIY retreat with our man cave makeover tips. Get inspired to create your perfect space!
(Many of the links in this article redirect to a specific reviewed product. Your purchase of these products through affiliate links helps to generate commission for Twigandthistle.com, at no extra cost. Learn more)
Introduction
Welcome to the ultimate guide on transforming a shed into the ultimate DIY retreat, also known as the man cave. Whether you're a hobbyist, a sports enthusiast, or simply in need of a personal sanctuary, converting a shed into a man cave offers a creative and fulfilling project that can significantly enhance your living space.
Creating a man cave is not just about adding a recreational area to your home; it's about crafting a space that reflects your personality, interests, and passions. From a cozy workshop for DIY projects to a sports-themed entertainment hub, the possibilities are endless. This transformation journey will involve careful planning, resourcefulness, and a touch of creativity to bring your vision to life.
In this comprehensive guide, we will delve into the step-by-step process of revamping a humble shed into a personalized haven. From initial planning and design to the final touches that make the space uniquely yours, each step will be explored in detail. We'll cover everything from clearing out the space and weatherproofing to electrical installations, flooring, and decor. By the end of this guide, you'll be equipped with the knowledge and inspiration to embark on your very own man cave makeover.
So, whether you're a seasoned DIY enthusiast or a newcomer to the world of home improvement, fasten your tool belt and get ready to embark on an exciting journey of transformation. It's time to unleash your creativity, roll up your sleeves, and turn that neglected shed into a remarkable retreat that reflects your individuality and passions. Let's dive into the first step: Planning and Design.
Step 1: Planning and Design
The initial phase of transforming a shed into a man cave begins with meticulous planning and innovative design. This step sets the foundation for the entire project, shaping the vision and functionality of the space. Here's a detailed breakdown of the planning and design process:
-
Assess the Space: Start by evaluating the shed's dimensions, layout, and existing features. Consider factors such as natural light sources, ventilation, and potential obstacles. This assessment will help determine the possibilities and limitations of the space.
-
Define the Purpose: Decide on the primary function of the man cave. Will it serve as a workshop, a gaming zone, a home theater, or a combination of activities? Understanding the intended purpose will guide the design and layout decisions.
-
Create a Layout: Sketch out a rough floor plan that incorporates essential elements such as seating areas, storage, workstations, and entertainment zones. Consider the flow of movement within the space and allocate areas for specific activities.
-
Set a Budget: Establish a realistic budget for the project, factoring in expenses for materials, furnishings, and any professional assistance required. Having a clear budget will help prioritize expenditures and prevent overspending.
-
Gather Inspiration: Explore design ideas and themes that resonate with your interests and personality. Whether it's a rustic workshop vibe, a sports-themed retreat, or a tech-savvy entertainment space, gather inspiration from various sources to refine your vision.
-
Consider Functional Requirements: Take into account the practical needs of the space, such as storage solutions, electrical outlets, lighting requirements, and any specialized equipment or furniture essential to your chosen theme.
-
Incorporate Personal Touches: Infuse the design with personal elements that reflect your hobbies, passions, and individuality. Whether it's displaying memorabilia, incorporating a specific color scheme, or integrating custom features, these personal touches will make the man cave uniquely yours.
By investing time and thought into the planning and design phase, you'll lay a solid groundwork for the transformation ahead. This step is crucial in ensuring that the end result aligns with your vision and fulfills your functional and aesthetic preferences. With the planning and design stage complete, it's time to move on to the next step: Clearing and Cleaning the Space.
Step 2: Clearing and Cleaning the Space
Before embarking on the transformation of your shed into a captivating man cave, it's essential to start with a clean slate. Clearing and cleaning the space is a fundamental step that sets the stage for the subsequent renovations. Here's a detailed exploration of this crucial phase:
-
Remove Unwanted Items: Begin by decluttering the shed, removing any unnecessary items, and sorting through belongings. Dispose of broken or unused items, and consider donating or repurposing items that no longer serve a purpose.
-
Deep Cleaning: Once the space is decluttered, initiate a thorough cleaning process. Sweep the floors, dust surfaces, and scrub away any accumulated dirt or grime. Pay attention to corners, ceilings, and hidden nooks that may have gathered dust over time.
-
Inspect for Damage: Take the opportunity to inspect the shed for any structural damage, water leaks, or pest infestations. Addressing these issues at the outset will prevent complications during the renovation process and ensure a sound foundation for the man cave.
-
Organize Storage: If the shed will incorporate storage areas, consider installing shelves, cabinets, or storage solutions to keep the space organized and maximize functionality. Efficient storage will contribute to a clutter-free and inviting environment.
-
Prepare for Renovations: Clearing and cleaning the space also involves preparing for the upcoming renovations. This includes protecting any items that will remain in the shed, covering windows, and securing the area to prevent dust and debris from spreading to other parts of the property.
By meticulously clearing and cleaning the space, you'll create a blank canvas ready for the transformation into a remarkable man cave. This process not only sets the stage for the subsequent steps but also instills a sense of freshness and readiness for the exciting changes to come. With the space cleared and prepped, the next step involves insulation and weatherproofing to ensure comfort and durability within the man cave.
Step 3: Insulation and Weatherproofing
Insulation and weatherproofing are pivotal aspects of transforming a shed into a comfortable and resilient man cave. This step focuses on enhancing the shed's structural integrity, regulating temperature, and safeguarding the interior against external elements. Here's a comprehensive exploration of the insulation and weatherproofing process:
-
Assessing Insulation Needs: Begin by evaluating the existing insulation, if any, and determining the insulation requirements based on the intended use of the man cave. Factors such as climate, seasonal variations, and the shed's construction materials play a crucial role in this assessment.
-
Selecting Insulation Materials: Choose insulation materials that align with the shed's structure and the desired level of thermal efficiency. Options range from traditional fiberglass batts and foam boards to modern spray foam insulation, each offering unique benefits in terms of installation ease, R-value, and moisture resistance.
-
Sealing Air Leaks: Identify and seal any air leaks or gaps in the shed's walls, windows, doors, and roof. This step is essential for preventing heat loss in colder months and maintaining a comfortable interior environment throughout the year.
-
Weatherproofing Exteriors: Weatherproofing the exterior surfaces involves applying protective coatings, sealants, or weather-resistant barriers to shield the shed from moisture, wind, and other environmental factors. This proactive measure helps prolong the lifespan of the structure and safeguards the interior against water infiltration.
-
Ventilation Considerations: Integrate adequate ventilation to regulate air circulation and prevent moisture buildup within the insulated space. Proper ventilation contributes to a healthier indoor environment and mitigates the risk of mold or mildew formation.
-
Addressing Moisture Control: Implement moisture control measures, such as installing vapor barriers and addressing drainage around the shed, to mitigate the impact of humidity and moisture on the insulation and interior surfaces.
-
Energy-Efficient Windows and Doors: Consider upgrading to energy-efficient windows and doors to enhance insulation, minimize heat transfer, and contribute to overall energy savings in the long run.
By prioritizing insulation and weatherproofing, you'll create a well-insulated, resilient, and comfortable environment within the man cave. This foundational step sets the stage for the subsequent phases of electrical and lighting installations, flooring, and wall coverings, ensuring that the interior space remains conducive to the envisioned purpose of the man cave. With insulation and weatherproofing addressed, the transformation journey progresses to the next phase of electrical and lighting considerations.
Step 4: Electrical and Lighting
The integration of electrical systems and strategic lighting plays a pivotal role in the transformation of a shed into a functional and inviting man cave. This phase involves meticulous planning, precise installations, and creative lighting solutions to enhance the ambiance and functionality of the space. Here's a detailed exploration of the electrical and lighting considerations:
-
Electrical Planning: Begin by devising a comprehensive electrical plan that encompasses the power requirements for lighting, appliances, entertainment systems, and any specialized equipment within the man cave. Assess the shed's existing electrical infrastructure and determine if upgrades or additional circuits are necessary to accommodate the intended usage.
-
Professional Consultation: If you're not well-versed in electrical work, consulting with a licensed electrician is highly recommended. Their expertise can ensure that the electrical installations comply with safety standards, local building codes, and best practices, minimizing the risk of electrical hazards and ensuring optimal functionality.
-
Lighting Design: Craft a lighting design that caters to the specific activities and ambiance you envision for the man cave. Incorporate a mix of ambient, task, and accent lighting to create a versatile and inviting atmosphere. Consider dimmer switches to adjust lighting levels based on different activities and moods.
-
Fixture Selection: Choose lighting fixtures that complement the theme and functionality of the man cave. Whether it's industrial-style pendant lights for a workshop vibe, LED track lighting for a modern touch, or themed fixtures for a personalized aesthetic, the selection of fixtures can significantly impact the overall ambiance.
-
Electrical Installations: Install electrical outlets strategically to accommodate various devices and equipment. Consider dedicated circuits for power-hungry appliances or entertainment systems to prevent overloading and ensure consistent power supply. Additionally, incorporate USB outlets for convenient device charging.
-
Smart Home Integration: Explore the integration of smart home technology for lighting control, such as programmable lighting schedules, voice-activated controls, and color-changing LED options. Smart lighting solutions offer convenience, energy efficiency, and the ability to personalize the ambiance with ease.
-
Safety Measures: Prioritize electrical safety by installing ground fault circuit interrupters (GFCIs) in areas prone to moisture, such as near sinks or beverage stations. Additionally, consider surge protectors to safeguard electronic devices from power surges and fluctuations.
By meticulously addressing the electrical and lighting aspects, you'll create a well-lit, functional, and safe environment within the man cave. This phase sets the stage for the subsequent steps of flooring and wall coverings, furnishing and decorating, and infusing personal touches, bringing you closer to the realization of your ultimate DIY retreat.
Step 5: Flooring and Wall Coverings
The flooring and wall coverings play a pivotal role in defining the aesthetic appeal, comfort, and functionality of a man cave. This phase of the transformation process involves thoughtful selection, precise installation, and creative integration of materials to create a cohesive and inviting interior space.
Flooring Considerations
When it comes to flooring options for a man cave, durability, ease of maintenance, and visual appeal are key factors to consider. Depending on the intended use of the space, various flooring materials can be explored:
-
Laminate Flooring: Known for its affordability, ease of installation, and versatility in mimicking the look of hardwood or stone, laminate flooring offers a practical and visually appealing option for man caves.
-
Vinyl Planks: With advancements in technology, vinyl planks now offer realistic wood and stone textures, waterproof properties, and easy maintenance, making them suitable for high-traffic man cave areas.
-
Carpet Tiles: For a cozy and sound-absorbing flooring solution, carpet tiles provide flexibility in design, easy replacement of damaged tiles, and a comfortable surface for lounging or gaming.
-
Epoxy Coatings: Ideal for workshop or garage-themed man caves, epoxy coatings offer a durable, stain-resistant, and customizable flooring option that can withstand heavy use and provide a sleek, industrial aesthetic.
Wall Covering Options
The selection of wall coverings contributes to the overall ambiance and theme of the man cave. From enhancing visual interest to providing practical benefits, the following options can be considered:
-
Paint: A fresh coat of paint in a color that complements the theme can instantly transform the ambiance of the man cave. Consider accent walls, textured finishes, or bold color choices to infuse personality into the space.
-
Wood Paneling: Whether opting for traditional wood paneling or modern shiplap, wooden wall coverings add warmth, texture, and a rustic charm to the man cave, creating a cozy and inviting atmosphere.
-
Wallpaper: With a myriad of designs, patterns, and textures available, wallpaper offers a versatile option to introduce visual interest, showcase hobbies or interests, or create a focal point within the space.
-
Wainscoting: Incorporating wainscoting or beadboard panels can add architectural detail, protect walls from wear and tear, and contribute to a classic or vintage-inspired aesthetic.
By carefully selecting flooring materials and wall coverings that align with the theme and functionality of the man cave, you can elevate the overall appeal and comfort of the space. This phase sets the stage for the subsequent steps of furnishing and decorating, infusing personal touches, and bringing the man cave to life as the ultimate DIY retreat.
Step 6: Furnishing and Decorating
Furnishing and decorating the man cave marks the transformative phase where the space truly begins to reflect your personality, interests, and envisioned purpose. This step involves the strategic selection of furniture, decor elements, and functional accessories to create a cohesive and inviting environment. Here's a detailed exploration of the furnishing and decorating process:
Furniture Selection
The choice of furniture sets the tone for the man cave's functionality and comfort. Consider the following factors when selecting furniture pieces:
- Comfort and Ergonomics: Whether it's a recliner for a home theater setup, a sturdy workbench for DIY projects, or versatile seating for social gatherings, prioritize comfort and ergonomic design to ensure an enjoyable experience within the space.
- Multi-Functional Pieces: Opt for furniture with dual purposes, such as storage ottomans, convertible sofa beds, or modular shelving units, to maximize space utilization and versatility.
- Theme Alignment: Select furniture that aligns with the overall theme and aesthetic of the man cave, whether it's industrial, rustic, modern, or sports-themed, to create a cohesive and visually appealing environment.
Decor Elements
Decor elements play a crucial role in personalizing the man cave and infusing it with character and charm. Consider the following decor options:
- Wall Art and Memorabilia: Display framed artwork, posters, sports memorabilia, or vintage signs that reflect your hobbies, passions, and personal style, adding visual interest and a personalized touch to the space.
- Textiles and Soft Furnishings: Introduce throw pillows, area rugs, and window treatments that complement the color scheme and add warmth and texture to the environment, creating a cozy and inviting atmosphere.
- Thematic Accents: Incorporate thematic accents such as themed lighting fixtures, custom signage, or decorative items related to your interests, further reinforcing the chosen theme and adding a layer of authenticity to the space.
Functional Accessories
In addition to furniture and decor, integrating functional accessories enhances the practicality and convenience of the man cave:
- Storage Solutions: Utilize storage bins, shelves, and organizational systems to keep the space tidy and efficiently store tools, gaming accessories, or hobby supplies, promoting a clutter-free environment.
- Entertainment Systems: Integrate audio-visual equipment, gaming consoles, or a home bar setup, depending on the intended use of the man cave, to create a captivating and entertaining space tailored to your preferences.
- Personal Touches: Infuse the space with personal touches such as family photos, awards, or mementos that hold sentimental value, adding a layer of nostalgia and personal history to the environment.
By thoughtfully furnishing and decorating the man cave, you'll bring your vision to life, creating a space that not only serves its functional purpose but also resonates with your individuality and passions. This phase sets the stage for the final step of infusing personal touches and final details, culminating in the realization of your ultimate DIY retreat.
Step 7: Personal Touches and Final Details
As the man cave nears completion, the infusion of personal touches and attention to final details elevates the space from a mere renovation project to a reflection of your unique identity and interests. This pivotal step involves adding nuanced elements that imbue the man cave with character, nostalgia, and a sense of belonging. Here's a detailed exploration of the personalization process and final touches that bring the ultimate DIY retreat to life.
Reflecting Personal Passions
Infusing the man cave with personal touches involves showcasing items that hold sentimental value and reflect your passions. Whether it's displaying cherished collectibles, showcasing hobby-related memorabilia, or integrating elements that pay homage to your favorite sports team, these personal artifacts add depth and authenticity to the space.
Customization and Craftsmanship
Consider incorporating custom-built elements or DIY projects that showcase your craftsmanship and creativity. From handcrafted furniture pieces to personalized signage or custom-built shelving, these bespoke additions not only serve a functional purpose but also become conversation starters, highlighting your skills and attention to detail.
Nostalgic Accents
Integrating nostalgic accents such as vintage signage, retro gaming consoles, or classic movie posters can evoke a sense of nostalgia and add a layer of storytelling to the man cave. These elements not only contribute to the overall theme but also create a welcoming atmosphere that resonates with fond memories and shared experiences.
Personalized Entertainment
Tailoring the entertainment options within the man cave to align with your preferences adds a personalized touch to the space. Whether it's setting up a vinyl record collection, creating a dedicated gaming corner, or integrating a home bar with your favorite beverages, these personalized entertainment features enhance the allure and functionality of the retreat.
Thoughtful Final Details
Attention to final details, such as ensuring cohesive color schemes, fine-tuning lighting levels, and optimizing the layout for seamless functionality, elevates the overall ambiance of the man cave. These meticulous adjustments and refinements contribute to a polished and harmonious environment that reflects your discerning taste and attention to detail.
By infusing the man cave with personal touches and attending to final details, you'll create a space that not only fulfills its intended purpose but also resonates with your individuality and passions. This transformative process culminates in the realization of a personalized retreat that celebrates your unique identity and serves as a testament to your creativity and vision.
Conclusion
Congratulations on reaching the culmination of the man cave transformation journey! What began as a humble shed has now evolved into a personalized haven, reflecting your passions, interests, and individuality. The process of converting a neglected space into the ultimate DIY retreat has been a testament to your creativity, resourcefulness, and unwavering vision.
As you stand amidst the carefully curated furnishings, thematic decor, and personalized accents, take a moment to appreciate the remarkable metamorphosis that has taken place. The man cave is not merely a renovated space; it is a reflection of your identity, a sanctuary that embodies your hobbies, memories, and aspirations.
The journey of planning, clearing, insulating, electrifying, and adorning the space has been a labor of love, driven by your dedication to creating a space that resonates with your lifestyle. Each step, from selecting flooring materials to infusing personal touches, has contributed to the realization of a retreat that is uniquely yours.
As you envision the countless hours of relaxation, creativity, and enjoyment that await within the man cave, remember that this space is a testament to your ingenuity and commitment to craftsmanship. It is a canvas that encapsulates your story, passions, and the experiences that have shaped your journey.
Whether it's a workshop for honing your DIY skills, a sports-themed entertainment hub, or a tranquil escape for unwinding, the man cave stands as a testament to the power of transformation and the fulfillment of a vision brought to life.
As you embark on this new chapter with your personalized retreat, may the man cave serve as a constant source of inspiration, relaxation, and joy. Cherish the memories created within its walls, and continue to infuse it with the essence of your evolving interests and experiences.
The completion of the man cave marks not just the end of a renovation project, but the beginning of a new chapter filled with creativity, relaxation, and the fulfillment of lifelong passions. Embrace this space as a reflection of your individuality, and may it continue to inspire and rejuvenate you for years to come.