
Home>Home & Furniture>Garage & Basement>DIY Garage Bar Ideas: Transform Your Space
Garage & Basement
DIY Garage Bar Ideas: Transform Your Space
Published: September 26, 2024
Transform your garage into a stylish bar with our DIY ideas! Discover tips, designs, and inspiration to create the ultimate home hangout spot. Cheers to creativity!
(Many of the links in this article redirect to a specific reviewed product. Your purchase of these products through affiliate links helps to generate commission for Twigandthistle.com, at no extra cost. Learn more)
Looking to turn that cluttered garage into a cool hangout spot? A garage bar might be just what you need. Whether your style is rustic, modern, or somewhere in between, creating your own garage bar can be a fun and rewarding project. It's a unique way to entertain friends while utilizing space that often goes unnoticed. Plus, you get to customize everything to fit your taste. With a bit of creativity and some basic tools, you'll be well on your way to having a personal retreat right at home. Ready to get started? Let’s dive in!
Preparation
Clear the Space: Remove any clutter, tools, or items not needed for the bar. Sweep and clean the area thoroughly.
Measure the Area: Use a tape measure to get accurate dimensions of the space. This helps in planning the layout and buying materials.
Plan the Layout: Sketch a rough design of where the bar, stools, shelves, and other elements will go. Consider the flow and functionality.
Gather Materials: Make a list of all needed materials like wood, screws, nails, paint, and tools. Visit a hardware store to purchase everything.
Set Up a Workspace: Designate a specific area for cutting, assembling, and painting. Lay down a tarp or old sheets to protect the floor.
Safety Gear: Wear safety goggles, gloves, and a dust mask. Keep a first aid kit nearby in case of minor injuries.
Check Electrical Outlets: Ensure there are enough outlets for any appliances or lighting. If not, consider hiring an electrician to install more.
Ventilation: Make sure the garage is well-ventilated, especially if using paints or adhesives. Open windows or use fans to circulate air.
Lighting: Plan for adequate lighting. Temporary work lights can help during construction, while permanent fixtures will enhance the final look.
Inspect Tools: Check that all tools are in good working condition. Sharpen blades and charge batteries for power tools.
Pre-cut Materials: If possible, pre-cut wood and other materials to the required sizes. This saves time during assembly.
Dry Run: Do a dry run by placing all elements in their planned spots without securing them. This helps visualize the final setup and make adjustments.
Materials and Tools Needed
- Wood Planks: Used for building the bar counter and shelves. Choose sturdy wood like oak or pine.
- Screws and Nails: Essential for assembling the bar structure. Make sure to get various sizes.
- Hammer: Needed for driving nails into the wood. A claw hammer is versatile.
- Screwdriver: Useful for driving screws. A set with different heads is best.
- Power Drill: Speeds up the process of drilling holes and driving screws.
- Saw: For cutting wood planks to the desired size. A circular saw or hand saw works well.
- Sandpaper: Smooths rough edges on wood. Get different grits for a fine finish.
- Wood Stain or Paint: Adds color and protects the wood. Choose a finish that matches your style.
- Paintbrushes or Rollers: Needed for applying stain or paint. Use different sizes for detailed work.
- Measuring Tape: Ensures accurate measurements for cutting and assembling.
- Level: Ensures your bar is even and balanced.
- Clamps: Holds pieces of wood together while you work.
- Safety Gear: Includes gloves, goggles, and a dust mask to protect yourself during construction.
- Bar Stools: Adds seating to your bar. Choose stools that match your bar’s height and style.
- Mini Fridge: Keeps drinks cold. Look for one that fits under your bar counter.
- Lighting: Adds ambiance. Consider LED strip lights or pendant lights.
- Decorative Items: Personalizes your bar. Think about signs, coasters, and glassware.
Skill Level and Time Required
Skill Level: Intermediate
Time Required: Approximately 2-3 weekends
- Planning and Design: 4-6 hours
- Gathering Materials: 3-5 hours
- Building the Bar Structure: 10-12 hours
- Installing Shelving and Storage: 6-8 hours
- Painting and Finishing Touches: 5-7 hours
Step-by-Step Instructions
Plan Your Layout
- Measure the garage space.
- Decide where the bar, seating, and storage will go.
- Sketch a simple floor plan.
Gather Materials
- Wood for the bar counter and shelves.
- Bar stools or chairs.
- Paint or stain for finishing.
- Tools: saw, drill, screws, sandpaper, level.
Build the Bar Counter
- Cut wood to desired length and width.
- Sand edges for smoothness.
- Assemble the frame using screws and a drill.
- Attach the countertop to the frame.
Install Shelving
- Measure and cut wood for shelves.
- Sand and finish the shelves.
- Use a level to ensure shelves are straight.
- Secure shelves to the wall with brackets.
Paint or Stain
- Choose a color or stain for the bar and shelves.
- Apply paint or stain evenly.
- Allow to dry completely.
Add Seating
- Place bar stools or chairs around the bar.
- Ensure they are at a comfortable height.
Decorate
- Hang wall art or signs.
- Add lighting like string lights or pendant lamps.
- Place bar accessories like glasses, shakers, and coasters.
Stock the Bar
- Fill shelves with beverages.
- Organize mixers and garnishes.
- Keep a variety of glassware handy.
Final Touches
- Clean the area.
- Test the bar setup.
- Invite friends and enjoy your new garage bar!
Tips and Tricks
Plan the Layout: Measure your garage space. Sketch a layout to know where everything will go. This helps avoid overcrowding.
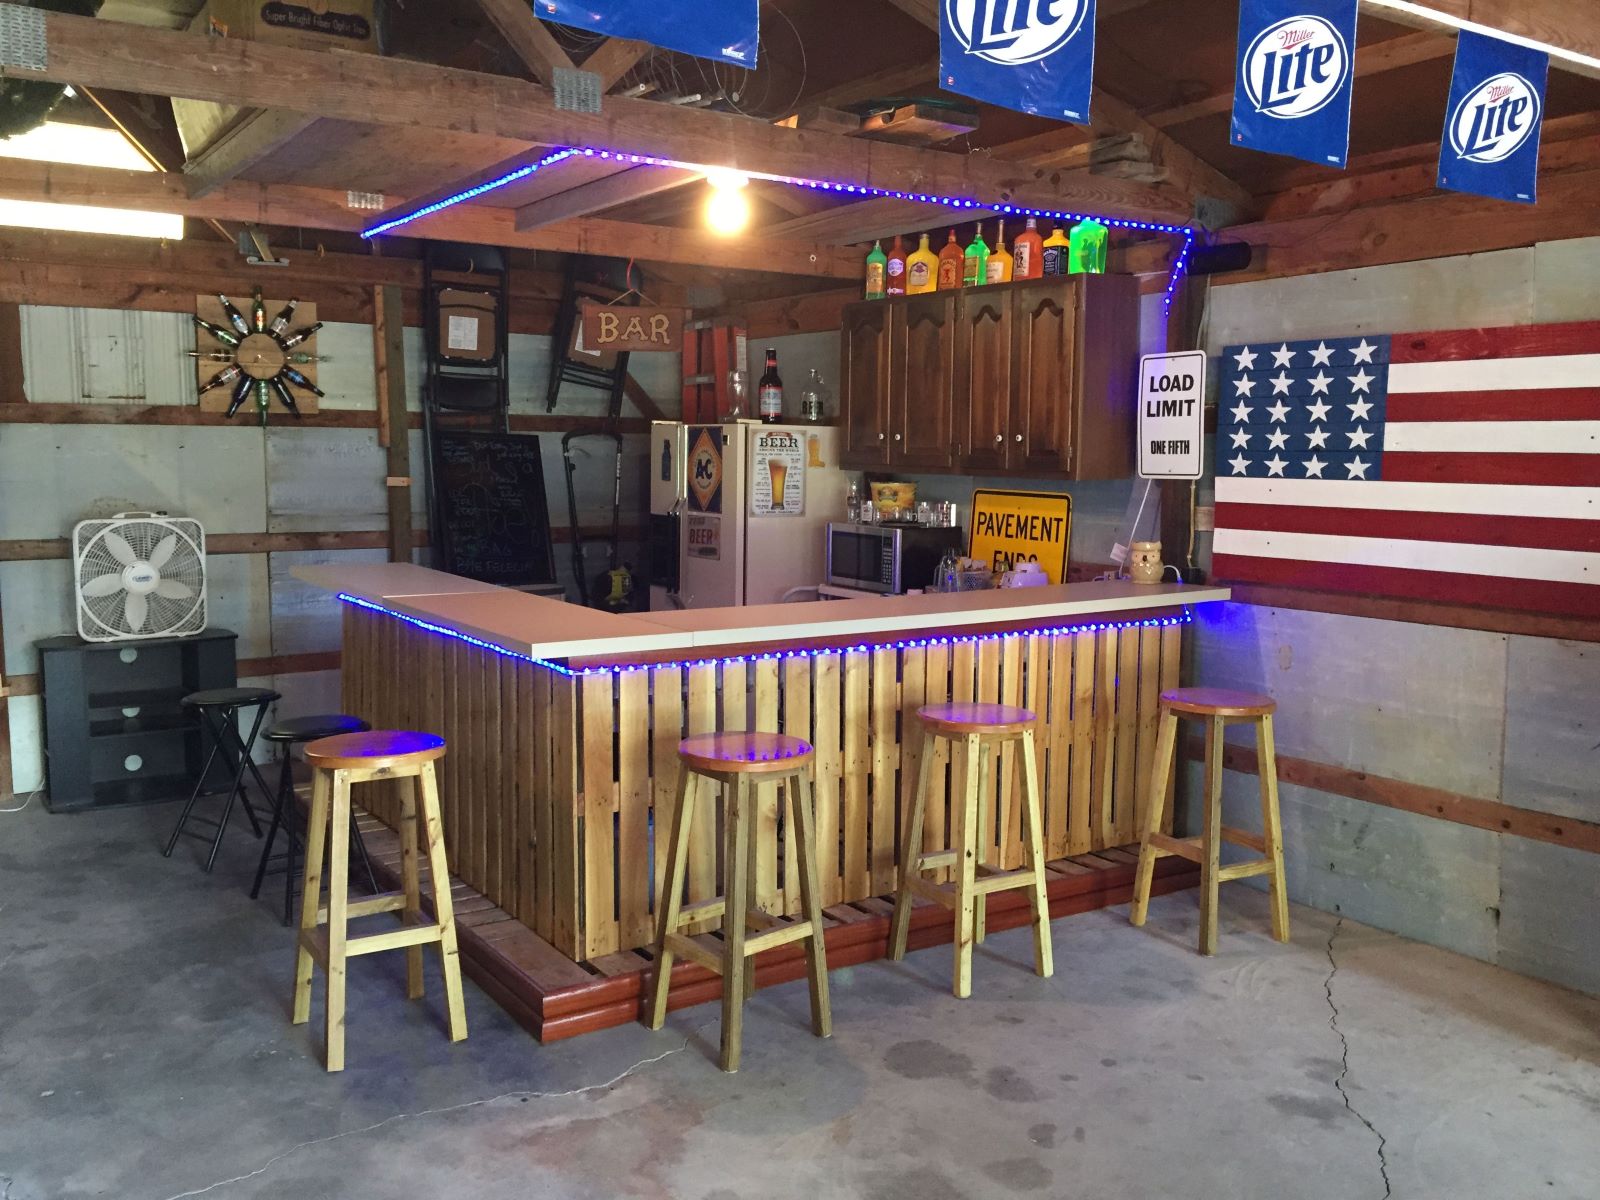
Use Reclaimed Wood: Reclaimed wood adds character and is eco-friendly. Pallets or old barn wood work great for bar tops and shelves.
Install Good Lighting: Use string lights or LED strips. Good lighting sets the mood and makes the space inviting.
Add Storage: Use wall-mounted shelves or cabinets. Keeps the bar area tidy and organized.
Comfortable Seating: Bar stools or cushioned chairs make guests comfortable. Look for second-hand options to save money.
DIY Decor: Create your own signs or wall art. Personal touches make the space unique.
Common Mistakes to Avoid:
- Ignoring Ventilation: Garages can get stuffy. Use fans or open windows to keep air flowing.
- Skipping Insulation: Insulate walls if you plan to use the bar year-round. Keeps the space warm in winter, cool in summer.
- Overloading Electrical Outlets: Spread out electrical devices to avoid tripping breakers. Consider adding more outlets if needed.
Material Alternatives:
- Bar Top: Instead of expensive granite, use butcher block or laminate.
- Seating: Repurpose old chairs with new cushions instead of buying new stools.
- Lighting: Use battery-operated LED lights if wiring is an issue.
Cost Estimation
Lumber: $100-$200 (for framing and shelves)
Bar Top: $50-$300 (depending on material like wood, laminate, or concrete)
Bar Stools: $50-$150 each (consider second-hand options for savings)
Paint or Stain: $20-$50 (for finishing touches)
Lighting: $30-$100 (LED strips or pendant lights)
Mini Fridge: $100-$200 (optional but useful)
Glassware and Accessories: $20-$50 (basic set)
Tools: $50-$150 (drill, saw, sander, screws, nails)
Total Estimate: $420-$1,200
Budget-Friendly Alternatives:
- Use reclaimed wood for the bar top and shelves.
- Check thrift stores for bar stools and accessories.
- Opt for DIY lighting solutions like string lights.
- Repurpose an old cabinet as a bar base.
Variations and Customizations
Materials: Use reclaimed wood for a rustic look or stainless steel for a modern vibe. Concrete countertops add an industrial feel, while granite offers a touch of luxury.
Colors: Paint the bar in bold colors like red or navy for a statement piece. For a more subtle look, use neutral tones like beige or gray. Add a chalkboard paint section for a fun, interactive element.
Styles: Go for a sports bar theme with team memorabilia and a big screen TV. A tiki bar style can bring a tropical feel with bamboo accents and colorful decorations. For a speakeasy vibe, use dim lighting, vintage signs, and leather bar stools.
Seating: Use bar stools made of wood for a classic look or metal for a contemporary touch. Add cushioned seats for extra comfort. Consider high-top tables for additional seating options.
Lighting: Install pendant lights above the bar for focused lighting. Use LED strip lights under the bar counter for a modern touch. String lights can add a cozy, inviting atmosphere.
Storage: Build shelves for displaying glassware and bottles. Use cabinets for hidden storage. Add a wine rack if you enjoy wine.
Decor: Hang posters or neon signs for a fun, lively feel. Use plants to add a touch of greenery. Display collectibles or souvenirs to personalize the space.
Extras: Include a mini-fridge for easy access to cold drinks. Add a kegerator if you love draft beer. Install a sound system for music and entertainment.
Sustainability Tips
Reclaimed wood is perfect for bar tops or shelves. It adds character and reduces waste. Pallets can be transformed into bar stools or tables. Sand them down, add a coat of eco-friendly paint or varnish, and they’re ready.
Recycled metal can be used for bar accents or stools. Old pipes or metal scraps can be turned into sturdy, industrial-style furniture.
Glass bottles can be repurposed into unique lighting fixtures. Cut the bottoms off and fit them with LED bulbs for a cool, ambient light.
Eco-friendly paint is a must. Choose low-VOC or zero-VOC paints to reduce harmful emissions.
Bamboo is a sustainable option for flooring or countertops. It’s durable, stylish, and grows quickly, making it an eco-friendly choice.
Upcycled furniture can save money and resources. Look for old cabinets, tables, or chairs that can be given a new life with a bit of creativity.
Solar-powered lights can add a nice touch to your bar area. They’re energy-efficient and reduce electricity usage.
Natural fabrics like cotton or linen can be used for cushions or upholstery. They’re biodegradable and often more sustainable than synthetic options.
Compostable or reusable cups and straws are great for reducing waste. Avoid single-use plastics to keep your bar eco-friendly.
Plants can enhance the space and improve air quality. Choose low-maintenance varieties that thrive indoors.
Cheers to Your New Garage Bar
You've got all the tools and ideas to turn your garage into a fantastic bar. Whether you go for a rustic look with reclaimed wood or a sleek, modern vibe with stainless steel, your space will be the new hangout spot. Don't forget to add some personal touches like custom signs or a dartboard. Lighting is key, so string up some fairy lights or install a cool neon sign. Stock up on your favorite drinks and snacks, and you're ready to host. Remember, the best part of a DIY project is making it your own. So, grab your tools, get creative, and enjoy your new garage bar. Cheers!
How do I start building a garage bar?
Start by cleaning and decluttering the space. Measure the area to plan your bar layout. Decide on a theme or style. Gather materials like wood, screws, and tools. Sketch a blueprint to guide your project.
What materials do I need?
You'll need wood for the bar frame and countertop, screws, nails, and brackets for assembly. Consider paint or stain for finishing touches. Don't forget bar stools, shelves, and lighting to complete the look.
How much will it cost?
Costs vary based on materials and size. A basic bar might cost around $200-$500. Using reclaimed wood or upcycled items can save money. High-end finishes and custom features will increase the budget.
Can I use my garage bar year-round?
Yes, but consider insulation and heating for winter months. A space heater or portable heater can keep it cozy. In summer, fans or a portable AC unit help maintain comfort.
How do I add electricity?
For safety, hire a licensed electrician to install outlets and lighting. Plan where you'll need power for fridges, blenders, and lights. Ensure the garage's electrical system can handle the additional load.
What are some fun bar themes?
Popular themes include sports bars, tiki bars, and vintage pubs. You could also go for a modern or industrial look. Decorate with memorabilia, neon signs, and unique glassware to match your theme.
How do I keep it organized?
Use shelves and cabinets for storage. Install hooks for bar tools and racks for glasses. Keep a cleaning routine to maintain order. Labeling shelves and drawers can help you find items quickly.