
Home>Home & Furniture>Garage & Basement>DIY Auto Repair Garages Ideas
Garage & Basement
DIY Auto Repair Garages Ideas
Published: September 24, 2024
Discover creative DIY auto repair garage ideas to transform your space into a functional and efficient workshop. Perfect for car enthusiasts and home mechanics alike!
(Many of the links in this article redirect to a specific reviewed product. Your purchase of these products through affiliate links helps to generate commission for Twigandthistle.com, at no extra cost. Learn more)
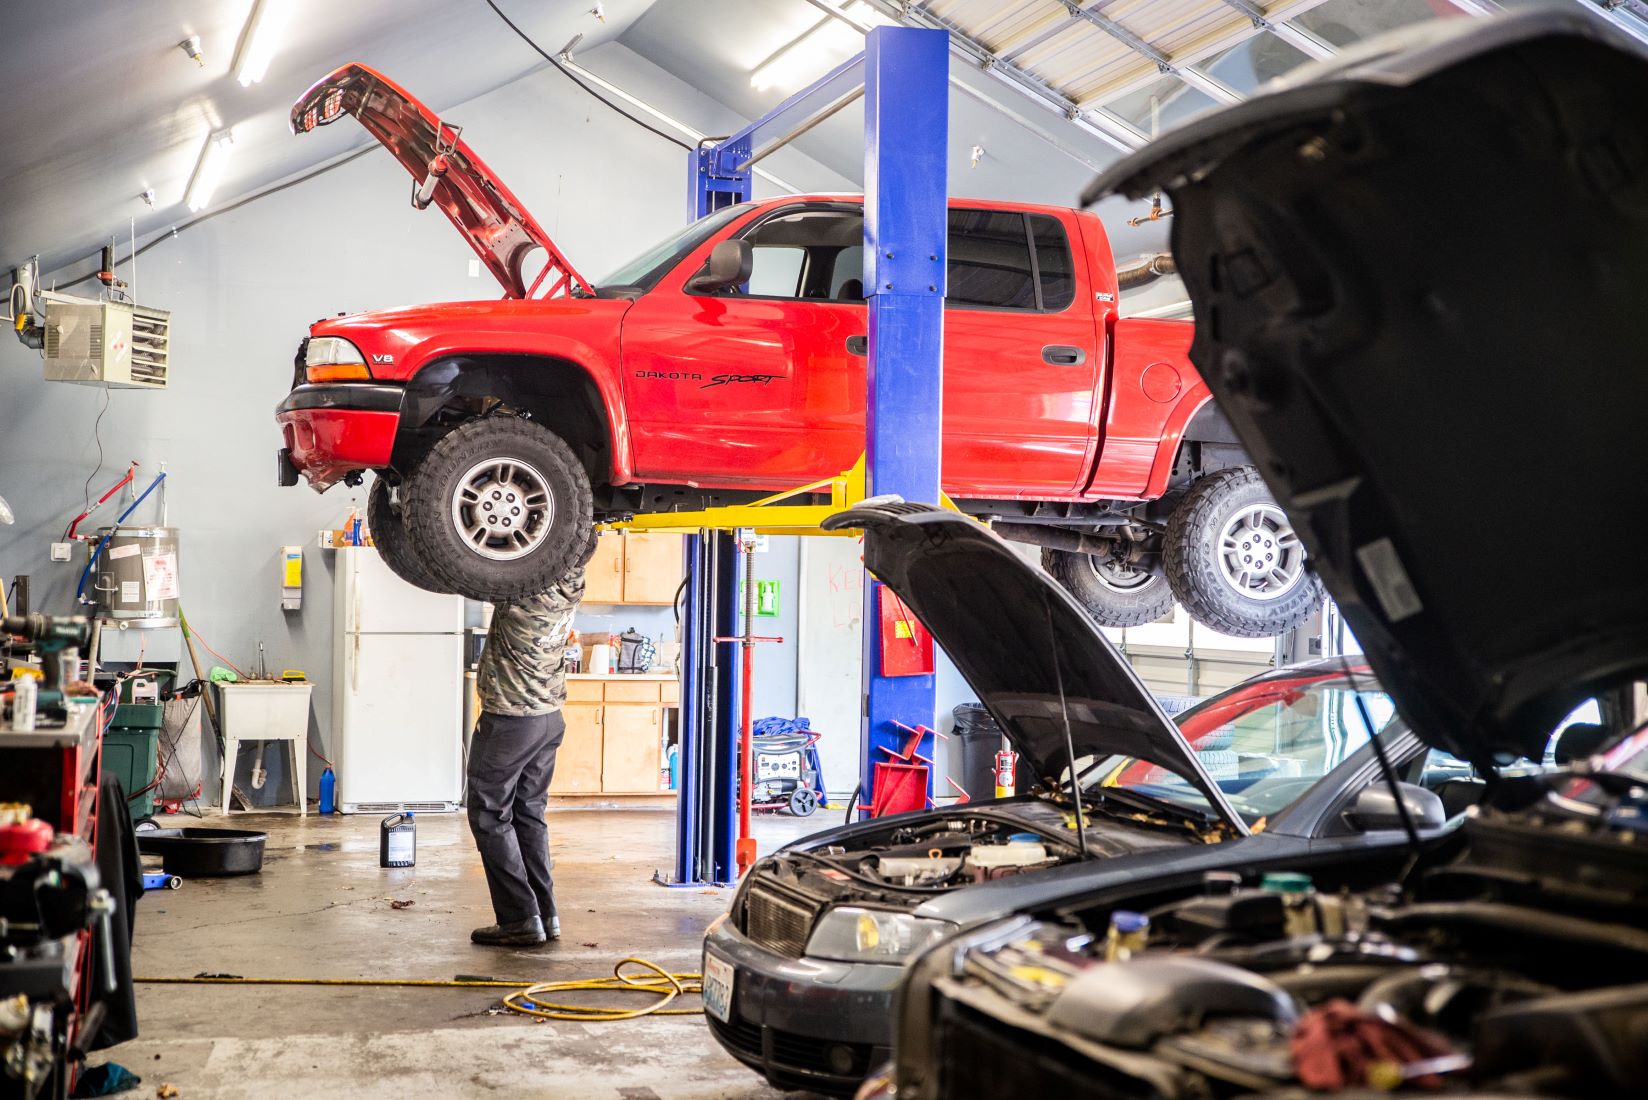
Working on your car can be both fun and practical. Creating a DIY auto repair garage at home lets you save money, learn new skills, and enjoy some quality time with your vehicle. Whether you are a seasoned mechanic or just starting out, having a dedicated space for car projects makes things easier. With a few essential tools, a bit of organization, and some elbow grease, you can turn any garage or shed into the perfect spot for auto repairs. Ready to get started? Here are some simple ideas to help you transform that space into a car lover’s dream.
Getting Ready for Your DIY Auto Repair
Safety Gear: Wear gloves, safety glasses, and closed-toe shoes. Keep a fire extinguisher nearby.
Workspace Setup: Ensure the garage is well-ventilated. Clear enough space to move around. Have a sturdy workbench and tool storage.
Tools and Equipment: Gather essential tools like wrenches, screwdrivers, jack stands, and a hydraulic jack. Check that all tools are in good condition.
Lighting: Install bright overhead lights and have a portable work light for detailed tasks.
Floor Protection: Lay down rubber mats or cardboard to protect the floor from oil spills and stains.
Organize Parts: Use bins or shelves to keep parts organized. Label each container for easy access.
Manuals and Guides: Have the car’s manual and any repair guides handy. These will provide specific instructions for your vehicle.
Safety First: Always disconnect the car battery before starting any electrical work. Use jack stands to support the car, never rely solely on a jack.
Clean Workspace: Keep the area clean to avoid accidents. Sweep up debris and dispose of any hazardous materials properly.
Emergency Plan: Know the location of the nearest first aid kit and have a phone nearby in case of emergencies.
Essential Tools and Materials
- Socket Set: Essential for loosening and tightening bolts and nuts. Includes various sizes to fit different fasteners.
- Wrenches: Used for gripping, fastening, turning, tightening, or loosening things like pipes, pipe fittings, nuts, and bolts.
- Screwdrivers: Necessary for removing or driving screws. Comes in different types like flathead and Phillips.
- Jack and Jack Stands: Lifts the car off the ground, allowing you to work underneath safely.
- Pliers: Useful for gripping, bending, and cutting wires or small metal pieces.
- Torque Wrench: Ensures bolts are tightened to the correct specifications, preventing over-tightening.
- Oil Drain Pan: Catches old oil during an oil change, preventing spills.
- Creeper: A low-profile tool with wheels that lets you slide under the car easily.
- Work Light: Illuminates dark areas under the car or in the garage, making it easier to see what you're doing.
- Brake Bleeder Kit: Helps remove air from the brake lines, ensuring proper brake function.
- Multimeter: Measures electrical properties like voltage, current, and resistance, useful for diagnosing electrical issues.
- Funnel: Assists in pouring fluids into small openings without spilling.
- Gloves: Protects your hands from cuts, burns, and chemicals.
- Safety Glasses: Shields your eyes from debris and harmful substances.
- Shop Rags: Handy for cleaning up spills and wiping down tools or parts.
- Toolbox: Keeps all your tools organized and easily accessible.
How Much Skill and Time Do You Need?
Skill Level: Intermediate
Time Required: 2-3 Days
Planning and Design: 4-6 hours
- Sketch layout
- Decide on tools and storage
Cleaning and Preparation: 6-8 hours
- Clear out space
- Clean floors and walls
Installing Storage Solutions: 8-10 hours
- Mount shelves
- Install pegboards
Setting Up Workbench: 4-6 hours
- Assemble workbench
- Secure in place
Organizing Tools and Equipment: 4-6 hours
- Arrange tools
- Label storage areas
Follow These Steps
Choose a Location
- Find a spot in your garage with enough space for your car and tools.
- Make sure the area has good lighting and ventilation.
Clean and Organize
- Remove any clutter from the garage.
- Sweep the floor and wipe down surfaces.
Install Storage Solutions
- Use shelves, pegboards, and cabinets to store tools and parts.
- Label each storage area for easy access.
Set Up a Workbench
- Place a sturdy workbench in a convenient spot.
- Add a vice and other essential tools.
Gather Essential Tools
- Wrenches, screwdrivers, pliers, and socket sets.
- Jack stands, a hydraulic jack, and an oil drain pan.
Create a Tool Wall
- Hang frequently used tools on a pegboard.
- Arrange them by type and size.
Install Proper Lighting
- Use bright overhead lights.
- Add task lighting for detailed work.
Ensure Safety Measures
- Keep a fire extinguisher nearby.
- Wear safety goggles and gloves.
Set Up a Parts Cleaning Area
- Use a small table or bench.
- Keep cleaning supplies like degreasers and brushes handy.
Organize Spare Parts
- Use bins or drawers for nuts, bolts, and small parts.
- Label each container clearly.
Add a Comfortable Chair
- Use a stool or rolling chair for comfort during long tasks.
Keep a Maintenance Log
- Use a notebook or digital app.
- Record all repairs and maintenance tasks.
Install a Power Source
- Ensure easy access to electrical outlets.
- Use extension cords and power strips if needed.
Set Up a Waste Disposal System
- Use bins for recycling and trash.
- Dispose of hazardous materials properly.
Personalize Your Space
- Add posters, signs, or other decorations.
- Make the space enjoyable to work in.
Handy Tips and Tricks
Organize Your Tools: Use pegboards and magnetic strips to keep tools visible and accessible. Label everything to save time.
Lighting: Install bright LED lights. Good lighting helps spot issues and makes work easier.
Flooring: Use epoxy floor coating. It’s durable, easy to clean, and resistant to chemicals.
Storage: Invest in sturdy shelves and cabinets. Keep heavy items on lower shelves for safety.
Ventilation: Ensure proper ventilation. Use exhaust fans to remove fumes and keep air fresh.
Workbenches: Build or buy a sturdy workbench. Make sure it’s at a comfortable height.
Safety Gear: Always have safety gear like gloves, goggles, and ear protection handy.
Power Outlets: Install multiple power outlets. This avoids the hassle of extension cords.
Common Mistakes to Avoid:
Overcrowding: Don’t cram too much into your space. Keep it clutter-free for safety and efficiency.
Ignoring Safety: Never skip safety measures. Always use proper gear and follow guidelines.
Poor Lighting: Insufficient lighting can lead to mistakes. Ensure your workspace is well-lit.
Alternatives for Materials or Methods:
Tool Storage: Instead of pegboards, use tool chests or rolling carts for mobility.
Flooring: If epoxy is too expensive, consider rubber mats. They’re also easy to clean and provide cushioning.
Lighting: If installing LED lights is difficult, use portable work lights. They’re flexible and can be moved around.
Ventilation: If exhaust fans aren’t an option, use portable fans and keep doors/windows open for airflow.
Estimating the Costs
Basic Tools:
- Socket Set: $50-$100
- Wrenches: $30-$70
- Screwdrivers: $20-$40
- Pliers: $15-$30
- Jack and Jack Stands: $50-$150
- Creeper: $30-$60
Specialty Tools:
- Torque Wrench: $40-$100
- OBD-II Scanner: $20-$100
- Brake Bleeder Kit: $20-$50
- Oil Filter Wrench: $10-$20
Safety Gear:
- Safety Glasses: $5-$15
- Mechanic Gloves: $10-$20
- Work Light: $20-$50
Materials:
- Motor Oil: $20-$40
- Brake Fluid: $10-$20
- Coolant: $10-$30
- Spark Plugs: $10-$30
Budget-Friendly Alternatives:
- Used Tools: Check local classifieds or online marketplaces for second-hand tools.
- Tool Rentals: Some auto parts stores offer tool rental programs.
- Basic Tool Kits: Purchase a comprehensive kit that includes multiple tools at a lower price.
Total Estimated Cost: $350-$900
Different Ways to Customize
Flooring: Use epoxy for a durable, easy-to-clean surface. For a more budget-friendly option, consider interlocking rubber tiles.
Lighting: Install LED strip lights under cabinets or along walls for better visibility. Hanging shop lights can provide bright, even lighting.
Storage: Use pegboards for organizing tools. Magnetic strips can hold metal tools securely. For a sleek look, install custom cabinets.
Workbenches: Build a foldable workbench to save space. Use reclaimed wood for a rustic feel or stainless steel for a modern look.
Colors: Paint walls in light colors to make the space feel larger. Use bright accents like red or blue for a pop of color.
Ventilation: Install a ceiling fan or exhaust fan to keep air circulating. For a more advanced setup, consider a ventilation system with filters.
Safety: Add non-slip mats around work areas. Install fire extinguishers and first aid kits for emergencies.
Tech Integration: Set up a wall-mounted tablet for easy access to repair manuals. Use smart plugs to control lighting and tools remotely.
Personal Touches: Hang posters or signs related to cars. Use custom decals on cabinets or walls to reflect your style.
Eco-Friendly Repair Tips
Reclaimed wood can be used for workbenches and shelves. It’s sturdy and gives a rustic look. Recycled metal is great for tool racks and storage units. Old car parts can be repurposed into unique decorations or even functional items like stools or tables.
LED lighting is energy-efficient and lasts longer than traditional bulbs. Solar panels can power small tools or lighting, reducing electricity use. Non-toxic cleaners are better for the environment and your health. Look for biodegradable options.
Insulate the garage with recycled materials to keep it warm in winter and cool in summer. This reduces the need for heating or cooling. Rainwater collection systems can be used for washing cars or cleaning the garage.
When painting or sealing surfaces, choose low-VOC (volatile organic compounds) products. They release fewer harmful chemicals into the air. Reuse old containers for storing nuts, bolts, and other small items. This keeps things organized and reduces waste.
Upcycling old tires into mats or bumpers can protect your garage floor and walls. Composting organic waste from snacks or lunches in the garage can enrich your garden soil.
Electric or hybrid tools are quieter and produce fewer emissions than gas-powered ones. Reusable rags made from old clothes can replace disposable paper towels.
Proper disposal of hazardous materials like oil, batteries, and chemicals is crucial. Many auto parts stores offer recycling programs. Digital manuals save paper and are easy to update.
Second-hand tools are often just as good as new ones and cost less. Sharing tools with neighbors or friends reduces the need for everyone to buy the same items.
Natural ventilation like windows or vents can improve air quality without using electricity. Planting trees around the garage can provide shade and reduce cooling costs.
Your DIY Garage Awaits
Building your own DIY auto repair garage can be a game-changer. With some planning and effort, you can create a space that meets your needs. Start by choosing the right location and layout. Make sure to invest in essential tools like wrenches, jacks, and safety gear. Don't forget about lighting and ventilation; they’re crucial for a functional workspace. Organize your tools and parts to keep things tidy and efficient. Finally, always prioritize safety. Wear protective gear and follow guidelines to avoid accidents.
By following these steps, you’ll have a garage that not only saves you money but also gives you the satisfaction of working on your own vehicle. So, roll up your sleeves and get started on your DIY auto repair garage today. You’ve got this!
How can I set up a DIY auto repair garage at home?
Start by clearing out a space in your garage. Make sure you have enough room to move around your vehicle. Next, gather essential tools like wrenches, screwdrivers, jacks, and a good set of sockets. Don't forget a sturdy workbench and proper lighting. Safety gear like gloves and goggles is also a must.
What are the must-have tools for a DIY auto repair garage?
You'll need a basic set of wrenches, screwdrivers, pliers, and sockets. A hydraulic jack and jack stands are crucial for lifting your car safely. An oil filter wrench, tire pressure gauge, and multimeter for electrical work are also handy. Don't skimp on quality; good tools last longer and make the job easier.
How do I ensure safety while working on my car?
Always wear safety gear like gloves and goggles. Make sure your car is on a flat surface and use jack stands when lifting it. Keep a fire extinguisher nearby and ensure your workspace is well-ventilated. Double-check that all tools are in good condition to avoid accidents.
Can I perform regular maintenance tasks myself?
Absolutely! Tasks like oil changes, tire rotations, and brake pad replacements are straightforward with the right tools and a bit of know-how. Just follow your car's manual for specific instructions and intervals.
What are some common mistakes to avoid in DIY auto repair?
Avoid using the wrong tools for the job, as this can damage parts and cause injury. Don't skip the safety steps like using jack stands or wearing gloves. Also, make sure to disconnect the battery when working on electrical components to prevent shocks.
How do I dispose of old car parts and fluids?
Most auto parts stores and service centers will take used oil, filters, and batteries for recycling. Check with your local waste management for guidelines on disposing of other parts. Never dump fluids down the drain or in the trash; it's harmful to the environment.
Is it cost-effective to do my own auto repairs?
Yes, doing your own repairs can save a lot of money on labor costs. While you'll need to invest in tools upfront, these will pay for themselves over time. Plus, you'll gain valuable skills and the satisfaction of fixing your car yourself.