
Home>Home & Furniture>Doors & Windows>How to Make a DIY Window Pane Mirror
Doors & Windows
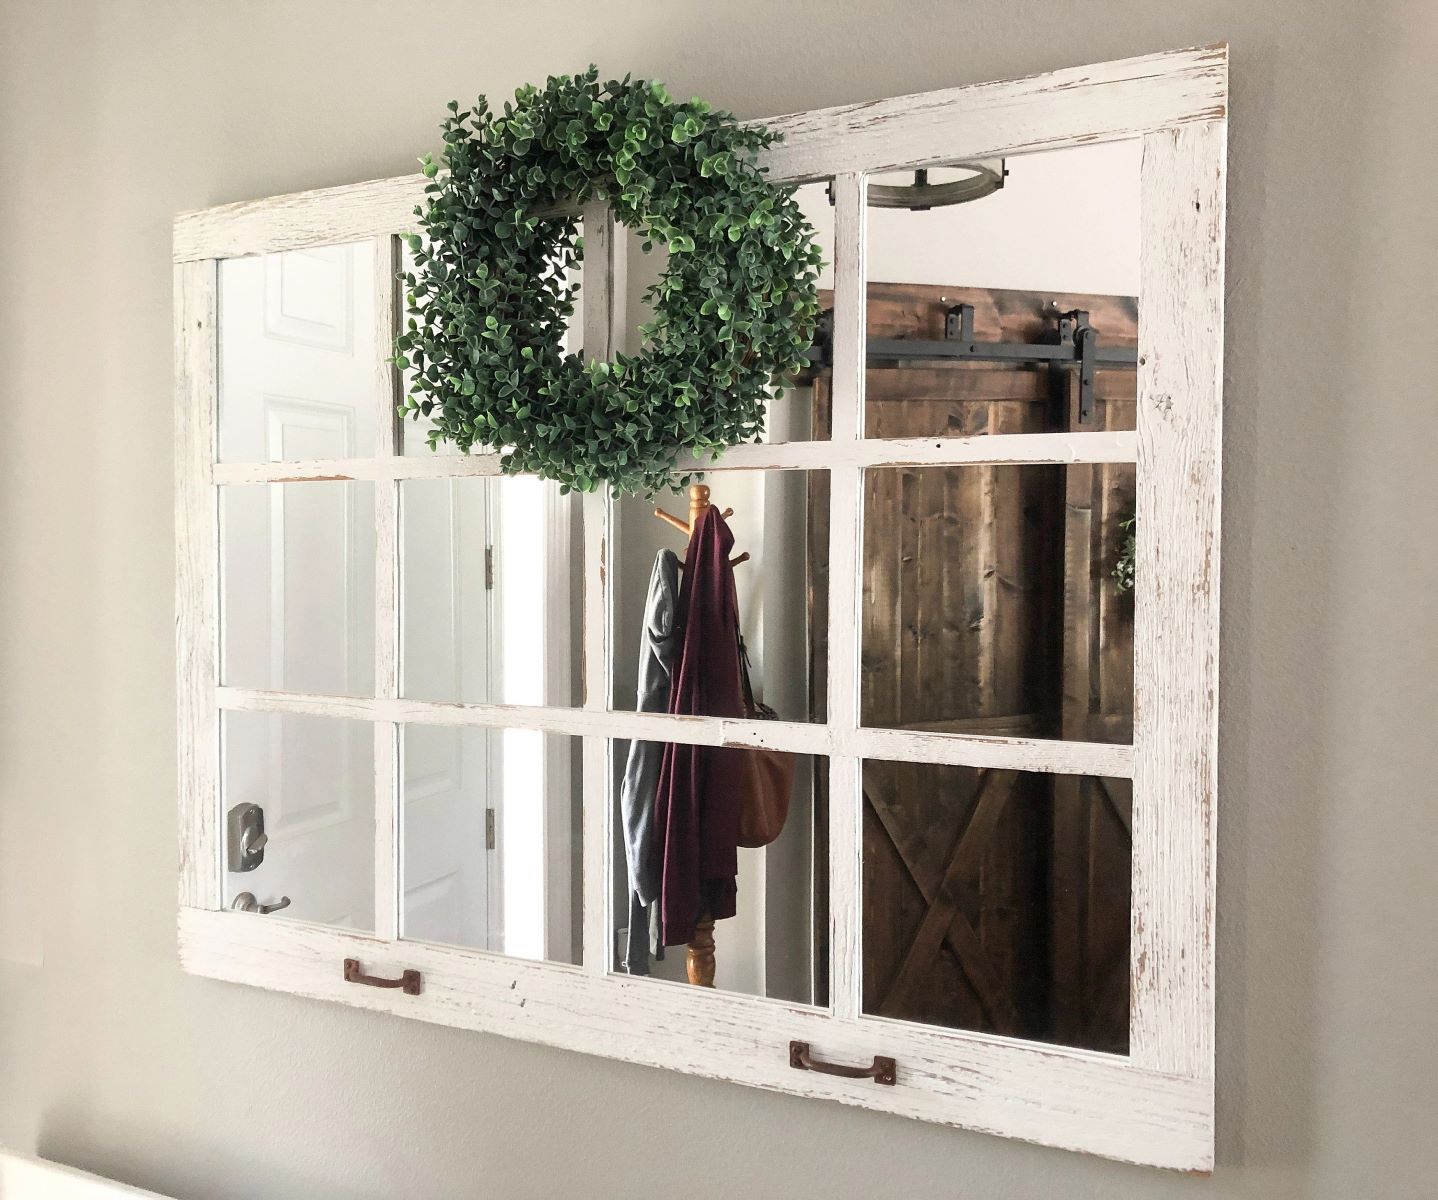
How to Make a DIY Window Pane Mirror
Published: August 15, 2024
Learn how to create a stunning DIY window pane mirror with our step-by-step guide. Perfect for adding a touch of elegance and charm to any room in your home!
(Many of the links in this article redirect to a specific reviewed product. Your purchase of these products through affiliate links helps to generate commission for Twigandthistle.com, at no extra cost. Learn more)
Making a DIY window pane mirror can bring a touch of elegance and charm to your home. It's a fun project that gives old materials new life. Even if you’re new to DIY projects, this guide will walk you through each step, making the process simple and enjoyable. Rediscovering an old window frame and turning it into a stylish mirror can be a weekend project that transforms any room. Let's dive into the tools you'll need, the materials to gather, and the steps to create your very own window pane mirror.
Getting Ready for Your Project
Gather Materials: Collect a large mirror, wooden trim, a measuring tape, a saw, wood glue, clamps, sandpaper, paint or stain, a paintbrush, and hanging hardware.
Measure and Cut: Measure the mirror's dimensions. Cut the wooden trim into pieces that will form the window pane grid. Ensure precise measurements for a snug fit.
Safety Gear: Wear safety goggles and gloves when cutting wood and handling glass. This protects your eyes and hands from potential injuries.
Workspace Setup: Clear a large, flat workspace. Lay down a drop cloth to protect surfaces from paint or glue spills.
Sand and Paint: Sand the wooden trim pieces to remove rough edges. Paint or stain them in your desired color. Let them dry completely.
Assemble the Grid: Arrange the painted trim pieces on the mirror to form the window pane design. Use wood glue to attach them. Clamp the pieces in place until the glue dries.
Attach Hanging Hardware: Once the glue is dry, attach hanging hardware to the back of the mirror. Ensure it is secure and can support the mirror's weight.
Clean the Mirror: Wipe down the mirror to remove any dust or fingerprints before hanging it.
Hang the Mirror: Choose a sturdy wall and use appropriate anchors or screws to hang your new window pane mirror securely.
Gathering Materials and Tools
Materials:
- Old Window Frame: Acts as the base for the mirror.
- Mirror Tiles: These will be cut and placed into the window frame sections.
- Mirror Adhesive: Special glue to attach mirror tiles to the frame.
- Wood Filler: Used to fill any gaps or cracks in the window frame.
- Sandpaper: Smooths out the wood filler and any rough edges.
- Paint or Stain: Gives the frame a finished look.
- Painter’s Tape: Protects areas you don’t want painted or stained.
- Cleaning Solution: Cleans the mirror tiles and frame.
Tools:
- Measuring Tape: Ensures accurate measurements for mirror tiles.
- Glass Cutter: Cuts mirror tiles to fit the window frame sections.
- Putty Knife: Applies wood filler to gaps and cracks.
- Paintbrush or Roller: Applies paint or stain to the frame.
- Screwdriver: Removes any old hardware from the window frame.
- Clamps: Holds the mirror tiles in place while the adhesive dries.
- Safety Glasses: Protects your eyes when cutting glass.
- Gloves: Protects your hands from sharp edges and chemicals.
Required Skills and Time Commitment
Skill Level: Intermediate
Time Required: 4-6 hours
- Gather Materials: Collect a large mirror, wooden trim, paint, glue, and a saw.
- Measure and Cut: Measure the mirror dimensions. Cut the wooden trim to fit around the mirror.
- Paint the Trim: Paint the wooden trim your desired color. Let it dry completely.
- Attach the Trim: Use glue to attach the trim to the mirror edges, creating a window pane effect.
- Secure and Finish: Ensure the trim is securely attached. Allow the glue to dry for a few hours.
Important Keywords: Skill Level, Intermediate, Time Required, 4-6 hours, Gather Materials, Measure and Cut, Paint the Trim, Attach the Trim, Secure and Finish.
Detailed Steps to Create Your Mirror
Gather Materials:
- Old window frame
- Mirror tiles
- Liquid nails or mirror adhesive
- Measuring tape
- Glass cleaner
- Painter's tape
- Paint (optional)
- Paintbrush (optional)
- Sandpaper (optional)
- Hanging hardware
Prepare the Window Frame:
- Clean the window frame thoroughly.
- Sand any rough edges if needed.
- Paint the frame if desired. Let it dry completely.
Measure and Cut Mirror Tiles:
- Measure each pane of the window frame.
- Cut mirror tiles to fit each pane using a glass cutter.
Apply Adhesive:
- Apply liquid nails or mirror adhesive to the back of each mirror tile.
- Spread adhesive evenly for a secure hold.
Place Mirror Tiles:
- Carefully place each mirror tile into the corresponding pane.
- Press firmly to ensure they stick well.
Secure and Dry:
- Use painter's tape to hold mirror tiles in place while the adhesive dries.
- Allow adhesive to dry according to the manufacturer's instructions.
Clean the Mirrors:
- Once dry, remove painter's tape.
- Clean mirror tiles with glass cleaner to remove any smudges or fingerprints.
Attach Hanging Hardware:
- Attach hanging hardware to the back of the window frame.
- Ensure it is secure and can support the weight of the mirror.
Hang Your Mirror:
- Choose a spot on the wall.
- Hang your new window pane mirror securely.
Helpful Tips and Tricks
Measure your space carefully before starting. Use painter's tape to mark where the mirror will go. Cut wood for the frame using a miter saw for precise angles. Sand the wood to smooth any rough edges. Paint or stain the wood before assembling to avoid messes later.
Common mistakes include not measuring accurately, which leads to a poor fit. Skipping sanding can result in splinters or rough edges. Forgetting to paint or stain before assembly makes it harder to get a clean finish.
Alternatives for materials include using pre-made frames instead of building one from scratch. Acrylic mirrors can be used instead of glass for a lighter, shatterproof option. Adhesive mirror tiles can replace a single large mirror, making installation easier.
Estimating the Cost
Materials:
- Mirror tiles: $50 for a pack of 12
- Wood for frame: $20 for basic pine wood
- Wood glue: $5
- Paint or stain: $10
- Sandpaper: $5
- Hanging hardware: $5
Tools:
- Saw: $30 (or borrow one)
- Measuring tape: $5
- Clamps: $10
- Paintbrush: $3
Total Cost: Approximately $143
Budget-friendly alternatives:
- Mirror tiles: Use old mirrors or buy second-hand for around $20
- Wood for frame: Reclaimed wood or pallet wood, often free or $10
- Paint or stain: Use leftover paint or stain from other projects
Total Cost with Alternatives: Approximately $93
Different Ways to Customize
Frame Material: Instead of wood, try using metal or plastic for a modern look. Reclaimed wood can give a rustic feel.
Paint Colors: Paint the frame in bold colors like red or blue for a pop of color. For a more subtle look, use neutral tones like white or gray.
Mirror Shape: Instead of rectangular, consider round or oval mirrors. Hexagonal mirrors can add an interesting geometric touch.
Pane Dividers: Use thin metal strips instead of wood for a sleek, industrial look. Rope or twine can give a nautical feel.
Glass Treatment: Frost some of the mirror panes for a unique design. Use tinted glass for a different effect.
Frame Style: Add decorative molding to the frame for an elegant touch. Use distressed techniques for a vintage look.
Hanging Method: Use decorative hooks or chains instead of standard brackets. Leather straps can add a unique touch.
Additional Elements: Attach small shelves or hooks to the bottom of the frame for added functionality. Add LED lights around the frame for a backlit effect.
Eco-Friendly Tips for Your Project
Reclaimed Wood: Use old wood from pallets, barns, or other sources. This gives character and reduces waste.
Old Windows: Find discarded windows at salvage yards or thrift stores. Clean them up and use them as the frame.
Eco-Friendly Paint: Choose low-VOC or zero-VOC paints. These are better for indoor air quality and the environment.
Recycled Glass: Use mirrors made from recycled glass. Many companies offer these as an eco-friendly option.
Natural Adhesives: Opt for natural or non-toxic adhesives. These are safer for you and the planet.
Upcycled Hardware: Use old hinges, handles, or brackets from other projects. This adds a unique touch and reduces the need for new materials.
Energy-Efficient Tools: Use hand tools or energy-efficient power tools. This reduces energy consumption during your project.
Local Materials: Source materials locally to cut down on transportation emissions. This also supports local businesses.
Minimal Packaging: Choose products with minimal or recyclable packaging. This reduces waste and helps the environment.
Sustainable Practices: Always measure twice to cut once. This minimizes mistakes and material waste.
Reflecting on Your DIY Success
You did it! Your DIY window pane mirror is complete. This project not only adds a charming touch to your space but also gives you a sense of accomplishment. Remember, the key steps were measuring, cutting, assembling, and painting. Each step required patience and precision, but the end result is worth it. Now, you’ve got a unique piece that reflects both your style and hard work. Don’t forget to share your creation with friends and family. They’ll be impressed by your craftsmanship and might even ask for tips. Keep this momentum going and tackle more DIY projects. You’ve proven you have the skills and creativity to make something beautiful from scratch. Enjoy your new mirror and the pride that comes with making it yourself. Happy crafting!
What materials do I need to make a DIY window pane mirror?
You'll need an old window frame, mirror tiles, strong adhesive, a measuring tape, a pencil, a level, and a saw if you need to cut the mirror tiles.
How do I prepare the window frame?
Clean the frame thoroughly. Sand any rough edges and remove old paint if necessary. You might want to repaint or stain the frame to match your decor.
How do I measure for the mirror tiles?
Measure the inside of each pane in the window frame. Mark these measurements on the mirror tiles and cut them to fit. Make sure to double-check your measurements to avoid mistakes.
What kind of adhesive should I use?
Use a strong, clear adhesive designed for mirrors. This ensures the tiles stay securely in place without damaging the reflective surface.
How do I attach the mirror tiles to the frame?
Apply the adhesive to the back of each mirror tile. Press the tiles firmly into each pane, making sure they're level and aligned properly. Let the adhesive dry according to the manufacturer's instructions.
Can I add any decorative touches?
Absolutely! You can add decorative trim around the edges, paint designs on the frame, or even use stencils to create patterns on the mirrors themselves.
How do I hang the finished mirror?
Use sturdy picture hangers or D-rings attached to the back of the frame. Make sure to use wall anchors if you're hanging it on drywall to support the weight of the mirror.