
Home>Home & Furniture>Doors & Windows>How to Build Outswing Hidden Bookcase Door Plans
Doors & Windows
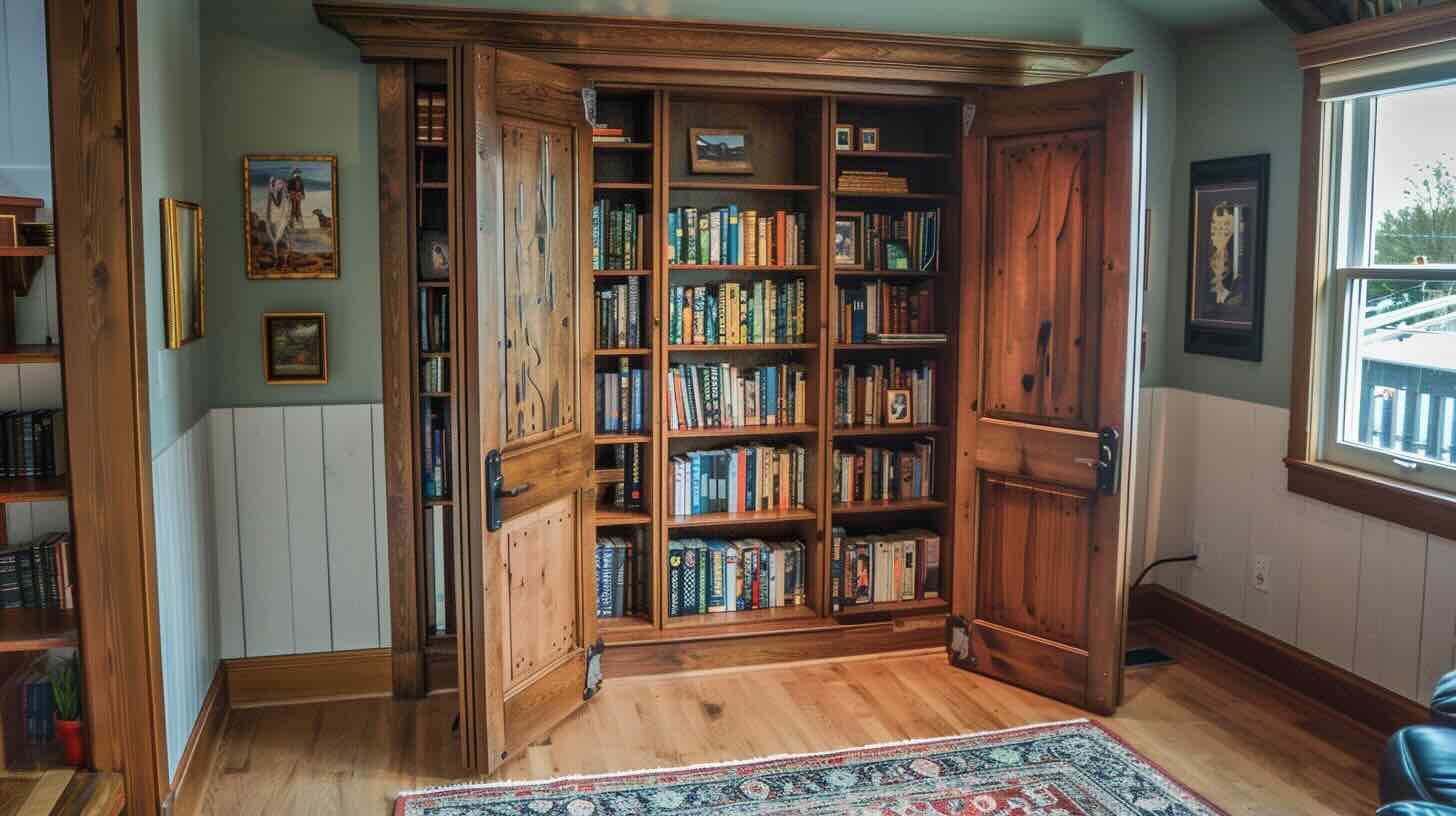
How to Build Outswing Hidden Bookcase Door Plans
Published: September 18, 2024
Learn how to build an outswing hidden bookcase door with our step-by-step plans. Transform your space with this secret door project that's both functional and stylish.
(Many of the links in this article redirect to a specific reviewed product. Your purchase of these products through affiliate links helps to generate commission for Twigandthistle.com, at no extra cost. Learn more)
Want to add a touch of mystery to your home? Building an outswing hidden bookcase door could be the perfect project. This clever design not only hides a room but also provides extra storage for books or decor. It's a fun DIY project that combines carpentry skills with creativity. With some basic tools and materials, you can create a functional piece that adds a unique flair to your space. Whether you're a seasoned DIY enthusiast or a beginner, this guide will walk you through the steps to build your very own hidden bookcase door.
Getting Ready for Your Project
Gather Materials: Collect all necessary tools and supplies. This includes wood, screws, hinges, a drill, a saw, a measuring tape, and a level.
Measure the Doorway: Accurately measure the doorway where the bookcase door will go. Write down the height, width, and depth.
Plan the Design: Sketch the bookcase door design. Ensure it fits the doorway and includes space for books or other items.
Safety Gear: Wear safety goggles, gloves, and a dust mask. Protect your eyes, hands, and lungs from wood dust and debris.
Clear the Workspace: Clean the area where you’ll work. Remove any clutter to avoid tripping or accidents.
Cut the Wood: Use a saw to cut the wood pieces according to your measurements. Double-check each piece before cutting.
Assemble the Frame: Build the bookcase frame using screws and a drill. Make sure it’s sturdy and level.
Install Hinges: Attach heavy-duty hinges to the bookcase and the doorway. Ensure they can support the weight of the bookcase.
Test the Swing: Before adding shelves, test the swing of the door. Make sure it opens and closes smoothly.
Add Shelves: Install shelves inside the bookcase. Secure them properly to hold books or items.
Paint or Stain: Finish the bookcase with paint or stain. Let it dry completely before use.
Final Check: Inspect the bookcase door for any loose parts or issues. Fix them before loading books or items.
Essential Materials and Tools
Materials:
- Plywood Sheets: Used for the main structure of the bookcase.
- Wood Screws: Secure the plywood pieces together.
- Wood Glue: Provides additional strength to the joints.
- Hinges: Allows the bookcase to swing open like a door.
- Magnetic Latches: Keeps the bookcase door closed when not in use.
- Paint or Stain: Finishes the bookcase to match your room's decor.
- Shelf Brackets: Supports the shelves inside the bookcase.
- Trim Molding: Gives the bookcase a polished, finished look.
- Handles or Knobs: Makes it easier to open and close the bookcase door.
Tools:
- Tape Measure: Ensures accurate measurements.
- Circular Saw: Cuts the plywood sheets to size.
- Drill: Makes holes for screws and hinges.
- Screwdriver: Tightens screws.
- Clamps: Holds pieces together while the glue dries.
- Level: Ensures the bookcase is straight and even.
- Paintbrush or Roller: Applies paint or stain.
- Sanding Block: Smooths rough edges and surfaces.
- Stud Finder: Locates wall studs for secure mounting.
Each material and tool plays a crucial role in building a sturdy, functional hidden bookcase door.
Required Skills and Time Commitment
Skill Level: Advanced
Estimated Time Required: 20-30 hours
- Planning and Measuring: 2-3 hours
- Cutting and Assembling the Frame: 5-6 hours
- Building the Bookcase: 6-8 hours
- Installing Hinges and Hardware: 3-4 hours
- Finishing Touches (Painting/Staining): 4-5 hours
Detailed Step-by-Step Guide
Gather Materials and Tools
- Plywood sheets
- Wood screws
- Hinges
- Wood glue
- Paint or stain
- Drill
- Saw
- Measuring tape
- Level
- Sandpaper
Measure the Doorway
- Measure the height and width of the doorway.
- Ensure the bookcase will fit snugly.
Cut the Plywood
- Cut two pieces for the sides of the bookcase.
- Cut top, bottom, and shelves to fit between the sides.
Assemble the Frame
- Attach the top and bottom pieces to the sides using wood screws and glue.
- Ensure corners are square using a level.
Install Shelves
- Measure and mark shelf positions.
- Attach shelves with screws and glue.
Sand and Finish
- Sand all surfaces until smooth.
- Apply paint or stain as desired.
Attach Hinges
- Attach hinges to one side of the bookcase.
- Ensure hinges are evenly spaced.
Install the Bookcase Door
- Attach the other side of the hinges to the doorway frame.
- Ensure the bookcase swings open smoothly.
Add Trim and Molding
- Cut and attach trim around the bookcase to hide gaps.
- Paint or stain trim to match the bookcase.
Test and Adjust
- Open and close the bookcase door several times.
- Make any necessary adjustments to ensure smooth operation.
Helpful Tips and Tricks
Measure Twice, Cut Once: Accurate measurements are crucial. Double-check dimensions before cutting wood to avoid mistakes.
Use Quality Hinges: Invest in heavy-duty hinges to support the weight of the bookcase. Cheap hinges may sag over time.
Reinforce the Frame: Ensure the door frame is sturdy. Use wood glue and screws for extra strength.
Level the Floor: Make sure the floor is level where the bookcase will swing. An uneven floor can cause the door to stick.
Hidden Latch: Install a hidden latch or magnetic lock to keep the door secure and maintain the hidden aspect.
Balance the Weight: Distribute weight evenly on the shelves to prevent the door from becoming unbalanced.
Smooth Edges: Sand all edges to avoid splinters and ensure a smooth finish.
Paint or Stain Before Assembly: It's easier to paint or stain the wood before assembling the bookcase.
Common Mistakes to Avoid:
Incorrect Measurements: Misjudging dimensions can lead to a poor fit. Always double-check.
Weak Hinges: Using weak hinges can cause the door to sag. Opt for heavy-duty options.
Ignoring Floor Level: Not leveling the floor can result in a door that sticks or doesn't close properly.
Poor Weight Distribution: Unevenly distributed weight can make the door difficult to open and close.
Alternatives for Materials or Methods:
Plywood vs. Solid Wood: Plywood is cheaper and lighter but less durable. Solid wood offers better durability and aesthetics.
Pocket Screws vs. Nails: Pocket screws provide a stronger, cleaner joint compared to nails.
Magnetic Locks vs. Traditional Locks: Magnetic locks are easier to hide and use, maintaining the secretive nature of the door.
Budgeting for Your Hidden Bookcase Door
Materials:
- Plywood: $50-$70 per sheet (you'll need 2-3 sheets)
- Wood Screws: $5-$10 per box
- Wood Glue: $5-$10 per bottle
- Hinges: $20-$40 for heavy-duty hidden hinges
- Paint or Stain: $15-$30 per can
- Handles/Knobs: $10-$20
Tools:
- Circular Saw: $50-$100 (or borrow one)
- Drill: $30-$60 (or borrow one)
- Screwdriver Set: $10-$20
- Paintbrushes: $5-$15
- Measuring Tape: $5-$10
- Level: $10-$20
Total Cost: $215-$425
Budget-Friendly Alternatives:
- Use MDF instead of plywood: $30-$40 per sheet
- Borrow tools from friends or family
- Buy second-hand tools from thrift stores or online marketplaces
- Use leftover paint or stain from previous projects
Creative Variations and Customizations
Materials: Instead of traditional wood, try plywood for a budget-friendly option or hardwood for a more durable, elegant look. Metal or glass shelves can add a modern touch.
Colors: Paint the bookcase to match your room's decor. Use bold colors like navy or emerald for a statement piece, or neutral tones like white or beige for a subtle look. Stain the wood to highlight its natural grain.
Styles: For a rustic feel, use reclaimed wood and add iron hardware. A contemporary style can be achieved with sleek lines and minimalistic design. For a vintage look, incorporate ornate moldings and antique handles.
Handles: Use hidden handles for a seamless look or decorative knobs to add character. Magnetic latches can keep the door secure without visible hardware.
Lighting: Add LED strip lights along the shelves for a dramatic effect. Recessed lighting can highlight your favorite books or decor items.
Shelving: Customize the shelf heights to accommodate different book sizes or display items. Add adjustable shelves for flexibility.
Secret Compartments: Incorporate hidden compartments within the bookcase for storing valuables or personal items. Use false backs or hinged panels to create these spaces.
Trim and Molding: Add crown molding or baseboards to blend the bookcase with existing room decor. Decorative trim can enhance the overall look.
Mechanism: Use heavy-duty hinges for stability. Consider soft-close hinges to prevent slamming. Sliding mechanisms can offer a different opening style.
Decor: Personalize with decorative bookends, plants, or picture frames. Add a mirror on the back panel for depth.
Security: Install a hidden lock for added security. Use RFID locks for a high-tech touch.
Eco-Friendly Building Tips
Use reclaimed wood for the bookcase frame. Old pallets or barn wood can add character and reduce waste. Choose low-VOC (volatile organic compounds) paint or finishes to minimize harmful emissions. For the hinges and hardware, consider recycled metal options.
Instead of buying new shelves, repurpose old ones from another piece of furniture. Use natural adhesives like wood glue made from plant-based materials. Opt for LED lights if you want to add lighting to the bookcase, as they are energy-efficient.
Insulate the hidden door with eco-friendly materials like sheep wool or recycled denim to improve energy efficiency. When cutting wood, save the scraps for other projects or donate them to a local school or community center.
Finally, use manual tools whenever possible to reduce electricity consumption.
Your Secret Door Awaits
Building an outswing hidden bookcase door is a rewarding project. You've got the tools, the materials, and the steps laid out. Just remember to measure twice, cut once. Pay attention to the hinges and alignment for smooth operation. Don't rush the painting or staining; a good finish makes all the difference. If you hit a snag, take a break and come back with fresh eyes. This project not only adds a touch of mystery to your home but also serves a practical purpose. Imagine the look on your friends' faces when you reveal your hidden door. So, gather your supplies, roll up your sleeves, and get started. Your secret door awaits, ready to add a unique charm to your space. Happy building!
How do I start building an outswing hidden bookcase door?
Begin by measuring the doorway where you want the bookcase. Gather materials like wood, hinges, screws, and a latch. Draw a plan showing the dimensions and design.
What tools will I need?
You'll need a saw, drill, screwdriver, measuring tape, level, and sandpaper. A stud finder and wood glue can also be handy.
How do I make sure the bookcase swings out smoothly?
Use heavy-duty hinges and ensure they're aligned properly. Test the swing before attaching the bookcase to the wall. Adjust as needed for smooth movement.
Can I use any type of wood?
Yes, but hardwoods like oak or maple are more durable. Softwoods like pine are easier to work with but may not last as long.
How do I hide the hinges?
Use concealed hinges or paint them to match the bookcase. You can also add trim or molding to cover them up.
What kind of latch should I use?
Magnetic latches work well and are easy to install. You can also use a hidden latch or a push-to-open mechanism for a cleaner look.
How do I secure the bookcase to the wall?
Attach the bookcase to wall studs using screws. Make sure it's level and secure to prevent tipping. Use brackets for extra stability if needed.