
Home>Home & Furniture>Doors & Windows>How to Build Octagon Window Blinds
Doors & Windows
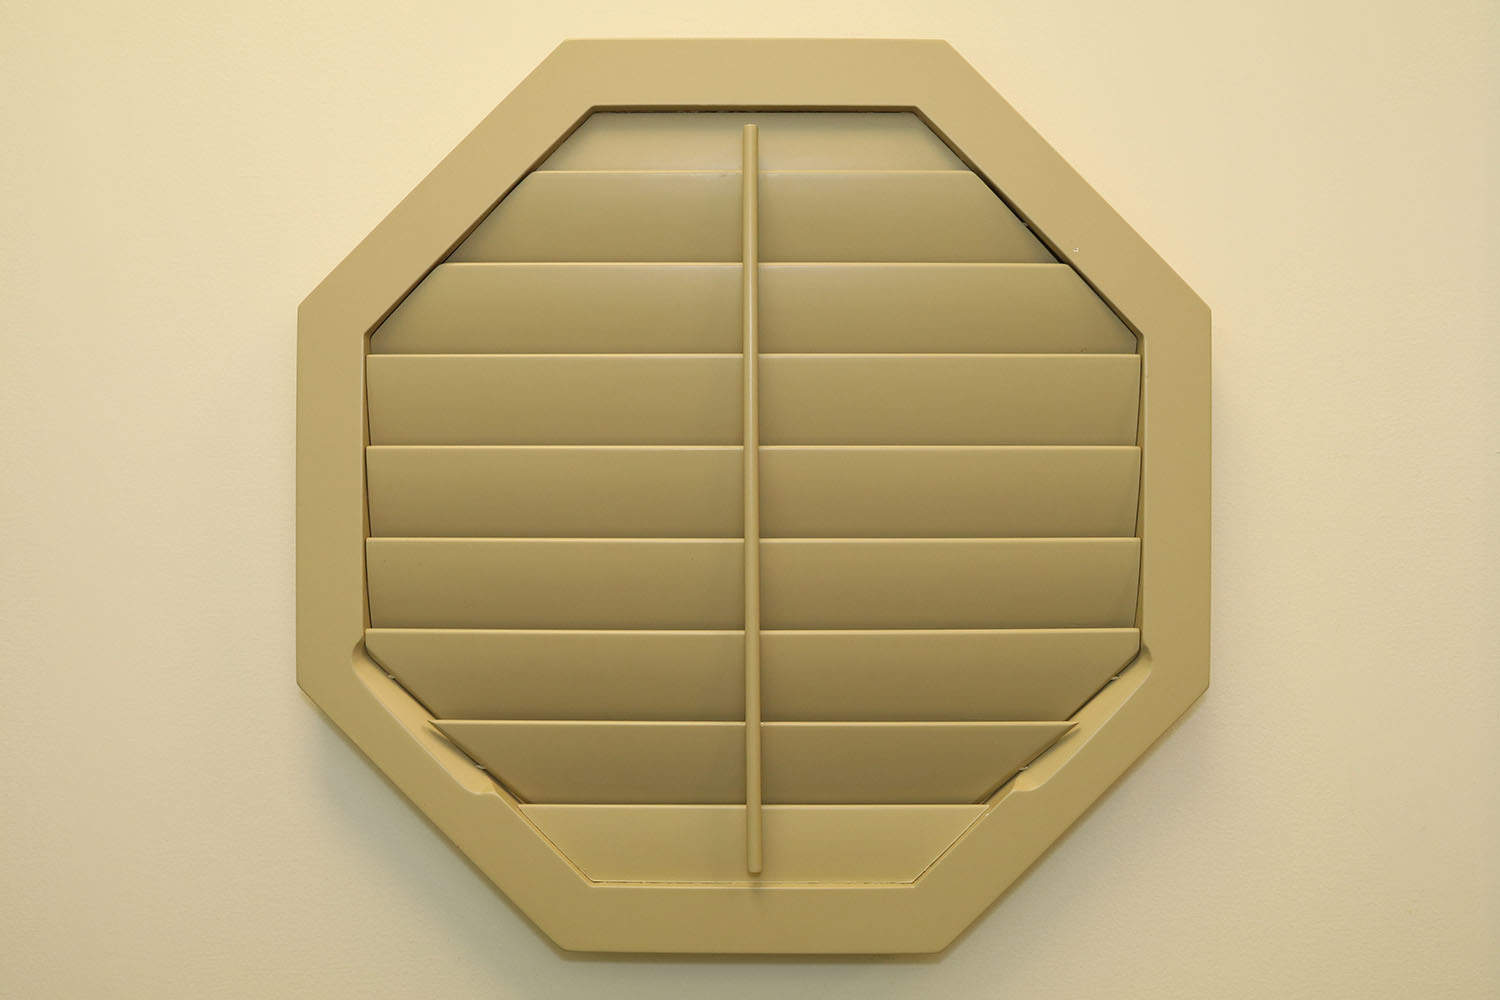
How to Build Octagon Window Blinds
Published: August 15, 2024
Learn how to build custom octagon window blinds with our step-by-step guide. Enhance your home's unique windows with stylish, functional blinds that fit perfectly.
(Many of the links in this article redirect to a specific reviewed product. Your purchase of these products through affiliate links helps to generate commission for Twigandthistle.com, at no extra cost. Learn more)
Building octagon window blinds might sound tricky, but it’s doable with some patience and basic tools. Octagon windows add a unique flair to rooms but finding ready-made blinds can be challenging. Making your own allows for a custom fit and design to match your decor. This guide will walk through the steps, providing clear instructions and tips to ensure success. Even if you’re new to DIY, you’ll find this project manageable and rewarding. Ready to transform those distinctive windows? Let’s get started!
Getting Ready for the Project
Measure the Window: Use a tape measure to get the exact dimensions of the octagon window. Write down each side's length and the overall diameter.
Gather Materials: Collect all necessary materials like wood, fabric, screws, brackets, and a saw. Make sure everything is within reach.
Safety Gear: Wear safety goggles, gloves, and a dust mask. These protect your eyes, hands, and lungs from debris.
Clear the Workspace: Ensure your workspace is clean and organized. Remove any clutter to avoid accidents.
Cut the Wood: Use a saw to cut the wood pieces according to your measurements. Double-check each piece to ensure accuracy.
Assemble the Frame: Lay out the wood pieces and assemble the frame using screws and brackets. Make sure the frame is sturdy and square.
Attach the Fabric: Cut the fabric to fit the frame, leaving extra for folding. Use a staple gun to attach the fabric to the frame, pulling it tight to avoid wrinkles.
Install the Blinds: Mount the blinds inside the window frame using brackets. Ensure they fit snugly and operate smoothly.
Test the Blinds: Open and close the blinds several times to ensure they work properly. Make any necessary adjustments.
Clean Up: Dispose of any debris and put away tools. Clean the area to leave it safe and tidy.
Items and Equipment You Will Need
Materials:
- Wooden Slats: These form the main structure of the blinds. Choose a type of wood that matches your decor.
- Fabric: Used to cover the slats for a softer look. Pick a durable fabric that complements your room.
- Cord: Allows the blinds to be raised and lowered. Ensure it’s strong enough to handle daily use.
- Mounting Brackets: Secure the blinds to the window frame. They need to be sturdy to hold the weight.
- Screws: Used to attach the mounting brackets. Make sure they are the right size for your window frame.
- Glue: Helps attach the fabric to the wooden slats. Use a strong adhesive that dries clear.
Tools:
- Saw: Cuts the wooden slats to the correct size. A miter saw works best for precise angles.
- Drill: Makes holes for the screws. A cordless drill is convenient for this task.
- Screwdriver: Tightens the screws. A power screwdriver can save time.
- Measuring Tape: Ensures accurate measurements. Double-check all dimensions before cutting.
- Scissors: Cuts the fabric to size. Sharp scissors make cleaner cuts.
- Sandpaper: Smooths the edges of the wooden slats. Prevents splinters and gives a polished look.
- Staple Gun: Attaches the fabric to the wooden slats. Make sure to use staples that are long enough to hold the fabric securely.
- Level: Ensures the blinds are hung straight. A small level works well for this job.
These materials and tools will help you create functional and stylish octagon window blinds.
Required Skills and Time Commitment
Skill Level: Intermediate
Time Required: 4-6 hours
- Measure and Cut Materials: 1-2 hours
- Assemble Frame: 1 hour
- Attach Blinds: 1-2 hours
- Install and Adjust: 1 hour
Detailed Guide to Building Octagon Window Blinds
Measure the Window:
- Use a tape measure to find the width and height of the octagon window.
- Write down the measurements.
Choose Materials:
- Select a fabric or material for the blinds.
- Get a wooden dowel or metal rod for the top.
Cut the Fabric:
- Lay out the fabric flat.
- Mark the measurements on the fabric.
- Cut the fabric to match the window size, adding an extra inch on each side for seams.
Sew the Edges:
- Fold the edges of the fabric over by half an inch.
- Sew along the folded edges to create clean seams.
Attach the Rod:
- Sew a pocket at the top of the fabric for the rod.
- Slide the rod through the pocket.
Install Mounting Brackets:
- Use a drill to attach mounting brackets above the window.
- Ensure brackets are level.
Hang the Blinds:
- Place the rod with the fabric into the brackets.
- Adjust the fabric so it hangs evenly.
Add a Pull Cord:
- Attach a pull cord to the bottom of the blinds.
- Ensure the cord is long enough to reach easily.
Test the Blinds:
- Pull the cord to raise and lower the blinds.
- Make any necessary adjustments for smooth operation.
Secure the Bottom:
- Attach small hooks or Velcro to the bottom corners of the window.
- Secure the bottom of the blinds to keep them in place.
Helpful Hints for Success
Measure accurately. Octagon windows have unique angles, so precise measurements are crucial. Use a protractor to get the exact angles.
Use a template. Cut a cardboard template of your window. This helps ensure your blinds fit perfectly before cutting expensive materials.
Choose the right material. Lightweight materials like bamboo or fabric work best. Heavy materials can be difficult to cut and install.
Reinforce corners. Octagon blinds have more corners than regular blinds. Use corner brackets or extra stitching to keep them sturdy.
Install brackets properly. Make sure the brackets are level and secure. Uneven brackets can cause the blinds to hang crookedly.
Common mistakes to avoid:
- Skipping measurements. Always double-check measurements to avoid costly mistakes.
- Using the wrong tools. Use a sharp utility knife or saw for clean cuts.
- Ignoring instructions. Follow the manufacturer's instructions for the best results.
Alternative methods:
- Pre-made blinds. Some companies offer custom blinds for unique window shapes.
- DIY Roman shades. Fabric shades can be easier to make and install.
- Curtains. Simple curtains can be a stylish and functional alternative.
Budgeting for Your DIY Blinds
Materials:
- Wood: $30-$50 (depends on type and size)
- Fabric: $20-$40 (depends on quality and amount)
- Screws and Nails: $5
- Paint or Stain: $10-$20
- Thread: $3
Tools:
- Saw: $50-$100 (can be rented for $10-$20/day)
- Drill: $40-$60 (can be rented for $10/day)
- Measuring Tape: $5
- Hammer: $10
- Paintbrushes: $5
Budget-Friendly Alternatives:
- Use Reclaimed Wood: Often free or very cheap
- Old Sheets or Curtains: Can replace new fabric
- Borrow Tools: Ask friends or neighbors
- Second-Hand Stores: Find cheaper tools and materials
Total Estimated Cost: $178-$298 (without renting tools) or $78-$128 (with renting and using alternatives)
Personalizing Your Window Blinds
Materials: Instead of traditional wood, try using bamboo for a more natural look. PVC can be a good option for a modern, sleek appearance. Fabric blinds can add a soft touch and come in various patterns.
Colors: Paint the blinds in bold colors like red or blue to make them stand out. For a more subtle look, use neutral tones like beige or gray. Metallic finishes like gold or silver can add a touch of elegance.
Styles: Go for a rustic style by using reclaimed wood and leaving it unfinished. For a contemporary look, use sleek materials and minimalistic designs. Vintage styles can be achieved with distressed paint and antique hardware.
Mechanisms: Instead of traditional pull cords, consider motorized blinds for ease of use. Magnetic closures can be a simple, child-friendly option. Spring-loaded mechanisms can offer a smooth, silent operation.
Decorative Elements: Add stenciled designs or decals to the blinds for a personalized touch. Use decorative trim or tassels to enhance the edges. Embroidery can add a unique, handcrafted feel.
Installation: For a unique twist, install the blinds inside the window frame for a flush look. Outside mounting can make the window appear larger. Use adjustable brackets to easily change the angle of the blinds.
Eco-Friendly Ideas for Your Project
Eco-friendly materials can make your octagon window blinds both stylish and sustainable. Start by reusing old fabric from curtains or tablecloths. This not only saves money but also reduces waste.
For the frame, consider using reclaimed wood. You can find this at salvage yards or even from old furniture. Reclaimed wood adds character and is better for the environment than new wood.
Natural dyes can color your fabric. These dyes come from plants, vegetables, and fruits, making them a non-toxic option.
Instead of plastic, use metal or wooden hardware. These materials are more durable and recyclable.
For the cords or strings, opt for organic cotton or hemp. These materials are biodegradable and have a lower environmental impact.
When assembling, use non-toxic glue or eco-friendly nails. This ensures that your project remains safe for both you and the planet.
By choosing these materials and methods, you create beautiful, sustainable octagon window blinds.
Finishing Touches
Building octagon window blinds might seem tricky at first, but with patience and the right tools, it's totally doable. Measure your window accurately, cut the materials precisely, and assemble with care. Don't rush the process; taking your time ensures a better fit and finish. Once installed, these custom blinds will not only provide privacy and light control but also add a unique touch to your space. Remember, practice makes perfect. If your first attempt isn't flawless, don't get discouraged. Each project improves your skills. Now, grab your tools, and get started on those blinds. Happy building!
How do I measure for octagon window blinds?
Measure each side of the octagon. Write down the lengths. Measure the distance from one corner to the opposite corner to get the diameter. These measurements will help you get the right size blinds.
What materials do I need to build octagon window blinds?
You'll need fabric or slats, a measuring tape, a saw, screws, a drill, brackets, and a mounting board. Don't forget a pencil for marking measurements.
Can I use regular blinds for an octagon window?
Regular blinds won't fit an octagon window properly. You need custom blinds or make your own to match the unique shape.
How do I cut the blinds to fit an octagon shape?
Measure and mark the fabric or slats according to your window's dimensions. Use a saw to cut the material carefully along the lines. Make sure each piece fits snugly.
How do I install the blinds once they're cut?
Attach brackets to the window frame. Secure the mounting board to the brackets. Hang the blinds on the mounting board, ensuring they fit well and can open and close smoothly.
Are there any tips for making the blinds look professional?
Use a level to ensure everything is straight. Double-check your measurements before cutting. Smooth out any rough edges. Consider adding a decorative trim for a polished look.
How long does it take to build and install octagon window blinds?
It depends on your skill level. For a beginner, it might take a weekend. More experienced DIYers could finish in a few hours.