
Home>Home & Furniture>Doors & Windows>How to Build Bypass Barn Doors
Doors & Windows
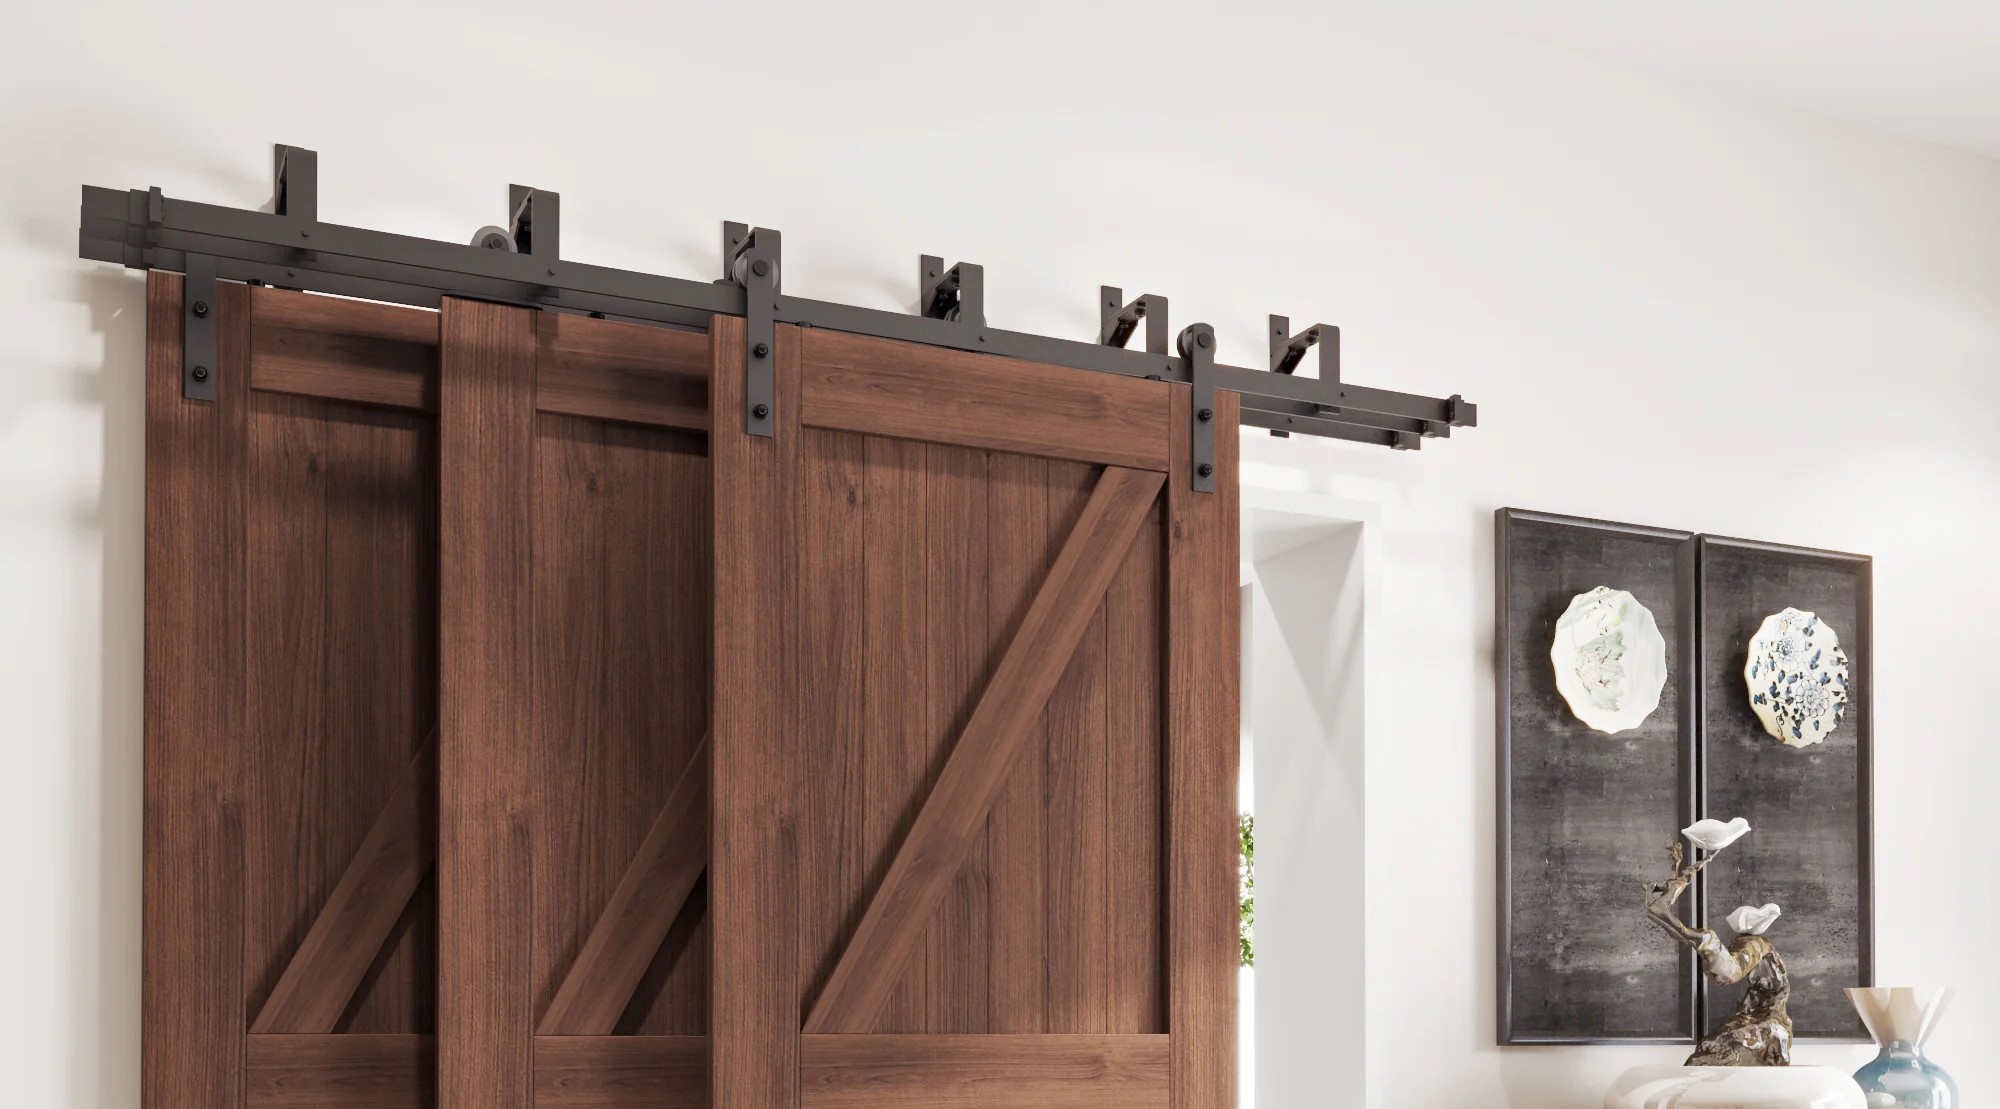
How to Build Bypass Barn Doors
Published: September 7, 2024
Learn how to build bypass barn doors with our step-by-step guide. Perfect for saving space and adding rustic charm to your home. Get started on your DIY project today!
(Many of the links in this article redirect to a specific reviewed product. Your purchase of these products through affiliate links helps to generate commission for Twigandthistle.com, at no extra cost. Learn more)
Thinking about adding some style to your home with bypass barn doors? Great choice! These doors not only look awesome but also save space. This guide will help you build your own bypass barn doors from scratch. Whether you’re new to DIY projects or have some experience, you’ll find everything you need to get started right here. Gather your materials, clear your workspace, and get ready to add a charming, functional touch to your home. Let’s dive in and turn this idea into a reality!
Getting Ready for the Project
Measure the Doorway: Use a tape measure to get the exact width and height of the doorway. Add a few inches to each side for overlap.
Gather Materials: Collect wood planks, screws, a drill, a saw, a level, sandpaper, paint or stain, and barn door hardware.
Safety Gear: Wear safety goggles, gloves, and a dust mask to protect yourself from wood dust and debris.
Prepare the Workspace: Clear an area large enough to lay out the wood planks. Ensure good ventilation if painting or staining.
Cut the Wood: Use a saw to cut the wood planks to the measured dimensions. Sand the edges to smooth any rough spots.
Assemble the Door Panels: Lay out the planks side by side. Attach horizontal support pieces across the back using screws and a drill.
Paint or Stain: Apply paint or stain to the assembled door panels. Let them dry completely before moving on.
Install Hardware: Follow the instructions provided with the barn door hardware kit. Attach the rollers to the top of the door panels.
Mount the Track: Use a level to ensure the track is straight. Secure it above the doorway with screws.
Hang the Doors: Lift the doors onto the track. Test to make sure they slide smoothly.
Final Adjustments: Check for any uneven spots or rough edges. Make necessary adjustments to ensure the doors operate properly.
Gather Your Materials and Tools
- Wood Boards: These will form the main structure of the barn doors. Choose sturdy, high-quality wood for durability.
- Plywood: Used for the door panels. It provides a smooth surface and adds stability.
- Barn Door Hardware Kit: Includes tracks, rollers, and mounting brackets. Essential for the sliding mechanism.
- Screws and Nails: Necessary for assembling the door and attaching hardware.
- Wood Glue: Helps secure joints and adds extra strength.
- Sandpaper: Smooths out rough edges and surfaces.
- Paint or Stain: Adds color and protects the wood.
- Measuring Tape: Ensures accurate measurements for cutting and fitting.
- Saw: Used to cut wood boards and plywood to the required sizes.
- Drill: Needed for making holes for screws and hardware.
- Screwdriver: Tightens screws and helps with assembly.
- Level: Ensures the door and hardware are installed straight.
- Clamps: Holds pieces together while the glue dries.
- Pencil: Marks measurements and cutting lines.
- Safety Gear: Includes gloves, goggles, and a dust mask for protection during cutting and sanding.
Required Skills and Time Commitment
Skill Level: Intermediate
Time Required: 6-8 hours
- Measure and Cut Wood: 1-2 hours
- Assemble Door Panels: 1-2 hours
- Install Hardware: 2-3 hours
- Finishing Touches: 1 hour
Detailed Instructions for Assembly
Gather Materials and Tools
- Two barn door slabs
- Bypass barn door hardware kit
- Measuring tape
- Level
- Drill
- Screws
- Screwdriver
- Pencil
- Stud finder
Measure the Doorway
- Measure the width and height of the doorway.
- Add 2 inches to the width for overlap.
- Ensure the height allows for floor clearance.
Install the Header Board
- Locate wall studs using a stud finder.
- Cut a header board to the width of the door opening.
- Attach the header board above the doorway, securing it to the studs.
Attach the Track
- Measure and mark the placement for the track on the header board.
- Drill pilot holes for the track screws.
- Attach the track to the header board using screws.
Prepare the Doors
- Lay the barn door slabs flat.
- Attach the door rollers to the top of each door according to the hardware kit instructions.
Hang the Doors
- Lift the first door and place the rollers onto the back track.
- Lift the second door and place the rollers onto the front track.
- Ensure both doors slide smoothly.
Install Door Guides
- Attach floor guides to keep the doors from swinging.
- Position guides at the bottom of the doorway.
- Secure guides with screws.
Test the Doors
- Slide both doors back and forth.
- Adjust rollers if necessary for smooth operation.
Finish Up
- Tighten all screws.
- Check alignment and make final adjustments.
- Enjoy your new bypass barn doors!
Helpful Tips and Tricks
Measure Twice, Cut Once: Always double-check measurements before cutting wood. This ensures pieces fit perfectly.
Use a Level: Make sure tracks and doors are level. Uneven tracks cause doors to slide poorly.
Pre-Drill Holes: Prevent wood from splitting by pre-drilling holes for screws.
Choose Quality Hardware: Invest in sturdy tracks and rollers. Cheap hardware wears out quickly.
Sand Edges: Smooth edges of wood to avoid splinters and give a polished look.
Paint or Stain Before Assembly: It's easier to paint or stain wood before putting everything together.
Use a Stud Finder: Secure tracks to wall studs for maximum support.
Common Mistakes to Avoid:
Skipping Measurements: Guessing leads to poorly fitting doors.
Ignoring Wall Studs: Attaching tracks to drywall alone won't hold the weight.
Using Cheap Hardware: Low-quality tracks and rollers break easily.
Not Leveling Tracks: Uneven tracks cause doors to slide improperly.
Alternatives for Materials or Methods:
Plywood Instead of Solid Wood: Plywood is cheaper and lighter but still sturdy.
Sliding Door Kits: Pre-made kits simplify the process, including all necessary hardware.
Reclaimed Wood: Adds character and is eco-friendly.
Pocket Doors: Slide into the wall, saving space but requiring more complex installation.
Estimating the Cost
Materials:
- Wood: $100-$200 (depends on type and size)
- Barn Door Hardware Kit: $50-$150
- Screws and Nails: $10
- Wood Stain or Paint: $20-$40
- Sandpaper: $5
- Handles: $10-$30
Tools:
- Drill: $50 (or borrow)
- Saw: $50 (or borrow)
- Measuring Tape: $10
- Level: $10
- Paintbrushes: $10
Total Cost: $315-$565
Budget-Friendly Alternatives:
- Use reclaimed wood: $0-$50
- Borrow tools from friends or family
- Buy a basic hardware kit: $50
- Skip handles or use simple drawer pulls: $5
Different Ways to Customize
Materials: Instead of traditional wood, try reclaimed wood for a rustic look or plywood for a budget-friendly option. Metal doors can give an industrial feel.
Colors: Paint the doors in bold colors like navy blue or forest green for a modern touch. For a classic look, use white or stain the wood to highlight its natural grain.
Styles: Add decorative trim or molding to create a more elegant appearance. Use shiplap panels for a farmhouse vibe.
Hardware: Swap out standard handles for antique or modern designs. Choose black or brushed nickel hardware to match your home’s decor.
Glass Inserts: Incorporate frosted glass panels for added privacy while allowing light to pass through. Clear glass inserts can make the space feel larger and more open.
Patterns: Create a chevron or herringbone pattern with the wood planks for a unique design. Use mixed-width boards for a more eclectic look.
Finishes: Apply a distressed finish for a vintage feel. Use a high-gloss finish for a sleek, contemporary style.
Eco-Friendly Building Tips
Reclaimed wood is a great choice. It adds character and reduces waste. Look for old barn wood, pallets, or even discarded furniture. Recycled metal can be used for hardware like handles and tracks. It’s sturdy and eco-friendly.
Low-VOC paints and finishes help keep indoor air quality safe. They release fewer harmful chemicals. Natural oils like linseed or tung oil can also be used to finish the wood. They are biodegradable and non-toxic.
Bamboo is another sustainable option. It grows quickly and is very durable. It can be used for the door panels or even the track system.
Salvaged glass can be incorporated for a unique look. It reduces the need for new materials and adds a vintage touch.
Energy-efficient lighting around the doors can enhance their appearance while saving electricity. Use LED lights, which last longer and consume less power.
Insulation is key if the doors are for an exterior space. Use eco-friendly insulation materials like sheep’s wool or recycled denim. They are effective and sustainable.
Upcycling old doors into bypass barn doors is another creative option. It saves resources and gives new life to something old.
Local sourcing of materials reduces the carbon footprint. It supports local businesses and cuts down on transportation emissions.
Minimalist design can also be more sustainable. Fewer materials mean less waste and a cleaner look.
Your DIY Masterpiece Awaits
You've got all the steps to build bypass barn doors. From gathering materials to installing the hardware, it's all about taking it one step at a time. Don't rush. Measure twice, cut once. If you hit a snag, take a breather and think it through. Mistakes happen, but they’re part of the learning process. Once those doors are up, you’ll feel a sense of accomplishment that’s hard to beat. Plus, you’ll have a stunning addition to your space that you made with your own hands. So grab your tools, roll up your sleeves, and get started. Your DIY masterpiece is just a few steps away. Happy building!
How do I measure for bypass barn doors?
Measure the width and height of your doorway. Add a few inches to the width so the doors overlap when closed. For height, include space for the track and any floor clearance.
What materials do I need?
You’ll need wood for the doors, a bypass barn door hardware kit, screws, a drill, a saw, a measuring tape, and sandpaper. Paint or stain is optional.
How do I install the track?
First, find the studs above your doorway. Attach the track to the wall using screws, making sure it’s level. Follow the instructions in your hardware kit.
Can I use any type of wood?
Most types of wood work, but pine, oak, and cedar are popular choices. Pick wood that matches your home’s style and your budget.
How do I attach the doors to the track?
Attach the rollers to the top of each door. Lift the doors and place the rollers on the track. Make sure they slide smoothly.
What if my doors don’t slide smoothly?
Check if the track is level and free of debris. Adjust the rollers if needed. Sometimes, a little lubricant can help.
Can I customize the look of my barn doors?
Absolutely! Paint, stain, or add decorative hardware to match your style. You can even add windows or panels for a unique look.