
Home>Home & Furniture>Doors & Windows>How to Build a Window Catio Step-by-step
Doors & Windows
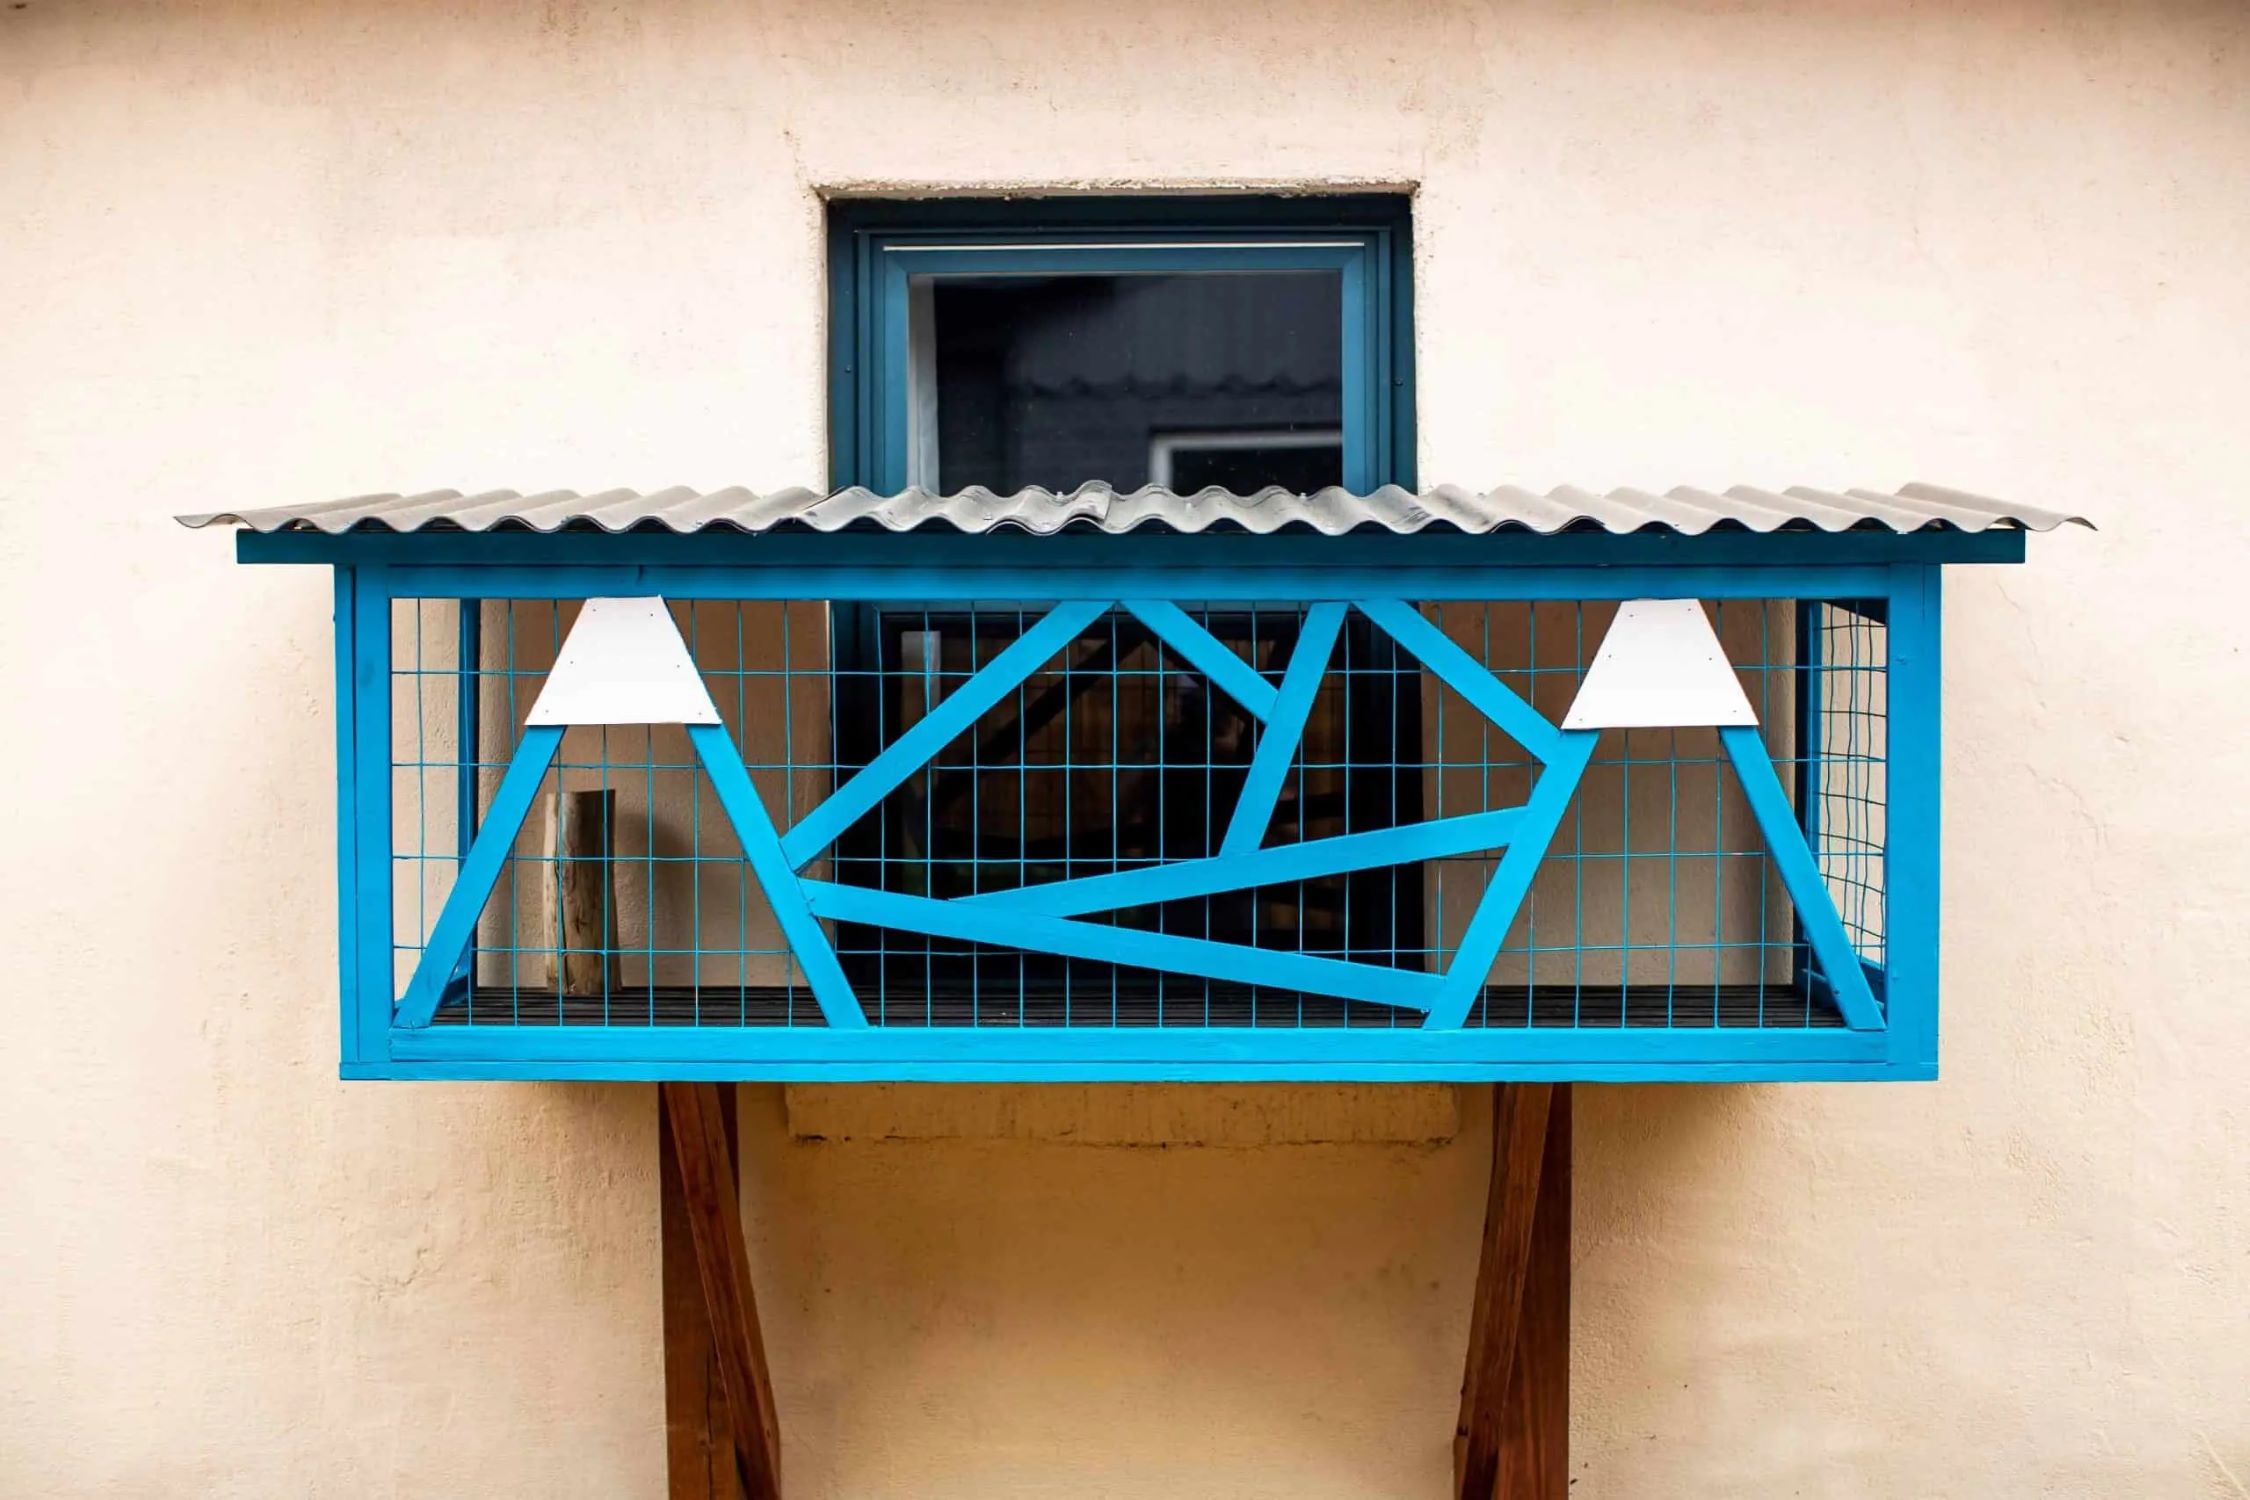
How to Build a Window Catio Step-by-step
Published: August 11, 2024
Learn how to build a window catio step-by-step! Create a safe outdoor space for your cat with our comprehensive guide. Perfect for DIY enthusiasts and cat lovers alike.
(Many of the links in this article redirect to a specific reviewed product. Your purchase of these products through affiliate links helps to generate commission for Twigandthistle.com, at no extra cost. Learn more)
Cats love fresh air and watching birds, but keeping them safe is always a concern. Building a window catio provides a perfect solution. This enclosed outdoor space allows cats to experience the outside world without the risks. Crafting one isn't as hard as it sounds. With some basic materials and a bit of effort, you can create a cat haven right outside your window. This guide will take you through the steps needed to build a window catio, so your feline friends can enjoy the outdoors safely. Let’s get started on creating a fun, secure space for your cats!
Preparation
Measure the Window: Use a tape measure to get the height and width of the window where the catio will attach.
Gather Materials: Collect wood, screws, nails, wire mesh, hinges, and a latch. Make sure everything is sturdy and safe for your cat.
Safety Gear: Wear safety goggles, gloves, and a dust mask to protect yourself while cutting wood or handling tools.
Clear the Workspace: Ensure the area around the window is free of clutter. This will give you enough room to work and prevent accidents.
Cut the Wood: Using a saw, cut the wood to match the measurements of your window. Double-check the dimensions before cutting.
Assemble the Frame: Lay out the wood pieces and use screws or nails to build the frame. Make sure it’s square and sturdy.
Attach the Wire Mesh: Cut the wire mesh to fit the frame and staple it securely. This will keep your cat safe inside the catio.
Install Hinges and Latch: Attach hinges to one side of the frame and a latch to the other. This will allow you to open and close the catio easily.
Test Fit: Place the catio frame against the window to ensure it fits properly. Make any necessary adjustments.
Secure the Catio: Once satisfied with the fit, secure the catio to the window frame using screws. Make sure it’s stable and won’t wobble.
Inspect for Safety: Check for any sharp edges or loose parts. Sand down rough spots and tighten any loose screws.
Introduce Your Cat: Let your cat explore the new catio. Monitor them to ensure they are safe and comfortable.
Materials and Tools Needed
Materials:
- Wooden Planks: Used for the frame. Choose weather-resistant wood like cedar or treated pine.
- Wire Mesh: Keeps cats safe inside while allowing fresh air. Opt for galvanized mesh to prevent rust.
- Screws and Nails: Essential for assembling the frame and attaching the mesh.
- Hinges: Needed for any doors or access points.
- Latches: Secure doors to prevent cats from escaping.
- Weatherproof Sealant: Protects wood from moisture and prolongs the structure's life.
- Paint or Stain: Adds a protective layer and can match your house's exterior.
Tools:
- Measuring Tape: Ensures accurate measurements for cutting wood and mesh.
- Saw: Cuts wooden planks to the required lengths.
- Hammer: Drives nails into wood.
- Screwdriver or Drill: Tightens screws and attaches hinges and latches.
- Wire Cutters: Cuts wire mesh to fit the frame.
- Level: Ensures the structure is even and stable.
- Paintbrush or Roller: Applies paint or stain to the wood.
These materials and tools will help you build a sturdy, safe, and weather-resistant window catio for your feline friends.
Skill Level and Time Required
Skill Level: Intermediate
Time Required: 6-8 hours
- Gather Materials: 1 hour
- Measure and Cut Wood: 1.5 hours
- Assemble Frame: 2 hours
- Attach Mesh: 1 hour
- Install Catio: 1.5 hours
Step-by-Step Instructions
Measure the Window:
- Measure the height and width of the window where the catio will attach.
- Note these measurements for cutting materials.
Gather Materials:
- Wood: 2x4s for the frame.
- Wire Mesh: For the walls.
- Screws: To secure the frame.
- Hinges: For the door.
- Latch: To keep the door closed.
- Tools: Saw, drill, measuring tape, screwdriver, staple gun.
Cut the Wood:
- Cut four pieces for the frame's height.
- Cut four pieces for the frame's width.
- Cut additional pieces for the depth of the catio.
Assemble the Frame:
- Lay out the pieces on a flat surface.
- Screw the height and width pieces together to form a rectangle.
- Attach the depth pieces to create a box shape.
Attach the Wire Mesh:
- Cut the wire mesh to fit each side of the frame.
- Staple the mesh securely to the wood frame.
- Ensure there are no sharp edges sticking out.
Build the Door:
- Cut a smaller frame for the door.
- Attach wire mesh to this frame.
- Use hinges to attach the door to the main frame.
- Install a latch to keep the door closed.
Secure the Catio to the Window:
- Place the catio against the window.
- Use screws or brackets to attach the catio frame to the window frame.
- Ensure the catio is stable and secure.
Add Finishing Touches:
- Check for any sharp edges or loose mesh.
- Sand any rough wood edges.
- Add a cushion or perch inside for comfort.
Introduce Your Cat:
- Open the window and let your cat explore the new space.
- Supervise initially to ensure safety.
Enjoy watching your cat enjoy the outdoors safely!
Tips and Tricks
Measure your window accurately. Ensure you have the right dimensions before starting. Use pressure-treated wood for the frame. It lasts longer and resists weather damage. Pre-drill holes before screwing pieces together. This prevents wood from splitting.
Choose sturdy mesh for the enclosure. Hardware cloth or welded wire mesh works well. Secure the mesh tightly to the frame. Use staples or screws with washers. Add a hinged door for easy access. This helps with cleaning and maintenance.
Paint or stain the wood for added protection. It also makes the catio look nicer. Install shelves or perches inside. Cats love to climb and observe. Place a soft mat or rug on the floor. This makes it more comfortable for your cat.
Common mistakes to avoid: Not measuring correctly, using weak materials, and not securing the mesh properly. Alternatives for materials include PVC pipes for the frame and chicken wire for the mesh. Both are lightweight and easy to work with.
Cost Estimation
Lumber: Expect to spend around $50-$100 for wood. You’ll need 2x4s and plywood.
Wire Mesh: This will cost about $30-$50. Look for galvanized wire mesh for durability.
Screws and Nails: Budget around $10-$15 for these.
Hinges and Latches: These will cost about $10-$20.
Paint or Stain: If you want to protect the wood, plan to spend $20-$30.
Tools: If you don’t already have them, a saw, drill, and measuring tape will cost around $100-$150.
Total Cost: Roughly $220-$365.
Budget-Friendly Alternatives:
- Use reclaimed wood to save on lumber costs.
- Check for discounts or sales on wire mesh and hardware.
- Borrow tools from friends or rent them from a local store.
Variations and Customizations
Materials: Instead of traditional wood, consider using PVC pipes or metal frames for a more modern look. Recycled materials like old pallets can give a rustic charm.
Colors: Paint the catio in bright colors like turquoise or yellow for a fun vibe. For a more natural look, use earth tones like brown or green.
Styles: Create a multi-level catio with ramps and platforms for extra fun. Add hammocks or hanging beds for lounging. Use decorative lattice or bamboo screens for privacy and aesthetics.
Roofing: Use clear plastic panels to let in sunlight while keeping rain out. For shade, consider a fabric canopy or retractable awning.
Flooring: Use artificial turf for a grass-like feel. For easy cleaning, opt for removable tiles or rubber mats.
Accessories: Add scratching posts, climbing poles, and toys to keep cats entertained. Install solar-powered lights for nighttime use.
Windows: Use plexiglass instead of mesh for a clearer view. Add curtains or blinds for extra privacy.
Entrances: Create a tunnel entrance for a fun way to access the catio. Use a magnetic pet door for easy entry and exit.
Sustainability Tips
Materials Needed:
- Reclaimed Wood: Use old pallets or leftover wood from other projects.
- Recycled Metal Mesh: Find old screens or fencing.
- Eco-friendly Paint: Choose non-toxic, water-based paint.
- Reused Screws and Nails: Gather from previous projects or buy second-hand.
- Old Window Frame: Repurpose an old window frame for the structure.
Step-by-Step Instructions:
- Measure the Window: Determine the dimensions of the window where the catio will attach.
- Cut the Wood: Using reclaimed wood, cut pieces to form the base, sides, and top of the catio.
- Assemble the Frame: Attach the wood pieces using reused screws and nails to form a sturdy frame.
- Attach the Mesh: Secure recycled metal mesh to the frame using a staple gun or nails. Ensure there are no sharp edges.
- Paint the Frame: Apply eco-friendly paint to protect the wood and give it a finished look.
- Install the Catio: Attach the catio to the window frame securely. Ensure it is stable and safe.
- Add Perches: Use leftover wood to create perches inside the catio for your cat to sit on.
- Inspect for Safety: Check all connections and edges to ensure there are no hazards.
Using reclaimed and recycled materials helps reduce waste and makes your project more sustainable.
Your Feline's New Favorite Spot
Building a window catio is a rewarding project that brings joy to both you and your furry friend. With some basic tools, a bit of patience, and a sprinkle of creativity, you can create a safe, outdoor space for your cat to enjoy fresh air and sunshine. Remember to measure your window accurately, choose sturdy materials, and ensure all parts are securely fastened. Your cat will love the new vantage point, and you'll get the satisfaction of a job well done. Plus, it's a great way to keep your cat entertained and safe from outdoor dangers. So grab your tools, follow the steps, and watch your cat explore their new favorite spot. Happy building!
What materials do I need to build a window catio?
You’ll need wood, screws, wire mesh, hinges, and a latch. Don’t forget a saw, drill, and measuring tape.
How much time will it take to build a window catio?
It usually takes about 4-6 hours depending on your skill level and the complexity of the design.
Can I build a window catio by myself?
Absolutely! With the right tools and a bit of patience, you can definitely build one solo.
Do I need any special skills to build a window catio?
Basic carpentry skills and the ability to use power tools are helpful. If you can measure, cut, and screw things together, you’re good to go.
How do I make sure the catio is safe for my cat?
Ensure there are no sharp edges or gaps where your cat could get stuck. Use sturdy materials and double-check all connections.
Can I customize the design of my window catio?
Yes, you can! Feel free to add shelves, ramps, or even a roof to make it more fun for your cat.
What size should my window catio be?
The size depends on your window and available space. Make sure it’s big enough for your cat to move around comfortably.