
Home>Home & Furniture>Doors & Windows>How to Build a Hobbit Door for Your Dining Room
Doors & Windows
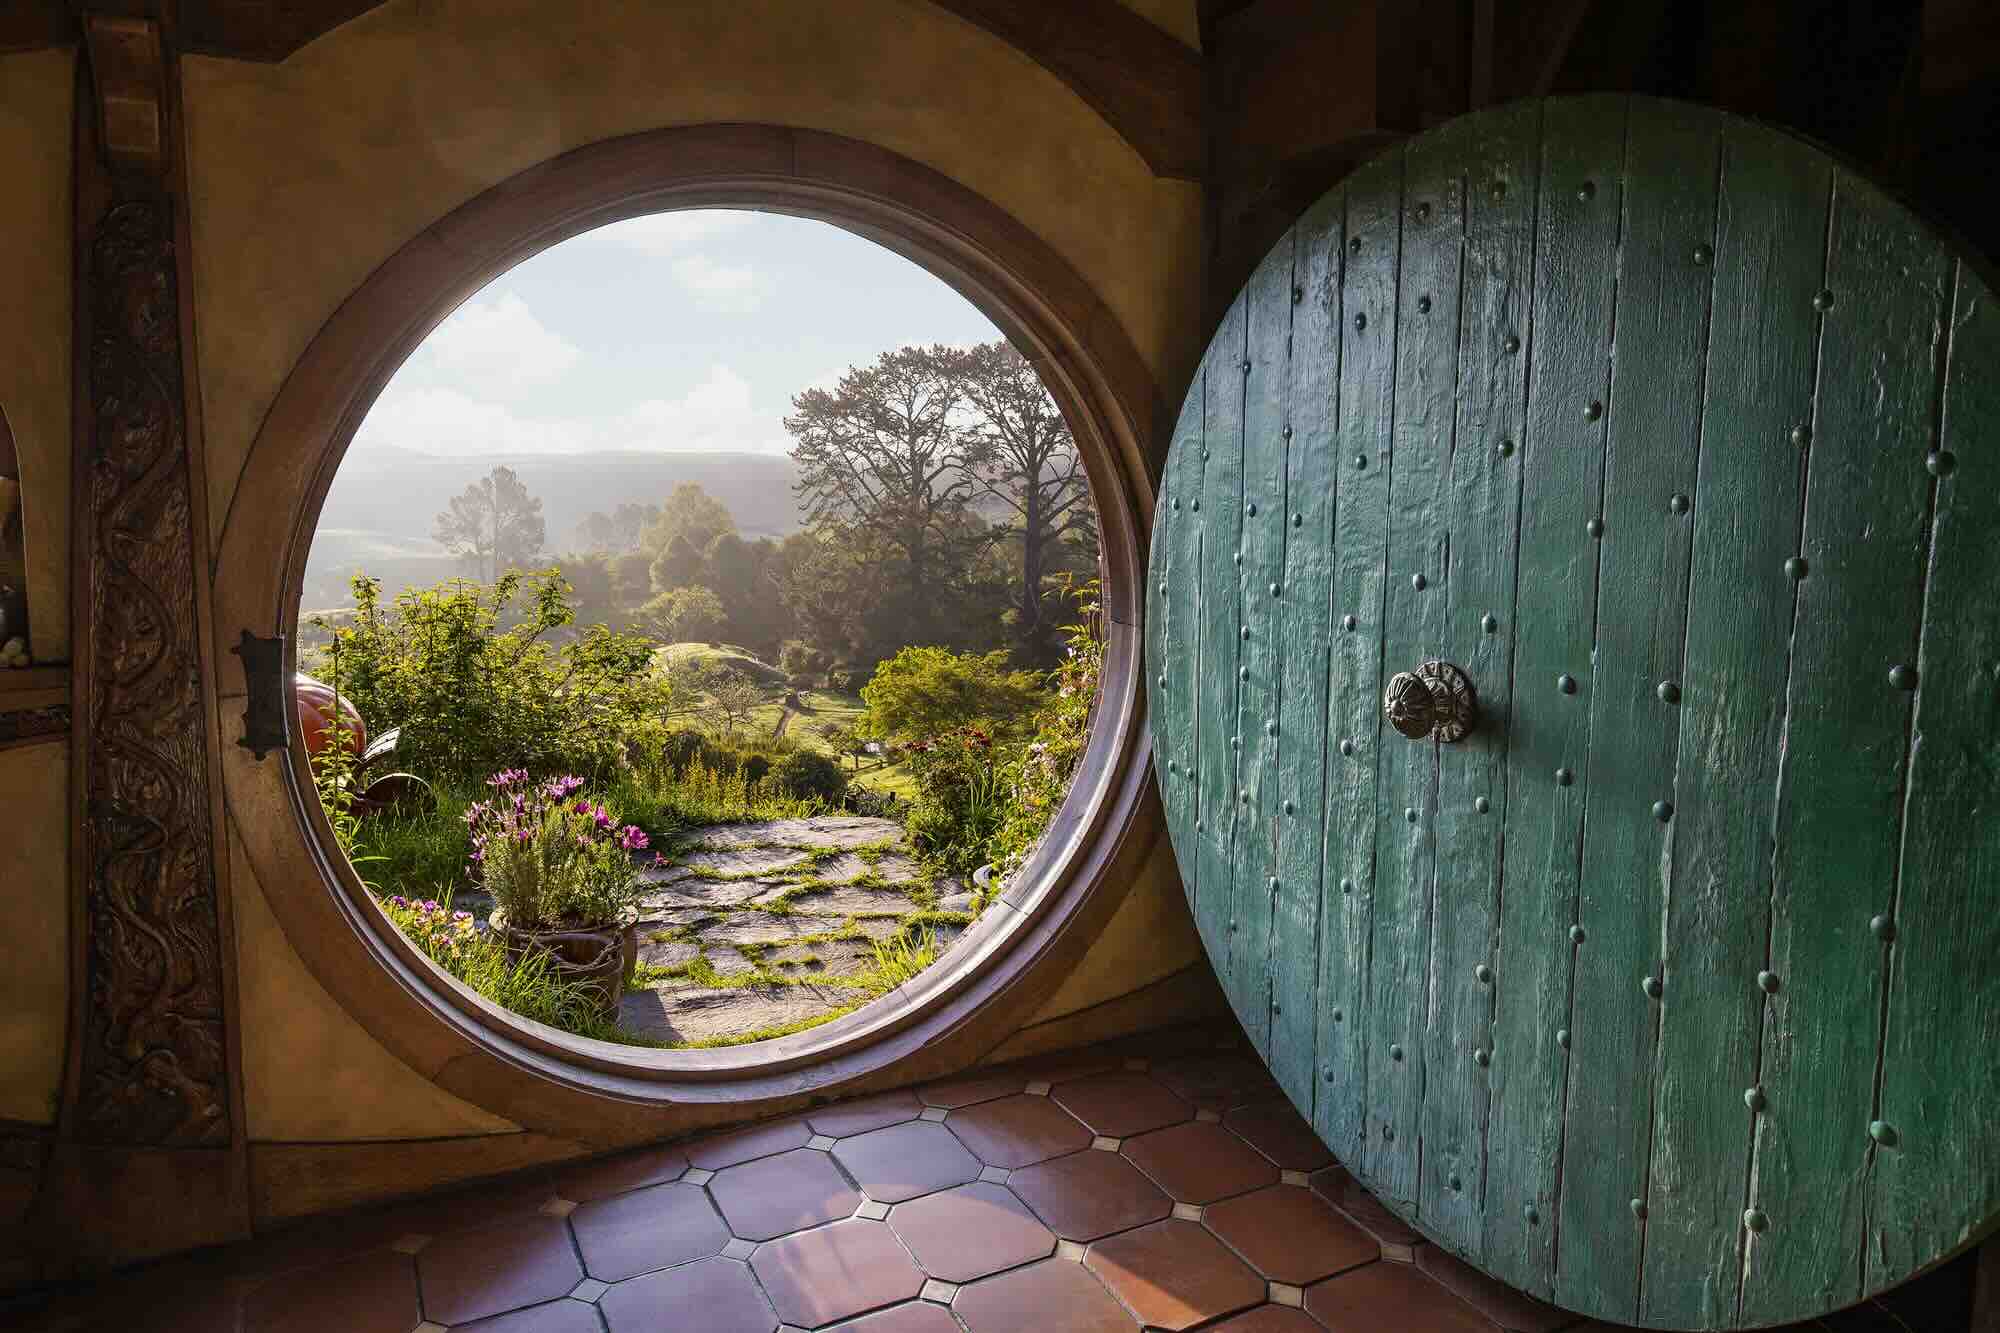
How to Build a Hobbit Door for Your Dining Room
Published: September 16, 2024
Transform your dining room with a charming hobbit door! Learn step-by-step instructions, materials needed, and tips for creating a magical entrance. DIY guide inside!
(Many of the links in this article redirect to a specific reviewed product. Your purchase of these products through affiliate links helps to generate commission for Twigandthistle.com, at no extra cost. Learn more)
Ever thought about adding a touch of Middle-Earth magic to your dining room? Building a hobbit door could be just the project you need. This quirky, charming addition can bring a sense of adventure and coziness to your home. Plus, it’s a fun conversation starter! You don’t need to be a master carpenter to create one. With some basic tools, materials, and a bit of patience, you can make your very own hobbit door. Ready to start your DIY journey? Let’s dive into the steps and materials you’ll need to bring a slice of the Shire into your home.
Getting Ready for Your Project
Measure the Doorway: Use a tape measure to get the exact dimensions of the doorway. Write down the height and width.
Gather Materials: Collect wood, hinges, screws, a door handle, and paint. Make sure you have enough wood to cover the entire doorway.
Safety Gear: Wear safety goggles and gloves to protect your eyes and hands. Use a dust mask if cutting wood.
Workspace Setup: Clear a large area to work. Lay down a tarp or old sheet to catch sawdust and paint drips.
Cut the Wood: Use a saw to cut the wood to the measured dimensions. Sand the edges to smooth them out.
Assemble the Door: Lay out the wood pieces and attach them using screws and a drill. Make sure everything is tight and secure.
Paint the Door: Apply a coat of primer first, then paint the door in your desired color. Let it dry completely.
Attach Hinges: Screw the hinges onto the door and then onto the doorway. Make sure the door swings open and closed smoothly.
Install the Handle: Attach the door handle at a comfortable height. Test to ensure it works properly.
Final Check: Inspect the door for any loose screws or rough edges. Make any necessary adjustments.
Materials and Tools Checklist
Plywood Sheets: Used for the main structure of the door. Choose sturdy, high-quality plywood for durability.
Wooden Planks: These will form the frame and decorative elements. Pine or oak works well.
Hinges: Heavy-duty hinges to support the weight of the door. Look for rustic or antique styles for an authentic look.
Door Handle: A round, metal handle fits the hobbit theme. Brass or iron handles are ideal.
Wood Stain: Enhances the wood’s natural color and provides protection. Choose a warm, earthy tone.
Sandpaper: Smooths out rough edges and surfaces. Medium and fine grit will be needed.
Wood Glue: Secures the wooden planks and other elements together. Ensure it’s strong and dries clear.
Screws and Nails: Fasten the door components. Use wood screws for a secure hold.
Circular Saw: Cuts the plywood and planks to size. Ensure it’s sharp and handle with care.
Drill: Makes holes for screws and handles. A cordless drill is convenient.
Measuring Tape: Ensures accurate measurements. Precision is key for a good fit.
Clamps: Hold pieces together while the glue dries. Essential for a strong bond.
Paintbrushes: Apply wood stain evenly. Use different sizes for large areas and details.
Level: Ensures the door hangs straight. Crucial for proper installation.
Pencil: Marks measurements and cutting lines. Simple but necessary.
Safety Gear: Includes gloves, goggles, and a dust mask. Protects you while working.
Required Skills and Time Commitment
Skill Level: Intermediate. This project requires basic woodworking skills, familiarity with power tools, and some painting or staining experience.
Time Required: 2-3 days. This includes time for cutting, assembling, painting or staining, and allowing for drying time.
Detailed Building Instructions
Gather Materials:
- Wooden planks
- Hinges
- Circular saw
- Sandpaper
- Wood stain or paint
- Door handle
- Screws
- Measuring tape
- Pencil
Measure the Doorway:
- Use measuring tape to get the height and width of your doorway.
- Add a few inches to each side for the frame.
Cut the Wood:
- Lay out wooden planks.
- Use a circular saw to cut them to the measured dimensions.
- Cut the top of the door into a rounded shape for that hobbit door look.
Sand the Edges:
- Smooth all edges with sandpaper.
- Focus on the rounded top to avoid splinters.
Assemble the Door:
- Lay planks side by side.
- Attach horizontal planks across the back to hold them together.
- Use screws to secure.
Stain or Paint:
- Apply wood stain or paint to the door.
- Let it dry completely.
Attach Hinges:
- Screw hinges onto one side of the door.
- Make sure they are evenly spaced.
Install the Door:
- Hold the door in place within the doorway.
- Screw the other side of the hinges into the door frame.
Add the Handle:
- Attach the door handle to the front.
- Ensure it is securely fastened.
Final Touches:
- Check that the door swings open and closed smoothly.
- Make any necessary adjustments.
Helpful Tips for Success
Measure twice, cut once. Accurate measurements ensure your door fits perfectly. Use a jigsaw for cutting the round shape. Sand the edges smooth to avoid splinters.
Use plywood for the door. It's sturdy and easier to cut. Paint or stain it to match your dining room decor. Add a decorative hinge and handle to give it an authentic look.
Common mistakes include not measuring the doorway properly, which can lead to a door that doesn't fit. Another mistake is using the wrong type of wood. Avoid particleboard; it’s not strong enough.
Alternatives for materials include using MDF instead of plywood. MDF is easier to paint but heavier. For methods, consider using a router to create decorative grooves on the door for added detail.
Budgeting for Your Hobbit Door
Materials:
- Wood: $100-$150 (Pine or plywood)
- Hinges: $20-$30 (Heavy-duty)
- Door Handle: $15-$25 (Rustic style)
- Wood Stain/Paint: $10-$20 (Depending on brand)
- Weatherstripping: $10-$15 (For sealing)
- Screws/Nails: $5-$10 (Various sizes)
Tools:
- Saw: $50-$100 (Circular or jigsaw)
- Drill: $30-$60 (Cordless)
- Screwdriver Set: $10-$20
- Paintbrushes/Rollers: $5-$10
- Measuring Tape: $5-$10
- Sandpaper: $5-$10
Total Cost: $265-$490
Budget-Friendly Alternatives:
- Wood: Use reclaimed wood or pallets ($0-$50)
- Hinges: Basic hinges ($10-$15)
- Door Handle: Repurpose an old handle ($0-$10)
- Paint: Use leftover paint ($0)
- Tools: Borrow from friends or rent ($0-$20)
Total Cost with Alternatives: $75-$175
Personalizing Your Design
Materials: Instead of traditional wood, consider using reclaimed wood for a rustic look or plywood for a budget-friendly option. For a more modern twist, try metal or fiberglass.
Colors: Paint the door in earthy tones like green, brown, or beige to match the Hobbit theme. For a more vibrant look, use bright colors like red or blue. You can also stain the wood to highlight its natural grain.
Styles: Add decorative carvings or engravings to the door for a more authentic feel. Use iron hardware for hinges and handles to give it a medieval touch. For a whimsical look, incorporate stained glass elements or mosaic tiles.
Shapes: While a round door is classic, you can also experiment with arched or oval shapes. Add a small window or peephole for extra character.
Finishes: Use a matte finish for a natural look or a glossy finish for a polished appearance. Consider adding a weathered or distressed finish for an aged effect.
Accessories: Enhance the door with vines, flowers, or fairy lights around the frame. Add a knocker shaped like a dragon or a tree for extra charm.
Eco-Friendly Building Practices
Reclaimed wood works great for a hobbit door. Look for old barn wood or pallets. Sand it down to remove splinters and give it a smooth finish.
Eco-friendly paint or stain can add color without harmful chemicals. Choose water-based options with low VOCs (volatile organic compounds).
For the hinges and handles, visit a salvage yard. You can find unique, vintage pieces that add character and reduce waste.
Use natural insulation like wool or cotton batting if you need to insulate the door. These materials are biodegradable and sustainable.
Beeswax polish can protect the wood and give it a nice shine. It's a natural alternative to chemical-based polishes.
For the window, consider using old glass from a discarded picture frame. Cut it to size and fit it into the door.
Recycled metal can be used for any decorative elements. Old metal scraps can be reshaped and repurposed.
When assembling, use non-toxic adhesives and sealants. Look for products labeled as eco-friendly or biodegradable.
Finally, solar-powered lights around the door can enhance the look and save energy. They are easy to install and maintain.
Your Hobbit Door Awaits
Building a hobbit door for your dining room is a fun project that adds a touch of magic to your home. With some wood, hinges, paint, and a bit of elbow grease, you can create a unique entrance that wows guests. Remember to measure your space carefully, cut your materials precisely, and take your time with the finishing touches. Don't forget to add some whimsical details like a round doorknob or a peephole. This project not only enhances your home's charm but also gives you a sense of accomplishment. So, gather your tools, roll up your sleeves, and get started on your hobbit door. Before you know it, you'll have a cozy, inviting entrance that makes every meal feel like a fantasy adventure. Happy building!
How do I start building a hobbit door for my dining room?
First, gather your materials: wood, screws, hinges, a doorknob, and paint. Measure the doorway to ensure the door fits perfectly. Draw a template on paper to guide your cuts.
What kind of wood should I use?
Use sturdy wood like oak or pine. These types are durable and give a rustic look, perfect for a hobbit door.
How do I get the round shape?
Trace a large circle on the wood using a string and pencil. Cut along the line with a jigsaw. Sand the edges to make them smooth.
How do I attach the door to the frame?
Use heavy-duty hinges. Attach them to the door first, then to the frame. Make sure the door swings smoothly.
Can I add a window to my hobbit door?
Absolutely! Cut a smaller circle in the upper part of the door. Fit a round piece of glass or plexiglass. Secure it with wood trim.
What kind of paint should I use?
Use outdoor paint for durability. Green is a classic hobbit door color, but feel free to choose any earthy tone.
How do I make the door look more authentic?
Add iron accents like a knocker or decorative nails. Use a wood stain to give it an aged look. Plant some vines or flowers around the doorway for extra charm.