
Home>Home & Furniture>Doors & Windows>DIY Window Seat Building Guide
Doors & Windows
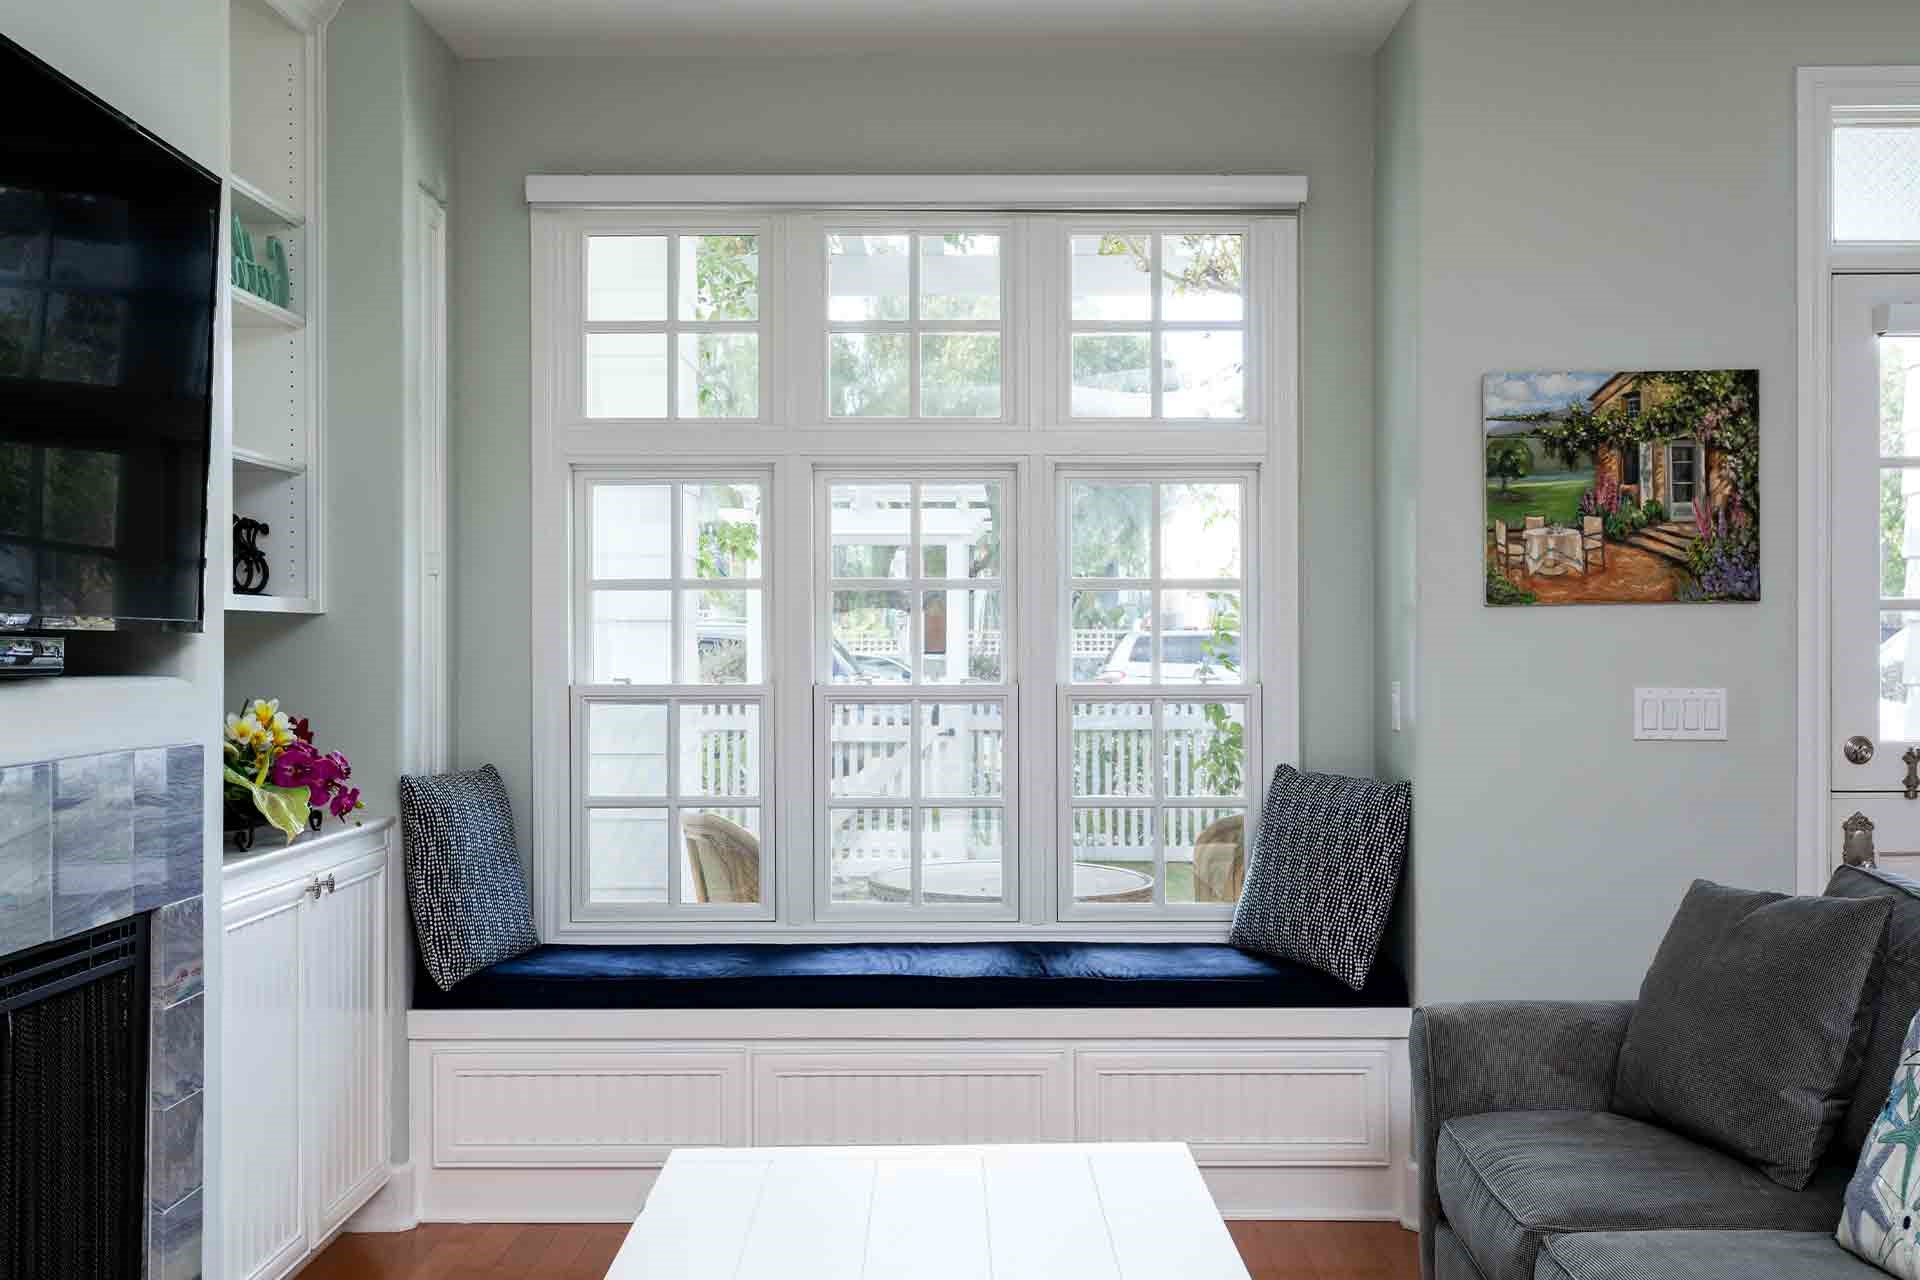
DIY Window Seat Building Guide
Published: August 27, 2024
Discover how to build a cozy DIY window seat with our step-by-step guide. Perfect for adding charm and extra seating to any room. Get started on your project today!
(Many of the links in this article redirect to a specific reviewed product. Your purchase of these products through affiliate links helps to generate commission for Twigandthistle.com, at no extra cost. Learn more)
Building your own window seat isn't as tricky as it might seem. With the right tools and a bit of planning, you can transform a simple space into a cozy nook perfect for reading, relaxing, or enjoying the view. This guide will take you through the essential steps, breaking everything down into manageable tasks. Whether you’re a seasoned DIY enthusiast or just starting, creating a window seat will be a rewarding project. Gather your materials, clear your schedule, and get ready to add a charming touch to your home. Let's get started!
Getting Ready for Your Project
Measure the Space: Use a tape measure to get the exact dimensions of the area where the window seat will go. Write these measurements down.
Gather Materials: Collect all necessary materials like wood, screws, brackets, and cushions. Make sure to have everything before starting.
Safety Gear: Wear safety goggles, gloves, and a dust mask to protect yourself from wood dust and sharp tools.
Clear the Area: Remove any furniture or items from the workspace. Ensure you have enough room to move around freely.
Check for Wires and Pipes: Use a stud finder to check for any hidden wires or pipes in the wall where you plan to attach the seat.
Cut the Wood: Use a saw to cut the wood pieces according to your measurements. Double-check the sizes before cutting.
Sand the Edges: Smooth out the edges of the cut wood using sandpaper to avoid splinters.
Pre-Drill Holes: Drill pilot holes in the wood pieces where screws will go. This helps prevent the wood from splitting.
Lay Out the Pieces: Arrange all the cut wood pieces on the floor in the shape of the window seat to ensure everything fits together.
Organize Tools: Keep all your tools like a drill, screwdriver, and level within easy reach. This saves time and keeps the project moving smoothly.
Gathering Materials and Tools
Materials Needed:
- Plywood: Forms the base and sides of the window seat. Choose sturdy, high-quality plywood for durability.
- 2x4 Lumber: Used for framing the seat. Provides structural support.
- Wood Screws: Fastens the plywood and lumber together. Ensure they are long enough to penetrate both materials securely.
- Wood Glue: Adds extra strength to joints. Helps keep everything in place.
- Foam Cushion: Provides comfort for sitting. Choose a thickness that suits your preference.
- Fabric: Covers the foam cushion. Pick a durable, easy-to-clean fabric.
- Batting: Adds softness to the cushion. Placed between the foam and fabric.
- Paint or Stain: Finishes the wood. Choose a color that matches your decor.
- Sandpaper: Smooths rough edges. Prepares the wood for painting or staining.
Tools Needed:
- Tape Measure: Ensures accurate measurements. Essential for cutting materials to the right size.
- Circular Saw: Cuts plywood and lumber. Provides straight, clean cuts.
- Drill: Makes holes for screws. Also used to drive screws into place.
- Screwdriver: Tightens screws. Can be manual or electric.
- Paintbrush or Roller: Applies paint or stain. Choose based on the finish you want.
- Staple Gun: Attaches fabric to the cushion. Makes the process quick and easy.
- Scissors: Cuts fabric and batting. Ensure they are sharp for clean cuts.
- Clamps: Holds pieces together while glue dries. Keeps everything aligned.
These materials and tools will help you build a sturdy, comfortable window seat.
Required Skills and Time
Skill Level: Intermediate
Time Required: Approximately 2-3 days
- Planning and Measuring: 2-3 hours
- Cutting Wood: 3-4 hours
- Assembling Frame: 4-5 hours
- Installing Seat and Trim: 3-4 hours
- Painting or Staining: 4-6 hours
- Cushioning and Final Touches: 2-3 hours
Step-by-Step Guide
Measure the Space
- Use a tape measure to find the length, width, and height of the area where the window seat will go.
- Write down these measurements.
Gather Materials
- Plywood or MDF boards
- 2x4 lumber
- Screws and nails
- Wood glue
- Paint or stain
- Cushion and fabric (optional)
Cut the Wood
- Cut the plywood or MDF to match the seat dimensions.
- Cut 2x4s for the frame, ensuring they fit the length and width of the seat.
Build the Frame
- Assemble the 2x4s into a rectangular frame using screws and wood glue.
- Add cross supports inside the frame for extra strength.
Attach the Seat Base
- Secure the plywood or MDF to the top of the frame with screws.
- Ensure it is level and sturdy.
Add the Backrest (Optional)
- Cut and attach a backrest piece to the frame if desired.
- Secure it with screws and wood glue.
Sand and Paint
- Sand all surfaces to remove rough edges.
- Paint or stain the wood to match your room decor.
Install the Seat
- Place the completed seat in the designated spot.
- Secure it to the wall or floor if needed for stability.
Add Cushion and Fabric (Optional)
- Measure and cut foam to fit the seat.
- Cover the foam with fabric, securing it with staples underneath.
Final Touches
- Check for any loose screws or nails.
- Make sure everything is secure and comfortable.
Helpful Tips and Tricks
Measure twice, cut once. Accurate measurements prevent wasted materials. Use a level to ensure everything is straight. Pre-drill holes before screwing to avoid splitting wood. Use wood glue along with screws for extra strength.
Common mistakes to avoid: Not considering the weight capacity of the seat. Ensure the frame can support people sitting on it. Skipping sanding can lead to rough edges and splinters. Ignoring storage space underneath the seat is a missed opportunity.
Alternatives: Instead of plywood, consider MDF for a smoother finish. For a more rustic look, use reclaimed wood. If you lack power tools, hand tools like a handsaw and hammer can work, though they require more effort.
Estimating the Cost
Plywood: $50 - $70
2x4 Lumber: $20 - $30
Wood Screws: $5 - $10
Wood Glue: $5 - $10
Paint or Stain: $15 - $25
Sandpaper: $5 - $10
Cushion Foam: $30 - $50
Fabric for Cushion: $20 - $40
Staple Gun: $10 - $20
Staples: $5 - $10
Paint Brushes or Rollers: $5 - $10
Total Cost: $170 - $285
Budget-Friendly Alternatives:
Reclaimed Wood: Free or low cost from pallets or old furniture
Old Cushions: Repurpose from old furniture
Leftover Paint: Use paint from previous projects
Thrift Store Fabric: Find cheap fabric at thrift stores
Different Variations and Customizations
Materials: Instead of using standard plywood, consider reclaimed wood for a rustic look or MDF for a smoother finish. For a more luxurious feel, use hardwood like oak or maple.
Colors: Paint the seat in bold colors like navy blue or forest green for a statement piece. For a more subtle look, use neutral tones like beige or gray. You can also stain the wood to highlight its natural grain.
Cushions: Customize the seat with different cushion fabrics. Use velvet for a plush feel, cotton for breathability, or leather for a sleek, modern look. Mix and match patterns like stripes, florals, or geometric designs.
Storage: Add built-in drawers underneath for extra storage. Use baskets or bins for a more casual look. Install open shelving on the sides to display books or decorative items.
Backrest: Incorporate a padded backrest for added comfort. Use tufted upholstery for a classic look or a simple fabric cover for a minimalist style. You can also add a wooden back panel for a more structured appearance.
Lighting: Install under-seat lighting for a cozy ambiance. Use LED strip lights for a modern touch or small lamps on either side for a traditional feel.
Trim and Molding: Add decorative trim or crown molding to the edges for a polished look. Use wainscoting on the front panel for added texture and interest.
Legs: Customize the seat with different leg styles. Use hairpin legs for a mid-century modern look, turned wooden legs for a classic style, or block legs for a contemporary feel.
Accessories: Decorate with throw pillows in various shapes and sizes. Add a cozy blanket for warmth. Place a small side table nearby for convenience.
Finishing Touches: Personalize with monograms or stencils. Add hooks on the sides for hanging bags or coats. Use decorative knobs on drawers for an extra touch of style.
Eco-Friendly Tips
Reclaimed wood can be a great choice for building a window seat. Look for old pallets, barn wood, or even wood from old furniture. This not only saves trees but also gives your seat a unique look.
Bamboo is another eco-friendly option. It grows quickly and is very strong. You can use bamboo panels or boards for the seat and backrest.
Recycled metal brackets or supports can add strength to your window seat. Check local scrap yards or online marketplaces for used metal pieces.
Low-VOC paints and finishes are better for the environment and your health. These products release fewer harmful chemicals into the air.
Natural fabrics like cotton, linen, or wool can be used for cushions and upholstery. These materials are biodegradable and often more sustainable than synthetic fabrics.
Cork is a renewable resource that can be used for padding or even as a decorative element. It’s soft, durable, and has a unique texture.
Recycled foam or natural latex can be used for cushion filling. These materials are more sustainable than traditional foam.
Solar-powered tools can help reduce your carbon footprint while working on your project. Look for solar chargers for your power tools.
Upcycling old furniture parts, like legs or handles, can give your window seat character and reduce waste. Check thrift stores or garage sales for items you can repurpose.
Local materials reduce the carbon footprint associated with transportation. Try to source wood, fabric, and other materials from local suppliers.
Your Cozy Corner Awaits
Building a window seat isn't just about adding extra seating; it's about creating a cozy nook for reading, relaxing, or enjoying a cup of coffee. With some basic tools, a bit of patience, and a dash of creativity, you can transform any window space into a functional and stylish feature. Remember to measure carefully, choose durable materials, and add personal touches like cushions or storage compartments. Don't stress over minor imperfections; they add character. Now, grab your tools, roll up your sleeves, and start building your perfect window seat. Before you know it, you'll have a new favorite spot in your home. Happy building!
How much time will it take to build a window seat?
Building a window seat usually takes about a weekend. If you’re experienced with tools, you might finish faster. Just make sure to plan ahead and gather all materials first.
What materials do I need?
You’ll need plywood, 2x4s, screws, wood glue, paint or stain, and cushions. A saw, drill, measuring tape, and sander will also come in handy.
Do I need any special skills?
Basic carpentry skills are enough. If you can measure, cut, and screw pieces together, you’re good to go. Watching a few online tutorials can help too.
Can I customize the design?
Absolutely! You can add storage underneath, choose different cushion fabrics, or even add decorative trim. Make it fit your style and needs.
How do I ensure it’s sturdy?
Use quality wood and reinforce joints with screws and wood glue. Make sure the seat is level and securely attached to the wall if needed.
What’s the cost estimate?
Costs can vary, but expect to spend around $100 to $300. This depends on the type of wood, cushions, and any extra features you add.
Can I build it in a rental home?
Yes, but avoid permanent fixtures. Use freestanding designs or secure it in a way that’s easy to remove without damage.