
Home>Home & Furniture>Doors & Windows>DIY Shed Door Ideas: Creative Ways to Upgrade Your Space
Doors & Windows
DIY Shed Door Ideas: Creative Ways to Upgrade Your Space
Published: September 21, 2024
Discover creative DIY shed door ideas to upgrade your space. From rustic barn doors to modern sliding options, transform your shed with these inspiring and practical solutions.
(Many of the links in this article redirect to a specific reviewed product. Your purchase of these products through affiliate links helps to generate commission for Twigandthistle.com, at no extra cost. Learn more)
Thinking about giving your old shed a fresh look? Upgrading your shed door can make a big difference. Whether you're aiming for a rustic charm or a modern vibe, there's a DIY shed door idea perfect for you. From repurposed barn doors to sleek sliding panels, the possibilities are endless. With some basic tools, creativity, and a bit of elbow grease, you can transform your shed into a standout feature of your yard. Don’t worry if you’re not a seasoned carpenter—many of these projects are simple enough for beginners. Ready to get started? Let's dive in!
Getting Ready for Your Shed Door Project
Measure the Doorway: Use a tape measure to get the exact dimensions of the doorway. Write down the width and height.
Choose Materials: Decide on the type of wood or metal for the door. Make sure it's sturdy and weather-resistant.
Gather Tools: Collect a saw, drill, screws, hinges, and a level. Having everything ready saves time.
Clear the Workspace: Remove any clutter around the shed. Ensure there's enough room to move and work comfortably.
Safety Gear: Wear safety goggles and gloves. Protect your eyes and hands from splinters and sharp edges.
Check the Ground: Make sure the ground around the shed is level. Uneven ground can make the door installation tricky.
Pre-drill Holes: Mark where the hinges will go and pre-drill the holes. This makes attaching the door easier.
Weatherproofing: Apply a weatherproof sealant to the door. This helps it last longer and withstand the elements.
Test Fit: Before final installation, test fit the door to ensure it opens and closes smoothly.
Secure Hinges: Attach the hinges to the door and then to the shed frame. Use a level to make sure the door hangs straight.
Install Handle and Lock: Add a handle and lock for security. Make sure they are easy to use and sturdy.
Final Check: Open and close the door several times. Ensure everything works perfectly and make any necessary adjustments.
Gathering Materials and Tools
- Plywood Sheets: Strong, versatile wood for the door's main structure.
- 2x4 Lumber: Provides sturdy framing for the door.
- Hinges: Allows the door to swing open and close.
- Door Handle: Makes opening and closing the door easy.
- Screws and Nails: Essential for assembling the door and attaching hardware.
- Wood Glue: Adds extra strength to joints and connections.
- Sandpaper: Smooths out rough edges and surfaces.
- Paint or Stain: Adds color and protects the wood from weather.
- Weatherstripping: Seals gaps to keep out drafts and pests.
- Measuring Tape: Ensures accurate measurements for cuts and placements.
- Circular Saw: Cuts plywood and lumber to the required sizes.
- Drill: Makes holes for screws and helps drive them in.
- Hammer: Drives nails into wood.
- Level: Ensures the door is hung straight.
- Clamps: Holds pieces together while glue dries.
- Safety Gear: Includes gloves, goggles, and a dust mask for protection.
Each item plays a crucial role in building a functional, attractive shed door.
Assessing Skill Level and Time Commitment
Skill Level: Intermediate
Time Required: 4-6 hours
- Measure and Cut Materials: 1 hour
- Assemble Door Frame: 1 hour
- Attach Panels: 1 hour
- Install Hinges and Handle: 1 hour
- Paint or Stain: 1-2 hours
Detailed Steps to Build Your Shed Door
Gather Materials:
- Plywood or solid wood panels
- Hinges
- Screws
- Door handle
- Paint or stain
- Sandpaper
- Measuring tape
- Saw
- Drill
- Level
Measure Door Frame:
- Use measuring tape to get the height and width of the door frame.
- Add an extra inch to each side for a proper fit.
Cut Wood Panels:
- Mark measurements on wood panels.
- Use a saw to cut panels to the correct size.
Sand Edges:
- Sand all edges of the wood panels to smooth out rough spots.
- Wipe away dust with a cloth.
Assemble Door:
- Lay panels flat on the ground.
- Attach horizontal braces across the back using screws.
Attach Hinges:
- Position hinges evenly along one side of the door.
- Screw hinges into place.
Install Door Handle:
- Mark the spot for the handle.
- Drill holes and attach the handle securely.
Paint or Stain:
- Apply paint or stain to the door.
- Let it dry completely.
Hang Door:
- Hold the door in place within the frame.
- Screw hinges into the door frame.
- Use a level to ensure the door hangs straight.
Test Door:
- Open and close the door to ensure it swings smoothly.
- Make any necessary adjustments to hinges or handle.
Helpful Tips and Tricks
Measure twice, cut once: Always double-check measurements before cutting materials. This saves time and prevents waste.
Use reclaimed wood: Old pallets or barn wood can add character and save money. Sand and treat it to ensure durability.
Install a window: Adding a small window can brighten the shed and make it more inviting. Use plexiglass for safety.
Weatherproofing: Seal gaps with weatherstripping to keep out drafts and moisture. This extends the life of your shed.
Decorative hardware: Swap out plain hinges and handles for more stylish options. This small change can make a big impact.
Paint or stain: A fresh coat of paint or stain can transform the look. Choose colors that complement your garden or home.
Sliding barn door: If space is tight, consider a sliding barn door. It’s functional and adds a rustic touch.
Common mistakes to avoid:
- Ignoring the foundation: Ensure the shed is level to prevent door misalignment.
- Using untreated wood: This can lead to rot and decay. Always use treated or weather-resistant materials.
- Skipping primer: When painting, always use a primer to ensure the paint adheres properly and lasts longer.
Alternatives for materials or methods:
- Metal doors: For a modern look, consider metal. It’s durable and low-maintenance.
- Composite materials: These can mimic wood but are more resistant to weather and pests.
- Pre-hung doors: If building from scratch seems daunting, pre-hung doors can simplify the process.
Estimating the Cost of Your Project
Materials:
- Plywood: $30-$50 per sheet
- 2x4 Lumber: $3-$5 per piece
- Hinges: $10-$20 per set
- Door Handle: $5-$15
- Paint or Stain: $20-$40 per gallon
- Screws and Nails: $5-$10 per box
- Weatherstripping: $10-$15
Tools:
- Circular Saw: $50-$100 (or rent for $10-$20/day)
- Drill: $40-$60
- Tape Measure: $5-$10
- Level: $10-$20
- Paintbrushes/Rollers: $10-$15
- Hammer: $10-$15
Total Cost: $208-$370
Budget-Friendly Alternatives:
- Reclaimed Wood: Often free or very cheap
- Basic Hinges: $5-$10 per set
- Second-hand Tools: Check thrift stores or online marketplaces
- Sample Paints: $5-$10 per sample size
Total Cost with Alternatives: $100-$200
Creative Variations and Customizations
Materials: Use reclaimed wood for a rustic look or metal sheets for a modern, industrial feel. Plywood offers a budget-friendly option, while fiberglass provides durability and weather resistance.
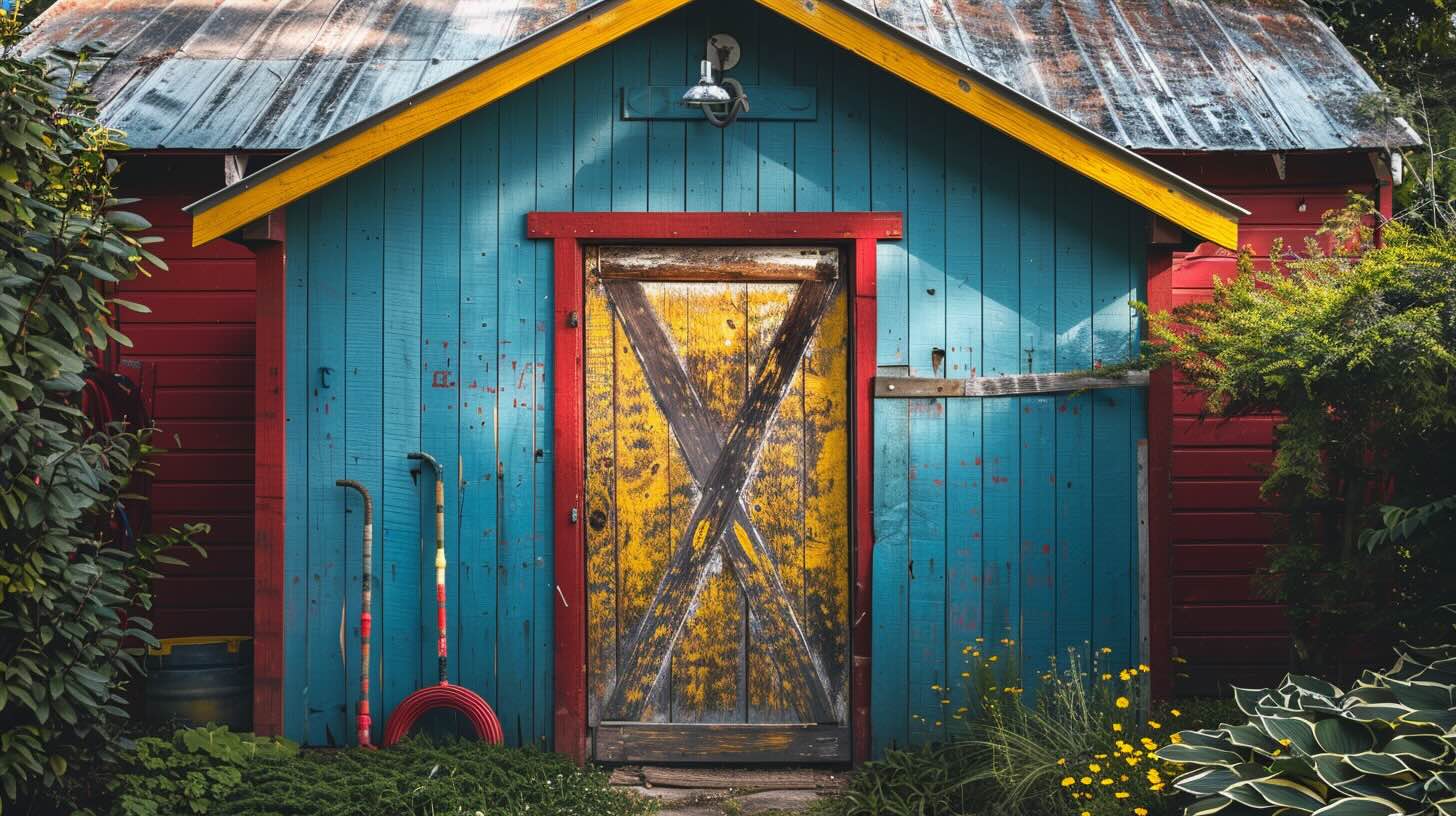
Colors: Paint the door in bold colors like red or blue to make it stand out. For a more subtle look, choose neutral tones like beige, gray, or white. Stain the wood to highlight its natural grain.
Styles: Install a barn door for a farmhouse vibe or a French door to let in more light. A sliding door saves space, while a Dutch door adds charm and functionality.
Hardware: Swap out standard handles for decorative knobs or antique pulls. Add hinges with unique designs or strap hinges for a vintage touch.
Windows: Incorporate small windows to allow natural light inside. Use frosted glass for privacy or stained glass for a pop of color.
Decorative Elements: Attach trim or molding to create a more polished look. Add decorative brackets or corbels for extra flair. Install a chalkboard panel for notes and reminders.
Security: Enhance security with a deadbolt or padlock. Consider a smart lock for keyless entry.
Weatherproofing: Add weatherstripping to keep out drafts and moisture. Use a door sweep to seal the gap at the bottom. Apply a protective sealant to guard against the elements.
Personal Touches: Customize with monograms, house numbers, or seasonal decorations. Attach a mail slot or package drop for convenience.
Eco-Friendly Tips for Your Shed Door
Reclaimed Wood: Use old pallets or barn wood. Sand and paint them for a rustic look.
Recycled Metal: Old metal sheets or corrugated panels can be repurposed. They add a modern, industrial touch.
Salvaged Windows: Turn old windows into doors. They let in natural light and add charm.
Bamboo Panels: Bamboo grows quickly, making it a sustainable choice. Use bamboo panels for a natural, tropical feel.
Recycled Plastic: Composite materials made from recycled plastic are durable and eco-friendly. They resist weather and pests.
Natural Paints: Choose paints with low VOCs (volatile organic compounds). They are better for your health and the environment.
Upcycled Hardware: Reuse old hinges, handles, and locks. Clean them up or give them a fresh coat of paint.
Living Door: Attach planters to your door. Grow herbs or flowers for a green, living door.
Insulation: Use eco-friendly insulation like sheep's wool or recycled denim. It keeps your shed energy-efficient.
Solar-Powered Lights: Install solar lights on or around your door. They save energy and add a welcoming glow.
Your Shed Door Awaits
Upgrading your shed door can be a fun, rewarding project. With a bit of creativity and some elbow grease, you can transform a plain door into something unique. Whether you choose to paint it a bold color, add decorative hardware, or build a custom door from scratch, the possibilities are endless. Don't forget to consider functionality alongside aesthetics. A well-built door not only looks good but also keeps your shed secure and weatherproof. So, gather your tools, pick your materials, and get started on your DIY shed door project. You'll be amazed at how a simple change can make a big difference. Happy building!
How can I make my shed door more secure?
Adding a deadbolt lock or a heavy-duty padlock can beef up security. Reinforcing the door frame with metal plates also helps.
What materials are best for a DIY shed door?
Wood is a popular choice due to its versatility and ease of use. Metal and fiberglass are durable options, though they might be trickier to work with.
Can I add windows to my shed door?
Absolutely! Adding windows can brighten up the space. Just make sure to use shatterproof glass and seal the edges well to keep out moisture.
How do I weatherproof my shed door?
Use weatherstripping around the edges and apply a waterproof sealant to the door's surface. Installing a door sweep at the bottom can also prevent drafts.
What are some creative design ideas for a shed door?
Consider a barn-style door for a rustic look or a sliding door to save space. Painting the door with bright colors or adding decorative hardware can make it stand out.
How do I fix a sagging shed door?
Tighten the hinges and check for any warped wood. Adding a brace or turnbuckle can help straighten and support the door.
Can I install a shed door by myself?
Yes, with some basic tools and a bit of patience, you can install a shed door. Follow a step-by-step guide and make sure to measure everything accurately.