
Home>Home & Furniture>Doors & Windows>DIY Mirror Barn Door Guide
Doors & Windows
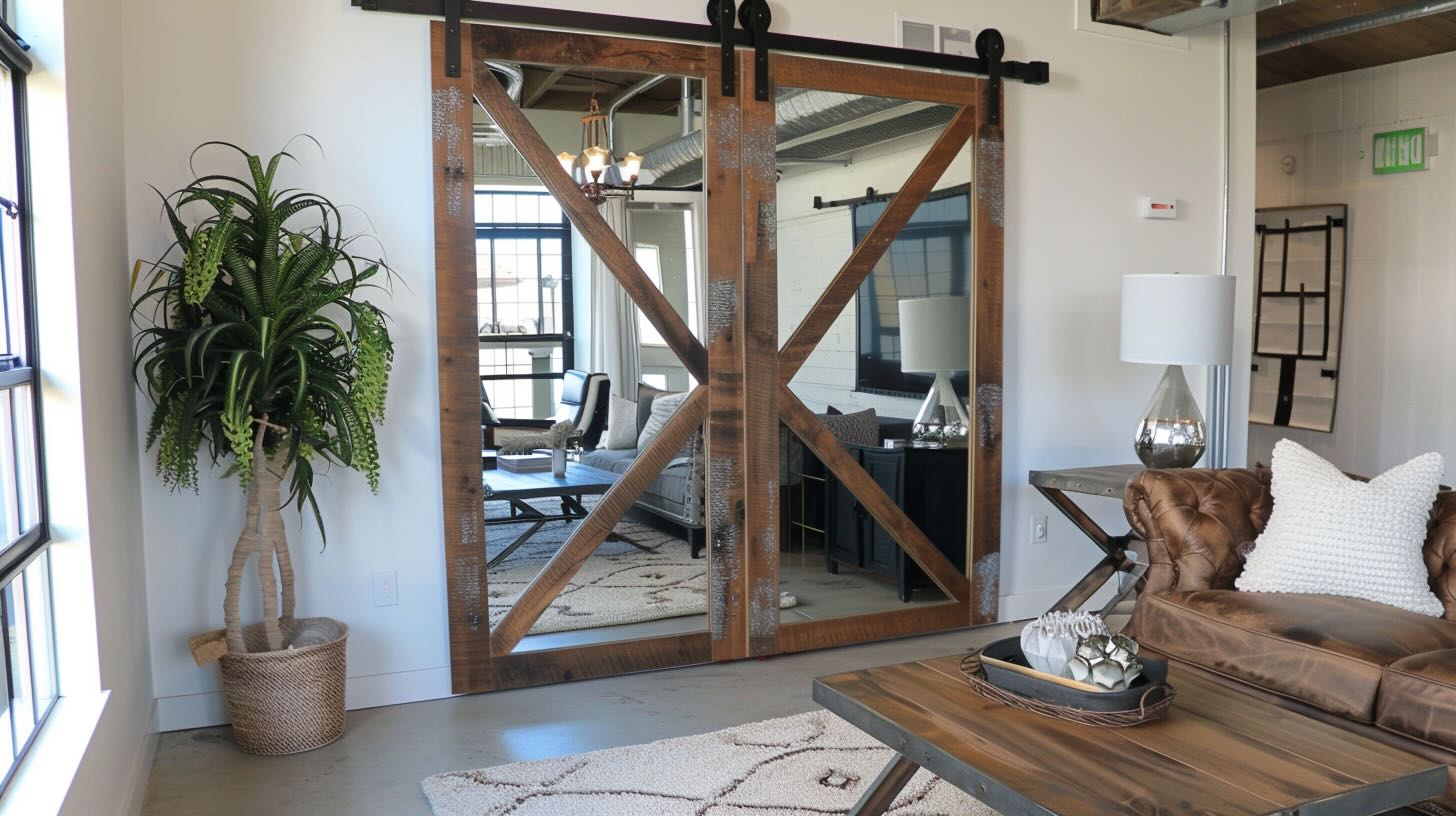
DIY Mirror Barn Door Guide
Published: September 17, 2024
Transform your space with a DIY mirror barn door! Our step-by-step guide covers materials, tools, and tips for a stylish, functional addition to any room.
(Many of the links in this article redirect to a specific reviewed product. Your purchase of these products through affiliate links helps to generate commission for Twigandthistle.com, at no extra cost. Learn more)
Looking to add a rustic yet modern touch to your home? Building a DIY mirror barn door might be just the project for you. Not only does this door save space, but it also adds character and functionality to any room. Even if you’re new to DIY projects, this guide will walk you through the essential steps to create your own stylish barn door. Grab some basic tools, materials, and a bit of patience. Soon, you'll have a stunning piece that reflects both your handiwork and personal style. Ready to get started? Let’s jump in!
Getting Ready for Your Project
Measure the Space: Use a tape measure to get the exact dimensions of the doorway. Write down the height and width.
Choose the Right Mirror: Pick a mirror that fits within the door dimensions. Make sure it’s not too heavy for the door material.
Gather Materials: You’ll need a barn door kit, mirror, wood screws, adhesive, and a drill. Don’t forget safety gear like gloves and goggles.
Prepare the Door: Sand the door to smooth any rough edges. Clean it thoroughly to remove dust and debris.
Set Up Workspace: Find a flat, stable surface to work on. Lay down a drop cloth to protect the floor from scratches or adhesive spills.
Safety First: Wear gloves to protect your hands from sharp edges. Use goggles to shield your eyes when drilling or cutting.
Pre-Drill Holes: Mark where you’ll attach the mirror and hardware. Pre-drill holes to make screwing easier and prevent wood splitting.
Attach the Mirror: Apply adhesive to the back of the mirror. Press it firmly onto the door, aligning it with your marks. Let it dry according to the adhesive instructions.
Install Hardware: Follow the barn door kit instructions to attach the rollers and track. Make sure everything is level and secure.
Test the Door: Slide the door back and forth to ensure it moves smoothly. Adjust if necessary.
What You Need to Get Started
- Barn Door Kit: Includes the track, rollers, and mounting hardware. Essential for sliding door functionality.
- Mirror: A large mirror to fit the door. Adds style and utility.
- Wood Panels: For the door frame. Choose sturdy wood like pine or oak.
- Wood Screws: To assemble the door frame. Ensure they are the right length for your wood panels.
- Wood Glue: Provides extra strength to the joints.
- Sandpaper: Smooths out rough edges on the wood panels.
- Paint or Stain: For finishing the wood. Choose a color that matches your decor.
- Measuring Tape: Ensures accurate measurements for cutting wood and placing the mirror.
- Saw: Cuts the wood panels to size. A circular saw or handsaw works well.
- Drill: For making holes for screws and mounting hardware.
- Screwdriver: Tightens screws. A power screwdriver can save time.
- Level: Ensures the door and track are straight.
- Clamps: Holds wood pieces together while the glue dries.
- Safety Gear: Includes gloves, goggles, and a dust mask. Protects you while working.
How Much Time and Skill You Need
Skill Level: Intermediate
Time Required:
- Preparation: 1-2 hours
- Assembling Materials: 1 hour
- Cutting and Measuring: 2-3 hours
- Mounting Hardware: 2-3 hours
- Attaching Mirror: 1-2 hours
- Final Adjustments: 1 hour
Total Time: 8-12 hours
Follow These Steps
Gather Materials
- Mirror
- Barn door hardware kit
- Wooden door slab
- Screws
- Drill
- Measuring tape
- Level
- Wood glue
- Sandpaper
- Paint or stain (optional)
Prepare the Door
- Sand the wooden door slab to smooth any rough edges.
- Paint or stain the door if desired. Let it dry completely.
Attach the Mirror
- Measure the door to find the center.
- Apply wood glue to the back of the mirror.
- Press the mirror onto the door, centering it carefully.
- Allow the glue to dry according to the manufacturer's instructions.
Install Barn Door Hardware
- Follow the instructions in the barn door hardware kit.
- Measure and mark where the hardware will go on the door.
- Drill holes for the screws.
- Attach the hardware to the door using screws.
Mount the Track
- Measure and mark where the track will go on the wall.
- Use a level to ensure the track is straight.
- Drill holes for the screws.
- Attach the track to the wall using screws.
Hang the Door
- Lift the door and align the hardware with the track.
- Slide the door onto the track.
- Test the door to ensure it slides smoothly.
Final Adjustments
- Check that the door is level.
- Tighten any loose screws.
- Make any necessary adjustments to ensure the door operates correctly.
Helpful Tips and Tricks
Measure Twice, Cut Once: Always double-check measurements before cutting wood or glass. This prevents mistakes and wasted materials.
Use Safety Gear: Wear gloves when handling glass and safety goggles when cutting wood. Safety first!
Pre-Drill Holes: Pre-drill holes for screws to avoid splitting the wood. This makes assembly smoother.
Level the Track: Ensure the barn door track is level. Use a spirit level to check. An uneven track will cause the door to slide improperly.
Secure the Mirror: Use mirror adhesive and clips to secure the mirror to the door. This prevents it from falling or shifting.
Smooth Edges: Sand the edges of the wood to avoid splinters. Smooth edges give a professional finish.
Choose the Right Hardware: Select sturdy hardware that can support the weight of the door and mirror. Cheap hardware may fail over time.
Common Mistakes to Avoid:
- Rushing the Process: Take your time. Rushing can lead to errors and accidents.
- Ignoring Weight Limits: Ensure the wall and hardware can support the door's weight.
- Skipping Instructions: Follow the instructions provided with your hardware kit. Skipping steps can lead to problems.
Alternatives for Materials or Methods:
- Wood Types: Use plywood instead of solid wood for a lighter door.
- Mirror Options: Consider acrylic mirrors if weight is a concern. They are lighter and shatter-resistant.
- Track Systems: Use a bypass track system if space is limited. This allows doors to slide past each other.
How Much Will It Cost?
Materials:
- Barn Door Kit: $100-$200
- Mirror: $50-$100
- Wood Panels: $30-$60
- Screws and Nails: $10
- Wood Stain or Paint: $20-$30
- Handles and Hardware: $20-$40
Tools:
- Drill: $50-$100
- Saw: $50-$100
- Measuring Tape: $10
- Level: $15
- Screwdriver: $10
Total Cost: $365-$660
Budget-Friendly Alternatives:
- Repurpose Old Mirror: Save $50-$100
- Use Pallet Wood: Save $30-$60
- Borrow Tools: Save $120-$220
Different Ways to Customize
Materials: Instead of traditional wood, consider using reclaimed wood for a rustic look or metal for an industrial style. Plywood can be a budget-friendly option.
Colors: Paint the door in bold colors like navy blue or forest green for a modern touch. For a classic look, use neutral colors such as white, gray, or beige. Stain the wood to highlight its natural grain.
Styles: Add decorative trim or molding to the door for a more elegant appearance. Use frosted glass instead of a mirror for a softer look. Incorporate geometric patterns or stencils to create unique designs.
Hardware: Choose black iron hardware for a farmhouse feel or brushed nickel for a contemporary look. Copper or brass hardware can add a vintage touch. Consider using hidden tracks for a sleek, minimalist style.
Mirror Options: Use a full-length mirror for maximum reflection or multiple smaller mirrors arranged in a pattern. Opt for a beveled edge mirror for added sophistication.
Additional Features: Install LED strip lights around the mirror for extra illumination. Add hooks or shelves to the door for additional functionality. Use chalkboard paint on one side for a dual-purpose door.
Eco-Friendly Tips
Use reclaimed wood for the door frame. This wood can come from old furniture or pallets. Recycled glass can be used for the mirror itself. Look for mirrors at thrift stores or garage sales. Eco-friendly paint or stain will help protect the wood without harmful chemicals. Use natural fiber ropes or hemp instead of synthetic materials for any decorative elements. For the sliding mechanism, consider repurposing old hardware from other projects or buying second-hand. LED lights around the mirror can add a nice touch while being energy-efficient.
Your DIY Mirror Barn Door Awaits
You've got all the tools and materials ready. Now, it's time to put your skills to the test. Start by measuring your space accurately. Cut the wood to fit, then sand it down for a smooth finish. Attach the mirror securely using adhesive and brackets. Assemble the door frame, ensuring everything is level. Install the track and hang your new barn door. Don't forget to add any final touches like handles or decorative elements. With a bit of patience and effort, you'll have a stunning, functional piece that adds character to your home. Enjoy the satisfaction of a job well done and the compliments from friends and family. Happy building!
How do I choose the right mirror for my barn door?
Pick a mirror that fits the door's size. Measure the door first, then find a mirror that leaves a bit of space around the edges. Also, consider the mirror's weight to ensure the door can support it.
What tools will I need for this project?
You'll need a drill, screws, measuring tape, level, adhesive, and safety gear like gloves and goggles. A screwdriver and sandpaper might come in handy too.
How do I attach the mirror to the barn door?
First, clean the door and mirror. Apply adhesive to the back of the mirror and press it onto the door. Use screws or brackets for extra support, especially if the mirror is heavy.
Can I use any barn door for this project?
Most barn doors will work, but make sure yours is sturdy enough to hold a mirror. Avoid doors with too many panels or intricate designs that might make it hard to attach the mirror securely.
How do I ensure the mirror is level?
Use a level to check the mirror's alignment before the adhesive dries. Adjust as needed. You can also mark the door with a pencil to guide placement.
What if the mirror breaks?
Handle the mirror carefully to avoid breaks. If it does break, wear gloves to clean up the pieces. Consider using a shatterproof or safety mirror to minimize risks.
How do I maintain the mirror and barn door?
Clean the mirror with a glass cleaner and a soft cloth. Wipe down the barn door with a damp cloth to remove dust. Check the adhesive and screws periodically to ensure everything stays secure.