
Home>Home & Furniture>Doors & Windows>DIY Door Latch Installation Guide
Doors & Windows
DIY Door Latch Installation Guide
Published: September 11, 2024
Learn how to install a door latch with our step-by-step DIY guide. Perfect for beginners, this tutorial ensures a secure and professional finish for your doors.
(Many of the links in this article redirect to a specific reviewed product. Your purchase of these products through affiliate links helps to generate commission for Twigandthistle.com, at no extra cost. Learn more)
Installing a door latch might seem tricky, but with a little guidance, you can do it yourself! Whether you’re looking to replace an old latch or install a new one, this guide will help you through the steps. You don’t need to be a professional carpenter; just follow along, and soon your door will have a secure latch. Before starting, gather all the necessary tools. This project is a great way to build your DIY skills, save money, and boost your confidence. Get ready to tackle this task and enjoy the satisfaction of a job well done!
Getting Ready for the Project
Gather Tools and Materials: Get a screwdriver, drill, measuring tape, pencil, door latch kit, and safety glasses.
Safety First: Wear safety glasses to protect your eyes. Keep your workspace clean to avoid tripping.
Measure and Mark: Use a measuring tape to find the right spot for the latch. Mark it with a pencil.
Prepare the Door: If replacing an old latch, remove it first. Clean the area to ensure a smooth installation.
Drill Holes: Follow the instructions in the latch kit to drill holes. Make sure they are the correct size.
Check Alignment: Ensure the latch aligns with the strike plate on the door frame. Adjust if necessary.
Organize Workspace: Keep tools within reach. Make sure you have enough light to see clearly.
Read Instructions: Go through the latch kit instructions. Understand each step before starting.
Test Fit: Before final installation, test fit the latch to ensure everything lines up correctly.
What You Need: Materials and Tools
- Door Latch Kit: Contains the latch mechanism, strike plate, screws, and other necessary components.
- Screwdriver: Used to tighten or loosen screws. A Phillips head is most common.
- Drill: Makes holes for screws and the latch. A cordless drill is convenient.
- Drill Bits: Different sizes for various holes. Usually, a 1/8-inch and a 1-inch spade bit are needed.
- Chisel: Carves out wood to fit the latch and strike plate. A 1/2-inch chisel works well.
- Hammer: Taps the chisel and helps with other tasks.
- Tape Measure: Measures distances accurately. Essential for proper placement.
- Pencil: Marks where to drill and chisel.
- Utility Knife: Cuts away small pieces of wood or trims edges.
- Safety Glasses: Protects eyes from wood chips and debris.
- Level: Ensures the latch and strike plate are aligned properly.
- Masking Tape: Holds templates in place and protects surfaces from scratches.
Skill Level and Time Commitment
Skill Level: Beginner
Time Required: 1-2 hours
- Gather Tools: Screwdriver, measuring tape, pencil, chisel, hammer.
- Mark Position: Use measuring tape and pencil to mark latch position.
- Drill Holes: Drill holes for latch and screws.
- Install Latch: Place latch in position, secure with screws.
- Test Function: Ensure latch works smoothly.
How to Install a Door Latch: Step-by-Step
Gather Tools and Materials
- Door latch kit
- Screwdriver
- Drill
- Measuring tape
- Pencil
- Chisel
Remove Old Latch (if applicable)
- Unscrew the old latch from the door.
- Pull the latch out carefully.
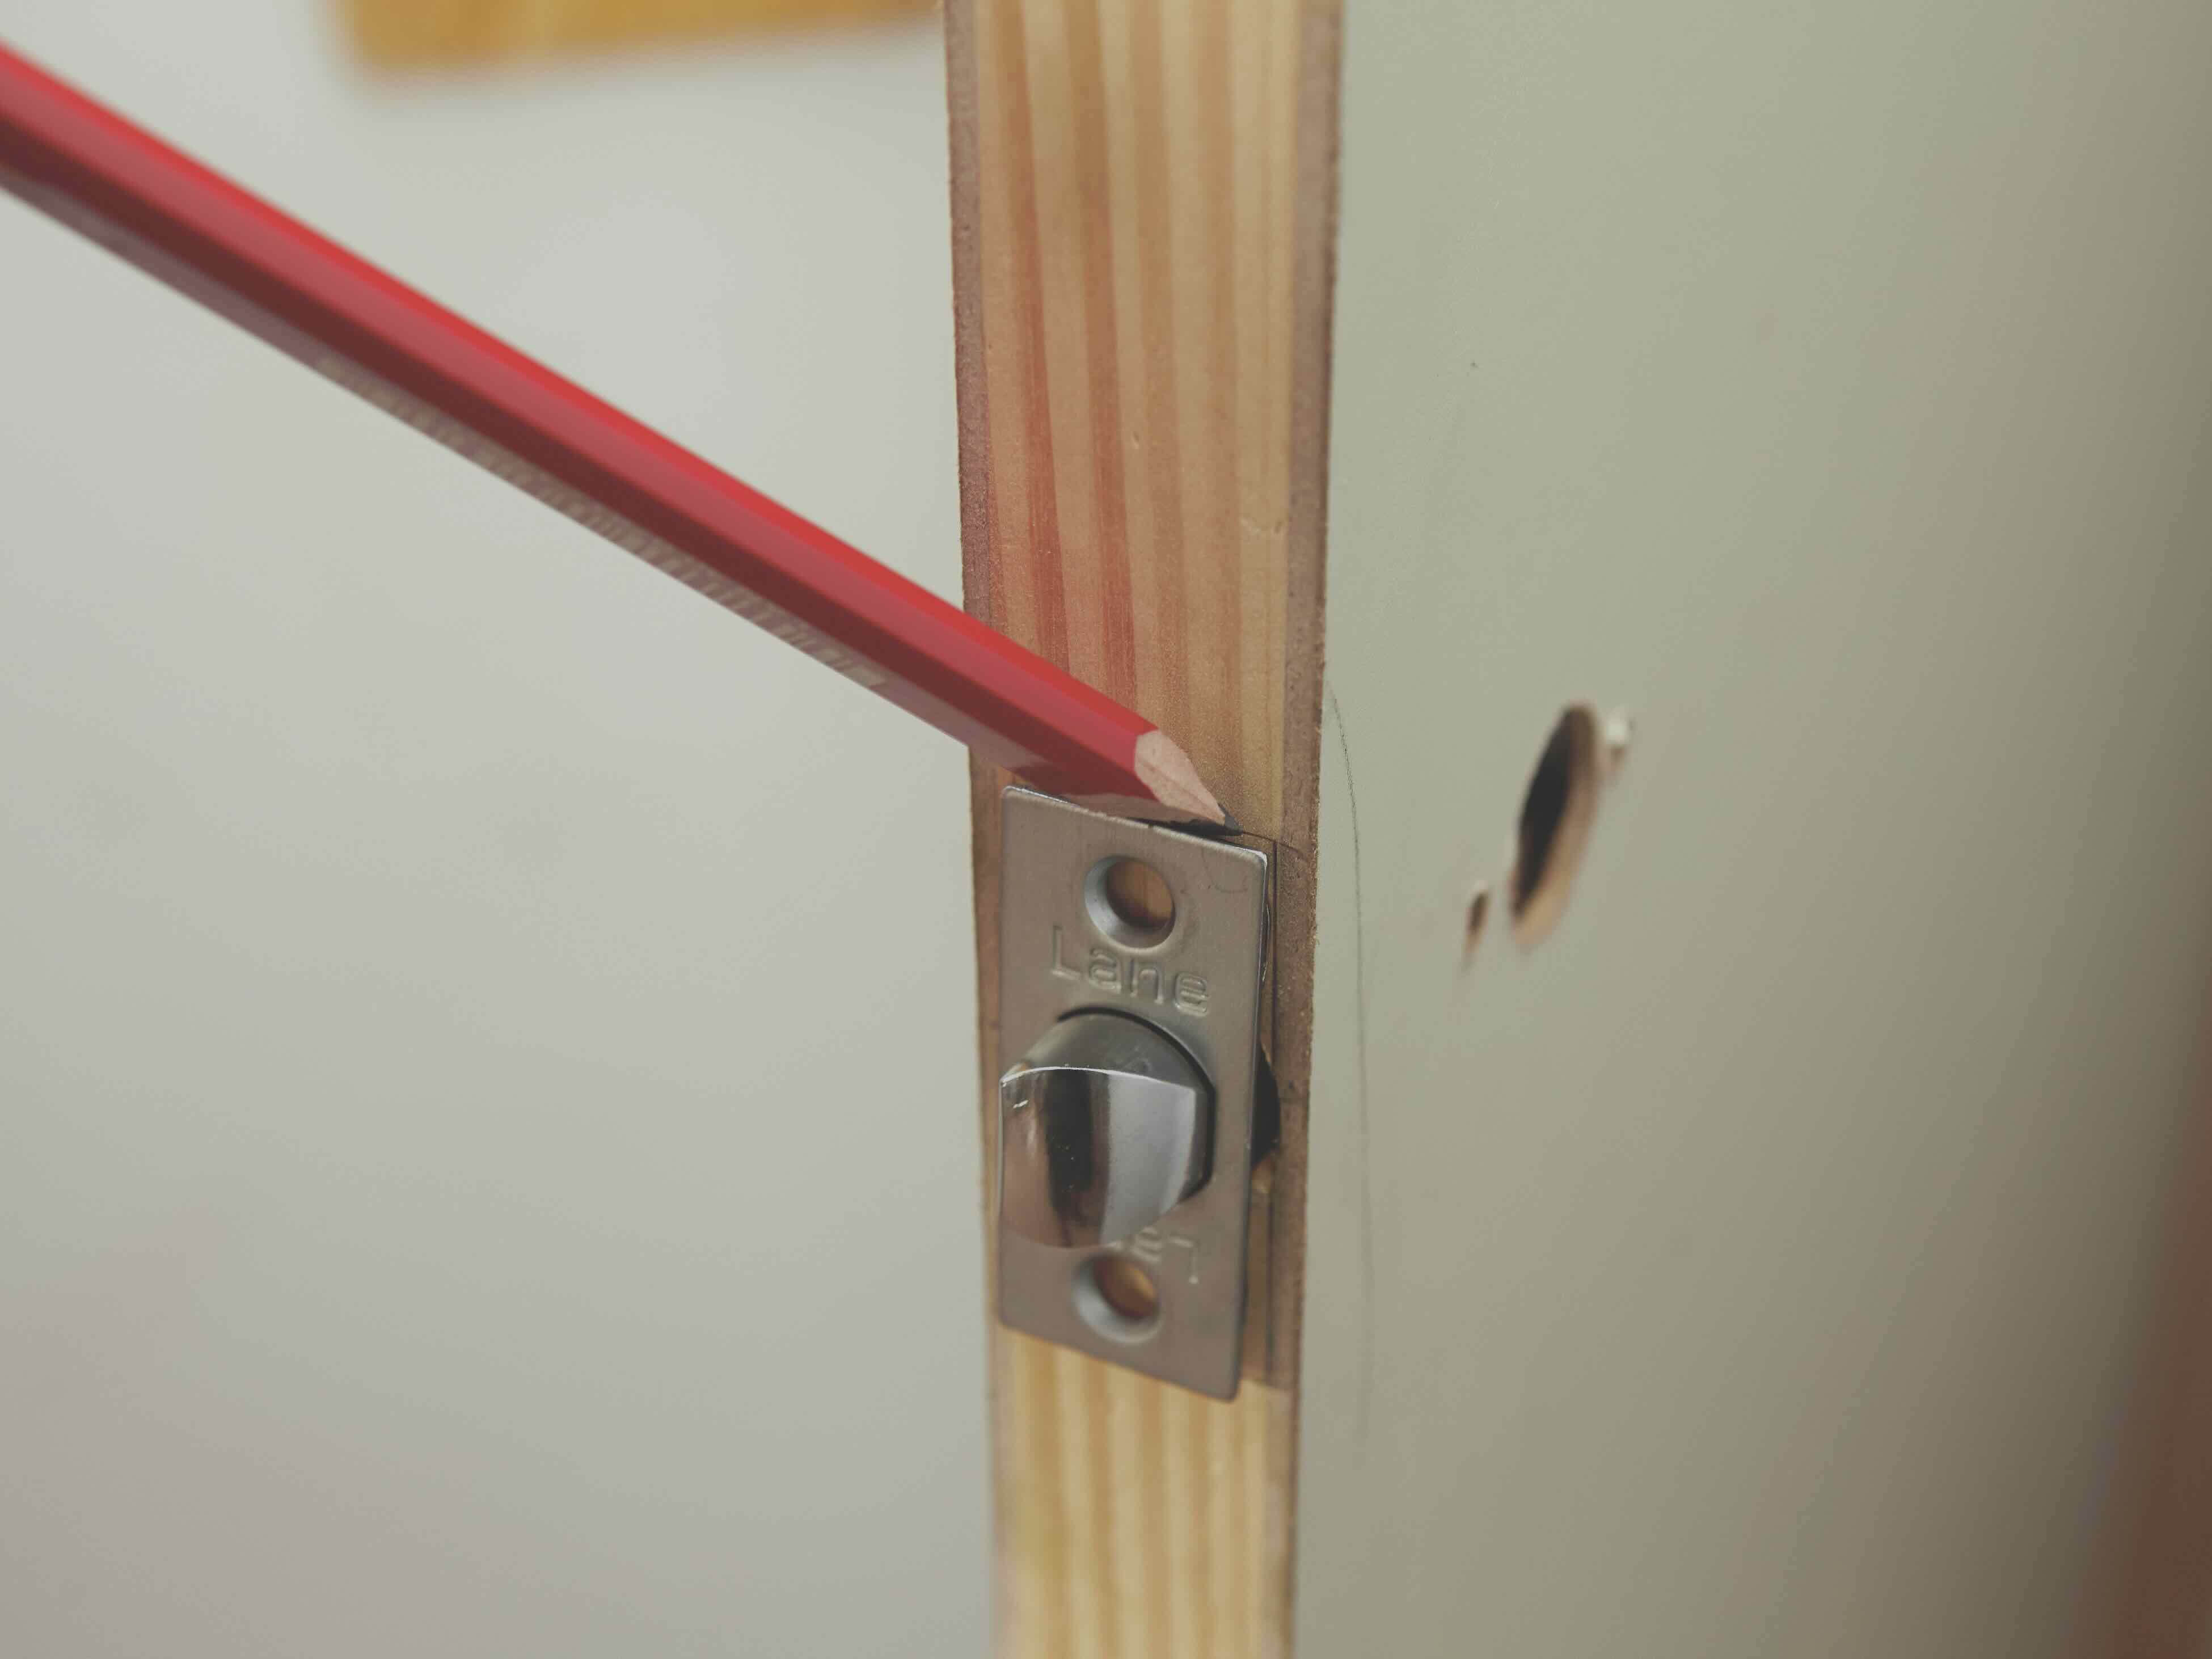
Mark the New Latch Position
- Close the door.
- Use a pencil to mark where the latch will go on the door edge.
Drill the Latch Hole
- Use a drill bit that matches the latch size.
- Drill a hole where you marked.
Chisel the Latch Plate Area
- Place the latch plate on the door edge.
- Trace around it with a pencil.
- Use a chisel to carve out a shallow area for the latch plate.
Install the Latch
- Insert the latch into the hole.
- Ensure the latch plate fits flush with the door edge.
- Screw the latch plate into place.
Attach the Strike Plate
- Close the door.
- Mark where the latch hits the door frame.
- Drill a hole for the latch in the door frame.
- Chisel out a shallow area for the strike plate.
- Screw the strike plate into place.
Test the Latch
- Open and close the door.
- Ensure the latch works smoothly.
- Adjust if necessary.
Helpful Tips and Tricks
Measure Twice, Drill Once: Always double-check measurements before drilling. This prevents misalignment.
Use a Template: Many latch kits include a template. Use it to mark holes accurately.
Pilot Holes: Drill small pilot holes before using larger bits. This keeps wood from splitting.
Lubricate Screws: Rub screws with soap or wax. They’ll go in easier and reduce the risk of stripping.
Level the Latch: Ensure the latch is level before securing. A crooked latch can cause door issues.
Common Mistakes to Avoid:
- Skipping Pilot Holes: This can split wood and make screws difficult to insert.
- Over-Tightening Screws: Can strip the screw head or damage the door.
- Ignoring Alignment: Misaligned latches can cause the door to stick or not close properly.
Material Alternatives:
- Wood Putty: If holes are misaligned, fill them with wood putty, let dry, then re-drill.
- Self-Tapping Screws: These can be easier to use and require less effort than traditional screws.
- Magnetic Latches: For a modern touch, consider magnetic latches instead of traditional ones.
Estimating the Cost
Materials:
- Door latch: $10-$20
- Screws: $2-$5
- Strike plate: $3-$7
Tools:
- Screwdriver: $5-$15
- Drill: $30-$50
- Drill bits: $5-$10
- Chisel: $5-$10
- Tape measure: $3-$7
- Pencil: $1
Total Cost: $64-$125
Budget-Friendly Alternatives:
- Borrow tools from friends or family.
- Buy a basic tool kit that includes multiple tools.
- Look for sales or discounts at local hardware stores.
Different Ways to Customize
Materials: Instead of a standard metal latch, consider using brass, bronze, or stainless steel for different looks and durability. For a rustic feel, try wrought iron.
Colors: Paint or spray-paint the latch in colors that match or contrast with your door. Matte black, brushed nickel, or antique gold can add style.
Styles: Choose between modern, vintage, or industrial latch designs. A sleek, minimalist latch works well for contemporary homes, while an ornate, decorative latch suits traditional settings.
Handles: Swap out standard handles for ceramic knobs, leather pulls, or wooden handles to add a unique touch.
Locking Mechanisms: Opt for a keyed lock, thumb turn, or smart lock depending on your security needs.
Installation Position: Install the latch at a non-standard height for a custom look. For example, placing it higher or lower than usual can make your door stand out.
Additional Features: Add a door knocker, peephole, or decorative plate around the latch area for extra flair.
Finishes: Experiment with different finishes like polished, satin, or antique to match your home’s decor.
Eco-Friendly Options: Use reclaimed wood or recycled metal for a sustainable choice.
Personal Touches: Engrave initials or a small design on the latch for a personalized touch.
Eco-Friendly Tips
Choose reclaimed wood for the door frame. It adds character and reduces waste. Use recycled metal for the latch itself. Many hardware stores offer options made from recycled materials.
Opt for non-toxic paint or finishes. These are better for your health and the environment. Consider screws and nails made from recycled steel. They are just as strong and eco-friendly.
Reuse old hardware if you have it. Clean and polish it to give it a new life. Look for biodegradable packaging when buying new materials. This reduces plastic waste.
Use a manual screwdriver instead of a power drill. It saves energy and gives you more control. Recycle any packaging or leftover materials. Many communities have recycling programs for metal and wood.
Choose local suppliers to reduce the carbon footprint from shipping. Local stores often have unique, sustainable options. Plan your project to minimize waste. Measure twice, cut once to avoid mistakes.
Donate leftover materials to a local school or community center. They can use them for projects. Keep your workspace clean and organized. It helps you see what materials you have and reduces waste.
Your Door's Ready to Shine
You've got all the tools and steps needed to install a door latch. From measuring the spot to drilling the holes, each step is crucial. Remember, patience is key. Rushing might lead to mistakes. Double-check your measurements and make sure everything lines up. If something feels off, don't hesitate to revisit the instructions. A well-installed latch not only enhances security but also adds a touch of professionalism to your home. Now, grab your tools, follow the steps, and give your door the upgrade it deserves. Happy DIY-ing!
How do I choose the right door latch for my door?
First, measure the thickness of your door. Then, decide if you need a privacy, passage, or dummy latch. Privacy latches are for bathrooms and bedrooms, passage latches for hallways and closets, and dummy latches for decorative purposes.
What tools will I need for installing a door latch?
You’ll need a screwdriver, drill, measuring tape, chisel, and pencil. Having a level can also help ensure everything is straight.
Can I install a door latch without a drill?
Yes, but it’s more challenging. You’ll need a manual screwdriver and chisel. Drilling makes the process faster and more precise.
How do I align the latch with the strike plate?
Close the door and mark where the latch hits the door frame. Then, align the strike plate with that mark and screw it in place. Make sure the latch fits snugly into the strike plate.
What if my door latch is loose?
Check if the screws are tight. If they are, but the latch is still loose, you might need to use longer screws or add a wood filler to the holes before re-screwing.
How do I remove an old door latch?
Unscrew the screws on the latch plate and the doorknob. Pull the knob and latch out of the door. If it’s stuck, gently use a chisel to pry it out.
Can I install a door latch on a metal door?
Yes, but you’ll need metal-specific tools like a metal drill bit. The process is similar to installing on a wooden door, just a bit more effort.