
Home>Home & Furniture>Doors & Windows>DIY Door Closer Installation Guide
Doors & Windows
DIY Door Closer Installation Guide
Published: September 10, 2024
Learn how to install a door closer with our step-by-step DIY guide. Enhance your home's functionality and security with easy-to-follow instructions and expert tips.
(Many of the links in this article redirect to a specific reviewed product. Your purchase of these products through affiliate links helps to generate commission for Twigandthistle.com, at no extra cost. Learn more)
Do you have a door in your home that always seems to slam shut or doesn’t close properly? Installing a door closer can solve this problem, ensuring your door shuts smoothly and quietly every time. You might think this sounds complicated, but with a few tools and some simple steps, you can easily install a door closer yourself. This guide will walk you through the process, making it straightforward even for beginners. Whether it's for safety or convenience, learning to install a door closer can make a big difference in your home. Ready to get started?
Getting Ready for the Project
Gather Tools and Materials: You'll need a screwdriver, drill, measuring tape, pencil, door closer kit, and safety glasses.
Read Instructions: Carefully read the manual that comes with the door closer kit.
Choose the Right Door Closer: Make sure the door closer matches the weight and size of your door.
Clear the Workspace: Remove any obstacles around the door area to ensure you have enough space to work.
Mark Drill Points: Use a pencil and measuring tape to mark where you'll drill holes for the door closer.
Wear Safety Gear: Put on safety glasses to protect your eyes from debris.
Check Door Alignment: Ensure the door is properly aligned and swings smoothly before installing the closer.
Test the Door: Open and close the door a few times to make sure it operates correctly without the closer.
Prepare the Door and Frame: Clean the surfaces where the door closer will be mounted to ensure a secure fit.
Have a Helper: If possible, get someone to assist you in holding the door or parts while you work.
What You Need: Materials and Tools
Door Closer Kit: Includes the main mechanism, arm, and mounting hardware. Essential for controlling door closing speed and ensuring it shuts properly.
Screwdriver: Needed for tightening screws. A Phillips head is most common.
Drill: Used to create holes for mounting screws. A cordless drill is convenient.
Drill Bits: Various sizes required to match the screws in the door closer kit.
Measuring Tape: Ensures accurate placement of the door closer.
Pencil: Marks drilling spots and measurements.
Level: Ensures the door closer is mounted straight.
Wrench: Adjusts the tension on the door closer arm.
Safety Glasses: Protects eyes from debris while drilling.
Step Ladder: Needed if the door is tall or if you can't reach the top comfortably.
Each tool and material plays a crucial role in ensuring the door closer is installed correctly and functions smoothly.
Required Skills and Time Commitment
Skill Level: Intermediate
Time Required: 1-2 hours
Steps:
- Gather Tools: Screwdriver, drill, measuring tape, pencil.
- Mark Holes: Use the template provided with the door closer to mark where holes will go.
- Drill Holes: Carefully drill holes where marked.
- Attach Bracket: Secure the bracket to the door frame.
- Install Closer: Attach the door closer to the bracket.
- Adjust Tension: Use the adjustment screws to set the closing speed.
Important Tips:
- Read Instructions: Always follow the manufacturer's instructions.
- Safety First: Wear safety glasses when drilling.
- Check Alignment: Ensure the door closes smoothly without sticking.
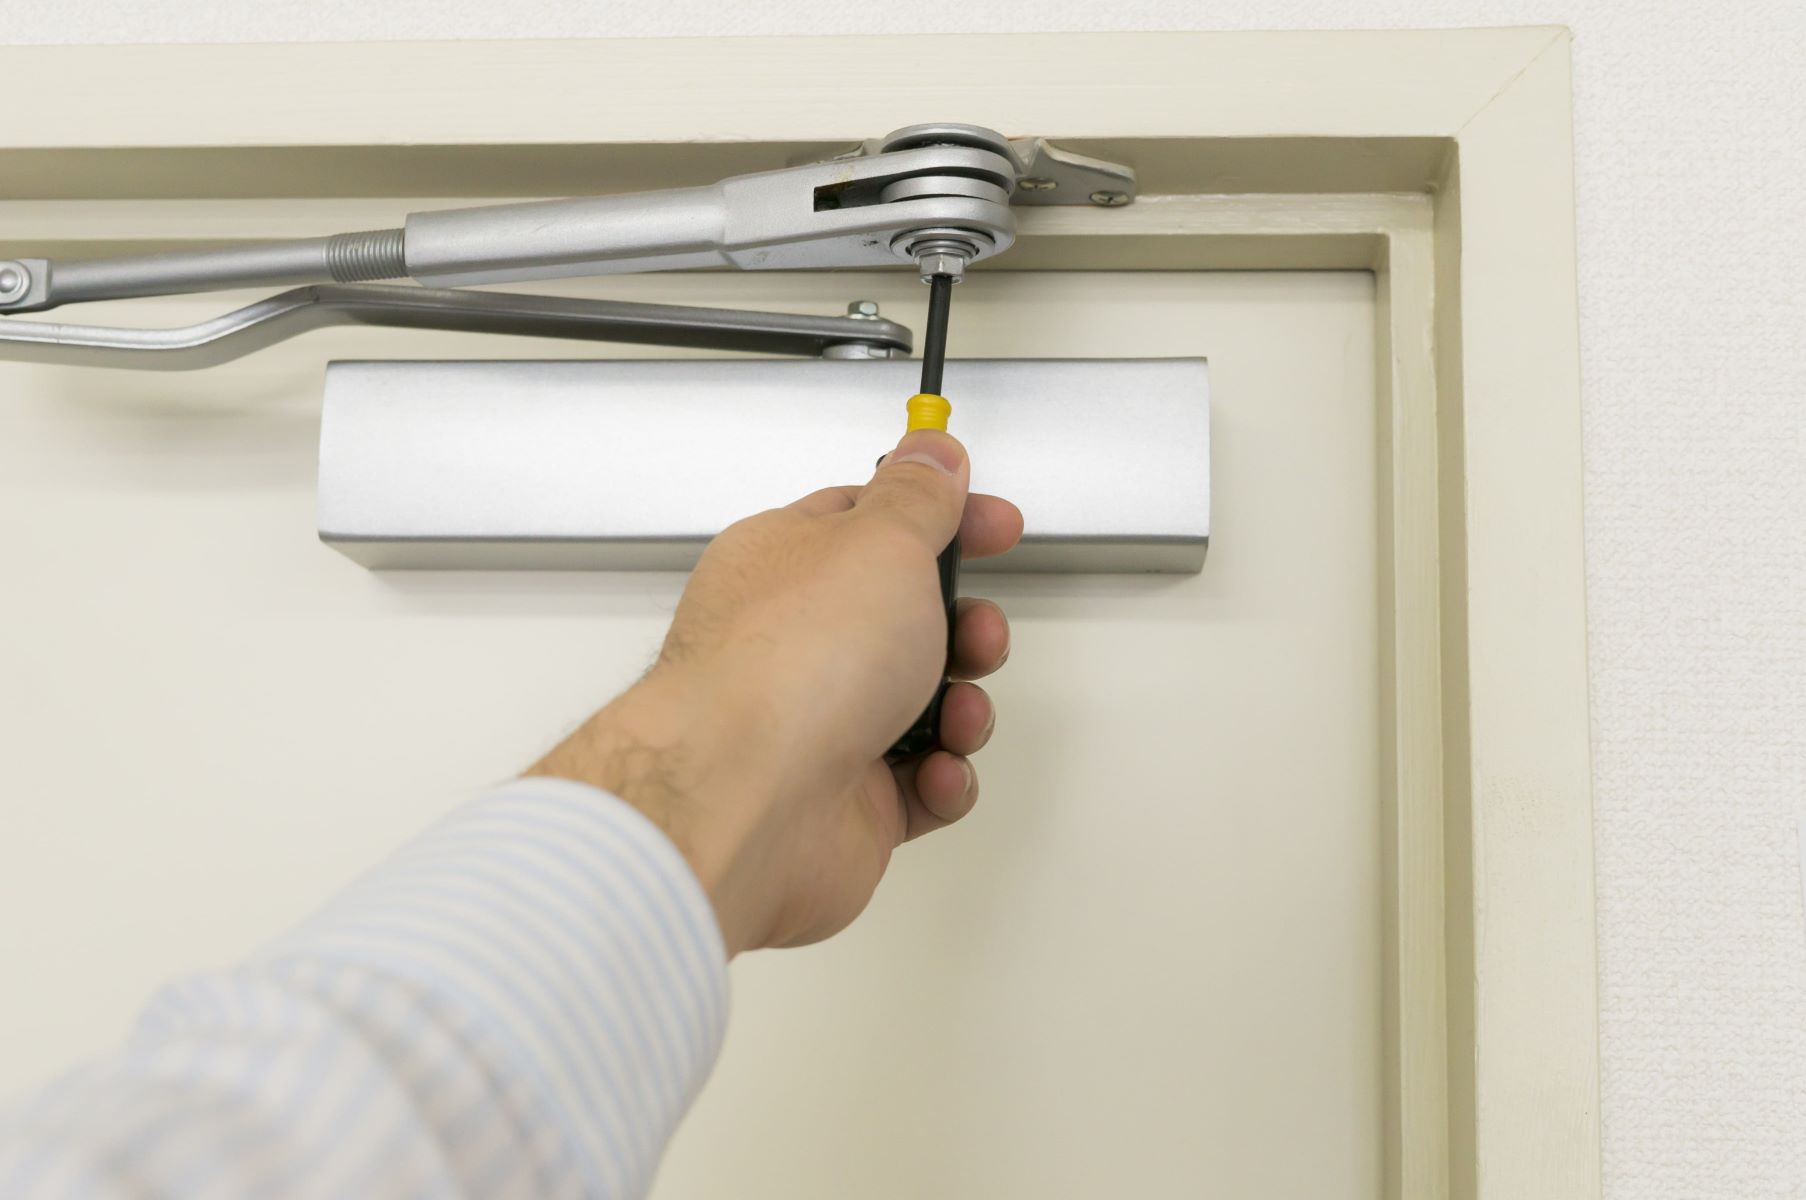
How to Install a Door Closer: Step-by-Step
Gather Materials
- Door closer kit
- Screwdriver
- Drill
- Measuring tape
- Pencil
Choose the Location
- Decide if the door closer will be installed on the push or pull side of the door.
Mark the Holes
- Use the template provided in the kit.
- Align the template on the door and frame.
- Mark the screw holes with a pencil.
Drill Pilot Holes
- Use a drill to create pilot holes where you marked.
- Ensure the holes are the correct size for the screws.
Attach the Door Closer Body
- Position the door closer body on the door.
- Insert screws into the pilot holes.
- Tighten screws with a screwdriver.
Install the Arm
- Attach the arm to the door closer body.
- Secure it with the provided screws.
Connect the Arm to the Frame
- Extend the arm and connect it to the frame.
- Use screws to secure it in place.
Adjust the Tension
- Turn the adjustment screws to set the closing speed.
- Test the door to ensure it closes smoothly.
Test the Door
- Open and close the door several times.
- Make any necessary adjustments to the tension screws.
Tighten All Screws
- Ensure all screws are tight.
- Double-check the stability of the door closer.
Clean Up
- Remove any debris.
- Store leftover materials properly.
Helpful Tips and Tricks
Measure Twice, Drill Once: Before drilling, double-check measurements. Ensures holes align perfectly.
Use a Template: Many door closers come with a template. Tape it to the door and frame for precise hole placement.
Pre-drill Holes: Prevents wood from splitting. Use a bit slightly smaller than screws.
Adjust Tension Properly: Door closers have tension settings. Adjust to ensure the door closes smoothly without slamming.
Lubricate Moving Parts: Keeps the closer operating smoothly. Use a silicone-based lubricant.
Common Mistakes to Avoid:
Incorrect Placement: Installing too high or low affects functionality. Follow manufacturer’s instructions.
Over-tightening Screws: Can strip screws or damage the door/frame. Tighten just enough to hold securely.
Ignoring Manufacturer’s Instructions: Each model may have specific requirements. Always read the manual.
Alternatives for Materials or Methods:
Hydraulic vs. Pneumatic Closers: Hydraulic closers offer smoother operation. Pneumatic closers are often cheaper.
Surface-Mounted vs. Concealed Closers: Surface-mounted are easier to install. Concealed closers provide a cleaner look but require more effort.
Screw Types: Use self-tapping screws for metal doors. Wood screws work best for wooden doors.
Estimating the Cost
Door Closer: $20-$50
Screwdriver Set: $10-$20
Drill: $30-$60
Drill Bits: $10-$15
Measuring Tape: $5-$10
Pencil: $1-$2
Level: $10-$15
Total Cost: $86-$172
Budget-Friendly Alternatives:
- Door Closer: Opt for a basic model around $20.
- Screwdriver Set: Borrow or use an existing set.
- Drill: Rent one from a local hardware store for about $10.
- Drill Bits: Purchase only the required size for around $5.
- Measuring Tape: Use one you already have.
- Pencil: Any pencil at home will work.
- Level: Use a free leveling app on your smartphone.
Total Cost with Alternatives: $36-$52
Different Ways to Customize
Materials: Instead of standard metal door closers, try brass or bronze for a more classic look. For a modern touch, use stainless steel or aluminum. If you prefer a lightweight option, plastic door closers can work well.
Colors: Paint the door closer to match your door. Use spray paint designed for metal or plastic. Choose black or white for a sleek look, or go bold with red, blue, or green. For a more subtle approach, use neutral colors like beige or gray.
Styles: Opt for a concealed door closer if you want it hidden from view. These are installed inside the door frame. For a more decorative option, choose a door closer with ornate designs or engraved patterns. If you prefer a minimalist style, select a sleek, simple design.
Mounting Options: Install the door closer on the top, middle, or bottom of the door, depending on your preference. For a unique look, mount it on the side of the door frame. If you have a glass door, use a surface-mounted door closer designed for glass.
Additional Features: Add a hold-open feature to keep the door open when needed. Choose a door closer with adjustable closing speed for more control. For added security, select a door closer with an integrated lock.
Accessories: Use decorative covers or caps to hide screws and mounting hardware. Add rubber or felt pads to reduce noise when the door closes. Install a door stop to prevent the door from hitting the wall.
Installation Tips: Use a template to ensure accurate placement of screws. If drilling into metal, use a pilot hole to make it easier. For wooden doors, use wood screws instead of metal ones.
Eco-Friendly Installation Tips
Eco-friendly materials can make your DIY door closer installation more sustainable. Reclaimed wood or recycled metal can be used for mounting plates or brackets. These materials reduce waste and give old items a new life.
Non-toxic adhesives and paints are better for the environment and your health. Look for products labeled as low-VOC (volatile organic compounds). They release fewer harmful chemicals into the air.
Manual door closers are a great option. They don't require electricity, which saves energy. If you need an automatic closer, choose one with an energy-efficient design.
Reusing screws and other hardware from old projects can cut down on waste. If you don't have any, consider buying recycled hardware. Many stores offer screws, bolts, and other items made from recycled materials.
Solar-powered tools can help reduce your carbon footprint. Using a solar-powered drill or screwdriver means less reliance on traditional electricity sources.
Proper insulation around the door frame can improve energy efficiency. This keeps your home warmer in winter and cooler in summer, reducing the need for heating and cooling.
Upcycling old materials for new purposes is another sustainable method. For example, an old metal rod can become a sturdy door closer arm.
Composting any wood shavings or sawdust from your project can turn waste into valuable garden material. This keeps organic waste out of landfills.
Local sourcing of materials reduces the carbon footprint associated with transportation. Buying from local suppliers supports the community and cuts down on emissions.
Digital manuals instead of printed ones save paper. Many manufacturers offer downloadable instructions, which you can view on your phone or tablet.
Using these eco-friendly methods and materials can make your DIY door closer installation both effective and sustainable.
Your Door Closer is Ready
You've got your door closer installed. No more slamming doors or drafts sneaking in. With just a few tools and some patience, you’ve made your home a bit more comfortable. Remember, adjustments might be needed over time. If the door starts closing too fast or too slow, tweak the tension screw. Keep an eye on the screws to ensure they stay tight. Regular checks will keep everything running smoothly. If you run into any issues, don’t hesitate to consult the manual or seek help from a local hardware store. Enjoy the peace and quiet of a door that closes just right. Happy DIY-ing!
How do I choose the right door closer for my door?
Look at the weight and width of your door. Heavier doors need stronger closers. Also, consider if the door is interior or exterior. Exterior doors usually need more durable closers.
What tools will I need to install a door closer?
You’ll need a drill, screwdriver, measuring tape, pencil, and the door closer kit. Some kits come with their own screws and templates.
Can I install a door closer on any type of door?
Most door closers can be installed on wood, metal, or fiberglass doors. Just make sure the closer you pick is compatible with your door material.
How long does it take to install a door closer?
It usually takes about 30 minutes to an hour. If you’re handy with tools, it might be quicker. First-timers might take a bit longer.
Do I need to adjust the door closer after installation?
Yes, you’ll probably need to adjust the closing speed and latching speed. Most closers have screws for these adjustments. Follow the instructions in the manual.
Can I install a door closer by myself, or do I need help?
You can install it by yourself, but having an extra set of hands can make the job easier, especially when holding the closer in place while you mark and drill holes.
What should I do if my door closer isn’t working properly after installation?
Check if all screws are tight and if the closer is properly aligned. If it still doesn’t work, consult the manual or contact the manufacturer for troubleshooting tips.