
Home>Home & Furniture>Doors & Windows>DIY Disney Cruise Door Magnets
Doors & Windows
DIY Disney Cruise Door Magnets
Published: September 9, 2024
Create magical DIY Disney Cruise door magnets with our step-by-step guide. Personalize your cruise experience and make your cabin door stand out with fun, creative designs!
(Many of the links in this article redirect to a specific reviewed product. Your purchase of these products through affiliate links helps to generate commission for Twigandthistle.com, at no extra cost. Learn more)
Cruises are a fun way to spend a vacation, and Disney cruises add extra magic. One unique tradition many cruisers enjoy is decorating their cabin doors with magnets. These decorations make it easy to spot your room and add a personal touch to your trip. Making your own Disney cruise door magnets is a fun and creative project that the whole family can join in on. You don’t need to be an artist or spend a lot of money to create beautiful designs. Just grab some basic supplies, and you’re ready to start crafting your personalized cruise door decor.
Getting Ready for Your Project
Gather Materials: Collect magnetic sheets, scissors, markers, glue, and Disney-themed printouts or stickers.
Design Your Magnets: Sketch or print out your favorite Disney characters or themes. Make sure they fit the size of your magnetic sheets.
Cut Out Designs: Carefully cut out your designs using scissors. Ensure edges are smooth to avoid any sharp points.
Attach Designs to Magnetic Sheets: Use glue to stick your cut-out designs onto the magnetic sheets. Press firmly to ensure they adhere well.
Trim Excess Magnet: Once the glue dries, trim any excess magnetic sheet around your design for a clean look.
Set Up Workspace: Choose a flat, clean surface to work on. Lay down newspaper or an old cloth to protect your workspace from glue and marker stains.
Safety Tips: Use child-safe scissors if kids are helping. Keep glue and small magnet pieces away from young children to prevent choking hazards.
Test Magnets: Before packing, test your magnets on a metal surface to ensure they stick properly. Adjust if needed.
Pack Carefully: Place finished magnets in a zip-lock bag or small box to prevent damage during travel.
What You Need to Get Started
Magnetic Sheets: These are the base for your magnets. They stick to the metal doors on the cruise.
Printable Vinyl: Used to print your designs. It’s durable and gives a professional look.
Printer: Needed to print your designs onto the vinyl. An inkjet printer works well.
Scissors or Craft Knife: For cutting out your designs after printing.
Cutting Mat: Protects your work surface when using a craft knife.
Ruler: Helps in making straight cuts.
Adhesive Spray: Optional, but helps in sticking the vinyl to the magnetic sheet if needed.
Computer: For creating or downloading designs.
Design Software: Programs like Adobe Illustrator or Canva to create your designs.
Laminator (Optional): Adds extra durability to your magnets.
Clear Sealant Spray (Optional): Protects the printed design from smudging or water damage.
These materials and tools will help you create personalized and durable Disney Cruise door magnets.
How Much Time and Skill You Need
Skill Level: Beginner
Time Required: 1-2 hours
- Design and Print: 30-45 minutes
- Cutting Out Shapes: 15-30 minutes
- Laminating (Optional): 10-15 minutes
- Attaching Magnets: 10-15 minutes
Follow These Steps
Gather Materials:
- Magnetic Sheets: Available at craft stores or online.
- Printer: For printing designs.
- Scissors: To cut out shapes.
- Laminating Sheets (optional): For added durability.
- Adhesive (optional): If using non-magnetic paper.
Choose Designs:
- Search for Disney-themed images online.
- Use photo editing software to customize designs with names or dates.
Print Designs:
- Print images directly onto magnetic sheets if possible.
- If using regular paper, print designs then laminate for durability.
Cut Out Shapes:
- Carefully cut around the printed designs using scissors.
- Ensure edges are smooth to avoid peeling.
Laminate (Optional):
- Place cut-out designs in laminating sheets.
- Use a laminator to seal designs, then cut out again.
Attach Magnets:
- If using laminated paper, attach adhesive magnetic strips to the back.
- Ensure magnets cover enough surface area for a secure hold.
Test Magnets:
- Place finished magnets on a metal surface to ensure they stick properly.
- Adjust if necessary by adding more magnetic strips.
Pack for Cruise:
- Store magnets in a protective folder or zip-lock bag.
- Keep them flat to avoid bending during travel.
Decorate Door:
- Upon arrival, place magnets on the cruise cabin door.
- Arrange them in a fun, eye-catching pattern.
Helpful Hints and Tips
Use magnetic sheets instead of regular paper. They stick better and won't fall off. Laminating your designs makes them more durable. Print your designs in high resolution for a sharp look. Personalize with names or dates to make them special.
Common mistakes include using tape or glue instead of magnets, which can damage the door. Avoid heavy decorations that might not stick well. Don't forget to measure the door space to ensure your magnets fit.
If you don't have magnetic sheets, try using magnetic tape on the back of printed designs. For a different method, consider vinyl decals that can be easily removed.
How Much Will It Cost?
Magnetic Sheets: $10 for a pack of 5 sheets
Printable Vinyl: $15 for a pack of 10 sheets
Printer Ink: $20 (depends on usage)
Scissors or Craft Knife: $5
Cutting Mat: $10
Laminating Sheets (optional): $10 for a pack of 20
Total Estimated Cost: $70
Budget-Friendly Alternatives:
- Use regular paper instead of printable vinyl: $5 for a pack of 100 sheets
- Skip laminating sheets if not needed: Save $10
- Borrow a printer from a friend or use a local library: Save $20
Adjusted Total Cost: $40
Different Ways to Personalize
Materials: Instead of using traditional magnetic sheets, try foam sheets with adhesive magnets. This adds a bit of depth and texture. Cardstock can also work well if laminated for durability.
Colors: Use glitter paper or metallic foil for a shiny, eye-catching look. Pastel colors can give a softer, more whimsical feel. Neon colors make the magnets stand out from a distance.
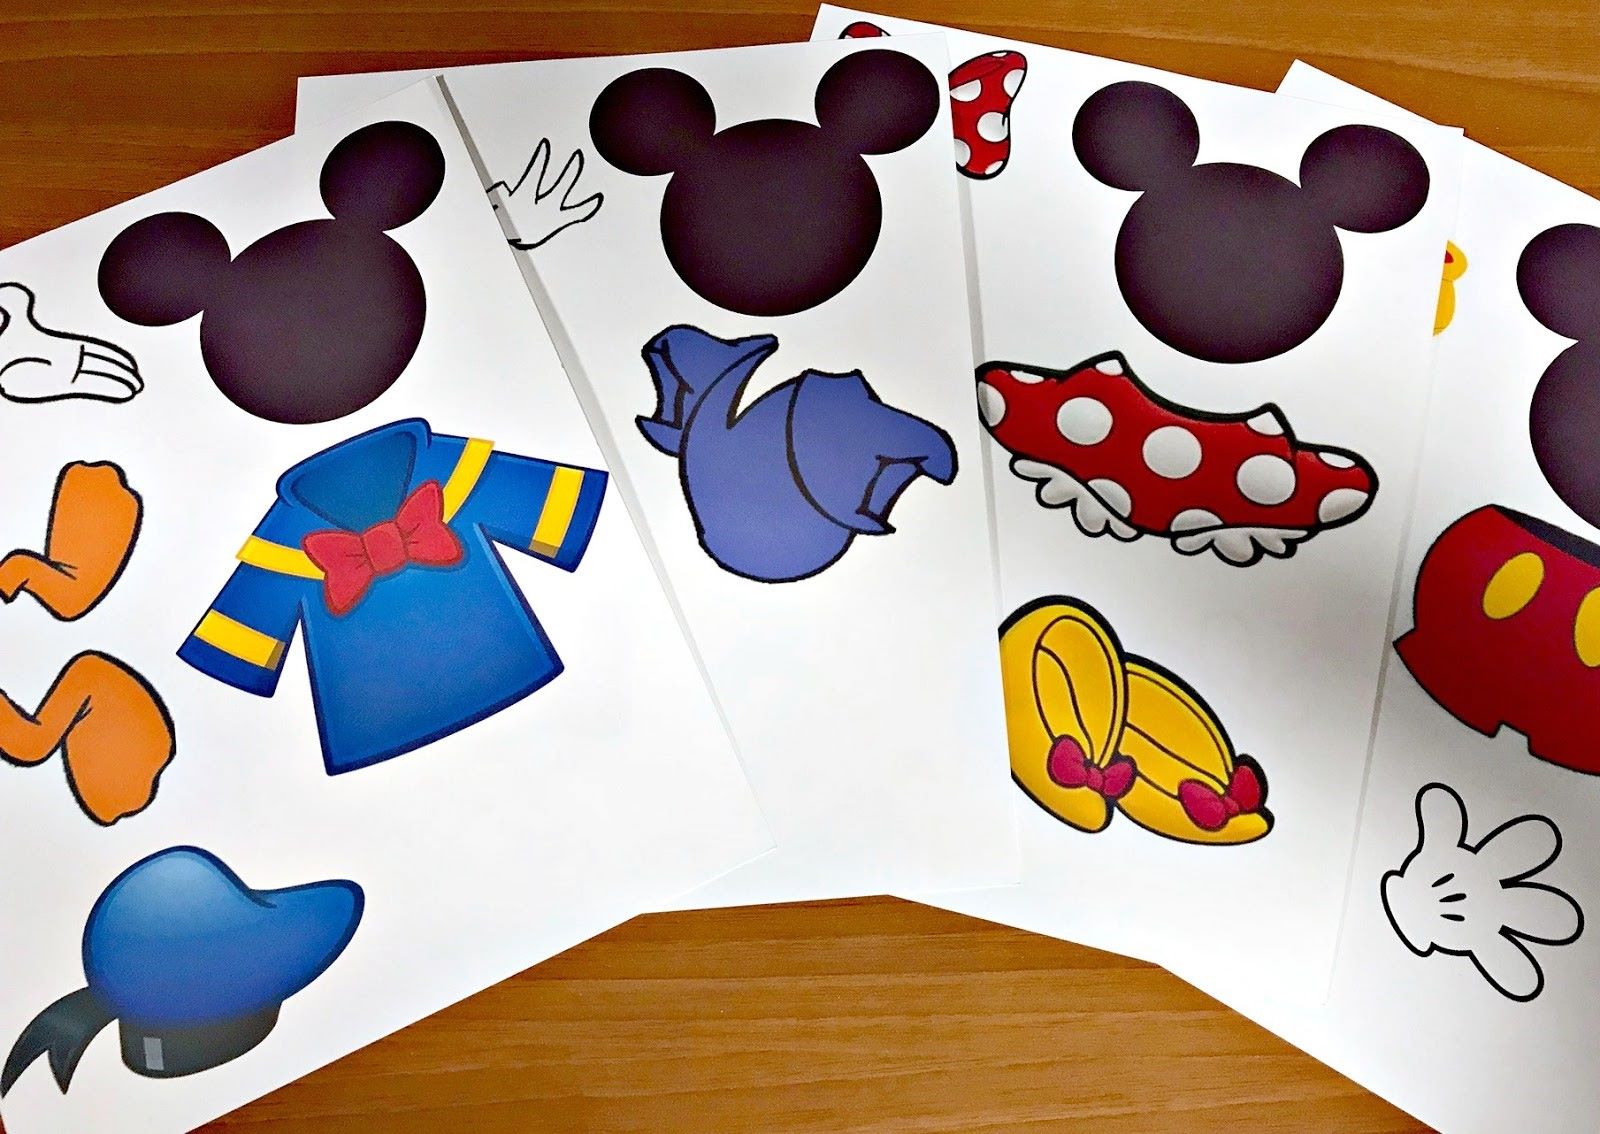
Styles: Create character-themed magnets like Mickey, Minnie, or Goofy. For a more personalized touch, make family name magnets with each member's favorite character. Seasonal themes like Halloween or Christmas can add a festive touch to your door.
Shapes: Instead of just circles or squares, cut the magnets into unique shapes like Mickey ears, stars, or hearts. Layered designs can add dimension, like a Mickey head with a smaller character cutout on top.
Textures: Add fabric or felt elements for a tactile experience. Rhinestones or sequins can make the magnets sparkle. Use puffy paint for raised details.
Techniques: Try hand-painting designs for a custom look. Decoupage with Disney-themed napkins or wrapping paper can add intricate patterns. Vinyl cutting with a Cricut machine allows for precise, professional-looking designs.
Extras: Attach small LED lights for a glowing effect. Use dry-erase materials so you can write and erase messages. Add small hooks to hang lightweight items like keychains or lanyards.
Eco-Friendly Crafting Ideas
Reusing old magnets from your fridge or other sources can be a great start. Recycling materials like cardboard or scrap paper for the base of your magnets helps reduce waste. Eco-friendly paints or markers can be used to decorate your designs. Natural adhesives like wheat paste or non-toxic glue are better for the environment. Upcycling old buttons, fabric scraps, or bottle caps can add unique touches to your magnets. Biodegradable or recycled laminating sheets can protect your designs without harming the planet.
Your Disney Cruise Awaits
You've got all the tools and tips to create some amazing Disney Cruise door magnets. With a bit of creativity and effort, your cabin door will stand out. Remember, personalization is key. Use bright colors, fun characters, and unique designs to make your magnets pop. Don't forget to involve the whole family in the crafting process; it's a great way to bond and get everyone excited for the trip. Keep in mind, the materials you choose should be durable and easy to apply. Now, gather your supplies, let your imagination run wild, and start crafting. Your Disney Cruise is just around the corner, and your door will be the talk of the ship. Happy sailing!
What materials do I need to make Disney Cruise door magnets?
You'll need magnetic sheets, Disney-themed images or stickers, scissors, and a printer. Optional: laminating sheets for extra durability.
How do I print the images for the magnets?
Print your chosen images on magnetic paper using a regular inkjet printer. Make sure the images are the right size for your door.
Can I use regular paper instead of magnetic sheets?
Yes, but you'll need to attach the printed images to magnetic backing. You can find adhesive magnetic sheets at craft stores.
How do I cut the magnets to the right shape?
Use scissors or a craft knife to carefully cut around your printed images. If you laminated them, cut after laminating.
Will the magnets damage the cruise ship doors?
No, these magnets are safe for the doors. They won't leave any residue or cause scratches.
Can I reuse the magnets for future cruises?
Absolutely! Just store them flat in a cool, dry place to keep them in good condition.
Where can I find Disney-themed images for my magnets?
Check out online resources like Pinterest, Etsy, or official Disney websites. You can also use Disney stickers if you prefer.