
Home>Home & Furniture>Bedroom>DIY Mario Bedroom Decor: Step-by-step Guide
Bedroom
DIY Mario Bedroom Decor: Step-by-step Guide
Published: July 22, 2024
Transform your space with our DIY Mario Bedroom Decor guide! Step-by-step instructions to create a fun, nostalgic Mario-themed room. Perfect for fans of all ages!
(Many of the links in this article redirect to a specific reviewed product. Your purchase of these products through affiliate links helps to generate commission for Twigandthistle.com, at no extra cost. Learn more)
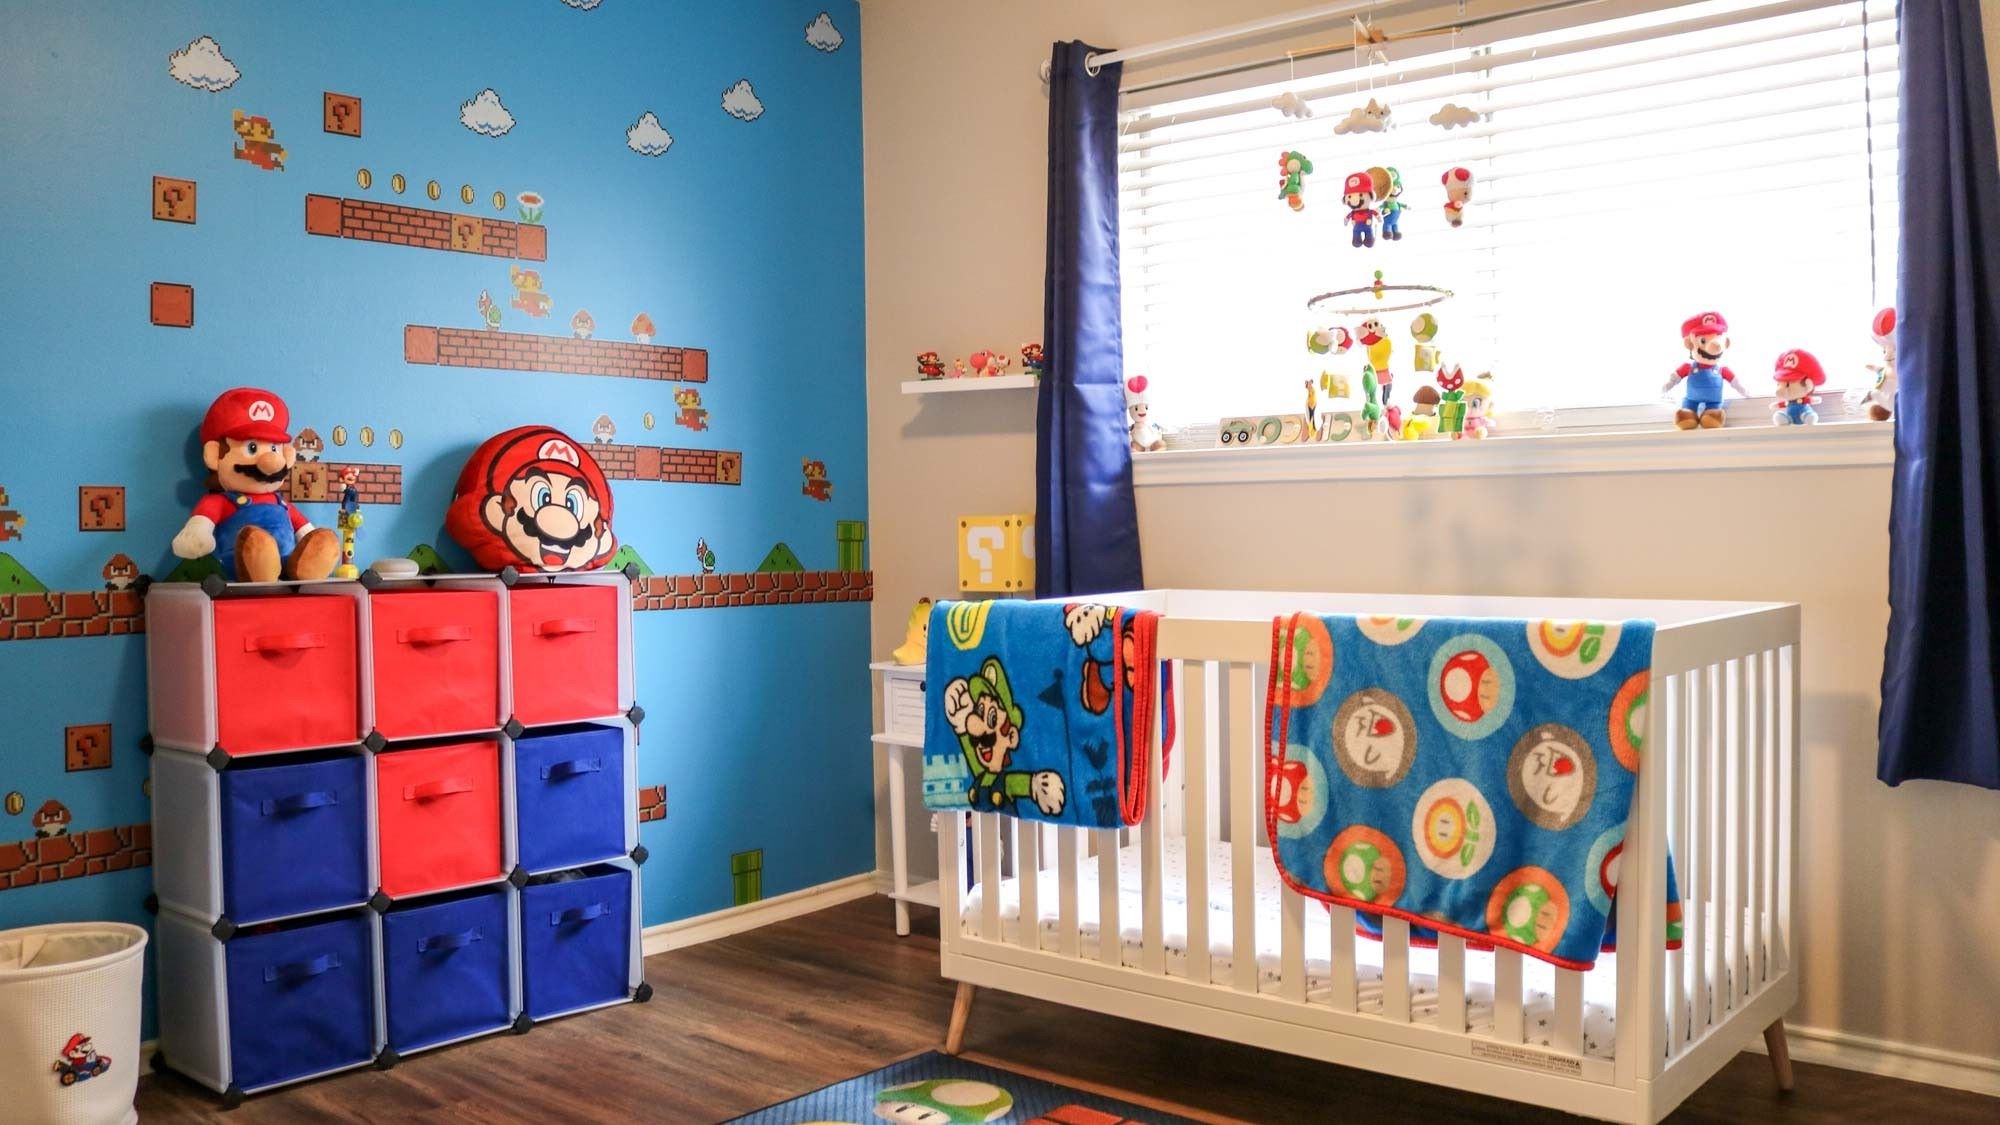
Transforming your bedroom into a Mario wonderland doesn't require a pro's touch. With some creativity and simple tools, you can easily bring this beloved character to life in your space. Whether you're a long-time Mario fan or just love the bright, playful aesthetic, this guide will help you create a fun and unique bedroom. From wall murals to themed bedding, you’ll find plenty of ideas to make your room pop. Ready to jump into the world of Mario and start your DIY adventure? Let’s get started decorating your dream Mario bedroom!
Getting Ready for Your Mario Bedroom Project
Gather Materials: Collect all necessary supplies like paint, brushes, stencils, wall decals, and any Mario-themed accessories.
Safety Gear: Wear gloves, goggles, and a mask to protect from paint fumes and dust.
Clear the Room: Move furniture out or to the center of the room. Cover with drop cloths to protect from paint splatters.
Clean Walls: Wipe down walls with a damp cloth to remove dust and grime. This helps paint adhere better.
Tape Off Areas: Use painter's tape to cover edges, trim, and any areas you don't want painted.
Prime Walls: Apply a coat of primer if changing wall colors drastically. This ensures even coverage.
Plan Layout: Sketch out where you want each Mario element. Measure and mark lightly with a pencil.
Ventilation: Open windows or use a fan to keep the room well-ventilated while painting.
Test Paint: Try a small patch of paint to see how it looks and dries. Adjust if needed.
Organize Tools: Keep all tools and materials within reach to avoid unnecessary trips and interruptions.
What You Need: Materials and Tools
- Paint: Red, blue, green, yellow, and white paint for walls and furniture.
- Paintbrushes and Rollers: Different sizes for detailed work and large areas.
- Painter's Tape: To create clean lines and protect areas not being painted.
- Drop Cloths: Protect floors and furniture from paint splatters.
- Stencils: Mario-themed stencils for characters and symbols.
- Wall Decals: Pre-made Mario decals for easy application.
- Measuring Tape: Ensure accurate placement of decals and stencils.
- Pencil: Mark spots for stencils and decals.
- Level: Keep designs straight and even.
- Screwdriver: Install shelves or hooks for Mario-themed accessories.
- Shelves: Display Mario toys and collectibles.
- Mario Bedding: Comforter, sheets, and pillowcases with Mario designs.
- Curtains: Red or blue curtains to match the theme.
- Lamps: Mario-themed lamps or nightlights.
- Rugs: Mario-themed area rugs for added decor.
- Storage Bins: Red and green bins for organizing toys and games.
- Posters: Mario posters to hang on the walls.
- Glue: Secure small decorations or craft projects.
- Scissors: Cut decals, tape, or fabric.
- Craft Supplies: Colored paper, markers, and stickers for custom decorations.
Skill Level and Time Commitment
Skill Level: Intermediate
Time Required: Approximately 2-3 days
Steps:
Planning and Design:
- Time: 2-3 hours
- Sketch out your design ideas and gather materials.
Wall Preparation:
- Time: 4-6 hours
- Clean and prime walls for painting.
Painting Background:
- Time: 6-8 hours
- Paint walls with base colors (sky blue, green for grass).
Detailing:
- Time: 8-10 hours
- Add Mario-themed elements like bricks, question blocks, and characters.
Furniture and Accessories:
- Time: 4-6 hours
- Assemble and place Mario-themed furniture and accessories.
Final Touches:
- Time: 2-3 hours
- Add any additional decorations or touch-ups.
Detailed Steps to Create Mario Decor
Plan Your Design
- Decide on a theme: Classic Mario, Mario Kart, or Super Mario Galaxy.
- Sketch a layout of the room, marking where each element will go.
Gather Materials
- Paint: Red, blue, green, yellow, and white.
- Stencils: Mario characters, question blocks, coins, and mushrooms.
- Wall decals: Mario characters and scenes.
- Bedding: Mario-themed sheets, pillowcases, and comforters.
- Accessories: Mario plush toys, lamps, and rugs.
Paint the Walls
- Prep the walls by cleaning and taping off areas.
- Paint the base color (sky blue for a classic Mario look).
- Use stencils to add details like clouds, bricks, and pipes.
Apply Wall Decals
- Peel and stick decals on the walls according to your layout.
- Smooth out any bubbles with a credit card.
Decorate the Bed
- Dress the bed with Mario-themed bedding.
- Add Mario plush toys for extra flair.
Add Accessories
- Place Mario-themed lamps on nightstands.
- Lay down a Mario-themed rug.
- Hang Mario posters or framed art on the walls.
Final Touches
- Arrange Mario toys and collectibles on shelves.
- Ensure everything is securely fastened and safe for use.
Helpful Tips and Tricks
Plan Your Layout: Sketch your room design first. Decide where each element will go. This helps avoid mistakes and ensures everything fits.
Use Stencils: For painting characters or symbols, use stencils. They make it easier to get clean lines and consistent shapes.
Wall Decals: Instead of painting, consider wall decals. They are easy to apply, remove, and reposition. Plus, they come in various designs.
Bright Colors: Use bright, bold colors like red, blue, and green. These colors capture the Mario theme perfectly.
DIY Furniture: Paint old furniture to match the theme. Add Mario-themed handles or stickers to drawers and cabinets.
Themed Bedding: Invest in Mario-themed bedding. It ties the room together and adds comfort.
Lighting: Use themed lamps or nightlights. They add a fun touch and are practical.
Accessories: Add small accessories like Mario plushies, posters, and rugs. These details make the room feel complete.
Common Mistakes to Avoid:
- Overcrowding: Don’t add too many elements. It can make the room feel cluttered.
- Ignoring Scale: Ensure characters and items are proportionate to the room size.
- Poor Quality Paint: Use high-quality paint to avoid chipping and fading.
- Skipping Prep Work: Always prep walls and furniture before painting. Clean, sand, and prime surfaces for the best results.
Material Alternatives:
- Foam Board: Use foam board for creating 3D elements instead of wood. It’s lighter and easier to cut.
- Fabric Paint: For bedding and curtains, use fabric paint instead of buying new items. It’s cost-effective and customizable.
- Peel-and-Stick Tiles: Use peel-and-stick tiles for a quick and easy floor makeover. They come in various designs and are easy to install.
Budgeting for Your Mario Bedroom
Paint:
- Red, Blue, Green, Yellow: $20 per gallon each. Total: $80.
- Primer: $15 per gallon. Total: $15.
- Painter's Tape: $5 per roll. Total: $10 (2 rolls).
Wall Decals:
- Mario Characters: $30.
- Brick Patterns: $20.
- Question Blocks: $15.
Bedding:
- Mario-themed Comforter: $40.
- Pillowcases: $15.
- Sheets: $25.
Furniture:
- Red Paint for Furniture: $20.
- Blue Paint for Furniture: $20.
Accessories:
- Mario Lamp: $25.
- Mario Rug: $30.
- Curtains: $20.
Tools:
- Paint Brushes/Rollers: $15.
- Drop Cloths: $10.
- Screwdrivers: $10.
- Hammer: $10.
Total Cost: $430.
Budget-Friendly Alternatives:
- Use Old Sheets: Paint Mario designs. Save $40.
- DIY Decals: Print and cut. Save $65.
- Reuse Old Furniture: Paint instead of buying new. Save $40.
- Thrift Store Accessories: Find lamps, rugs, curtains. Save $50.
Total Cost with Alternatives: $235.
Unique Variations and Customizations
Wall Colors: Instead of classic Mario red and blue, try green and brown for a Luigi theme or pink and yellow for Princess Peach.
Wall Decals: Use vinyl stickers of different Mario characters or create your own with stencils and paint. You can also add glow-in-the-dark stars for a night-time effect.
Furniture: Paint a dresser to look like a question block or a brick block. Use mushroom-shaped knobs for drawers.
Bedding: Choose bedding with Mario Kart designs if your child loves racing games. For a more subtle look, use solid colors that match the theme and add Mario-themed pillows.
Lighting: Use a mushroom lamp or a star-shaped night light. You can also create a DIY cloud light using cotton and LED lights.
Accessories: Add Mario-themed rugs, curtains, and posters. Create a DIY Mario hat wall hanger for coats and bags.
Alternative Materials: Instead of traditional paint, use removable wallpaper for easy updates. For furniture, consider using reclaimed wood for a rustic look.
Styles: For a modern twist, use minimalist designs with Mario elements. For a vintage feel, incorporate 8-bit graphics and retro colors.
Interactive Elements: Create a DIY Mario game wall with movable pieces or a chalkboard wall for drawing Mario scenes.
Eco-Friendly Tips for Your DIY Project
Step 1: Plan Your Design Sketch your Mario-themed bedroom layout. Decide where to place key elements like Mario, Luigi, and other characters. Measure the walls and furniture to ensure everything fits.
Step 2: Gather Materials Use recycled cardboard for wall decorations. Collect old magazines or printouts for character cutouts. Find eco-friendly paint for murals and furniture. Look for second-hand furniture to repaint or repurpose.
Step 3: Create Wall Art Cut out Mario characters from recycled cardboard. Paint them using eco-friendly paint. Attach them to the walls with reusable adhesive strips. This avoids damaging the walls and allows for easy repositioning.
Step 4: Repurpose Furniture Repaint old furniture with eco-friendly paint. Add Mario-themed decals or stencils. Use fabric scraps to create themed cushions or covers. This reduces waste and adds a personal touch.
Step 5: Make Accessories Craft a Mario-themed lamp using an old lamp base. Paint it with eco-friendly paint and add a Mario figure on top. Create a recycled paper mobile with Mario characters to hang from the ceiling.
Step 6: Use Natural Materials Incorporate natural materials like bamboo or reclaimed wood for shelves and frames. These materials are sustainable and add a rustic touch to the room.
Step 7: Lighting Use LED bulbs for energy-efficient lighting. Consider a Mario-themed night light made from recycled materials. This saves energy and adds to the theme.
Step 8: Final Touches Add Mario-themed bedding made from organic cotton. Use recycled plastic bins for storage. These small changes make a big difference in sustainability.
Step 9: Involve the Kids Get the kids involved in crafting and painting. This makes the project fun and teaches them about sustainability. Use non-toxic materials to ensure safety.
Step 10: Maintain and Update Keep the room updated with new Mario-themed items made from recycled or eco-friendly materials. This keeps the room fresh and sustainable.
Your Mario Bedroom Awaits
You've got all the tools and tips to transform a room into a Mario wonderland. From painting walls with iconic characters to crafting DIY decor, every step brings you closer to a space that screams fun and adventure. Remember, creativity is your best friend here. Mix and match ideas, add personal touches, and don't stress over perfection. The joy lies in the process and the memories you'll create along the way. Whether it's a mural of Mario jumping for coins or a cozy corner with themed pillows, each detail adds magic. Now, grab those paintbrushes, gather your materials, and let your imagination run wild. Your Mario-themed bedroom is just a few DIY projects away from becoming a reality. Happy decorating!
How do I start decorating a Mario-themed bedroom?
Begin by choosing a color scheme. Mario's world is full of bright colors like red, blue, green, and yellow. Paint the walls or use Mario-themed wallpaper to set the stage.
What kind of furniture works best for a Mario bedroom?
Look for simple, sturdy furniture. You can add Mario-themed stickers or decals to dressers, beds, and desks. A red bedspread or blue curtains can tie the room together.
Where can I find Mario-themed decor items?
Check out online stores like Amazon or Etsy for Mario posters, bedding, and toys. Local toy stores might also have Mario-themed items.
Can I make any Mario decor myself?
Absolutely! Create DIY wall art using stencils and paint. Make question block shelves or mushroom pillows with some basic crafting supplies.
How can I add Mario characters to the room?
Use wall decals or posters of Mario, Luigi, Princess Peach, and other characters. You can also place Mario plush toys on the bed or shelves.
What lighting works best for a Mario-themed room?
Go for fun, colorful lamps. You can even find Mario-themed nightlights or create your own using Mario stickers on a plain lamp.
How do I keep the room from looking too busy?
Stick to a consistent color scheme and limit the number of characters and items. Focus on a few key pieces to make the theme clear without overwhelming the space.