
Home>Home & Furniture>Bathroom>How to Create a Stylish Wet Room Bathroom
Bathroom
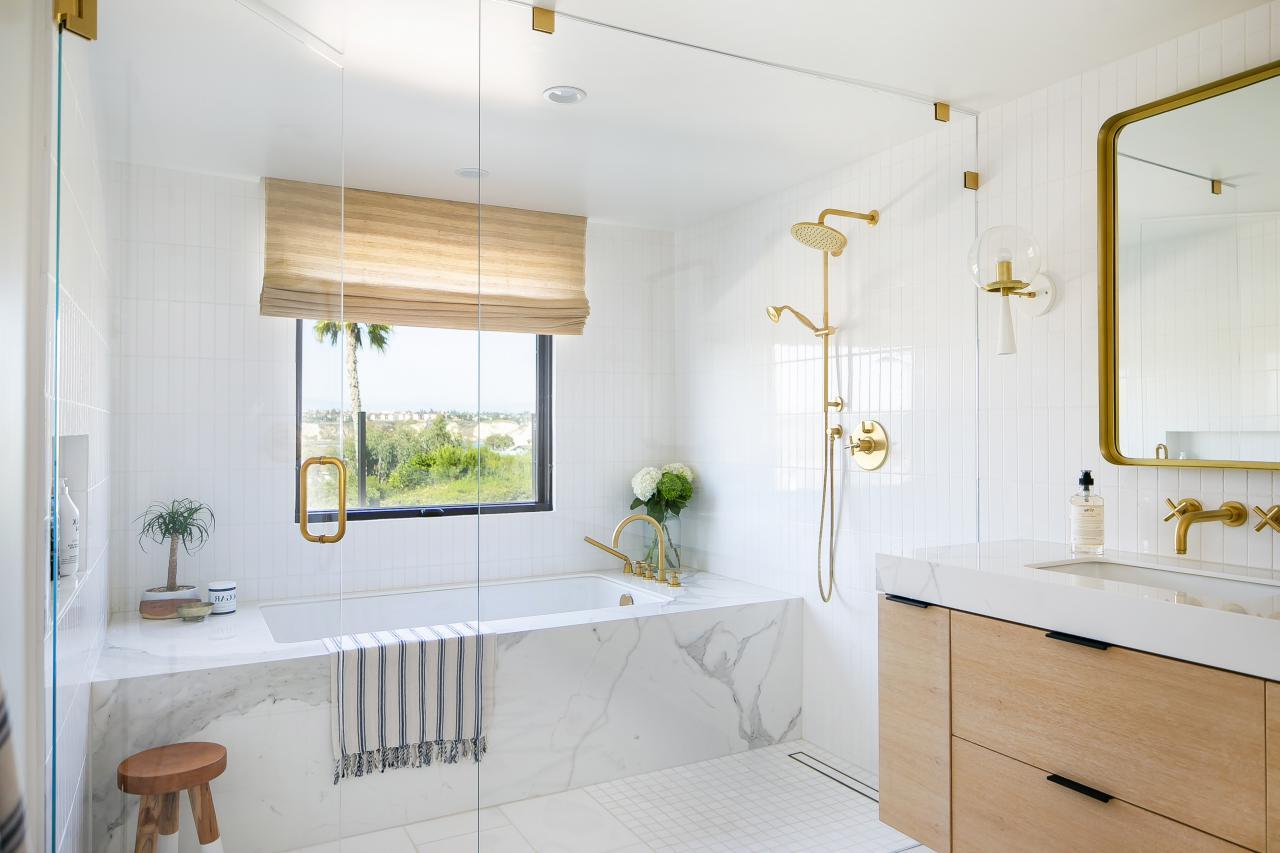
How to Create a Stylish Wet Room Bathroom
Published: July 18, 2024
Discover expert tips on creating a stylish wet room bathroom. Learn design ideas, essential features, and practical advice for a chic, functional space.
(Many of the links in this article redirect to a specific reviewed product. Your purchase of these products through affiliate links helps to generate commission for Twigandthistle.com, at no extra cost. Learn more)
Creating a stylish wet room bathroom can make your home feel modern and luxurious. Unlike traditional bathrooms, wet rooms open up the space, making it perfect for smaller areas. They can also add value to your home, offering a sleek, easy-to-clean design. With a little planning, you can transform your bathroom into a spa-like retreat. From choosing the right materials to adding those final touches, every step plays a role in achieving that perfect look. Ready to roll up your sleeves? Let’s dive into how you can make your dream wet room a reality.
Getting Ready for Your Wet Room Bathroom
Plan the Layout: Measure the space carefully. Decide where the shower, toilet, and sink will go. Make sure there's enough room for everything.
Gather Materials: Get waterproofing materials, tiles, a drain system, and fixtures. Make a list to avoid multiple trips to the store.
Set Up Workspace: Clear the area of any obstacles. Lay down protective sheets to keep the rest of the house clean.
Safety Gear: Wear gloves, goggles, and a mask. Keep a first aid kit nearby.
Turn Off Water Supply: Shut off the main water valve to avoid leaks or flooding.
Remove Old Fixtures: Carefully take out the old shower, toilet, and sink. Use a wrench and screwdriver.
Check Plumbing: Inspect pipes for leaks or damage. Replace any faulty parts before proceeding.
Waterproofing: Apply a waterproof membrane to walls and floors. Let it dry completely.
Install Drain System: Position the drain in the lowest part of the floor. Ensure it slopes correctly for proper water flow.
Tile Installation: Start tiling from the floor up. Use spacers for even gaps. Let the adhesive set before grouting.
Ventilation: Install an exhaust fan to prevent mold and mildew. Proper airflow is crucial in wet rooms.
Final Touches: Attach fixtures like the showerhead, faucet, and toilet. Seal all edges with silicone to prevent water seepage.
Essential Materials and Tools
- Waterproof Membrane: A special layer to keep water from seeping into walls and floors.
- Tile Adhesive: Sticky substance used to attach tiles to surfaces.
- Tiles: Ceramic or stone pieces for covering walls and floors.
- Grout: Filler for gaps between tiles, keeping them in place.
- Tile Cutter: Tool for cutting tiles to fit corners and edges.
- Trowel: Flat tool for spreading adhesive evenly.
- Spacers: Small pieces to keep tiles evenly spaced.
- Level: Tool to ensure surfaces are even and flat.
- Shower Drain: Special drain designed for wet rooms, allowing water to flow away quickly.
- Sealant: Waterproof material for sealing edges and joints.
- Screed: Layer of material to create a smooth, level floor.
- Paint Roller: Tool for applying waterproof membrane.
- Bucket: Container for mixing grout and adhesive.
- Sponge: Used for cleaning excess grout from tiles.
- Protective Gear: Gloves, goggles, and masks to keep safe while working.
Required Skills and Time Commitment
Skill Level: Advanced
Time Required: 2-3 weeks
- Planning and Design: 2-3 days
- Demolition and Preparation: 2-4 days
- Plumbing Installation: 3-5 days
- Waterproofing: 2-3 days
- Tiling: 3-5 days
- Fixture Installation: 1-2 days
- Finishing Touches: 1-2 days
Detailed Step-by-Step Guide
Plan the Layout
- Measure the bathroom space.
- Decide where the shower, toilet, and sink will go.
- Ensure proper drainage slope.
Prepare the Room
- Remove old fixtures and tiles.
- Clean the walls and floor thoroughly.
- Check for any water damage or mold.
Install Waterproof Membrane
- Apply a waterproof membrane to the floor and walls.
- Seal all corners and joints with waterproof tape.
- Let the membrane dry completely.
Install the Drainage System
- Choose a linear or point drain.
- Install the drain at the lowest point of the floor.
- Ensure the floor slopes towards the drain.
Tile the Floor and Walls
- Start with the floor tiles, ensuring a slight slope.
- Use waterproof adhesive for the tiles.
- Grout the tiles with waterproof grout.
Install Fixtures
- Attach the showerhead and controls.
- Install the toilet and sink.
- Ensure all plumbing connections are secure.
Seal and Finish
- Apply silicone sealant around fixtures and edges.
- Check for any gaps or leaks.
- Clean the tiles and fixtures.
Test the Wet Room
- Turn on the shower to test drainage.
- Check for any leaks or water pooling.
- Make any necessary adjustments.
Helpful Tips and Tricks
Plan the Layout: Ensure proper drainage by sloping the floor slightly towards the drain. Keep the shower area away from the door to prevent water from escaping.
Waterproofing: Use a waterproof membrane on walls and floors. Apply waterproof tape on joints and corners to avoid leaks.
Ventilation: Install an extractor fan to reduce moisture and prevent mold. A window can also help with ventilation.
Choose the Right Materials: Use non-slip tiles for safety. Large tiles reduce grout lines, making cleaning easier.
Fixtures and Fittings: Wall-mounted fixtures save space and make cleaning simpler. Opt for a rainfall showerhead for a luxurious feel.
Lighting: Use waterproof LED lights for a modern look. Place lights strategically to avoid shadows.
Storage: Install recessed shelves to keep toiletries organized without taking up space. Use waterproof materials for shelves.
Heating: Underfloor heating keeps the room warm and helps dry the floor quickly. Heated towel rails add comfort and style.
Common Mistakes to Avoid:
- Skipping waterproofing steps can lead to leaks.
- Poor ventilation causes mold and mildew.
- Using slippery tiles increases the risk of falls.
- Ignoring proper drainage can result in water pooling.
Alternatives for Materials or Methods:
- Instead of tiles, consider waterproof vinyl flooring.
- Use waterproof paint on walls as an alternative to tiles.
- For a budget-friendly option, use a shower curtain instead of a glass screen.
Budgeting for Your Project
Waterproofing materials: Expect to spend around $200-$300 for waterproof membranes and sealants. Tiles: Floor and wall tiles can range from $2 to $10 per square foot. For a 100 sq. ft. area, budget $200-$1,000. Shower fixtures: A basic showerhead and controls set costs $100-$300. High-end options can go up to $1,000. Drainage system: A quality linear drain costs $100-$300. Toilet and sink: Basic models start at $100 each, while designer options can reach $500 or more. Lighting: Waterproof LED lights cost $50-$150 each. Ventilation: A good exhaust fan costs $50-$200. Tools: Basic tools like trowels, tile cutters, and levels might cost around $100-$200 if you don't already have them.
Budget-friendly alternatives: Use vinyl flooring instead of tiles, costing $1-$3 per square foot. Opt for basic fixtures and fittings, which can save $200-$500. Consider second-hand or refurbished items for toilets and sinks, potentially saving $100-$200.
Unique Variations and Customizations
Tiles: Use mosaic tiles for a colorful, intricate look. Large slate tiles give a natural, earthy feel. Marble tiles add luxury.
Showerheads: Install a rainfall showerhead for a spa-like experience. A handheld showerhead offers flexibility. Dual showerheads provide both options.
Walls: Paint walls with waterproof paint in bold colors like navy or emerald. Use glass panels for a modern, open feel. Wood paneling treated for moisture can add warmth.
Flooring: Choose non-slip tiles for safety. Pebble flooring gives a natural, massage-like feel. Heated floors add comfort, especially in colder climates.
Storage: Install built-in niches for a sleek look. Use floating shelves to save space. Vanity cabinets can provide extra storage.
Lighting: Add LED strip lights under shelves for a modern touch. Use recessed lighting for a clean, unobtrusive look. Pendant lights can add a stylish focal point.
Fixtures: Choose brushed nickel for a contemporary look. Matte black fixtures add a bold, modern touch. Brass fixtures give a vintage feel.
Doors: Use a frameless glass door for an open, airy feel. A sliding barn door can add rustic charm. Frosted glass doors offer privacy while still letting light through.
Accessories: Add plants for a touch of nature. Use mirrors with built-in lighting for functionality. Towel warmers add a touch of luxury.
Eco-Friendly Ideas
Reclaimed wood can add warmth and character to your wet room. Use it for shelving or even as a feature wall. Recycled glass tiles are another great option. They come in various colors and styles, making it easy to find something that fits your design.
Low-flow fixtures help save water without sacrificing performance. Look for showerheads and faucets designed to reduce water usage. Natural stone like slate or granite is durable and adds a touch of luxury. Ensure the stone is sourced responsibly.
Eco-friendly paint is essential. Choose paints with low or no VOCs (volatile organic compounds) to improve air quality. Bamboo is a sustainable material that grows quickly. Use it for flooring or accessories like towel racks.
LED lighting is energy-efficient and long-lasting. Install dimmable LED lights to create a relaxing atmosphere. Upcycled furniture can add a unique touch. Repurpose old cabinets or tables for storage solutions.
Green plants improve air quality and add a natural element. Choose moisture-loving plants like ferns or spider plants. Insulation is crucial. Properly insulate walls and floors to maintain temperature and reduce energy use.
Natural ventilation helps reduce humidity and mold. Install windows or vents to allow fresh air to circulate. Waterproof membranes made from recycled materials can be used to protect walls and floors from moisture.
Solar water heaters can provide hot water while reducing energy consumption. Consider installing one if possible. Non-toxic cleaners keep your wet room clean without harmful chemicals. Look for eco-friendly cleaning products.
Your Wet Room Awaits
Creating a stylish wet room bathroom isn't as tough as it seems. With careful planning, the right materials, and a bit of elbow grease, you can transform your space into a modern, functional oasis. Remember to focus on waterproofing, proper drainage, and choosing non-slip flooring. These elements ensure safety and longevity. Don't forget to add personal touches like decorative tiles or sleek fixtures to make the space truly yours. Whether you're tackling this project solo or with some help, the end result will be worth the effort. Your new wet room will not only add value to your home but also provide a luxurious retreat for you to enjoy. So, roll up your sleeves, gather your tools, and get started on creating the bathroom of your dreams. Happy DIY-ing!
What is a wet room bathroom?
A wet room bathroom is a fully waterproofed space where the shower area is level with the rest of the floor. No need for a separate shower tray or enclosure.
How do you waterproof a wet room?
To waterproof a wet room, use a waterproof membrane on floors and walls. Seal all joints and corners with waterproof tape. Apply a waterproof coating over the membrane for extra protection.
What kind of flooring is best for a wet room?
Non-slip tiles are ideal for wet room floors. They provide good grip and are easy to clean. Vinyl flooring is another great option due to its waterproof nature.
Do I need a special drain for a wet room?
Yes, a linear drain or a central drain is essential. These drains help direct water flow efficiently, preventing puddles and ensuring the floor dries quickly.
Can I install underfloor heating in a wet room?
Absolutely! Underfloor heating is perfect for wet rooms. It keeps the floor warm and helps evaporate water faster, reducing the risk of mold.
How do I prevent water from escaping the wet room area?
Use a shower screen or a partial glass wall to contain water spray. Ensure the floor slopes slightly towards the drain to guide water away effectively.
Are wet rooms suitable for small bathrooms?
Yes, wet rooms can make small bathrooms feel more spacious. By eliminating bulky shower enclosures, you create a more open and airy feel.