
Home>Home & Furniture>Bathroom>How to Build DIY Tile Countertops
Bathroom
How to Build DIY Tile Countertops
Published: July 17, 2024
Learn how to build stunning DIY tile countertops with our step-by-step guide. Discover tips on materials, tools, and techniques to create a durable and stylish surface.
(Many of the links in this article redirect to a specific reviewed product. Your purchase of these products through affiliate links helps to generate commission for Twigandthistle.com, at no extra cost. Learn more)
Thinking of giving your kitchen or bathroom a fresh look without spending too much? Building your own tile countertops might be just the project for you. Not only do they add a stylish touch, but they’re also practical and durable. Plus, you can customize them to match your personal taste. Whether you're a DIY newbie or a seasoned pro, creating tile countertops can be a fun and rewarding experience. Let's dive into the basics and get you started on transforming your space with a unique and affordable upgrade. Ready to tackle this project? Let’s get started!
Getting Ready for Your Project
Gather Materials: Get tiles, adhesive, grout, spacers, a notched trowel, a tile cutter, and safety gear like gloves and goggles.
Measure and Plan: Measure the countertop area. Sketch a layout to determine how many tiles you need.
Clear the Workspace: Remove any items from the countertop. Clean the surface thoroughly to ensure proper adhesion.
Safety First: Wear gloves and goggles to protect your hands and eyes from sharp edges and dust.
Prepare the Surface: Sand the countertop lightly to roughen it up. This helps the adhesive stick better.
Cut Tiles: Use a tile cutter to trim tiles to fit around edges and corners.
Dry Fit: Lay out the tiles without adhesive to check the fit. Adjust as needed.
Mix Adhesive: Follow the instructions on the adhesive package. Mix only what you can use in 30 minutes.
Apply Adhesive: Use a notched trowel to spread adhesive on a small section of the countertop.
Place Tiles: Press tiles into the adhesive. Use spacers to keep gaps even.
Let it Set: Allow the adhesive to dry for at least 24 hours before grouting.
Mix Grout: Follow the package instructions. Mix until it’s the consistency of peanut butter.
Apply Grout: Use a grout float to spread grout over the tiles. Fill all gaps.
Clean Excess Grout: Wipe off excess grout with a damp sponge. Rinse the sponge frequently.
Seal Grout: After the grout dries, apply a grout sealer to protect it from stains and moisture.
Gather Your Materials and Tools
Materials and Tools Needed:
- Tiles: Choose ceramic, porcelain, or stone tiles. These will form the countertop surface.
- Tile Adhesive: Used to stick tiles to the countertop base. Make sure it’s suitable for your tile type.
- Grout: Fills gaps between tiles. Pick a color that complements your tiles.
- Tile Spacers: Ensure even spacing between tiles. They come in various sizes.
- Tile Cutter: Cuts tiles to fit edges and corners. Manual or electric options are available.
- Notched Trowel: Spreads adhesive evenly on the surface. The notches help create grooves for better adhesion.
- Grout Float: Helps spread grout into tile joints. It has a flat, rubber surface.
- Sponge: Cleans excess grout from tiles. Use a damp sponge for best results.
- Level: Ensures tiles are even and flat. A small bubble level works well.
- Measuring Tape: Measures the countertop area and tile cuts. Accurate measurements are crucial.
- Pencil: Marks cutting lines on tiles. Use a pencil that’s easy to see.
- Safety Gear: Includes gloves, goggles, and a dust mask. Protects you from sharp edges and dust.
- Bucket: Mixes grout and adhesive. A sturdy plastic bucket works best.
- Rubber Mallet: Taps tiles into place without breaking them. Gentle taps ensure proper adhesion.
- Tile Sealer: Protects grout and tiles from stains. Apply after grout has cured.
These materials and tools will help you create a beautiful, durable tile countertop.
Skill Level and Time Commitment
Skill Level: Intermediate
Time Required: 2-3 days
- Preparation and Planning: 2-3 hours
- Removing Old Countertop: 2-4 hours
- Cutting and Installing Backer Board: 3-4 hours
- Laying Out Tiles: 2-3 hours
- Applying Adhesive and Setting Tiles: 4-6 hours
- Grouting and Sealing: 4-6 hours
- Drying Time: 24 hours
Follow These Steps
Gather Materials:
- Tiles
- Tile adhesive
- Grout
- Tile spacers
- Notched trowel
- Grout float
- Sponge
- Measuring tape
- Level
- Tile cutter or wet saw
- Plywood
- Cement backer board
- Screws
- Screwdriver
Prepare the Surface:
- Measure the countertop area.
- Cut plywood to fit the countertop dimensions.
- Secure plywood to the cabinets using screws.
- Cut cement backer board to fit over the plywood.
- Attach backer board to plywood with screws, ensuring it is level.
Plan Tile Layout:
- Lay out tiles on the countertop without adhesive to determine the best fit.
- Use tile spacers to maintain even gaps between tiles.
- Adjust tiles as needed to minimize small cuts at edges.
Apply Tile Adhesive:
- Spread tile adhesive on a small section of the backer board using a notched trowel.
- Comb adhesive with the notched side to create grooves.
Place Tiles:
- Press tiles into the adhesive, starting from the center and working outward.
- Use tile spacers to keep gaps even.
- Continue until all tiles are placed.
Cut Tiles:
- Measure and mark tiles that need cutting.
- Use a tile cutter or wet saw to cut tiles to fit edges and corners.
- Place cut tiles in adhesive.
Let Adhesive Dry:
- Allow adhesive to dry according to manufacturer’s instructions, usually 24 hours.
Apply Grout:
- Remove tile spacers.
- Mix grout according to package instructions.
- Spread grout over tiles using a grout float, pressing it into gaps.
Clean Excess Grout:
- Wipe excess grout from tile surfaces with a damp sponge.
- Rinse sponge frequently to keep it clean.
Let Grout Cure:
- Allow grout to cure as per manufacturer’s instructions, typically 24-48 hours.
Seal Grout:
- Apply grout sealer to protect grout from stains and moisture.
- Follow sealer instructions for application and drying times.
Finishing Touches:
- Install any edge trim or backsplash tiles if desired.
- Clean tiles thoroughly to remove any remaining grout haze.
Helpful Tips and Tricks
Measure Twice, Cut Once: Always double-check measurements before cutting tiles. Mistakes can be costly.
Use a Tile Spacer: Tile spacers help keep grout lines even. This ensures a professional look.
Seal the Plywood: Apply a waterproof sealant to the plywood base. This prevents water damage.
Dry Fit First: Lay out tiles without adhesive first. This helps visualize the final look and make adjustments.
Mix Small Batches of Thinset: Thinset can dry quickly. Mixing small batches ensures it stays workable.
Use a Level: Check that tiles are level as you go. Uneven tiles can cause issues later.
Clean as You Go: Wipe off excess thinset and grout immediately. Dried thinset is hard to remove.
Grout Sealer: Apply grout sealer after the grout dries. This protects against stains and moisture.
Common Mistakes to Avoid:
Skipping the Sealant: Not sealing the plywood can lead to water damage.
Uneven Spacing: Not using spacers can result in uneven grout lines.
Rushing the Job: Allow proper drying time for thinset and grout. Rushing can cause tiles to shift.
Alternatives for Materials or Methods:
Plywood Base: Instead of plywood, use cement backer board. It’s more water-resistant.
Epoxy Grout: Use epoxy grout instead of traditional grout. It’s more durable and stain-resistant.
Peel-and-Stick Tiles: For a quicker project, consider peel-and-stick tiles. They’re easier to install and remove.
Estimating the Cost
Tiles: $2 - $10 per square foot, depending on material and design.
Tile adhesive: $20 - $30 for a 25-pound bag.
Grout: $10 - $20 for a 10-pound bag.
Backer board: $10 - $15 per sheet (3x5 feet).
Edge trim: $1 - $3 per linear foot.
Sealer: $15 - $25 per quart.
Notched trowel: $5 - $10.
Grout float: $5 - $10.
Tile spacers: $3 - $5 per pack.
Tile cutter: $20 - $50 (or rent for $10 - $20 per day).
Sponge: $2 - $5.
Bucket: $3 - $5.
Safety gear: $10 - $20 for gloves and goggles.
Total cost: Approximately $150 - $400, depending on the size of the countertop and materials chosen.
Budget-friendly alternatives:
- Use ceramic tiles instead of natural stone.
- Borrow or rent tools from friends or a local hardware store.
- Look for sales or discounts on tiles and materials.
Different Ways to Customize
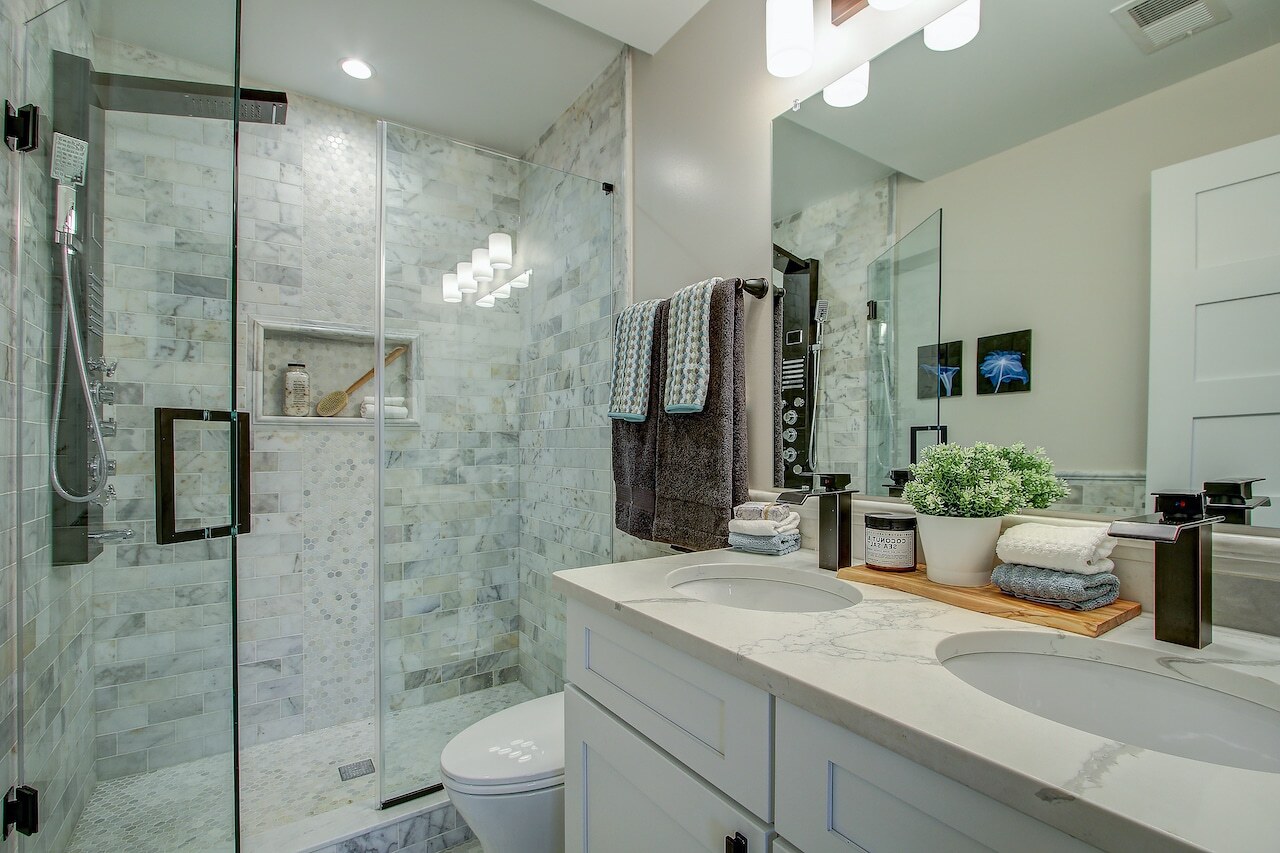
Materials: Instead of traditional ceramic tiles, consider using glass tiles for a sleek, modern look. Marble tiles add a touch of luxury, while porcelain tiles offer durability. For a rustic feel, try terracotta tiles.
Colors: Choose bright, bold colors like red or blue for a vibrant kitchen. Neutral tones like beige or gray create a calm, sophisticated atmosphere. Mix and match different colors to create unique patterns or mosaics.
Styles: For a classic look, use subway tiles arranged in a brick pattern. Hexagon tiles offer a trendy, geometric style. Moroccan tiles bring an exotic flair with intricate designs. Penny tiles can create a retro vibe.
Grout: Use colored grout to make the tiles pop or clear grout for a seamless look. Epoxy grout is more durable and stain-resistant compared to traditional grout.
Edges: Finish the edges with bullnose tiles for a smooth, rounded look. Metal trim can add a modern touch, while wood trim offers a warm, natural finish.
Patterns: Create a herringbone pattern for a dynamic look. Checkerboard patterns add a playful element. Randomly placed tiles can create an artistic, eclectic feel.
Sealants: Use a high-gloss sealant for a shiny, reflective surface. Matte sealants provide a more subdued, natural finish. Waterproof sealants are essential for areas prone to spills.
Backsplash: Extend the tile design to the backsplash for a cohesive look. Use contrasting tiles for the backsplash to create visual interest. Mirror tiles can make the space feel larger.
Inlays: Incorporate decorative inlays like medallions or accent tiles to add focal points. Metal inlays can add a touch of industrial chic. Glass inlays provide a modern, sleek appearance.
Underlayment: Use cement board for a sturdy base. Plywood can be a budget-friendly option. Foam backer board is lightweight and easy to cut.
Finishing Touches: Add LED strip lights under the countertop edge for a modern touch. Install outlets with USB ports for added functionality. Use silicone caulk around the edges for a clean, finished look.
Eco-Friendly Ideas
Reclaimed tiles can be a great choice. Look for tiles from old buildings or renovation projects. These tiles often have unique patterns and colors, adding character to your countertop.
Eco-friendly adhesives are available. Choose low-VOC (volatile organic compounds) adhesives to reduce harmful emissions. These are better for indoor air quality.
Recycled glass tiles are another option. Made from post-consumer glass, they come in various colors and styles. They are durable and add a modern touch.
Natural grout can be used instead of synthetic options. Look for grout made from natural materials like sand and lime. It’s less harmful to the environment.
Sealants should also be eco-friendly. Choose water-based sealants with low VOCs. They protect your countertop without releasing harmful chemicals.
Salvaged wood can be used for the countertop base. Old barn wood or reclaimed lumber adds a rustic feel and reduces the need for new materials.
Energy-efficient tools should be used during construction. Battery-powered tools with rechargeable batteries can save energy and reduce waste.
Recycling waste from your project is important. Separate tiles, wood, and other materials to ensure they are properly recycled.
Upcycling old furniture into a countertop base can be creative. An old dresser or table can be repurposed, giving it new life and reducing waste.
Local materials reduce the carbon footprint. Sourcing tiles and other materials from local suppliers cuts down on transportation emissions.
Your DIY Tile Countertop Awaits
You've got all the tools and know-how to tackle this project. Start by prepping your surface, ensuring it's clean and level. Lay out your tiles to get a sense of the pattern, then apply adhesive and set the tiles in place. Don't forget to use spacers for even gaps. Once the adhesive sets, apply grout to fill the spaces between tiles. Wipe away excess grout with a damp sponge. After everything dries, seal the grout to protect against stains and moisture.
Remember, patience is key. Take your time to ensure each step is done correctly. Before you know it, you'll have a stunning, custom tile countertop that adds a personal touch to your space. Enjoy the satisfaction of a job well done and the beauty of your new countertop!
How do I choose the right tiles for my countertop?
Pick tiles that are durable, heat-resistant, and easy to clean. Porcelain or ceramic tiles work great. Make sure they match your kitchen's style.
What tools will I need for this project?
You'll need a tile cutter, notched trowel, tile spacers, grout float, level, measuring tape, and safety gear like gloves and goggles.
How do I prepare the surface before tiling?
Clean the countertop thoroughly. Sand it down if it's rough. Apply a cement backer board to ensure a smooth, stable surface for the tiles.
What's the best way to apply the tiles?
Spread thin-set mortar with a notched trowel. Press each tile firmly into place, using spacers to keep them evenly spaced. Check with a level as you go.
How long does it take for the mortar to set?
Let the mortar set for at least 24 hours before grouting. This ensures the tiles are firmly in place.
How do I apply the grout?
Mix the grout according to the package instructions. Use a grout float to spread it over the tiles, pressing it into the gaps. Wipe off excess with a damp sponge.
How do I maintain my new tile countertop?
Clean regularly with a mild cleaner and a soft cloth. Avoid harsh chemicals. Seal the grout every 6 months to keep it looking fresh.