
Home>Home & Furniture>Bathroom>DIY Unclog Bathroom Sink: Step-by-step Guide
Bathroom
DIY Unclog Bathroom Sink: Step-by-step Guide
Published: July 17, 2024
Learn how to unclog your bathroom sink with our easy, step-by-step DIY guide. Save time and money by tackling this common issue yourself with simple tools and tips.
(Many of the links in this article redirect to a specific reviewed product. Your purchase of these products through affiliate links helps to generate commission for Twigandthistle.com, at no extra cost. Learn more)
Clogged bathroom sinks are a common issue that can disrupt daily routines. Hiring a plumber can be expensive, and sometimes, the problem isn't severe enough to require professional help. Luckily, unclogging a bathroom sink is a manageable task you can do yourself with some basic tools and a little patience. This guide will walk you through the steps to get your sink draining smoothly again. Whether it’s hair, soap scum, or other debris causing the blockage, this straightforward approach will help you tackle the problem efficiently without breaking the bank. Let's get started!
Getting Ready for the Task
- Gather Tools: Get a plunger, bucket, wrench, plumber's snake, and rubber gloves.
- Clear the Area: Remove items from under the sink to create a clear workspace.
- Safety First: Wear rubber gloves to protect your hands from dirty water and chemicals.
- Turn Off Water: Shut off the water supply to avoid any accidental spills.
- Place Bucket: Position a bucket under the sink to catch any water or debris.
- Remove P-Trap: Use a wrench to loosen and remove the P-trap, the curved pipe under the sink.
- Check for Blockages: Inspect the P-trap for any clogs and clean it out.
- Use Plunger: If the clog persists, use a plunger to try and dislodge it.
- Plumber's Snake: For stubborn clogs, insert a plumber's snake into the drain to break up the blockage.
- Reassemble: Once clear, reattach the P-trap and ensure all connections are tight.
- Test: Turn the water back on and test the sink to ensure it's draining properly.
Gather Your Materials and Tools
- Plunger: A simple tool with a rubber cup on one end. Used to create suction and pressure to dislodge clogs.
- Drain Snake: A flexible, long tool that can reach deep into pipes to break up or pull out blockages.
- Bucket: Placed under the sink to catch water and debris when removing the drain trap.
- Adjustable Wrench: Used to loosen and tighten nuts on the drain trap.
- Rubber Gloves: Protects hands from dirty water and debris.
- Baking Soda and Vinegar: Natural cleaning agents that can help dissolve minor clogs.
- Old Toothbrush: Useful for scrubbing away grime from the drain and trap.
- Flashlight: Helps to see inside dark pipes and under the sink.
- Pipe Brush: A long, flexible brush designed to clean the inside of pipes.
- Towels or Rags: Used to clean up spills and dry off tools and hands.
Skill Level and Time Commitment
Skill Level: Beginner
Time Required: 30-45 minutes
- Gather Tools: Plunger, bucket, wrench, plumber's snake, baking soda, vinegar.
- Remove Debris: Clear visible debris from the sink drain.
- Use Plunger: Place plunger over the drain, push down, and pull up several times.
- Check P-Trap: Place bucket under the sink, use wrench to remove P-trap, clean out debris.
- Use Plumber's Snake: Insert snake into the drain, twist to break up clogs.
- Flush with Solution: Pour baking soda followed by vinegar down the drain, wait 15 minutes, then flush with hot water.
Estimated Time: 30-45 minutes
Detailed Steps to Unclog Your Sink
Gather Supplies:
- Rubber gloves
- Bucket
- Plunger
- Pipe wrench
- Plumber's snake or wire hanger
- Baking soda and vinegar (optional)
- Old toothbrush
Prepare the Area:
- Clear items from under the sink.
- Place a bucket under the sink to catch water.
Remove the Stopper:
- Pull out the sink stopper. If it’s stuck, twist and lift.
Use a Plunger:
- Fill the sink with some water.
- Place the plunger over the drain.
- Push down and pull up quickly several times.
- Check if the water drains. If not, move to the next step.
Check the P-Trap:
- Locate the P-trap (curved pipe) under the sink.
- Use a pipe wrench to loosen the nuts on both ends.
- Remove the P-trap and empty its contents into the bucket.
- Clean the P-trap with an old toothbrush.
- Reattach the P-trap.
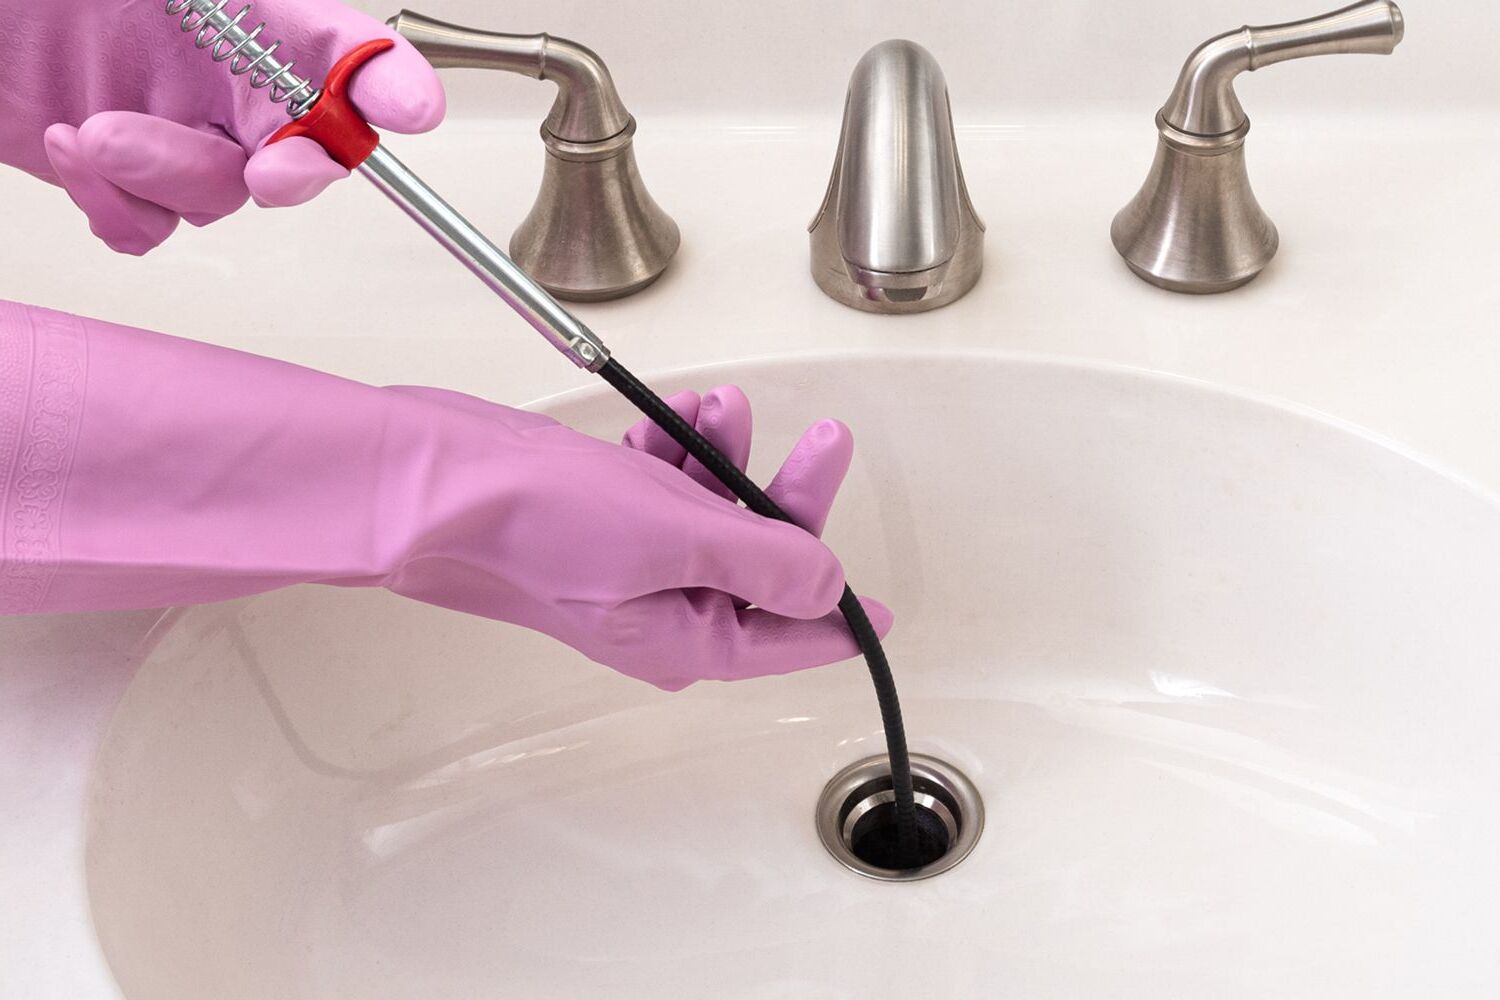
Use a Plumber's Snake:
- Insert the plumber's snake into the drain.
- Turn the handle to push it further down.
- When you feel resistance, turn the handle to break up the clog.
- Pull out the snake and clean off any debris.
Flush with Baking Soda and Vinegar (Optional):
- Pour 1/2 cup of baking soda into the drain.
- Follow with 1/2 cup of vinegar.
- Let it sit for 15 minutes.
- Flush with hot water.
Test the Drain:
- Run water to see if it drains properly.
- If still clogged, repeat the steps or consider calling a professional.
Clean Up:
- Dispose of any debris.
- Wipe down the area.
- Return items under the sink.
Helpful Tips and Tricks
Use a Plunger: Fill the sink halfway with water. Place the plunger over the drain, ensuring a tight seal. Push down and pull up rapidly to create suction. This can often dislodge minor clogs.
Baking Soda and Vinegar: Pour half a cup of baking soda down the drain, followed by half a cup of vinegar. Cover the drain with a wet cloth to contain the fizzing reaction. Wait 15 minutes, then flush with hot water.
Remove the P-Trap: Place a bucket under the sink to catch water. Unscrew the P-trap (the U-shaped pipe) and remove it. Clean out any debris or gunk inside, then reattach.
Use a Drain Snake: Insert a drain snake into the drain and twist it to catch the clog. Pull out the snake and dispose of the debris. Repeat if necessary.
Boiling Water: Boil a kettle of water and carefully pour it down the drain in stages. This can help dissolve soap scum or grease.
Avoid Chemical Drain Cleaners: These can damage pipes and are harmful to the environment. Stick to natural methods whenever possible.
Check the Pop-Up Stopper: Sometimes hair and gunk get stuck around the pop-up stopper. Remove it and clean thoroughly before reinserting.
Use a Wet/Dry Vacuum: Set the vacuum to liquid mode. Create a tight seal around the drain with a wet cloth and turn on the vacuum to suck out the clog.
Common Mistakes to Avoid:
- Forcing the Plunger: Too much force can damage pipes.
- Ignoring Safety: Always wear gloves and goggles when dealing with clogs.
- Overusing Chemicals: Can corrode pipes and harm the environment.
- Skipping Regular Maintenance: Regularly clean drains to prevent clogs.
Alternative Methods:
- Wire Hanger: Straighten a wire hanger, leaving a small hook at the end. Use it to fish out clogs.
- Dish Soap and Hot Water: Pour dish soap down the drain, followed by hot water. This can help break down grease.
- Enzyme Cleaners: Use enzyme-based cleaners that are safe for pipes and environmentally friendly.
Estimating the Cost
Plunger: $10-$15
Drain Snake: $15-$25
Baking Soda: $1-$2
Vinegar: $2-$3
Bucket: $5-$10
Rubber Gloves: $2-$5
Wrench: $10-$20
Old Toothbrush: Free or $1
Total Cost: $45-$81
Budget-Friendly Alternatives:
Wire Hanger (instead of a drain snake): Free
Plastic Bottle (cut to use as a plunger): Free
Old Rags (instead of rubber gloves): Free
Different Approaches and Customizations
Alternative Materials: Instead of using a plunger, try a drain snake or a wire hanger. For a natural solution, mix baking soda and vinegar instead of using commercial drain cleaners.
Colors: Use a colored plunger or decorative drain covers to match your bathroom's theme. Choose brightly colored gloves to make the task more fun.
Styles: Opt for a vintage-style plunger or a modern, sleek drain snake. Use a stylish bucket to catch water instead of a plain one.
Tools: Swap out a standard wrench for an adjustable one with a comfortable grip. Use a multi-tool that combines several functions to save space and effort.
Cleaning Solutions: Instead of harsh chemicals, use eco-friendly cleaners or a mixture of lemon juice and baking soda. Try enzymatic cleaners that break down organic matter naturally.
Storage: Store tools in a decorative basket or a toolbox that matches your bathroom decor. Hang tools on a pegboard for easy access and organization.
Safety Gear: Wear stylish safety goggles and colorful gloves to protect yourself while adding a touch of personality. Use a non-slip mat to prevent accidents.
Additional Tips: Add a scented candle or essential oil diffuser to keep the bathroom smelling fresh during the process. Use a small mirror to see under the sink without straining.
Eco-Friendly Tips
Materials Needed:
- Baking soda
- White vinegar
- Boiling water
- Old toothbrush
- Wire hanger
- Plunger
Step-by-Step Guide:
Remove Debris: Use an old toothbrush to clean around the drain. This helps remove any visible gunk.
Wire Hanger: Straighten a wire hanger, leaving a small hook at one end. Insert the hook into the drain to pull out hair or other debris.
Baking Soda and Vinegar: Pour 1/2 cup of baking soda down the drain. Follow with 1/2 cup of white vinegar. Let the mixture fizz for about 15 minutes. This natural reaction helps break down clogs.
Boiling Water: Boil a kettle of water. Carefully pour the boiling water down the drain. This helps flush out any remaining debris.
Plunger: If the clog persists, use a plunger. Place it over the drain and pump vigorously. The suction can help dislodge stubborn clogs.
Repeat if Necessary: Sometimes, repeating the baking soda, vinegar, and boiling water steps may be needed for tougher clogs.
Eco-friendly Tips:
- Reuse Materials: Use an old toothbrush and a wire hanger you already have at home.
- Avoid Chemicals: Stick to baking soda and vinegar instead of harsh chemical drain cleaners.
- Recycle: If you need to replace the wire hanger, recycle the old one.
Your Sink's Ready for Action
You did it! Your bathroom sink's now clog-free. With just a few tools and some elbow grease, you tackled a common household issue. Remember, regular maintenance can prevent future clogs. Clean the drain stopper and use a drain cover to catch hair and debris. If you notice slow drainage again, don't wait. Address it early to avoid bigger problems. Keep your tools handy and stay confident in your DIY skills. You've proven you can handle this. Next time a clog appears, you'll know exactly what to do. Happy plumbing!
How do I know if my bathroom sink is clogged?
If water drains slowly or not at all, you've got a clog. You might also notice a gurgling sound or a bad smell.
What tools do I need to unclog my bathroom sink?
You'll need a plunger, a drain snake, baking soda, vinegar, and possibly a wrench. Gloves are a good idea too.
Can I use chemical drain cleaners?
You can, but they're harsh on pipes and the environment. Try natural methods first, like baking soda and vinegar.
How do I use a plunger to unclog the sink?
Fill the sink with enough water to cover the plunger's cup. Place the plunger over the drain, then push and pull rapidly.
What if the plunger doesn't work?
Try a drain snake. Insert it into the drain, twist, and pull out any gunk. You might need to repeat a few times.
How do I prevent future clogs?
Avoid dumping hair, grease, or large food particles down the drain. Use a drain cover to catch debris.
Is it safe to take apart the drain pipe?
Yes, but be careful. Place a bucket underneath to catch water, then use a wrench to loosen the pipe. Clean out any blockages and reassemble.