
Home>Home & Furniture>Bathroom>DIY Bathroom Sink Storage Ideas
Bathroom
DIY Bathroom Sink Storage Ideas
Published: July 18, 2024
Discover creative and practical DIY bathroom sink storage ideas to maximize space and keep your essentials organized. Transform your bathroom with these easy, budget-friendly solutions!
(Many of the links in this article redirect to a specific reviewed product. Your purchase of these products through affiliate links helps to generate commission for Twigandthistle.com, at no extra cost. Learn more)
Tired of the clutter around your bathroom sink? You're not alone. Many people struggle with organizing their bathroom essentials, leading to a messy and chaotic space. Luckily, with a bit of creativity and some basic tools, you can transform your sink area into an organized haven. From repurposed jars to built-in shelves, there are countless DIY solutions that can help you make the most of every inch of space. This guide will provide you with practical and easy-to-follow ideas that can be tailored to fit your bathroom's style and your storage needs. Ready to declutter?
Getting Ready for Your Project
Measure the Space: Use a tape measure to get the dimensions under your sink. This helps in choosing or building storage solutions that fit perfectly.
Clear the Area: Remove everything from under the sink. This gives you a clean slate to work with and prevents any items from getting damaged.
Check for Leaks: Inspect pipes and fittings for any leaks. Fix these before starting your project to avoid water damage to your new storage.
Gather Tools and Materials: Collect all necessary tools like a screwdriver, drill, and materials like shelves, baskets, or organizers. Having everything ready saves time.
Wear Safety Gear: Put on gloves and safety glasses. This protects your hands and eyes from any sharp edges or debris.
Ventilate the Area: Open a window or use a fan. This ensures good airflow, especially if you’re using strong adhesives or paints.
Mark Installation Points: Use a pencil to mark where you’ll install shelves or hooks. This helps in accurate placement and avoids mistakes.
Prepare the Workspace: Lay down a drop cloth or old newspaper. This keeps your bathroom floor clean from dust and debris.
Read Instructions: Go through any manuals or guides that come with your storage items. Understanding the steps beforehand makes the process smoother.
Test Fit: Before final installation, place your storage items under the sink to ensure they fit well. Adjust as needed for a perfect fit.
Gather Your Supplies
Measuring Tape: Essential for measuring the space under the sink accurately.
Plywood: Used to create shelves or dividers. Choose a sturdy type that can handle moisture.
Screws and Nails: Needed to assemble the plywood pieces securely.
Drill: Helps in making holes for screws and installing brackets.
Brackets: Supports shelves and dividers, ensuring they stay in place.
Saw: Used to cut plywood to the required dimensions.
Sandpaper: Smooths out rough edges on the wood.
Paint or Wood Stain: Protects the wood from moisture and gives it a finished look.
Paintbrushes: Needed for applying paint or stain evenly.
Level: Ensures shelves and dividers are installed straight.
Storage Bins or Baskets: Keeps smaller items organized and easily accessible.
Adhesive Hooks: Useful for hanging items like towels or cleaning brushes.
Caulk: Seals any gaps to prevent water damage.
Safety Gear: Includes gloves and goggles to protect yourself while working.
Skill Level and Time Commitment
Skill Level: Beginner
Time Required: 2-4 hours
Install Under-Sink Shelves
- Skill Level: Beginner
- Time Required: 1-2 hours
Add Tension Rods for Hanging Cleaners
- Skill Level: Beginner
- Time Required: 30 minutes
Use Stackable Bins
- Skill Level: Beginner
- Time Required: 30 minutes
Install Pull-Out Drawers
- Skill Level: Intermediate
- Time Required: 2-3 hours
How to Do It: Step-by-Step Guide
Measure the Space
- Use a tape measure to find the dimensions under your sink.
- Note the height, width, and depth.
Choose Storage Solutions
- Pick baskets, bins, or drawers that fit your measurements.
- Consider stackable options for more space.
Install Shelving
- Purchase adjustable shelves if needed.
- Use a drill to attach brackets to the cabinet walls.
- Place the shelf on the brackets.
Add Hooks or Rods
- Attach adhesive hooks to the inside of cabinet doors.
- Install a tension rod for hanging spray bottles.
Organize Items
- Group similar items together.
- Place frequently used items in easy-to-reach spots.
Label Containers
- Use a label maker or stickers.
- Clearly mark each container for quick identification.
Maintain Order
- Regularly check and tidy up the space.
- Remove items no longer needed.
Helpful Hints and Tips
Use vertical space: Install shelves above or beside the sink. This keeps items within reach but off the counter.
Add baskets or bins: Place these under the sink for organizing toiletries. Label them for easy access.
Install hooks: Attach hooks on the inside of cabinet doors for hanging hairdryers or brushes.
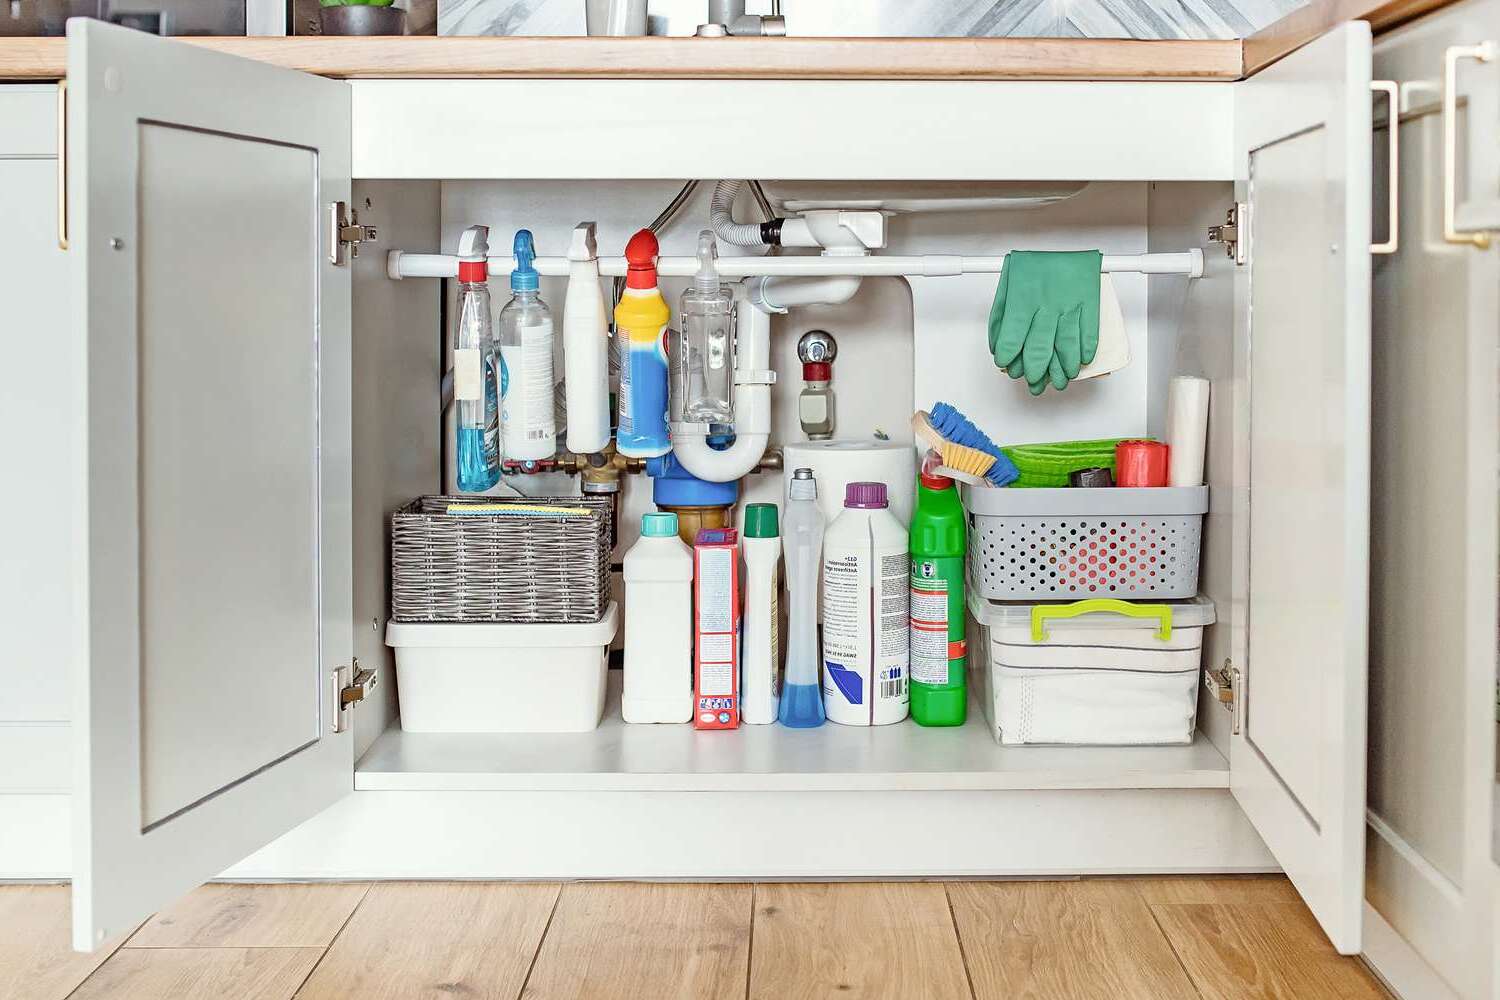
Use tension rods: Place a tension rod under the sink to hang spray bottles or cleaning supplies.
Repurpose items: Use mason jars or old mugs to hold toothbrushes, cotton balls, or makeup brushes.
Drawer organizers: Insert dividers in drawers to keep small items like makeup or hair ties sorted.
Over-the-door organizers: Hang an organizer on the cabinet door to store extra towels or cleaning supplies.
Magnetic strips: Attach a magnetic strip inside a cabinet door to hold tweezers, nail clippers, or bobby pins.
Avoid clutter: Don't overcrowd the space. Keep only what you use daily within easy reach.
Common mistakes to avoid: Overloading shelves can cause them to sag. Make sure to use sturdy brackets. Avoid using cardboard boxes under the sink; they can get damp and fall apart.
Alternatives for materials or methods: Instead of wooden shelves, consider metal or plastic for a modern look. If hooks don't work for you, try adhesive strips or suction cups for hanging items.
Budgeting for Your Project
Materials:
- Wood (for shelves or cabinets): $30-$50
- Paint or Stain: $10-$20
- Brackets (for mounting shelves): $5-$15
- Screws and Nails: $5
- Handles or Knobs: $10-$20
- Hooks (for hanging items): $5-$10
Tools:
- Drill: $40-$60
- Saw: $20-$50
- Screwdriver Set: $10-$20
- Measuring Tape: $5-$10
- Paintbrushes: $5-$10
- Sandpaper: $5
Total Cost: $150-$275
Budget-Friendly Alternatives:
- Repurpose Old Wood: Free or low cost
- Use Leftover Paint: Free
- Buy Second-Hand Tools: Half the price of new
- Skip Handles or Knobs: Use existing ones
- Use Adhesive Hooks: $3-$5
Personalize Your Creation
Floating Shelves: Use reclaimed wood for a rustic look or painted MDF for a modern touch.
Baskets: Wicker baskets add a natural feel, while metal baskets give an industrial vibe.
Under-Sink Cabinets: Opt for sleek, white cabinets for a clean look or dark wood for a more traditional style.
Drawer Organizers: Use bamboo for a warm, eco-friendly option or plastic for easy cleaning.
Tension Rods: Install tension rods to hang cleaning supplies. Choose stainless steel for durability or colored rods to match your decor.
Hanging Bins: Attach bins to the inside of cabinet doors. Clear plastic bins keep items visible, while fabric bins add a soft touch.
Pegboards: Paint pegboards to match your bathroom color scheme. Use metal hooks for a modern look or wooden pegs for a classic feel.
Rolling Carts: Metal carts offer a sleek, industrial look, while wooden carts provide a cozy, farmhouse style.
Over-the-Door Racks: Choose wire racks for a minimalist look or wooden racks for a more substantial feel.
Custom Labels: Create labels for jars and containers. Use chalkboard labels for a vintage look or printed labels for a clean, organized appearance.
Eco-Friendly Ideas
Repurpose old wooden crates for under-sink storage. Sand them down, paint with eco-friendly paint, and stack them for a rustic look.
Use glass jars or metal tins to store small items like cotton balls or hair ties. Decorate with labels or twine for a personal touch.
Install shelves made from reclaimed wood. These can be cut to fit your space and mounted with brackets.
Create storage baskets from old fabric. Weave strips of fabric together to form sturdy, colorful baskets.
Opt for bamboo organizers. Bamboo grows quickly and is a sustainable material. Use bamboo trays or dividers to keep items organized.
Transform old drawers into pull-out storage. Attach wheels to the bottom of an old drawer for easy access under the sink.
Recycle cardboard boxes into drawer dividers. Cut and fit pieces to organize toiletries and cleaning supplies.
Utilize mason jars for toothbrush holders or makeup brush storage. Attach them to a wooden board for a wall-mounted solution.
Make a hanging organizer from an old shoe rack. Cut it to fit the space and hang it on the inside of the cabinet door.
Convert wine crates into wall-mounted shelves. Sand and paint them, then mount them on the wall for extra storage.
Your Bathroom, Your Way
Creating DIY bathroom sink storage solutions can be a game-changer. With just a bit of creativity and elbow grease, you can transform a cluttered space into an organized haven. Whether you’re using floating shelves, baskets, or repurposed items, the key is to make the most of your available space. Don’t be afraid to mix and match materials or styles to suit your taste. Remember, the goal is to make your bathroom both functional and stylish. So, grab those tools, get inspired, and start building. Your bathroom will thank you, and you’ll wonder how you ever lived without these clever storage hacks. Happy DIY-ing!
How can I maximize space under my bathroom sink?
Use stackable bins or drawers. They help you keep things organized and easy to find. You can also add a tension rod to hang spray bottles.
What are some creative storage ideas for small bathrooms?
Try using over-the-door organizers or floating shelves. They save floor space and add extra storage. Magnetic strips can hold small metal items like tweezers or nail clippers.
How do I keep my bathroom sink area clutter-free?
Use trays or baskets to group similar items together. This keeps everything neat and makes cleaning easier. Also, consider wall-mounted storage to free up counter space.
Can I use everyday items for bathroom storage?
Absolutely! Mason jars can hold cotton balls or Q-tips. Old mugs can store toothbrushes or makeup brushes. Even a wine rack can be repurposed to hold rolled-up towels.
What’s the best way to store cleaning supplies under the sink?
Use a lazy Susan for easy access to all your cleaning products. Hooks or command strips can hold gloves or brushes. Make sure to keep toxic items out of reach of kids and pets.
How can I add storage without drilling holes?
Adhesive hooks and suction cup organizers are great for adding storage without damaging walls. Over-the-cabinet baskets can also provide extra space without any drilling.
Are there any eco-friendly storage options?
Yes! Look for bamboo or recycled plastic organizers. You can also repurpose old containers or jars instead of buying new ones.