
Home>Create & Decorate>DIY & Crafts>Toothpick Bridge: A DIY Craft Project For Engineering Enthusiasts
DIY & Crafts
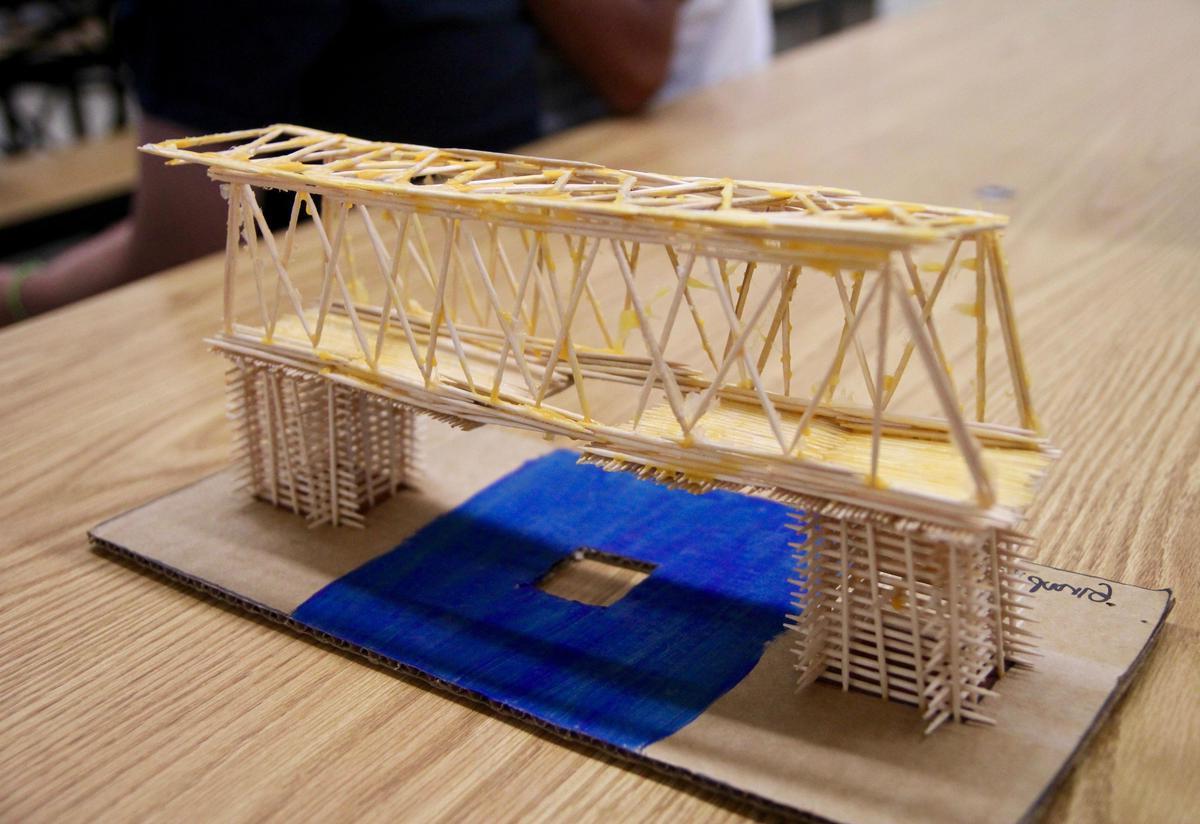
Toothpick Bridge: A DIY Craft Project For Engineering Enthusiasts
Published: May 27, 2024

Senior Editor in Create & Decorate, Kathryn combines traditional craftsmanship with contemporary trends. Her background in textile design and commitment to sustainable crafts inspire both content and community.
Discover how to build a toothpick bridge with this engaging DIY craft project for engineering enthusiasts. Unleash your creativity and engineering skills with this fun and educational activity. Ideal for DIY & Crafts enthusiasts!
(Many of the links in this article redirect to a specific reviewed product. Your purchase of these products through affiliate links helps to generate commission for Twigandthistle.com, at no extra cost. Learn more)
Introduction
Are you an engineering enthusiast looking for a fun and challenging DIY craft project? If so, building a toothpick bridge might be just the activity for you! This project not only allows you to unleash your creativity but also provides an opportunity to learn about engineering principles in a hands-on way. Whether you're a student looking for a unique school project or simply someone who enjoys tinkering with materials, constructing a toothpick bridge can be a rewarding and educational endeavor. In this article, we'll guide you through the process of creating your very own toothpick bridge, from gathering the necessary materials to testing and evaluating the final product. So, roll up your sleeves and get ready to embark on a fascinating journey of craftsmanship and engineering!
Materials Needed
To embark on this exciting toothpick bridge project, you will need the following materials:
- Toothpicks: The main building blocks of your bridge. Opt for sturdy, straight toothpicks to ensure the structural integrity of your creation.
- Wood Glue: Essential for bonding the toothpicks together. Choose a strong, quick-drying wood glue to expedite the construction process.
- Ruler: A precise ruler will aid in measuring and cutting the toothpicks to the desired lengths, ensuring uniformity in your bridge's construction.
- Cardboard or Foam Board: This will serve as the base for your bridge, providing a stable foundation for the structure.
- Weights or Books: These will be used to apply pressure while the glue dries, ensuring a secure bond between the toothpicks.
- Paint and Brushes (Optional): If you wish to add a decorative touch to your bridge, consider having paint and brushes on hand to personalize the final product.
Gathering these materials will set the stage for an enjoyable and educational crafting experience as you bring your toothpick bridge to life.
Planning and Design
Before diving into the construction phase, it's crucial to devote ample time to planning and designing your toothpick bridge. This stage sets the foundation for a successful and structurally sound final product. Here's how to approach the planning and design process:
-
Research Bridge Designs: Begin by researching different bridge designs to gain inspiration and insight into the various structural forms. Consider exploring truss, arch, and suspension bridge designs to understand their unique characteristics and load-bearing capabilities.
-
Select a Design: Once you've familiarized yourself with different bridge designs, select a specific style that aligns with your preferences and skill level. Take into account the intended purpose of your bridge, whether it's purely decorative or intended to support weight.
-
Create a Blueprint: Using graph paper or a design software, create a detailed blueprint of your bridge. This should include precise measurements, the arrangement of toothpicks, and the overall structure. Pay close attention to the distribution of weight and the placement of load-bearing elements.
-
Consider Load-Bearing Capacity: Assess the load-bearing capacity of your chosen design and ensure that it aligns with your intended use for the bridge. If you plan to test the bridge with weights, factor in the anticipated loads during the design phase.
-
Gather Feedback: If possible, seek feedback from individuals with engineering or construction experience. Their insights can provide valuable guidance and help identify potential structural weaknesses in your design.
By investing time and effort into the planning and design phase, you'll lay a solid groundwork for the construction process, ultimately leading to a well-executed and visually appealing toothpick bridge.
Construction Process
With a well-thought-out plan and a clear design in hand, you're ready to embark on the construction of your toothpick bridge. Follow these steps to bring your design to life:
-
Prepare the Work Area: Set up a clean and spacious work area with ample lighting. A flat surface, such as a table or workbench, will provide a stable foundation for assembling the bridge.
-
Cutting the Toothpicks: Using a ruler and a sharp pair of scissors, carefully cut the toothpicks to the required lengths as per your blueprint. Ensure precision in your cuts to maintain uniformity in the bridge's structure.
-
Assembling the Base: Place the cardboard or foam board on your work surface. This will serve as the base of your bridge. Use a small amount of wood glue to secure the toothpicks in the desired arrangement, following the blueprint's specifications.
-
Building the Trusses: Construct the trusses of the bridge by assembling the toothpicks according to your design. Apply wood glue at the joints to ensure a strong bond between the toothpicks. Use weights or books to hold the trusses in place while the glue sets.
-
Adding Support Structures: Integrate additional support structures, such as vertical columns or diagonal braces, to enhance the bridge's stability and load-bearing capacity. Carefully align these elements with precision to maintain the structural integrity of the bridge.
-
Fine-Tuning and Detailing: Once the primary structure is in place, inspect the bridge for any loose or weak connections. Apply additional wood glue as needed to reinforce the joints. If desired, add decorative elements or paint to personalize the bridge.
-
Allow for Proper Drying: After completing the construction, allow sufficient time for the wood glue to dry and cure. This is essential to ensure that the bridge achieves maximum strength and stability.
By following these steps with precision and attention to detail, you'll successfully construct a sturdy and visually appealing toothpick bridge that reflects your design and craftsmanship.
Testing and Evaluation
Once the construction of your toothpick bridge is complete, it's time to subject it to rigorous testing and evaluation to assess its structural integrity and load-bearing capacity. Follow these steps to ensure that your bridge meets the necessary performance standards:
-
Load Testing: Begin by conducting a load test to determine the bridge's ability to support weight. Place incremental weights, such as small bags of coins or other weighted objects, on the bridge to assess its load-bearing capacity. Record the amount of weight the bridge can withstand before showing signs of stress or deformation.
-
Observation and Documentation: As you apply the weights during the load test, carefully observe the bridge for any signs of bending, sagging, or structural instability. Document your observations, including the amount of weight applied and the corresponding bridge response.
-
Structural Analysis: After the load test, perform a structural analysis of the bridge to identify areas of stress concentration or potential weaknesses. This analysis may involve inspecting the distribution of forces and identifying any areas that exhibit excessive strain under load.
-
Deflection Measurement: Measure the deflection, or the degree of bending, exhibited by the bridge under load. This measurement provides valuable insight into the bridge's ability to withstand external forces without compromising its structural integrity.
-
Failure Point Identification: If the bridge reaches a point of failure during the load test, carefully identify the specific location and nature of the failure. Understanding the failure point can offer valuable lessons for future bridge construction projects.
-
Evaluation of Design Choices: Reflect on the effectiveness of the design choices made during the planning and construction phases. Consider how the bridge's design influenced its performance during the load test and identify any areas for potential improvement.
-
Documentation of Results: Compile a comprehensive report detailing the results of the testing and evaluation process. Include observations, measurements, and any insights gained from the structural analysis. This documentation serves as a valuable reference for future projects and allows for the sharing of findings with others.
By subjecting your toothpick bridge to thorough testing and evaluation, you gain a deeper understanding of its structural behavior and the principles of load-bearing engineering. This process also provides valuable insights that can inform future design and construction endeavors.
Conclusion
In conclusion, constructing a toothpick bridge is not only a fun and engaging DIY craft project but also a valuable learning experience in engineering principles and structural design. By carefully planning, designing, and constructing your bridge, you gain hands-on insight into the fundamental aspects of bridge engineering, including load-bearing capacity, structural stability, and material strength. The testing and evaluation phase further enhances your understanding of how external forces impact the performance of a structure, providing practical knowledge that extends beyond the realm of DIY projects. Whether you're a student exploring the world of engineering or simply an enthusiast seeking a creative challenge, the process of building a toothpick bridge offers a unique blend of creativity and education. As you reflect on the journey from conceptualization to testing, take pride in the craftsmanship and knowledge gained from this rewarding endeavor.