
Home>Create & Decorate>DIY & Crafts>DIY Window Boxes: How To Create Beautiful Planters For Your Home
DIY & Crafts
DIY Window Boxes: How To Create Beautiful Planters For Your Home
Published: June 3, 2024

Senior Editor in Create & Decorate, Kathryn combines traditional craftsmanship with contemporary trends. Her background in textile design and commitment to sustainable crafts inspire both content and community.
Learn how to make stunning DIY window boxes for your home with our step-by-step guide. Get creative with our DIY & Crafts tips!
(Many of the links in this article redirect to a specific reviewed product. Your purchase of these products through affiliate links helps to generate commission for Twigandthistle.com, at no extra cost. Learn more)
Introduction
Are you looking to add a touch of charm and greenery to the exterior of your home? DIY window boxes are a fantastic way to enhance the curb appeal of your house while showcasing your favorite plants and flowers. In this guide, we will walk you through the step-by-step process of creating beautiful window boxes that will elevate the look of your home and provide a welcoming environment for both you and your guests. Let's dive into the world of DIY window boxes and get ready to unleash your creativity!
Choosing the Right Materials
When it comes to creating sturdy and visually appealing DIY window boxes, selecting the right materials is crucial. Here are the key materials you will need for this project:
1. Wood
Opt for a durable and weather-resistant wood such as cedar or redwood. These types of wood are known for their ability to withstand outdoor conditions, making them ideal for constructing window boxes that will last for years to come.
2. Screws or Nails
Choose corrosion-resistant screws or nails to assemble the window boxes. This will ensure that the boxes remain securely fastened together, even when exposed to the elements.
3. Wood Glue
Using wood glue in conjunction with screws or nails will provide extra reinforcement, making your window boxes even more durable.
4. Drill and Saw
A drill will be essential for creating pilot holes and driving screws, while a saw will be necessary for cutting the wood to the desired dimensions.
5. Lining Material
To protect the wood from moisture and prolong the lifespan of your window boxes, consider using a plastic or metal liner inside the boxes.
By carefully selecting high-quality materials, you can ensure that your DIY window boxes not only look stunning but also stand the test of time. Now that you have the right materials in hand, it's time to move on to the next step in the process.
Measuring and Cutting the Wood
Before diving into the assembly of your DIY window boxes, it's crucial to measure and cut the wood with precision. Follow these steps to ensure that your window boxes are perfectly sized and ready for assembly:
-
Measure the Window: Start by measuring the width of the window where you plan to install the window boxes. Take accurate measurements to determine the length of the window boxes you will need.
-
Choose the Wood: Once you have the measurements, mark the wood according to the dimensions needed for the front, back, and sides of the window boxes. Use a pencil and a straight edge to create clear cutting lines on the wood.
-
Use a Saw: Carefully cut the wood along the marked lines using a saw. Take your time to ensure that the cuts are straight and accurate, as precise cuts will contribute to the overall professional look of your window boxes.
-
Create Drainage Holes: If your window boxes will be used for planting flowers or other greenery, it's essential to create drainage holes in the bottom piece of wood. Use a drill to make several small holes, allowing excess water to escape and preventing root rot.
-
Sand the Edges: After cutting the wood, use sandpaper to smooth out any rough edges or splinters. This step will not only enhance the appearance of the window boxes but also protect you from potential splinters during assembly and maintenance.
By taking the time to measure and cut the wood accurately, you'll set the foundation for well-constructed and visually appealing DIY window boxes. With the wood pieces prepared, you're now ready to move on to the next phase of the project: assembling the window boxes.
Assembling the Window Boxes
Now that you have all the wood pieces cut to the correct dimensions, it's time to assemble your DIY window boxes. Follow these steps to put everything together seamlessly:
-
Lay Out the Pieces: Begin by laying out the front, back, and side pieces of the window box on a flat surface. Ensure that the pieces are positioned correctly and that the edges align perfectly.
-
Pre-Drill Holes: To prevent the wood from splitting, use a drill to create pilot holes where the screws or nails will be inserted. This step is especially important when working with hardwoods.
-
Apply Wood Glue: Before securing the pieces together, apply a thin layer of wood glue along the edges where they will be joined. The wood glue will provide additional strength and stability to the window box.
-
Secure the Corners: Using corrosion-resistant screws or nails, carefully fasten the front, back, and side pieces together. Make sure the corners are square and the box is sturdy.
-
Attach the Bottom Piece: Once the frame of the window box is assembled, attach the bottom piece using screws or nails. This will complete the basic structure of the window box.
-
Add Decorative Trim (Optional): If you want to add a decorative touch to your window boxes, consider attaching trim pieces along the top edge. This step is optional but can enhance the visual appeal of the window boxes.
By following these steps, you'll be able to assemble your DIY window boxes with precision and care. Once the boxes are assembled, it's time to move on to the next phase: painting and decorating.
Painting and Decorating
After assembling the window boxes, the next step is to add a splash of color and personality through painting and decorating. Here's how to transform your window boxes into eye-catching features that complement your home's exterior:
-
Choose Exterior-Grade Paint: Select high-quality exterior-grade paint that is designed to withstand outdoor conditions. Opt for a color that harmonizes with the exterior of your home and complements the surrounding environment.
-
Prepare the Surface: Before painting, lightly sand the surface of the window boxes to create a smooth base for the paint. Remove any dust or debris, ensuring that the surface is clean and ready for painting.
-
Apply Primer (Optional): If you're painting the window boxes a lighter color or if the wood has a tendency to bleed, consider applying a coat of primer before the paint. Primer helps the paint adhere better and can prevent discoloration.
-
Paint the Window Boxes: Using a paintbrush or a paint sprayer, apply an even coat of paint to the entire surface of the window boxes. Allow the first coat to dry completely before applying a second coat for a more polished finish.
-
Add Decorative Accents: Once the paint has dried, consider adding decorative accents such as stenciled designs, hand-painted motifs, or even affixing small decorative elements to the window boxes. This personal touch can elevate the visual appeal of the boxes and make them unique to your home.
-
Protect with Sealant (Optional): To enhance the longevity of the paint and protect the window boxes from the elements, consider applying a clear sealant over the painted surface. This extra step can help prevent fading and weathering over time.
By following these steps, you can transform your window boxes into stunning features that enhance the overall aesthetic of your home's exterior. Once the painting and decorating are complete, it's time to move on to the exciting phase of planting your favorite flowers and greenery in the window boxes.
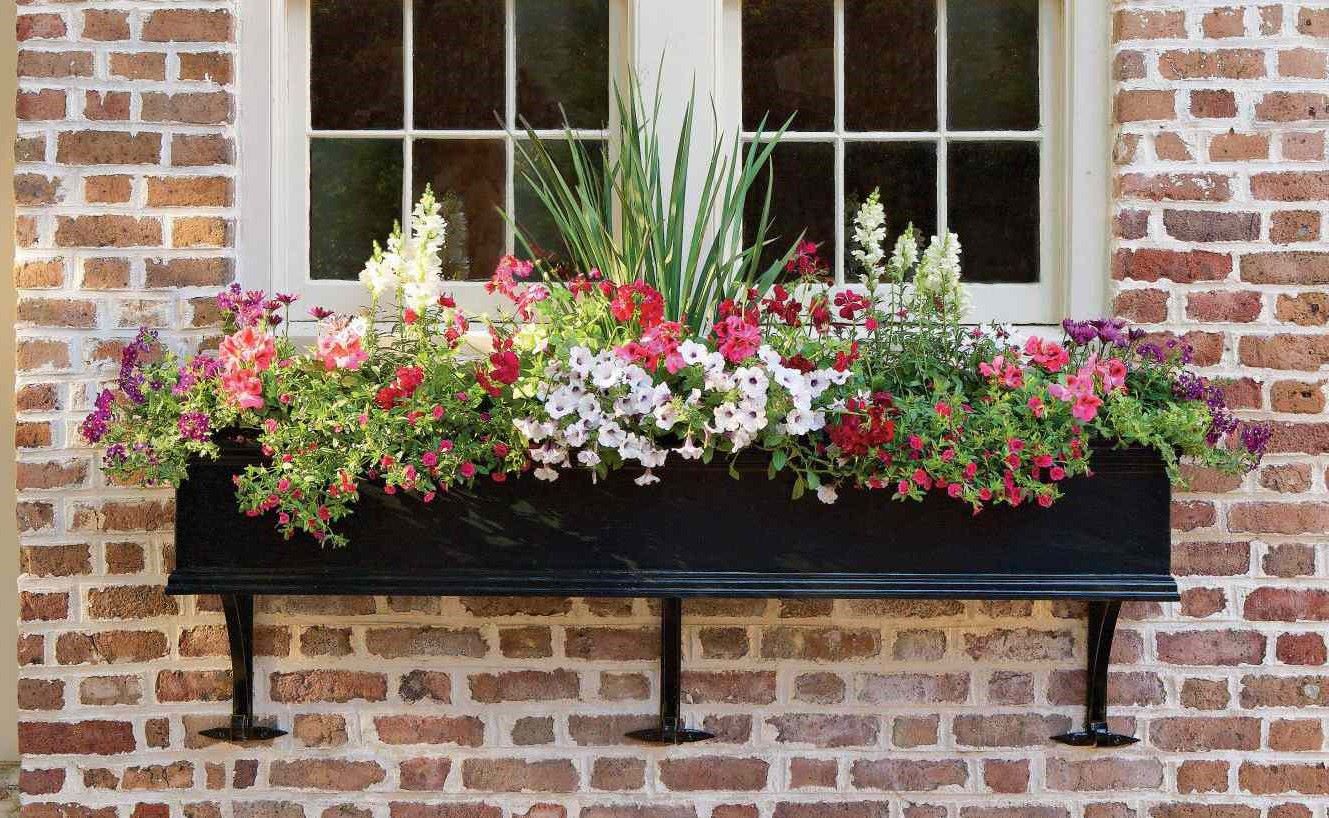
Planting Your Window Boxes
Now that your DIY window boxes are assembled, painted, and decorated, it's time to bring them to life with an array of beautiful plants and flowers. Follow these steps to create stunning and thriving window box planters:
1. Choose the Right Plants
Select a variety of plants and flowers that are suitable for the amount of sunlight your window boxes receive. Consider the climate in your area and choose plants that will thrive in those conditions. Opt for a mix of trailing, upright, and filler plants to create visual interest and depth in your window boxes.
2. Prepare the Soil
Fill the window boxes with high-quality potting soil, ensuring that it is well-draining and nutrient-rich. You can also add a slow-release fertilizer to provide essential nutrients to the plants throughout the growing season. Proper soil preparation is key to the success of your window box garden.
3. Arrange the Plants
Before planting, arrange the selected plants in the window boxes to determine the best placement for each variety. Consider the height, color, and growth habits of the plants to create an aesthetically pleasing arrangement. Once you're satisfied with the layout, it's time to start planting.
4. Planting Technique
Carefully remove the plants from their containers and gently loosen the roots. Dig small holes in the soil of the window boxes and place the plants at the same depth as they were in their original containers. Firmly press the soil around the plants to secure them in place.
5. Water and Maintenance
After planting, thoroughly water the window boxes to help the soil settle around the roots of the plants. Throughout the growing season, ensure that the plants receive adequate water and monitor the soil moisture regularly. Deadhead spent flowers and trim any overgrown foliage to maintain the appearance of the window boxes.
6. Seasonal Updates
As the seasons change, consider updating the plants in your window boxes to reflect the seasonal colors and textures. For example, transition from vibrant summer flowers to festive fall foliage, and then to evergreen arrangements for the winter months. This allows your window boxes to remain visually appealing throughout the year.
By following these planting and maintenance tips, you can create stunning and vibrant window box planters that will enhance the exterior of your home and bring joy to all who see them. Now, step back and admire the beauty you've brought to your home with your DIY window boxes!
Maintenance and Care Tips
Once your DIY window boxes are in place and filled with beautiful plants and flowers, it's important to provide them with the proper maintenance and care to ensure their longevity and continued visual appeal. Here are some essential maintenance and care tips to keep your window boxes looking their best:
-
Watering Schedule: Establish a regular watering schedule for your window boxes, taking into account the specific water needs of the plants you've chosen. During hot and dry periods, you may need to water more frequently to prevent the soil from drying out.
-
Fertilization: Periodically fertilize the plants in your window boxes to provide them with essential nutrients for healthy growth and vibrant blooms. Choose a fertilizer specifically formulated for container plants and follow the instructions for application.
-
Pruning and Deadheading: Regularly prune and deadhead the plants in your window boxes to remove spent flowers and encourage new growth. This will help maintain the overall appearance of the window boxes and promote continuous blooming.
-
Weed Control: Keep an eye out for any weeds that may try to take root in the soil of your window boxes. Remove any unwanted weeds promptly to prevent them from competing with your chosen plants for nutrients and space.
-
Pest and Disease Management: Monitor your window boxes for signs of pests or diseases that may affect the plants. Take proactive measures to address any issues, such as using organic pest control methods or seeking advice from a local gardening center.
-
Seasonal Maintenance: As the seasons change, assess the condition of your window boxes and make any necessary adjustments. Replace any plants that may have finished their blooming period and refresh the soil as needed.
-
Cleaning and Inspection: Periodically clean the surfaces of your window boxes to remove dirt, dust, and debris. Inspect the boxes for any signs of wear or damage, and make repairs or touch-ups as required.
-
Winter Protection: If you live in a region with cold winters, consider providing protection for your window boxes during the colder months. This may involve moving the boxes to a sheltered location or insulating them to prevent damage from freezing temperatures.
By following these maintenance and care tips, you can ensure that your DIY window boxes continue to enhance the beauty of your home's exterior and provide a welcoming display of nature throughout the year. With proper care, your window boxes will be a source of joy and admiration for both you and your visitors.
Conclusion
In conclusion, creating DIY window boxes is a rewarding and creative endeavor that allows you to add a personal touch to your home's exterior while showcasing the natural beauty of plants and flowers. By carefully selecting the right materials, measuring and cutting the wood with precision, assembling the window boxes with care, and adding your unique decorative flair, you can transform the look of your home in a simple yet impactful way. Planting and maintaining your window boxes will not only bring joy and color to your surroundings but also provide an ever-changing display of nature's wonders throughout the seasons. Whether you're a seasoned DIY enthusiast or a novice looking for a fulfilling project, DIY window boxes offer a delightful opportunity to express your creativity and enhance the curb appeal of your home. So, roll up your sleeves, gather your materials, and embark on the journey of creating beautiful window boxes that will be a source of pride and admiration for years to come.