
Home>Create & Decorate>DIY & Crafts>DIY Squat Rack: Build Your Own Fitness Equipment At Home
DIY & Crafts
DIY Squat Rack: Build Your Own Fitness Equipment At Home
Published: May 23, 2024

Content Creator specializing in woodworking and interior transformations. Caegan's guides motivate readers to undertake their own projects, while his custom furniture adds a personal touch.
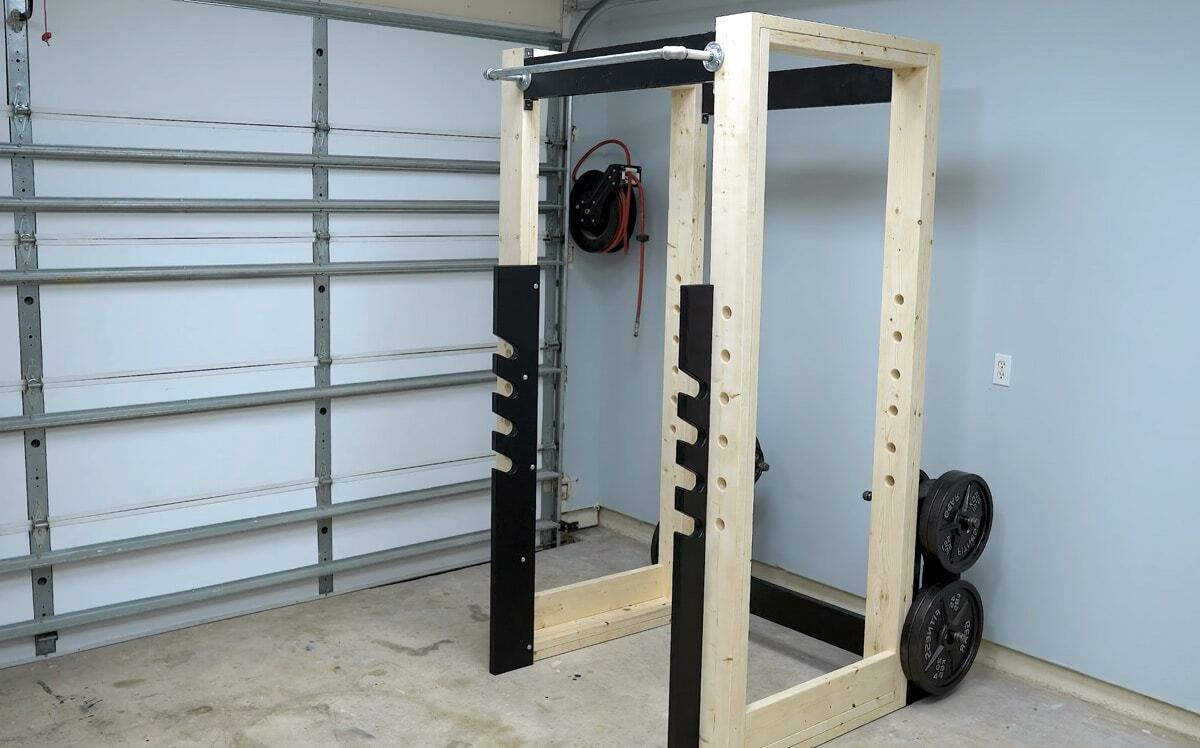
Build your own DIY squat rack and take your home gym to the next level with this easy DIY project. Get fit and save money with DIY fitness equipment!
(Many of the links in this article redirect to a specific reviewed product. Your purchase of these products through affiliate links helps to generate commission for Twigandthistle.com, at no extra cost. Learn more)
Introduction
Are you tired of waiting in line at the gym to use the squat rack? Or maybe you're looking for a cost-effective way to bring your workout routine home? Building your own squat rack might just be the solution you're looking for. In this article, we'll guide you through the process of creating your very own DIY squat rack, allowing you to take control of your fitness journey from the comfort of your own home. Whether you're a seasoned DIY enthusiast or a beginner looking for a new project, constructing a squat rack can be a rewarding and practical endeavor.
Benefits of Building Your Own Squat Rack
Building your own squat rack offers a multitude of benefits, making it a worthwhile endeavor for fitness enthusiasts. Here are some compelling reasons to consider constructing your own squat rack:
-
Cost-Effective: Purchasing a pre-made squat rack can be expensive. By building your own, you can save a significant amount of money while still achieving the same functionality.
-
Customization: When you build your own squat rack, you have the freedom to customize it to your specific needs and preferences. Whether you want to adjust the height, width, or add extra features, the design is entirely in your hands.
-
Convenience: Having a squat rack at home eliminates the need to travel to a gym, saving you time and providing the convenience of working out on your own schedule.
-
Skill Development: Building a squat rack is a practical way to enhance your DIY skills. It allows you to learn new techniques and gain a sense of accomplishment from creating a functional piece of fitness equipment.
-
Personalized Workout Space: Creating a squat rack at home gives you the opportunity to personalize your workout space, making it a comfortable and motivating environment for exercise.
-
Long-Term Investment: Once constructed, your DIY squat rack becomes a long-term investment in your fitness journey, providing a durable and reliable piece of equipment for years to come.
By considering these benefits, it's clear that building your own squat rack can be a rewarding and practical choice for fitness enthusiasts.
Materials Needed for DIY Squat Rack
To embark on your DIY squat rack project, you'll need to gather the necessary materials and tools. Here's a comprehensive list to get you started:
Wood
- 4×4 lumber: This will serve as the main support for the squat rack, providing stability and strength.
- 2×4 lumber: Used for additional bracing and support to reinforce the structure.
Hardware
- Wood Screws: Choose heavy-duty screws to securely fasten the wooden components together.
- Metal Brackets: These will be used to reinforce joints and connections, adding extra stability to the rack.
Barbell Rests
- Steel Pipe: Select a sturdy steel pipe to serve as the barbell rest. The length will depend on your preferred dimensions for the rack.
Tools
- Circular Saw: Essential for cutting the lumber to the required lengths.
- Drill and Drill Bits: Needed for creating holes and securing screws in the wood.
- Measuring Tape: To ensure accurate dimensions and cuts.
- Level: Ensures that the squat rack is assembled evenly and securely.
Optional Additions
- Protective Floor Mat: Consider adding a durable mat to protect the floor beneath the squat rack and provide stability during workouts.
- Paint or Stain: If desired, you can finish the wood with paint or stain to enhance the appearance and protect it from wear and tear.
By gathering these materials and tools, you'll be well-equipped to begin the construction of your DIY squat rack. Remember to prioritize safety by using appropriate protective gear and following best practices when handling tools and materials.
Step-by-Step Instructions for Building the Squat Rack
-
Prepare the Lumber: Begin by measuring and cutting the 4×4 lumber to the desired height for the squat rack. This will typically be based on your own height and the space available for the rack. Use a circular saw to make precise cuts, ensuring that the pieces are uniform in length.
-
Assemble the Uprights: Take the cut 4×4 lumber pieces and arrange them parallel to each other, creating the upright supports for the squat rack. Use the 2×4 lumber to brace the uprights, securing them together with wood screws. This will provide stability and reinforcement to the structure.
-
Attach the Crossbeam: Measure and cut a piece of 2×4 lumber to serve as the crossbeam for the squat rack. Position it horizontally between the uprights, ensuring that it is level and securely attach it using wood screws. This crossbeam will provide additional support and stability to the rack.
-
Install the Barbell Rests: Determine the desired height for the barbell rests and mark the locations on the uprights. Using a drill, create holes to accommodate the steel pipes that will serve as the barbell rests. Insert the steel pipes into the holes and secure them in place using metal brackets for added stability.
-
Finishing Touches: Once the main structure of the squat rack is assembled, inspect all connections and joints to ensure they are secure. If desired, apply a coat of paint or stain to the wood to protect it from moisture and wear. Additionally, consider adding a protective floor mat beneath the squat rack to safeguard the floor and provide stability during workouts.
-
Test for Stability: Before using the squat rack for workouts, perform a thorough stability test. Gently apply pressure to different parts of the rack to ensure that it can support the weight of the barbell and withstand the movements involved in squat exercises.
-
Adjust and Customize: Depending on your specific preferences and workout routine, you may want to make additional adjustments or customizations to the squat rack. This could include adding hooks for storing weights or incorporating safety features such as spotter arms for added security during heavy lifts.
By following these step-by-step instructions, you can successfully build your own DIY squat rack, tailored to your individual needs and preferences. Remember to prioritize safety throughout the construction process and enjoy the satisfaction of creating a functional piece of fitness equipment for your home gym.
Safety Tips for Using Your DIY Squat Rack
-
Weight Capacity Awareness: Before using your DIY squat rack, it's crucial to be aware of its weight capacity. Ensure that the materials and construction of the rack can support the maximum weight you intend to lift during your workouts. Exceeding the weight capacity can compromise the stability of the rack and pose a safety risk.
-
Proper Assembly Inspection: Regularly inspect the assembly of your squat rack to check for any loose screws, weakened joints, or signs of wear. Tighten any loose fasteners and replace any compromised components to maintain the structural integrity of the rack.
-
Secure Placement: Position your DIY squat rack on a stable and level surface to prevent any wobbling or tipping during use. Additionally, consider placing a protective floor mat beneath the rack to enhance stability and protect the underlying floor surface.
-
Warm-Up and Spotter Use: Prior to performing heavy lifts, ensure that you engage in a proper warm-up routine to prepare your muscles and joints. For added safety during intense workouts, consider having a spotter present to assist you during challenging lifts and provide support if needed.
-
Barbell Loading Technique: When loading the barbell onto the squat rack, use caution and maintain a balanced distribution of weight on both sides. Improper loading can lead to instability and potential accidents during lifting.
-
Clear Workout Space: Create a clear and unobstructed space around the squat rack to allow for safe and unrestricted movements during exercises. Remove any potential hazards or obstacles that could interfere with your workout.
-
Proper Form and Technique: Focus on maintaining proper form and technique during squat exercises to minimize the risk of injury. Ensure that your movements are controlled, and your body alignment is correct throughout the entire range of motion.
-
Gradual Progression: If you're new to using a squat rack, start with lighter weights and gradually progress to heavier loads as your strength and confidence increase. Avoid attempting maximal lifts without adequate experience and conditioning.
-
Emergency Preparedness: Have a plan in place for handling emergency situations, such as equipment failure or personal injury. Consider having a means of communication nearby in case assistance is required during workouts.
-
Educate Yourself: Stay informed about proper squat rack usage and safety guidelines. Utilize reputable resources, such as instructional videos or guidance from fitness professionals, to enhance your knowledge and understanding of safe workout practices.
By adhering to these safety tips, you can create a secure and supportive environment for using your DIY squat rack, minimizing the risk of accidents and maximizing the effectiveness of your home workouts.
Maintenance and Care for Your Homemade Fitness Equipment
Maintaining and caring for your homemade fitness equipment, such as the DIY squat rack, is essential to ensure its longevity and safe usage. By implementing regular maintenance practices and attentive care, you can preserve the functionality and structural integrity of the squat rack. Here are key maintenance and care guidelines to follow:
Regular Inspections
Regularly inspect the entire squat rack for any signs of wear, damage, or structural issues. Check for loose screws, cracks in the wood, or any indications of instability. Address any identified issues promptly to prevent them from escalating and compromising the safety of the equipment.
Cleaning and Dusting
Keep the squat rack clean and free from dust and debris. Use a soft cloth or brush to remove any accumulated dust or dirt from the surfaces and corners of the rack. Regular cleaning not only maintains the appearance of the equipment but also prevents the buildup of grime that could affect its performance.
Lubrication of Moving Parts
If your DIY squat rack includes any moving parts, such as adjustable components or sliding mechanisms, apply lubricant as needed to ensure smooth operation. Lubrication helps reduce friction and prevents components from seizing or becoming difficult to adjust.
Wood Protection
If the squat rack is constructed from wood, consider applying a protective finish, such as varnish or sealant, to shield the wood from moisture, humidity, and general wear. This protective layer can help extend the lifespan of the wood and maintain its structural integrity over time.
Weight Capacity Monitoring
Continuously monitor the weight capacity of the squat rack and ensure that it aligns with your workout requirements. Avoid exceeding the designated weight limit to prevent overloading the equipment, which could lead to structural damage or failure.
Floor Protection
Place a durable and non-slip mat beneath the squat rack to protect the underlying floor surface from scratches, dents, or damage caused by the equipment or dropped weights. The mat also enhances stability during workouts and minimizes the impact on the floor.
Storage and Shelter
When not in use, store the squat rack in a dry and sheltered area to protect it from environmental elements that could degrade its materials. Shielding the equipment from prolonged exposure to sunlight, moisture, or extreme temperatures can help maintain its quality.
User Guidelines
Educate all users of the squat rack on proper usage and safety guidelines. Emphasize the importance of adhering to weight limits, using the equipment as intended, and following recommended safety practices during workouts.
Repair and Replacement
Promptly address any identified issues or damage to the squat rack by conducting necessary repairs or replacing compromised components. Regularly assess the condition of the equipment to identify any areas that require attention.
By incorporating these maintenance and care practices into your routine, you can ensure that your homemade fitness equipment, including the DIY squat rack, remains in optimal condition for safe and effective use. Prioritizing the maintenance and care of the squat rack not only safeguards its performance but also contributes to a reliable and enduring addition to your home gym setup.
Conclusion
In conclusion, embarking on the journey of building your own DIY squat rack can be a fulfilling and practical endeavor for fitness enthusiasts. By constructing a squat rack at home, you not only gain the benefits of cost-effectiveness, customization, and convenience but also have the opportunity to enhance your DIY skills and create a personalized workout space. The step-by-step process of building the squat rack, along with the essential safety tips and maintenance guidelines, equips you with the knowledge and confidence to embark on this DIY project. With careful attention to safety, maintenance, and user guidelines, your homemade fitness equipment can serve as a reliable and enduring asset in your home gym, supporting your fitness journey for years to come. Whether you're a seasoned DIY enthusiast or a newcomer to the world of home improvement, the DIY squat rack stands as a testament to the rewarding nature of creating functional and personalized fitness equipment from scratch.