
Home>Create & Decorate>DIY & Crafts>DIY Soundproof Booth: Create Your Own Acoustic Sanctuary
DIY & Crafts
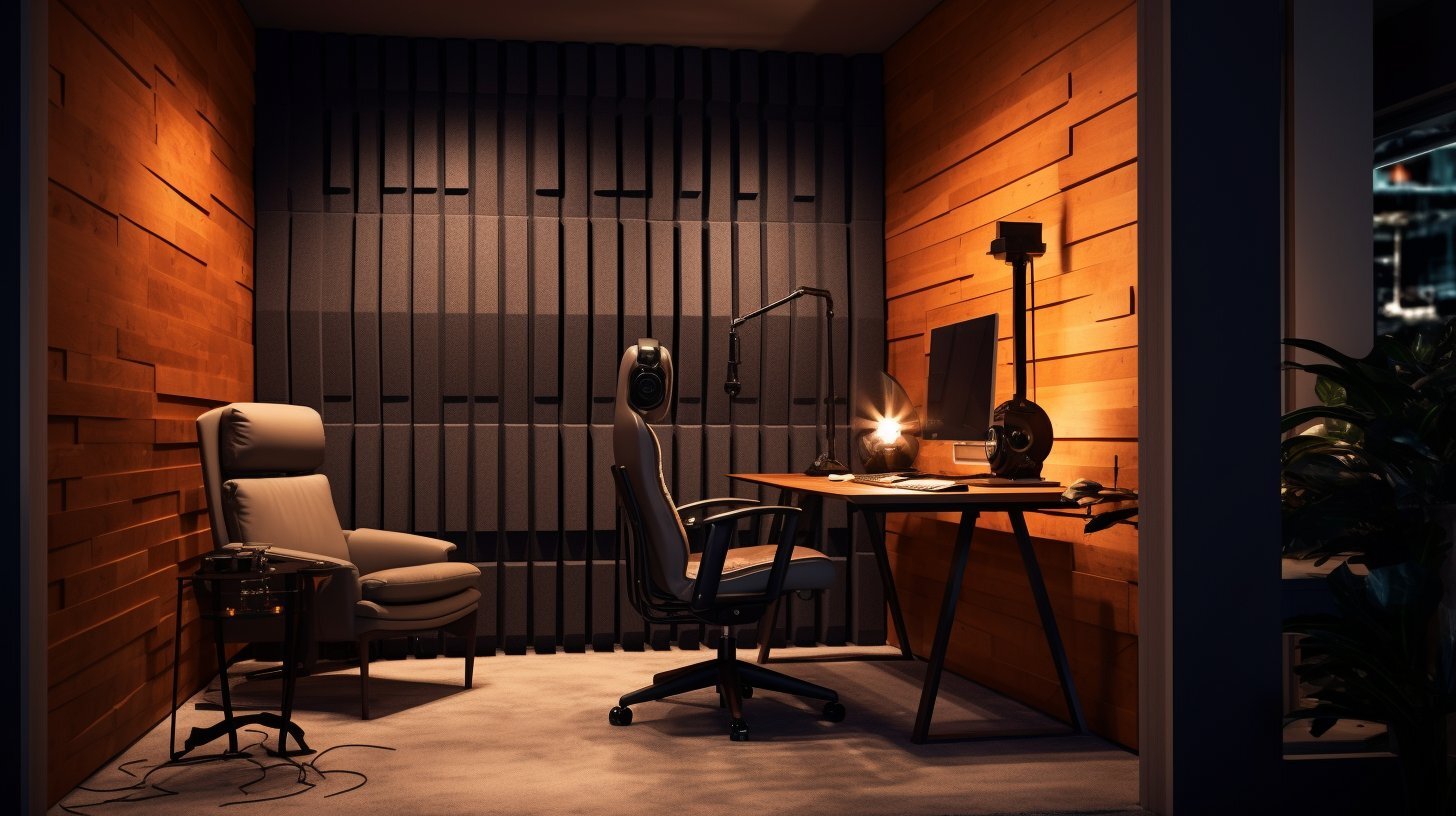
DIY Soundproof Booth: Create Your Own Acoustic Sanctuary
Published: June 15, 2024

Senior Editor in Create & Decorate, Kathryn combines traditional craftsmanship with contemporary trends. Her background in textile design and commitment to sustainable crafts inspire both content and community.
Create your own DIY soundproof booth and transform any space into an acoustic sanctuary with our easy-to-follow crafts guide. Ideal for DIY & Crafts enthusiasts.
(Many of the links in this article redirect to a specific reviewed product. Your purchase of these products through affiliate links helps to generate commission for Twigandthistle.com, at no extra cost. Learn more)
Introduction
Are you tired of being disturbed by outside noise while trying to record a podcast, practice a musical instrument, or simply enjoy some peace and quiet? Building your own DIY soundproof booth could be the perfect solution. In this article, we will guide you through the process of creating your very own acoustic sanctuary, where you can escape from the hustle and bustle of the outside world. Whether you're a musician, podcaster, or just someone who craves a quiet space, a soundproof booth can be a game-changer for your peace of mind and productivity.
Understanding the Importance of Soundproofing
When it comes to creating a space that is free from unwanted noise, understanding the importance of soundproofing is crucial. Whether you're a musician, content creator, or someone who simply values tranquility, a soundproof booth offers a myriad of benefits. Here's why soundproofing is essential:
-
Minimizing Distractions: Soundproofing helps to minimize external noise, allowing you to focus on your creative endeavors without being interrupted by the sounds of traffic, neighbors, or other environmental disturbances.
-
Enhancing Audio Quality: For musicians and podcasters, soundproofing is essential for capturing high-quality audio recordings. By reducing external noise, you can achieve a cleaner, more professional sound without the need for extensive post-production editing.
-
Creating a Peaceful Retreat: A soundproof booth provides a tranquil space where you can escape from the chaos of the outside world. Whether you're looking for a quiet place to read, meditate, or work on personal projects, a soundproof sanctuary offers a peaceful retreat within your own home.
-
Respecting Others: If you live in a shared space, soundproofing your booth demonstrates consideration for others. By containing sound within the booth, you can pursue your passions without disturbing those around you.
Understanding the importance of soundproofing sets the foundation for creating a space that not only meets your acoustic needs but also enhances your overall well-being.
Selecting the Right Location for Your DIY Soundproof Booth
Choosing the right location for your DIY soundproof booth is a critical first step in the construction process. The ideal location will depend on the intended use of the booth, the layout of your home, and the level of sound isolation required. Here are some key considerations to keep in mind when selecting the location for your soundproof sanctuary:
- Assessing Noise Levels: Before deciding on a location, take the time to assess the ambient noise levels in different areas of your home. Choose a space that is relatively quiet and free from constant disruptions, such as traffic noise or household activities.
- Considering Accessibility: If you plan to use the soundproof booth for recording music or podcasts, consider the accessibility of the location. It should be easily accessible from your living space, yet secluded enough to minimize foot traffic and other disturbances.
- Utilizing Existing Structures: Look for opportunities to leverage existing structures, such as closets or spare rooms, as potential locations for your soundproof booth. These areas can often be repurposed with minimal modifications, saving time and resources during the construction process.
- Isolating External Noise: When selecting a location, prioritize areas that are insulated from external noise sources. Interior rooms or spaces with minimal exterior wall exposure can help minimize the intrusion of outside sounds, providing a more conducive environment for soundproofing.
- Considering Future Needs: Anticipate your future needs when choosing the location for your soundproof booth. Whether it’s for personal use, professional recordings, or as a multifunctional space, selecting a versatile location can ensure that your acoustic sanctuary meets your evolving needs.
By carefully considering these factors, you can identify the optimal location for your DIY soundproof booth, setting the stage for a successful and effective soundproofing project.
Choosing the Best Materials for Soundproofing
When it comes to soundproofing your DIY booth, selecting the right materials is crucial for achieving optimal acoustic isolation. From insulating barriers to sound-absorbing elements, the choice of materials can significantly impact the effectiveness of your soundproofing efforts. Here are some key materials to consider for soundproofing your booth:
Mass-Loaded Vinyl (MLV)
Mass-loaded vinyl is a dense, flexible material that is highly effective at blocking sound transmission. It can be installed within walls, floors, and ceilings to create a barrier that prevents sound from passing through. MLV is particularly useful for reducing low-frequency noise, making it an essential component in soundproofing projects.
Acoustic Foam Panels
Acoustic foam panels are designed to absorb and diffuse sound waves, reducing reverberation and echo within the booth. These panels are available in various shapes and sizes, allowing for customizable placement to address specific acoustic issues. By strategically positioning acoustic foam panels, you can improve the overall sound quality inside the booth.
Green Glue
Green Glue is a viscoelastic compound that is used to dampen sound vibrations within walls and ceilings. When sandwiched between layers of drywall or plywood, Green Glue converts sound energy into small amounts of heat, effectively reducing the transmission of airborne and impact noise. Incorporating Green Glue into the construction of your booth can significantly enhance its soundproofing capabilities.
Fiberglass Insulation
Fiberglass insulation is a versatile material that can improve the soundproofing performance of walls and ceilings. By filling wall cavities with fiberglass insulation, you can reduce the transmission of airborne noise and enhance the overall acoustic isolation of the booth. Additionally, fiberglass insulation can contribute to thermal insulation, creating a more comfortable environment inside the booth.
Soundproofing Sealant
Soundproofing sealant is a flexible, acoustically rated caulk that is used to seal gaps, joints, and seams in the construction of the booth. By applying soundproofing sealant to potential air leaks and penetrations, you can prevent the escape of sound and ensure airtight construction, maximizing the effectiveness of your soundproofing efforts.
By carefully selecting and incorporating these materials into your DIY soundproof booth, you can create a space that offers exceptional acoustic isolation and sound quality, allowing you to fully immerse yourself in your creative pursuits without the intrusion of external noise.
Step-by-Step Guide to Building Your DIY Soundproof Booth
Building your own DIY soundproof booth requires careful planning and precise execution to achieve optimal results. Follow these step-by-step instructions to create your acoustic sanctuary:
-
Selecting the Design and Layout: Begin by determining the size and layout of your soundproof booth. Consider the intended use of the space, the available area in your home, and any specific acoustic requirements. Whether you opt for a freestanding booth or repurpose an existing room, the design and layout will form the foundation of your project.
-
Preparing the Space: Clear the designated area and ensure that it is clean and free from any obstructions. If repurposing an existing room, remove any unnecessary furniture or fixtures to create a blank canvas for the construction process.
-
Building the Frame: Construct the frame of the booth using sturdy, sound-absorbing materials such as MDF or plywood. Ensure that the frame is structurally sound and capable of supporting the weight of the soundproofing materials and interior fixtures.
-
Installing Soundproofing Materials: Line the interior of the frame with soundproofing materials such as mass-loaded vinyl, acoustic foam panels, and fiberglass insulation. Pay close attention to sealing gaps and seams to prevent sound leakage.
-
Sealing Air Leaks: Use soundproofing sealant to seal any gaps, joints, or seams in the construction of the booth. This step is crucial for creating an airtight enclosure that maximizes the soundproofing capabilities of the booth.
-
Adding Soundproof Doors and Windows: Install soundproof doors and windows to further enhance the isolation of the booth. Opt for doors and windows specifically designed for soundproofing, or apply soundproofing materials to existing fixtures.
-
Ventilation and Lighting: Incorporate ventilation and lighting fixtures as needed to ensure a comfortable and functional interior environment. Consider the placement of vents and lights to minimize sound transmission while maintaining the usability of the space.
-
Testing and Adjusting: Once the construction is complete, conduct thorough sound tests to identify any areas that may require additional attention. Make adjustments as necessary to optimize the acoustic performance of the booth.
-
Personalization and Aesthetics: Add personal touches and aesthetic elements to the interior of the booth, making it a welcoming and inspiring space for your creative endeavors.
By following these step-by-step instructions, you can build your own DIY soundproof booth with confidence, creating a dedicated space where you can immerse yourself in your passions without the intrusion of external noise.
Tips for Improving Acoustic Quality Inside the Booth
-
Strategic Placement of Acoustic Panels: Position acoustic panels strategically within the booth to target areas of high sound reflection and reverberation. Placing panels at reflection points on walls and ceilings can help absorb and diffuse sound waves, reducing unwanted echoes and enhancing the overall clarity of audio recordings.
-
Utilize Bass Traps: Incorporate bass traps in the corners of the booth to address low-frequency buildup. Bass traps are designed to absorb bass frequencies, preventing them from accumulating in confined spaces and creating a more balanced acoustic environment.
-
Optimize Speaker and Microphone Placement: When setting up audio equipment within the booth, carefully consider the placement of speakers and microphones. Position speakers away from reflective surfaces to minimize coloration and distortion, while ensuring that microphones are isolated from vibrations and external noise sources for pristine recordings.
-
Consider Room Calibration: Utilize room calibration software and tools to fine-tune the acoustic characteristics of the booth. By analyzing the frequency response and reverberation time, you can optimize the sonic performance of the space, ensuring that it meets the specific requirements of your audio projects.
-
Implement Diffusers: Integrate diffusers into the design of the booth to scatter sound waves and create a more balanced acoustic environment. Diffusers help to minimize hotspots and dead zones, promoting a more uniform distribution of sound throughout the space.
-
Address HVAC Noise: If the booth is equipped with ventilation or air conditioning systems, take measures to minimize the noise generated by these systems. Utilize soundproof ducting, vibration isolation mounts, and acoustic enclosures to reduce the impact of HVAC noise on the overall acoustic quality of the booth.
-
Opt for Quality Monitoring Equipment: Invest in high-quality studio monitors and headphones for accurate audio monitoring within the booth. Reliable monitoring equipment ensures that you can assess and fine-tune the acoustic characteristics of your recordings with precision.
-
Maintain Cleanliness and Order: Keep the interior of the booth clean and organized to minimize acoustic distractions. Clutter and debris can impact the sound quality within the space, so maintaining a tidy and well-kept environment is essential for optimal acoustic performance.
By implementing these tips, you can elevate the acoustic quality inside your DIY soundproof booth, creating an environment that is conducive to high-fidelity audio production and immersive creative experiences.
Conclusion: Enjoying Your Acoustic Sanctuary
After investing your time and effort into creating your DIY soundproof booth, it's time to reap the rewards of your acoustic sanctuary. With a carefully constructed space that offers exceptional sound isolation and quality, you can look forward to a multitude of benefits and opportunities for creative expression. Whether you're a musician, podcaster, or simply someone who values tranquility, your acoustic sanctuary provides a dedicated space where you can fully immerse yourself in your passions without the intrusion of external noise.
As you step into your soundproof booth, you'll immediately notice the difference in the ambient environment. The outside world fades away, and you are enveloped in a cocoon of tranquility. The absence of external distractions allows you to focus on your creative endeavors with unparalleled clarity and concentration. Whether you're recording music, conducting interviews, or engaging in personal reflection, the peace and quiet within your acoustic sanctuary create an ideal setting for productivity and inspiration.
Furthermore, the enhanced sound quality within your DIY soundproof booth elevates the standard of your audio recordings and performances. With reduced reverberation, minimal external noise, and optimized acoustics, you can achieve professional-grade results without the need for extensive post-production editing. Your acoustic sanctuary becomes a platform for sonic excellence, where your creative vision can be fully realized without compromise.
Beyond the practical advantages, your soundproof booth also serves as a personal retreat—a space where you can escape the chaos of the outside world and indulge in moments of solitude and introspection. Whether you seek solace for meditation, relaxation, or personal reflection, your acoustic sanctuary offers a haven of tranquility within the comfort of your own home.
As you enjoy the benefits of your DIY soundproof booth, take the time to appreciate the sense of accomplishment that comes with creating a space tailored to your unique needs. Your acoustic sanctuary is a testament to your ingenuity and dedication, providing a tangible expression of your commitment to your craft and your well-being.
In conclusion, your DIY soundproof booth is more than just a physical structure—it's a gateway to a world of creativity, productivity, and personal fulfillment. Embrace the opportunities that your acoustic sanctuary presents, and revel in the joy of having a space that is truly your own—a space where the outside world fades away, and your passions take center stage.